manuals.online logo
Brands
  1. Home
  2. •
  3. Brands
  4. •
  5. SAFETRACK
  6. •
  7. Welding System
  8. •
  9. SAFETRACK ECONECT SAFE 94350 User manual

SAFETRACK ECONECT SAFE 94350 User manual

IN-021-07
SAFETRACK BAAVHAMMAR AB
L.Mölleberga, 245 93 Staffanstorp, Sverige
Phone. +46 (0)40 44 53 00, Fax: +46 (0)40 44 55 53
Sales@safetrack.se www.safetrack.se
CONTENTS
Guarantee: Units 12 months, batteries 6 months. Valid only when using original parts,
batteries and chargers supplied or approved by SAFETRACK®.
The guarantee will expire if the equipment was used or has been used with
non-original spare parts, consumables or not used in accordance with the
instructions.
Http://www.safetrack.se E-Mail: Sales@safetrack.se
Read the instructions carefully before using the pinbrazing unit.
Check that all parts are received.
GENERAL
TECHNICAL SPECIFICATION 3
BATTERY CHARGING 4
GRINDING 5
PINBRAZING 6-7
MAINTENANCE 8-13
2
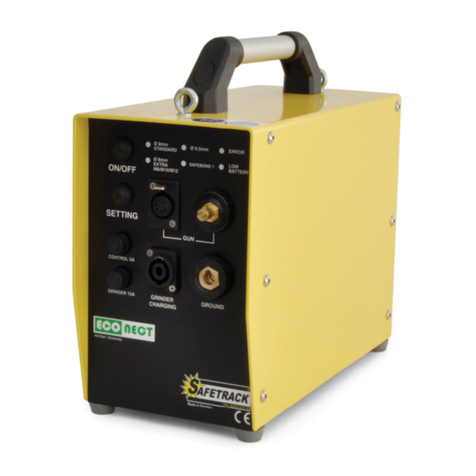
ECONECT SAFE 94350
ECONECT SAFE 94450
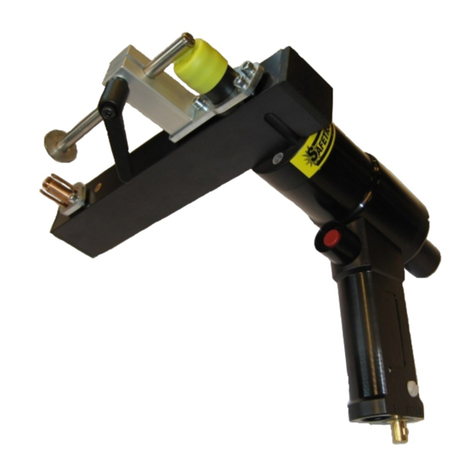
S15 Gun SAFE 91015
Tool kit SAFE 91250
Ground device SAFE 80730
Grinder SAFE 593070
Tool case SAFE 9524
Carrying Harness SAFE 9523
3
TECHNICAL SPECIFICATION
ON/OFF
Pin setting
Fuse for electronics
Ground
Grinding / charge
Gun control
Gun power
Battery indicator
Error Indication
Selected setting.
Technical specifi cation
Voltage 39V DC
No. of brazings/charge 40-60
Unit weight incl.batteries 9,8 Kg
Dimensions LxWxH (mm) 250x265x255
Temperature range -20 °C - +55 °C
Fuse for grinding /
charge
Connect the charger to the grinder / charging outlet on the unit then to the mains.
The battery is fully charged after about 1 hours (if completely discharged).
After charging is completed the charger can be disconnected.
The battery shall be charged every 6 month, if the unit isn’t in use.
If the batteries are left uncharged, they may be damaged.
CHARGING THE BATTERY
NOTICE!
CHARGING THE BATTERY CAN ONLY BE CARRIED OUT BETWEEN 0°C to +45°C
4
Blinking signal* Error description Troubleshooting
1 x Blinking,
2 sec pause No battery or defect
battery Please check charger cable and con-
necter for damage and the 15A fuse on
Econect.
2 x Blinking,
2 sec pause Battery voltage is too
high.
3 x Blinking,
2 sec pause Battery temperature is
under 0°C or over 45°C. Please let the unit cool or heat to the
right temperature, charging will start
automatically.
5 x Blinking,
2 sec pause Device temperature is to
high Please turn off the charger and give it
some time to cool down.
1. Infrared-LED, For factory programing only.
2. Mains, indicating that mains are connected and the charger is on.
3. Red Error-LED, indicating different errors by fl ashing, see chart 1.
4. Yellow Charging-LED, indicating when the charger is charging the battery.
5. Green Full-LED, indicating when battery is fully charged.
1234 5
* Blinking signals in continuous loop.
Chart 1.
5
Warning!
Always use eye protectors when grinding and brazing!
NOTICE!
Note, use only SAFETRACK´s grinding wheel specially made for
brazing, other type of wheels will leave a surface not suitable for
brazings. Keep the grinding wheel clean and free from oil etc.
- Connect the grinder to the unit.
- Grind the brazing and ground area until you have an even and clean
surface.
- Attach the ground magnet on the same rail/work piece where the
pinbrazing should be done.
- Try to attach the magnet within 0,5m from brazing area.
GRINDING
6
PINBRAZING
The build-in heating element automatically heat up the batteries. (Heating time)
Possible amount of brazings (See actuall brazing pin)
Heating time and number of brazings
Note!
If the temperature of the battery is below 12ºC the
ERROR will fl ash and the battery will be heated.
When battery has right temperature ERROR will stop
fl ashing and unit is ready to use.
PINBRAZING
- Connect the brazing gun, power and trigger cable to the unit.
- Connect the ground device to the unit.
- Press on/off button and select the right pin type by pressing the ”setting” button.
The unit will remember what setting was used last.
- Load the gun with brazing pin and ferrule.
- Make sure to braze in the top of the hole when
brazing to a vertical surface.
Operation.
- Hold the gun fi rmly with both hands as shown
and pull the trigger just once.
The electronic will by itself fi nish the brazing
process.
- Hold the gun in place for 3-4 sec after the
brazing while the braze freezes.
- Remove the gun straight backwards
without pulling the trigger!
- Knock off the shank of the brazing pin.
The brazing is completed.
If the brazing is aborted to early “ERROR” will turn on.
The brazing should be redone for a good result.
The lamp will be shut down after 8 seconds.
NOTICE!
The battery indicator “LOW BATT” fl ashes when the batteries are almost discharged,
when the “LOW BATT” is constantly lit the batteries are discharged and you can’t do
any more pin brazing. Charge the battery. 7
8
EQUIPMENT
- Make sure the batteries always are fully charged.
- Check the cables from time to time, so damages have not arise.
- Even the contact surface on the ground magnet with a fi le from time to time.
- Make sure that the brazing pin with the ferule passes easily in the gun, centered.
BRAZING PINS AND FERRULES
-Keep them dry.
RAILBONDS AND CABLE LUGS
-Keep them free from oxidation.
-Keep them free from contamination like: Grease, oil.
-Make sure that there are no damages on them.
SETTING RIGHT LIFT HEIGHT
The S15 brazing gun self adjust to the same lift height every time.
See seperate instruction for the gun.
PIN HOLDERS
Squeeze the fi ngers on the pin holder together each time you feel that
the brazing pin goes in too easy when mounting them into the pin holder.
This is important since all the current goes thru the pin holder to the
brazing pin. If the fi ngers are too loose the pin holder will be damaged
and must be replaced.
CHANGE PIN HOLDER.
- Separate the ring holder from the gun with your hands.
- Hold the nut closest to the pin holder with a 10mm key.
- Screw the pin holder off.
- When replacing the new pinholder, hold the nut, closest to the pinholder even now.
Warning! Never rotate the shaft, it can damage the gun.
MAINTENANCE
9
MAINTENANCE
Error indications on the unit:
“ERROR” led is lit.
- The temperature of the battery is over +55 °C.
Action: Wait until the light goes out, then the temperature dropped and it is
possible to braze again.
“ERROR” led fl ashes.
- The temperature of the battery is below +10 °C.
Action:Leavetheuniton, thebuilt-inheating elementwill heatupthe battery.
Wait until light goes out and the temperature has risen, and it is possible to braze.
“ERROR” and ”LOW BATTERY” led fl ashes.
- The temperature of the battery is below +10 °C and the battery is almost discharged.
Action: Charge the batteries.
“ERROR” Led is lit after a braze.
- The pin brazing was not complete.
Action: The braze should be remade to achieve good results.
The Led turns off after 8 seconds.
“ERROR” Led glows.
- Failure of a sensor in the unit.
Action: The unit should be sent for repair.
”LOW BATTERY” Led fl ashes.
- Battery is almost discharged
”LOW BATTERY” led is lit.
- Battery are discharged. Charge the batteries.
Nothing happen when you press the buttons.
- The electronics may have gotten stuck.
Action: Remove control 5A fuse for a short time, put it back again.
The brazing nerver stops.
- The electronics may have gotten stuck.
Action: Remove the gun and the ground magnet from the rails and
disconnect them from the unit as soon as possible.
Remove the control 5A fuse, check that nothing has been damaged
before the fuse is put back.
Replace the fuses:
Push and unscrew anti-clockwise to remove fuse holder.
Replace fuse and mount fuse holder.
NOTE!
Control: 5A fuse.
Grinder: 15A fuse.
MAINTENANCE
Special functions:
1. Battery indicator:
Press and hold the “SETTING” button, while you push the “ON / OFF” button.
“LOW BATTERY” LED will light. Release the buttons.
The LEDs on the front panel show the charge status of battery.
2. Lifting height control:
First the step above.
Press “Settings” and the lights start fl ashing, at this point, you can check the
lifting height of the gun.
3. Pressing “Settings” one more time and you goes back to battery indicator.
10
MAINTENANCE
Periodically maintenance of S15 automatic gun
IN-039-01
B.1. Check that all cables and lugs are without damages
and properly tighten in gun and unit.
B.2. Check that the right pinholder is fi tted in the gun.
Make sure that pinholder is tight to the gun, use spanners as the
fi gure shows. Otherwise a spark can destroy the axle.
Use one spanner 8mm and one 10mm for 8-9,5 mm and M8 pinholders.
Two pcs of spanner 10mm for M10 and M12 pinholders.
Make sure, never twist the axle when mounting the pinholder!
The brazing pin shouldn´t go too loose in the pinholder,
when it does push together with your fi ngers.
Otherwise you can have a contact fault or a spark can arise.
B.3. Check that the ringholder is the
right type. You can dismount it by hand
otherwise adjust with the small screw on
the side of the gun.
B.4. Load the gun with a 8mm pin and
ferrule. Check that the axle move easily
with the pin and ferrule fi tted when moving
back and forward.
If not, change either pinholder or ringholder.
If it still doesn´t move easily the axle is
damaged and must be sent for repair.
SAFE No. For brazing pin Mark
9211 8-9,5 mm A
9213 M8 threaded B
9215 M10 threaded C
9217 M12 threaded D
11
Lift level tool
SAFE 91245
2002-09-05
B.5.1. Insert this
end in to the gun.
B.5.2. Press and hold “SETTING” and press =”ON/OFF”.
When “LOW BATTERY” is lit, release buttons.
Press “SETTING” and the leds will start to blink.
In this mode it is able to check the lift height.
Important! Press the tool completely against the gun then pull the trigger.
Otherwise the gun may be damaged!
Important! Hold the gun so the tool is horizontal.
B.5.3. The lift level is calibrated when the inner rod, made
of brass, on the tool is in same level as the outer plastic
sleeve. Tolerance ±0,2 mm.
If the gun is not calibrated see seperate instruction for
adjusting of the gun.
MAINTENANCE
IMPORTANT! The normal liftheight is 2mm.
This is very important for the arc and energy amount.
Too high liftheight increase the risk of a “coldbrazing”,
too low liftheight reduce the time and increase misfi res.
12
MAINTENANCE
Advanced maintenance work
Adjusting the liftlevel.
B.6. Reset correct liftheight at a S15 gun.
Only when to reset a maladjusted gun.
Fit the instrument SAFE 91245 on the
gun as in B.5.
B.6.2. Connect the cables to the pinbrazing
unit and switch on the power.
B.6.3. Take off the plastic plug with the
needle in the upper small hole in the
front of the gun.
IMPORTANT, never adjust in the
hole where the big plug is!
B.6.4. When liftheight is too low.
Use the 3mm hexagon spanner and
adjust the screw in the small hole
anti-clockwise about 1/4 of a turn
then check with the instrument as in
B.5.
B.6.5. When liftheight is too high.
Use the 3mm hexagon spanner and
adjust the screw in the small hole
clockwise about 1/4 of a turn then
check with the instrument as in B.5.
If all is ok, fi t the plug in the hole
again.
If not ok, send for repair.
13
SAFETRACK BAAVHAMMAR AB
L.Mölleberga, 245 93 Staffanstorp, Sverige
Phone. +46 (0)40 44 53 00, Fax: +46 (0)40 44 55 53
Sales@safetrack.se www.safetrack.se

Other manuals for ECONECT SAFE 94350

1

This manual suits for next models

1

Other SAFETRACK Welding System manuals

SAFETRACK ECONECT SAFE 94350 User manual

SAFETRACK

SAFETRACK ECONECT SAFE 94350 User manual

SAFETRACK S15 User manual

SAFETRACK

SAFETRACK S15 User manual

Popular Welding System manuals by other brands

Telwin Advance227 Series instruction manual

Telwin

Telwin Advance227 Series instruction manual

Lincoln Electric INVERTEC PC208 CE Operator's manual

Lincoln Electric

Lincoln Electric INVERTEC PC208 CE Operator's manual

Taylor ARC4000 Series operating guide

Taylor

Taylor ARC4000 Series operating guide

ESAB Origo Mig L3000i Service manual

ESAB

ESAB Origo Mig L3000i Service manual

iWeld HEAVY DUTY 315 user manual

iWeld

iWeld HEAVY DUTY 315 user manual

Cebora Power Plasma 3035/M manual

Cebora

Cebora Power Plasma 3035/M manual

WARPP INTIG 402 PULSE operating manual

WARPP

WARPP INTIG 402 PULSE operating manual

Amada WELD CHECKER MM-400A Operation manual

Amada

Amada WELD CHECKER MM-400A Operation manual

WIA Weldmatic 190 Operator's manual

WIA

WIA Weldmatic 190 Operator's manual

Campbell Hausfeld IN972101AV Operating instructions and parts manual

Campbell Hausfeld

Campbell Hausfeld IN972101AV Operating instructions and parts manual

Kemppi MinarcTig Evo 200 Service manual

Kemppi

Kemppi MinarcTig Evo 200 Service manual

ESAB LHI 825 Instruction manual and spare parts list

ESAB

ESAB LHI 825 Instruction manual and spare parts list

iWeld GORILLA SUPERPULSE 200 user manual

iWeld

iWeld GORILLA SUPERPULSE 200 user manual

Mosa TS 350 YSX BC Use and maintenance manual

Mosa

Mosa TS 350 YSX BC Use and maintenance manual

Sealey SUPERMIG130 instructions

Sealey

Sealey SUPERMIG130 instructions

Silverline 30-135A manual

Silverline

Silverline 30-135A manual

Thermal Arc 202 AC/DC operating manual

Thermal Arc

Thermal Arc 202 AC/DC operating manual

bester 155-ND Operator's manual

bester

bester 155-ND Operator's manual

manuals.online logo
manuals.online logoBrands
  • About & Mission
  • Contact us
  • Privacy Policy
  • Terms and Conditions

Copyright 2025 Manuals.Online. All Rights Reserved.