manuals.online logo
Brands
  1. Home
  2. •
  3. Brands
  4. •
  5. Safety 1st
  6. •
  7. Baby Monitor
  8. •
  9. Safety 1st 49233 User manual

Safety 1st 49233 User manual

Weare surethat youwillfind theClearConnection Nursery Monitor convenient and easy to use.Toinsure that youwill benefit from
all of the great features thatour monitoroffers,and to makesure that it isusedproperly, we urge you to:
ClearConnectionRechargeable Nursery Monitor
Owner’sGuide Thank you for purchasing theSafety 1st Clear Connection Rechargeable Nursery
Monitor. This is a state-of-the-art system that combines some of the most unique
features that anybaby monitor offers. We are confidentthat you willappreciate
its many highlights.Asyou will soon learn thereare many more features...
TheBaby’sUnit(Transmitter) hascontinuous transmissionthatclearlysends
yourbaby’ssounds tothe Parent’s Unit. This gives you theability to continue
with your daily activitiesthroughout the house oryard and at the same time
monitoryourbaby.
TheParent’s Unit (Receiver) remains with youwherever you go to pick upthe
sounds that are transmitted fromthe Baby’s Unit. Itconveniently clipstoyour
beltoreasilystandson atable.
Bothunits are completely portableor ACpowered.The AC Adapterallows the
receiverand transmitter tobe plugged into any standard electrical outlet for use
with your household electricity. For convenientusewithoutanoutlet,usea
rechargeable battery pack for the Parent’s unit anda 9 volt alkaline battery for
theBaby’s unit(Batteriesnot included).
PLEASE READ ALL INSTRUCTIONS CAREFULLY BEFORE USING THE NURSERY MONITOR
KEEP THESE INSTRUCTIONS FOR YOUR FUTURE REFERENCE
IF YOU HAVE ANY QUESTIONS, CALL OUR TOLL FREE CONSUMER RELATIONS NUMBER: (800) 723-3065
No. 49233
CAUTION:
• THE CLEAR CONECTION RECHARGEABLE NURSERYMONITOR ISNOTINTENDEDTOREPLACERESPONSIBLE AND
PROPERPARENTALSUPERVISION.
• YOUSHOULDCHECK YOUR CHILD’S ACTIVITY ATREGULARINTERVALS ASTHISMONITOR WILLNOTALERT
PARENTS TOTHESILENT ACTIVITIESOFACHILD.
CAUTION
RISK OF ELECTRIC SHOCK
DO NOT OPEN!
CAUTION: TOREDUCETHERISKOFELECTRICALSHOCK,
DONOTREMOVECOVERORBACK.
NOSERVICEABLEPARTSINSIDE.
REFERTOSAFETY1ST CONSUMERRELATIONS: (800)723-3065.
WARNING: TOREDUCETHERISKOFFIREORELECTRICALSHOCK,
DONOTEXPOSETHISPRODUCTTOWATERORMOISTURE.
SafetyInstructions
READINSTRUCTIONS: All the safety instructions should be read before theNursery Monitor is operated.
RETAININSTRUCTIONS: The safety instructions shouldbe retained forfuture reference.
HEEDWARNINGS: All warnings on the Nursery Monitor and operating instructions should be adhered to.
FOLLOWINSTRUCTIONS: All operating instructions should be followed.
FeaturesandComponents
WATERANDMOISTURE: The Nursery Monitorshould notbe used nearwater, for example, neara bath tub, wash bowl,kitchen
sink, laundry tub, in a wet basement, near a swimming pool, etc.
VENTILATION:The Nursery Monitor should be placed so that itslocation or position does not interfere with proper ventilation
for the unit. For example, it should NEVER be situated on a bed, sofa, rug or similar surface that may block ventilation.
HEAT: The Nursery Monitor should bekept away from heat sourcessuchas radiators, heat registers, stoves or otherappliances
that produce heat.
ACPOWERSOURCE: The Nursery Monitor should be connected only to theAC Adapterssupplied with the unit.
POWERCORDPROTECTION: The power supply cord should be routed sothat it isnot likelyto be walked on orpinched by
items placed upon or against it. Pay particular attention to the cordat the plug, convenience receptacle, and at the point it
exitsfrom the AC adapters.
CLEANING: Use a dry cotton cloth to keep theNursery Monitorfree from dust.DO NOT USE WATER!
NON-USEPERIODS:The power cord of theNursery Monitor should be unplugged from the outlet when unused for long
periods of time. The batteries should also be removedduring these periods.
OBJECTANDLIQUIDENTRY:Care should be taken so that objects do not fall onto the product, and liquids are not spilled into
the enclosurethrough the openings.
DAMAGEREQUIRINGSERVICE: The Nursery Monitor should be servicedbyqualified personnel when:
A: The power supply cord or plug has been damaged;
B: Objects have fallen or liquidhas been spilled onto the product;
C: The Monitor has been exposed to rain;
D: The Monitor does not appear to operate normally or exhibits a marked change inits performance;
E: The Monitor has been dropped or the enclosure damaged.
THEUSER SHOULDNOT ATTEMPTTOSERVICEORREPAIRTHEMONITOR. ALLSERVICINGSHOULDBEREFERREDTO
SAFETY1ST CONSUMERRELATIONS: (800)723-3065.
KEEP ALL PARTSOFTHIS MONITOROUTOFREACHOFCHILDREN! DO NOT MOUNT INOR ONCRIB!
CAUTION: THECLEAR CONNECTION RECHARGEABLENURSERYMONITORIS NOT INTENDEDTO REPLACE
PROPERADULTSUPERVISION. YOUSHOULDCHECKYOUR CHILD’S ACTIVITYATREGULAR
INTERVALSASTHIS MONITORWILL NOT ALERT PARENTSTOTHESILENTACTIVITIESOFACHILD.
Contents
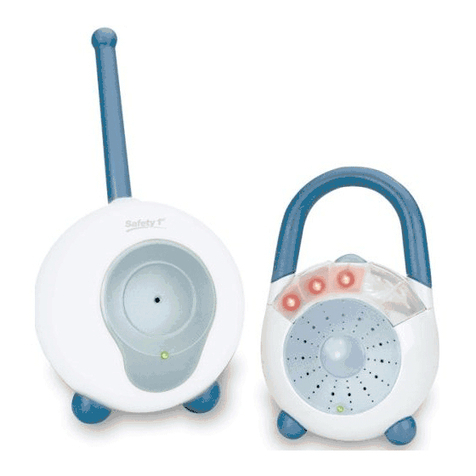
Parent’s Unit (Receiver) Baby’s Unit (Transmitter)
Recharging Stand AC Adapter
On/Off/Volume Switch
Channel Switch
Sound Lights Plastic Belt Clip
Compartment for
Rechargeable Battery
Speaker
Low Battery Indicator (Red)
Power On Indicator (Green) Flexible
Antenna
Battery contact for
Recharger
Follow these instructions to operate your Clear Connection Rechargeable Monitor. Reference the illustrations provided on
pages 2 and 3 for the location of allfeatures described in these instructions.
Baby’sUnit:
STEP1 Remove screw from battery cover onBaby’s Unit(Transmitter) and remove cover.
STEP2 Insert a 9-volt battery into the battery compartment by snapping the battery con-
tacts into the corresponding connectors on the battery clip in the unit. (Figure 1)
Note: The low battery indicator illuminates when the batteriesneed to be replaced.
STEP3 Replace the battery cover and insert and tightenthe screw.
STEP4 Plug the adapter into an electrical outlet, then plug the round end of the adapter
into the Baby’s Unit
Note: If you experience a power failure, the Baby’s Unit (Transmitter) will automatically
switchto battery power. The unit willrevertto AC power when power is restored
STEP5 Set the On/Off switch to “On”position. Poweron indicator should beilluminated.
STEP6 Set the Baby’s unit to setting “A”. If you experience static or noise interference,
switchboth units tosetting “B”.
For best results, place the Baby’s Unit on a table near the crib. It should be facing the baby’s head as closeto the crib as
possible, but out of baby’s reach.
OperatingYourRechargeableMonitor
Baby’sUnit(Transmitter)
On/Off Switch
Low Battery Indicator (Red)
Power On Indicator (Green)
Channel Switch
Microphone
Flexible Antenna
ACAdapter
The AC Adapter is a low voltage power source that allows you to use your house-
hold electricity to run the Baby’s Unitwhen you want to conserve battery life. It
connects to the AC Adapter Jack inthe Baby’s Unit, and plugs into any standard
electrical outlet in your home.
Caution:This adapter was made with a specific designfor Safety 1st Clear
Connection Rechargeable Monitor. It cannot be used with anyother appliance.
Neveruse a different type of adapter with this monitor.
ACAdapter
AC Adapter Jack
Figure 1
Lowbattery indicator will illuminate when it is time to recharge the battery.
Place the receiver in battery stand making sure it is seatedproperly
We recommend thatyourecharge the battery overnight. The receiver will operate while recharging.
The AC Adapter should beused on the Baby’s Unit whenever possible to increase the life of the batteries. Unit will automati-
cally convert toAC operation when used with the AC Adapter. It is not necessary to remove batteries during AC operation.
Unit will automatically switch back to battery power when disconnected from the adapter.
Parent’sUnit: InitialCharging
It is very important that you place the Parent’s Unit (Receiver) with the unit turned “Off” in the charging stand. Allowbattery
tochargeforatleast4hoursbeforefirstuse. This willensure that your battery is fully charged. The greenLED light on the
charging standwill illuminate whenthe receiver is placedinto it and the charging contacts are engaged.
UsingtheParent’sUnit:
STEP1 Placethe Parent’s Unit at least 10 feet from the Baby’s Unit.
STEP2 Place the charging stand in a location where the Receiver will remain in high use, for example, bedroom, kitchen, etc.
STEP3 Plug the charging standinto electrical outlet.
STEP4 When the Receiver is inthe charging stand, thebattery will continue to charge duringnormal operation.
STEP5 Turn theParent’s Unit “OFF” and leave unit in charging stand when not in use. This willallowthe batteryto receive
a complete charge.
Note: If youexperience a power failure, the Parent’s Unit (Receiver) will automatically switch to battery power. The unit
will revert to ACpower whenpower is restored.
STEP6 Set the Parent’s Unit to setting “A”. If you experience static ornoiseinterference, switch bothunits to setting “B”.
Note: Confirm the Parent’s Unitand Baby’s Unit are set to the same setting (A or B). Adjust the volume soyou can hear your
baby at all times.
LEDSoundLevelLightIndicators
The three (3) LED’s inthe center of the Parent’s Unitlight up todisplay the soundlevel coming from your baby. These sound
level indicators are preset in the factory and are not affected by the volume setting. This feature allowsyou to see the relative
volume level of your baby’s sounds. It is most effective if you are in a noisy environment and may not be able to hear the
sounds clearly. The louder the sound, the more LED’s will light up.
UsingtheACAdapter
RechargingtheBattery
ReplacingtheRechargeableBattery
The Parent's Unit (Receiver) requires 1 Ni-Cad rechargeable 3.6volt,300 mAh battery pack. To ensure that you are purchasing
the proper replacement battery pack, we recommend thatyou bring the existing battery pack withyou to reference. It is criti-
cal that the connector on theend of the battery pack is identicalto the connector on the enclosedbattery pack.(Figure 2)
Figure 4
STEP1 Unscrewthe battery door located onthe back of the Parent's Unit(Receiver).
STEP2 Remove the Ni-Cad rechargeable battery pack from thebattery compartment bygently disengaging the two connectors.
(Figure 3)
STEP3 Discard the old Ni-Cad rechargeable battery pack promptly.
STEP4 Reconnect the new battery pack by re-engaging the twoconnector ends. (Figure 4)
STEP5 Screw the battery door backon to the Parent's Unit (Receiver). Ensure that the door is securelyfastened.
STEP6 Place the Parent's Unit (Receiver) in the charging stand withthe unit turned"OFF". Allowthebatterytochargeforat
least4hourspriortouse.
Figure 2 Figure 3
•Recharge battery overnight.
•Make sure battery is fully
charged.
•May need new battery in baby
unit.
•Make sure both units are on the
same channel (A or B)
•Turn off the appliances that may
be causing interference
•Reduce the distance between
the two units or turn off lights
•Switch channel setting on both
Parent’s and Baby’s Units
•Parent’s Unit needs to be at
least 10 feet (3 meters) away
from the Baby’s Unit
•Change both units to the
alternate channel (A or B)
•Check batteries, replace if
necessary
•Move the units closer to each
other
•Battery may be dead, 9 volt battery
needs to be replaced, or rechargeable
battery needs to be recharged
•Make sure wall outlet is working.
•Rechargeable battery needs to be
replaced.
•Baby’s and Parent’s Units may be set
on different channels
•Appliances with loud fans near units
may be blocking transmission
•Unit may be under fluorescent lights
•Local interference from electrical or
radio frequency appliance near your
location
•Units are too close together
•Neighbors may have a baby monitor
or cordless phone
•Batteries may be weak
•Units may be too far away from
each other
•Power indicator light not working
•Power is not getting to the unit
•Static or interference in the signal
transmission
•Parent’s Unit is making loud noises
•Parent’s Unit is picking up noises
from outside your home
•Weak sound coming from unit
SolutionPossibleCauseProblem
TroubleshootingYourRechargeableMonitor
OperatingTips
If you have any questions or comments, please call our toll free Consumer Relations number: (800) 723-3065. We guarantee all of our
Safety 1st products. If you are not completely satisfied, please return with proof of purchase to:
Safety 1st, Inc.,210 Boylston Street Chestnut Hill, MA 02467USA
Safety 1st, Inc., 804, RueDeslauriers, Ville St-Laurent, Québec, H4N 1X1 Canada
Safety1st, Inc.,EuropeLtd. Osopad House, Shenley Road Borehamwood, Herfordshire WD1TE, GreatBritain
Madein CHINAto Safety1st quality specifications. ©1998 Safety 1st, Inc. 11/98
•Make surethat both units are on the samechannel.Even though you may hearyour baby’s sounds, proper use of this system
requires that both units must be on the same channel. Ifthe units are on different channels, the signals from the Baby’s Unit
may still be strong enough tobe pickedup by the Parent’s Unit, but there will be alot of static.
•When unit is notin use, remove ACAdapter and be sure the power dial is “Off”.
•Use your Baby’s Unit AC Adapter whenyou willbe in the same location for mostof the day. Use of the adapterprovides
maximumpower to the unit andprovides additional antenna length.
•When using the AC Adapter with household electricity, make sure the outlet has power. Some electrical outlets are
powered through a wallswitch in the room. If theBaby’s Unit is plugged in and turned “On”, the powerindicator light
should be lit. Ifit is not, try turning the wallswitch in the room “On”.
IMPORTANT!
Please do not return this product tothe store!
Your questionsandcomments areimportant to us!
Thank you for purchasing this quality product from Safety 1st. We are confident you will be
pleased with its many features and performance. If you are having any problems assembling,
installing,orusingthisproduct,pleasecallus.Wewillbeveryhappytoansweranyquestions
that you may have. Many times there is a simple solution to any problem that may occur.
Talkingtousdirectlywillbeconvenientandsaveyoutime.
CallourConsumerRelationsDepartmenttoll-freeat(800)723-3065
9:00amto5:00pm(EST)Monday-Friday.
Wewillgladlyansweranyandallofyourquestions
aboutthisproduct.

Other Safety 1st Baby Monitor manuals

Safety 1st 8232 User manual

Safety 1st

Safety 1st 8232 User manual

Safety 1st Genesis 08903 User manual

Safety 1st

Safety 1st Genesis 08903 User manual

Safety 1st TrustView MO079AR User manual

Safety 1st

Safety 1st TrustView MO079AR User manual

Safety 1st 48020 User manual

Safety 1st

Safety 1st 48020 User manual

Safety 1st 08038 User manual

Safety 1st

Safety 1st 08038 User manual

Safety 1st MO071 User manual

Safety 1st

Safety 1st MO071 User manual

Safety 1st TrustView MO080T User manual

Safety 1st

Safety 1st TrustView MO080T User manual

Safety 1st Genesis MO114 User manual

Safety 1st

Safety 1st Genesis MO114 User manual

Safety 1st 49270 User manual

Safety 1st

Safety 1st 49270 User manual

Safety 1st Two -Way Intercom Monitor User manual

Safety 1st

Safety 1st Two -Way Intercom Monitor User manual

Safety 1st 08028 User manual

Safety 1st

Safety 1st 08028 User manual

Safety 1st TechTouch MO140 User manual

Safety 1st

Safety 1st TechTouch MO140 User manual

Safety 1st VUP1048B User manual

Safety 1st

Safety 1st VUP1048B User manual

Safety 1st SAFE CONTACT User manual

Safety 1st

Safety 1st SAFE CONTACT User manual

Safety 1st 08024 User manual

Safety 1st

Safety 1st 08024 User manual

Safety 1st TrustView MO072R User manual

Safety 1st

Safety 1st TrustView MO072R User manual

Safety 1st MO180 User manual

Safety 1st

Safety 1st MO180 User manual

Safety 1st 8023 User manual

Safety 1st

Safety 1st 8023 User manual

Safety 1st TechTouch MO140RX User manual

Safety 1st

Safety 1st TechTouch MO140RX User manual

Safety 1st 08051 User manual

Safety 1st

Safety 1st 08051 User manual

Safety 1st MO173 User manual

Safety 1st

Safety 1st MO173 User manual

Popular Baby Monitor manuals by other brands

V-tech VM352-2 quick start guide

V-tech

V-tech VM352-2 quick start guide

V-tech VM3261 quick start guide

V-tech

V-tech VM3261 quick start guide

V-tech VM346 quick start guide

V-tech

V-tech VM346 quick start guide

V-tech DM1211 user manual

V-tech

V-tech DM1211 user manual

V-tech LM808-1W user manual

V-tech

V-tech LM808-1W user manual

V-tech VM5271 quick start guide

V-tech

V-tech VM5271 quick start guide

V-tech DM271 installation guide

V-tech

V-tech DM271 installation guide

Overmax OV-BABYLINE 2.1 user manual

Overmax

Overmax OV-BABYLINE 2.1 user manual

MOMCOZY BM01 user guide

MOMCOZY

MOMCOZY BM01 user guide

Beurer JBY 96 Instructions for use

Beurer

Beurer JBY 96 Instructions for use

Belkin Baby Pacifier user manual

Belkin

Belkin Baby Pacifier user manual

Snuza HERO instruction manual

Snuza

Snuza HERO instruction manual

iBaby M6S user manual

iBaby

iBaby M6S user manual

Sarabec mona operating instructions

Sarabec

Sarabec mona operating instructions

Summer 28030 instruction manual

Summer

Summer 28030 instruction manual

babymoov A014010 Instructions for use

babymoov

babymoov A014010 Instructions for use

Hubble Nursery Pal Connect user manual

Hubble

Hubble Nursery Pal Connect user manual

Clas Ohlson 18-2021 manual

Clas Ohlson

Clas Ohlson 18-2021 manual

manuals.online logo
manuals.online logoBrands
  • About & Mission
  • Contact us
  • Privacy Policy
  • Terms and Conditions

Copyright 2025 Manuals.Online. All Rights Reserved.