Saitek R80 User manual

R80 USB SPORTS
WHEEL
USER MANUAL
MANUEL D’UTILISATION
BEDIENUNGSANLEITUNG
MANUALE D’USO
MANUAL DEL USUARIO

R80 USB SPORTS WHEEL
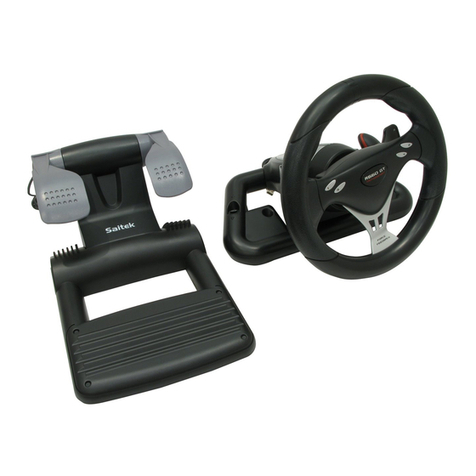
The R80 Sports wheel is guaranteed to improve your driving experience forever. It has no pedals because the
gas and brake functions are transferred to the paddles behind the wheel – but what does this mean for you?
There are no more tangles with cable wires, no more slippery pedals and all the controls are conveniently
placed at your fingertips for complete control, precision driving and the fastest race times
Main Features
•4 Wheel Mounted Buttons
•2 Gas and Brake Paddles
•Pedal-free Wheel
•Ultra Compact Design saves on desk space
•Easy to secure clamping mechanism
R80 USB SPORTS WHEEL
Buttons
Gearshift paddles
(for gas and brake)
Clamping system

Installing the R80 USB Sports Wheel on Windows® XP
1With your computer switched on and all applications shut down, plug the R80 Sports Wheel into one of
your computer’s USB ports.
2The Found New Hardware callout will appear to inform you that the wheel has been successfully
installed.
3To test that R80 Sports Wheel is functioning correctly, click on Start on the Windows® Taskbar and then
select Control Panel.
4In the Control Panel list, select Printers and other Hardware, then double-click the Game Controllers
icon. In the Game Controllers window select Saitek R80.
Note for users who have changed their XP®Desktop settings to Classic view: To test that the R80
Sports Wheel is functioning correctly, click on Start on the Windows® Taskbar and then select Settings
and Control Panel. In Control Panel, double-click the Game Controllers icon, then in the Game
Controllers window select Saitek R80.
5Next, click on Properties to open the Saitek R80 Properties window. Click on the Test tab and try out
the buttons and controls of your new wheel. Turn the wheel through its full range of movement and the
cursor should reach the left and right corners of the square. Press all the buttons and the indicators
should light up as you press the corresponding control. Press on the gas and brake paddles and the
throttle indicator should move up and down.
6After testing your wheel, click OK twice to finish. Now it’s time to load your favorite game and enjoy the
fun!
Installing the R80 USB Sports Wheel on Windows® 2000
1With your computer switched on and all applications shut down, plug the R80 Sports Wheel into one of
your computer’s USB ports.
2Your computer will automatically detect and load the drivers for your new wheel.
3To test that your R80 Sports Wheel is functioning correctly, click on Start on the Windows® Taskbar and
then select Settings and Control Panel.
4In the Control Panel, double-click the Gaming Options icon, then in the Gaming Options
window select
Saitek R80.
5Next, click on Properties to open the Saitek R80 Properties window. Click on the Test tab and try out
the buttons and controls of your new wheel. Turn the wheel through its full range of movement and the
cursor should reach the left and right corners of the square. Press all the buttons and the indicators
should light up as you press the corresponding control. Press on the gas and brake paddles and the
throttle indicator should move up and down.
6After testing your wheel, click OK twice to finish. Now it’s time to load your favorite game and enjoy the
fun!
Installing the R80 USB Sports Wheel on Windows® Me
1With your computer switched on and all applications shut down, plug the R80 Sports Wheel into one of
your computer’s USB ports.
2Your computer will automatically detect and load the drivers for your new wheel.
3To test that your R80 Sports Wheel is functioning correctly, click on Start on the Windows® Taskbar and
then select Settings and Control Panel.
4In the Control Panel, double-click the Game Controllers icon, then in the Game Controllers window
select Saitek R80
5Next, click on Properties to open the Gaming Options Properties window. Click on the Test tab and try
out the buttons and controls of your new wheel. Turn the wheel through its full range of movement and
the cursor should reach the left and right corners of the square. Press all the buttons and the indicators
should light up as you press the corresponding control. Press on the gas and brake paddles and the
throttle indicator should move up and down.
6After testing your wheel, click OK twice to finish. Now it’s time to load your favorite game and enjoy the
fun!

Installing the R80 USB Sports Wheel on Windows® 98 (Second Edition)
1With your computer switched on and all applications shut down, plug the R80 Sports Wheel into one of
your computer’s USB ports.
2When the Add New Hardware Wizard appears, click Next and follow the on-screen instructions.
3When prompted, select Search for the best driver for your device (Recommended) and click on Next
.
4At the following screen, select the CD-ROM drive option, insert your Windows® 98 (SE) CD and click on
Next.
5Continue to follow the on-screen instructions until the installation is complete, then click on Finish and
remove your CD.
6To test that your R80 Sports Wheel is functioning correctly, click on Start on the Windows® Taskbar and
then select Settings and Control Panel.
7In Control Panel, double-click the Game Controllers icon, then in the Game Controllers
window, select
R80 Sports Wheel.
8Next, click on Properties to open the Game Controller Properties window. Click on the Test
tab and try
out the buttons and controls of your new wheel. Turn the wheel through its full range of movement and
the cursor should reach the left and right corners of the square. Press all the buttons and the indicators
should light up as you press the corresponding control. Press on the gas and brake paddles and the
throttle indicator should move up and down.
9After testing your wheel, click OK twice to finish. Now it’s time to load your favorite game and enjoy the
fun!
TROUBLESHOOTING
QMy computer is not recognizing the R80 Sports Wheel – what’s wrong?
ACheck the cable connections. Unplug your controller and plug it back in, making certain that is securely
attached.
TECHNICAL SUPPORT
Can’t get started – don’t worry, we’re here to help you!
Did you know that nearly all the products that are returned to us as faulty are not faulty at all? They have just
not been installed properly.
So, if you experience any difficulty with this product, please visit our website or contact one of our friendly
technical support staff who will be pleased to help you.
Our website www.saitek.com is designed to help you get the best performance from your Saitek product.
And if you still have problems, we also have teams of product specialists around the world you can call for
advice and support. Contact details are provided on the Technical Support Center list provided with this prod
-
uct. Saitek is dedicated to helping you enjoy your purchase – please call us if you have any difficulties or wor
-
ries.
The Saitek Website
If you have access to an Internet connection, many of your technical queries may be answered with a simple
visit to the Saitek Website at:
www.saitek.com
The Technical Support area will provide you with all the information you need to get the most out of your con
-
troller and solve any problems you might have.
The site also contains regularly updated material, including information about:
•Current and forthcoming products
•Driver upgrades
•Links to useful sites

Contacting Saitek
If you do not have access to the Internet, or if the website cannot answer your question, you will need to con
-
tact your local Saitek Technical Support Team.
However, before contacting Technical Support, here are a few tips to help us to help you:
•Make sure you have followed all the steps shown in this manual
•Check that the controller is correctly connected to your computer
•Confirm that your PC is functioning normally
At Saitek, we aim to offer comprehensive and thorough technical support to all of our users. So, before you
call, follow the guidelines below to ensure that you have all of the information necessary for us to help you.
1Know the problem - make sure that you are clear about the problem you are having and that you can
describe the events that led up to it.
2Check the Troubleshooting Guide – in the Troubleshooting section of this manual.
3Know your hardware - if it is possible, have the following information to hand:
•The make and model of the computer you are using
•The name and version of the game you were using when you started having problems
•The make and model of your computer’s motherboard
•The make and model of your computer’s sound card
4Be ready - if possible, please try and ring whilst sitting at the computer with all the relevant information
and hardware to hand. If you are having a problem with a particular game or application, make sure that
you have it loaded.
5Be patient - we try our best to deal with customer queries as quickly as possible. At times it may be nec
-
essary to refer queries on to our specialist staff. Please be patient!
To contact your local Saitek Technical Support Center, please look up the relevant contact details on the sep
-
arate Technical Support Center sheet that came packaged with this product.
Conditions of Warranty
1Warranty period is 2 years from date of purchase with proof of purchase submitted.
2Operating instructions must be followed.
3Product must not have been damaged as a result of defacement, misuse, abuse, neglect, accident,
destruction or alteration of the serial number, improper electrical voltages or currents, repair, alteration or
maintenance by any person or party other than our own service facility or an authorized service center,
use or installation of non-Saitek replacement parts in the product or the modification of this product in any
way, or the incorporation of this product into any other products, or damage to the product caused by
accident, fire, floods, lightning, or acts of God, or any use violative of instructions furnished by Saitek plc.
4Obligations of Saitek shall be limited to repair or replacement with the same or similar unit, at our option.
To obtain repairs under this warranty, present the product and proof of purchase (e.g. bill or invoice) to the
authorized Saitek Technical Support Center (listed on the separate sheet packaged with this product)
transportation charges prepaid. Any requirements that conflict with any state or Federal laws, rules and/or
obligations shall not be enforceable in that particular territory and Saitek will adhere to those laws, rules,
and/or obligations.
5
When returning the product for repair, please pack it very carefully, preferably using the original packaging
materials. Please also include an explanatory note.
6
IMPORTANT: To save yourself unnecessary cost and inconvenience, please check carefully that you have
read and followed the instructions in this manual.
7This warranty is in Lieu of all other expressed warranties, obligations or liabilities. ANY IMPLIED WAR-
RANTIES, OBLIGATIONS, OR LIABILITIES, INCLUDING BUT NOT LIMITED TO THE IMPLIED WAR-
RANTIES OF MERCHANTABILITY AND FITNESS FOR A PARTICULAR PURPOSE, SHALL BE LIMITED
IN DURATION TO THE DURATION OF THIS WRITTEN LIMITED WARRANTY. Some states do not allow
limitations on how long an implied warranty lasts, so the above limitations may not apply to you. IN NO
EVENT SHALL WE BE LIABLE FOR ANY SPECIAL OR CONSEQUENTIAL DAMAGES FOR BREACH

OF THIS OR ANY OTHER WARRANTY, EXPRESS OR IMPLIED, WHATSOEVER Some states do not
allow the exclusion or limitation of special, incidental or consequential damages, so the above limitation
may not apply to you. This warranty gives you specific legal rights, and you may also have other rights
which vary from state to state.
FCC Compliance and Advisory Statement
Warning: Changes or modifications to this unit not expressly approved by the party responsible for compli-
ance could void the user’s authority to operate the equipment.
This device complies with Part 15 of the FCC Rules. Operation is subject to the following two conditions:
1This device may not cause harmful interference, and
2This device must accept any interference received, including interference that may cause undesired oper
-
ation
NOTE: This equipment has been tested and found to comply with the limits for a Class B digital device, pur-
suant to Part 15 of the FCC Rules. These limits are designed to provide reasonable protection against harm-
ful interference in a residential installation. This equipment generates, uses and can radiate radio frequency
energy and, if not installed and used in accordance with the instructions, may cause harmful interference to
radio communications. However, there is no guarantee that interference will not occur in a particular installa-
tion. If this equipment does cause harmful interference to radio or television reception, which can be deter-
mined by turning the equipment off and on, the user is encouraged to try to correct the interference by one or
more of the following measures:
•Reorient or relocate the receiving antenna
•Increase the separation between the equipment and receiver
•Connect the equipment into an outlet on a circuit different from that to which the receiver is connected
•Consult the dealer or an experienced radio/TV technician for help
Saitek Industries, 2295 Jefferson Street, Torrance, CA 90501, USA

VOLANT DE COURSE R80 POUR PC
Si vous n’aimez pas utiliser des pédales pour jouer avec vos jeux favoris, alors le volant de course R80 est
ce qu’il vous faut! Procurez-vous le et dites adieu aux pédales qui glissent et aux câbles qui s’emmêlent. Le
volant de course R80 vous permet d’être au volant d’une voiture, comme si vous y étiez, avec des boutons
de contrôle accessibles du bout des doigts, et ce, pour les courses automobiles les plus folles!
Caractéristiques:
•4 boutons facilement accessibles
•2 palettes de commandes, l’une pour l’accélération, l’autre pour le freinage
•Un design ultra compac,ce qui vous fait économiser de la place sur votre bureau
•Facile d’’utilisation, mécanisme d’attache de sécurité
VOLANT DE COURSE R80 POUR PC Boutons
Manettes
d’accélération
et de freinage
Système de
blocage

Installer le Saitek R80 sous Windows® XP
1Laissez votre ordinateur éteint et fermez tous les programmes. Branchez votre Saitek R80 sur un port
USB.
2Un message s’affiche automatiquement confirmant que votre volant était installé.
3Pour tester votre Saitek R80 cliquez sur Démarrer et choissez Paramètres.
4Double cliquez sur Imprimantes et Autres , puis sur Game Controllers et choissez Saitek R80.
Si vous avez choisi l’affichage classic du XP®: Double cliquez sur Game Controllers et choissez
Saitek R80.
5Puis, cliquez sur Propriétés. Cliquez Tester pour voir si votre volant fonctionne. Tournez les volant et
voyez commes le cursor bouge. Appuyez sur les boutons ou sur les pédales et les indicateurs vont
s’allumer.
6Après le test cliquez 2 fois sur OK. Maintenant vous êtes prêt à jouer!
Installer le Saitek R80 sous Windows® 2000
1Laissez votre ordinateur éteint et fermez tous les programmes. Branchez votre Saitek R80 sur un port
USB.
2Votre ordinateur va découvrir et installer automatiquement le pilote pour votre volant.
3Pour tester votre Saitek R80 cliquez sur Démarrer et choissez Paramètres.
4Double cliquez sur Options de jeu et choissez Saitek R80.
5Puis, cliquez sur Propriétés. Cliquez Tester pour voir si votre volant fonctionne. Tournez les volant et
voyez commes le cursor bouge. Appuyez sur les boutons ou sur les pédales et les indicateurs vont
s’allumer.
6Après le test cliquez 2 fois sur OK. Maintenant vous êtes prêt à jouer!
Installer le Saitek R80 sous Windows® Me
1Laissez votre ordinateur éteint et fermez tous les programmes. Branchez votre Saitek R80 sur un port
USB.
2Votre ordinateur va découvrir et installer automatiquement le pilote pour votre volant.
3Pour tester votre Saitek R80 cliquez sur Démarrer et choissez Paramètres.
4Double cliquez sur Options de jeu et choissez Saitek R80.
5Puis, cliquez sur Propriétés. Cliquez Tester pour voir si votre volant fonctionne. Tournez les volant et
voyez commes le cursor bouge. Appuyez sur les boutons ou sur les pédales et les indicateurs vont
s’allumer.
6Après le test cliquez 2 fois sur OK. Maintenant vous êtes prêt à jouer!
Installer le Saitek R80 sous Windows® 98 (Second Edition)
1Laissez votre ordinateur éteint et fermez tous les programmes. Branchez votre Saitek R80 sur un port
USB.
2Une fenêtre s’affiche. Cliquez Suivant et laissez-vous guider.
3Si demandé laissez chercher pour le meilleure pilote.
4Insérez le CD-ROM de Windows® 98 (SE) CD et cliquez sur Suivant.
5Terminez l’installation.
6Pour tester votre Saitek R80 cliquez sur Démarrer et choissez Paramètres.
7Double cliquez sur Options de jeu et choissez Saitek R80.
8Puis, cliquez sur Propriétés. Cliquez Tester pour voir si votre volant fonctionne. Tournez les volant et
voyez commes le cursor bouge. Appuyez sur les boutons ou sur les pédales et les indicateurs vont
s’allumer.
9Après le test cliquez 2 fois sur OK. Maintenant vous êtes prêt à jouer!
DIAGNOSTIC DES PANNES
QMon ordinateur ne reconnaît pas le R80 Sports Wheel; Qu’est-ce qui ne va pas?
A
Vérifier le branchement des câbles. Eteindre l’ordinateur et débrancher votre contrôleur. Puis rebranchez-
le en vous assurant qu’il est solidement fixé.
ASSISTANCE TECHNIQUE
Ça ne marche pas … Pas de panique, nous sommes là pour vous aider !
Saviez-vous que la quasi-totalité des produits qui nous sont renvoyés comme “défectueux” ont en fait été tout
simplement mal installés ?
Si vous avez un problème technique avec ce produit, veuillez donc visiter notre site Internet ou contacter une
personne de notre équipe technique : nous serons ravis de vous aider.
Notre site Internet www.saitek.com est conçu pour vous aider à apprécier votre produit Saitek aux
meilleures de ses performances. Si malgré cela, vous n’arrivez pas à résoudre votre problème, nos équipes
de spécialistes dans le monde sont à votre disposition pour vous conseiller et vous aider. Les numéros de
contact figurent dans la liste des Centres d’assistance fournie avec ce produit : n’hésitez pas à nous appeler
pour toute question ou tout problème.
Le site Saitek
Si vous avez accès à Internet, vous pourrez probablement trouver la réponse à vos questions techniques en
visitant notre site web à l’adresse suivante :
www.saitek.com
La section “Assistance technique” vous fournira toutes les informations nécessaires pour profiter au maximum
de votre contrôleur. Elle vous permettra de résoudre tout problème technique que vous pourriez avoir et de
télécharger les profils de jeux les plus récents.
Ce site est régulièrement mis à jour. Vous y trouverez les informations suivantes :
•Les produits actuels et à venir
•Mises à jour des pilotes
•Des liens vers d’autres sites utiles
Contacter Saitek
Si vous n’avez pas accès à Internet, ou si vous ne trouvez pas la réponse à votre question sur notre site,
vous pourrez alors contacter une équipe locale d’assistance technique.
Cependant, avant de la contacter, voici quelques conseils qui vous aideront à nous aider :
•Assurez-vous que vous avez suivi toutes les étapes décrites dans ce manuel
•Vérifiez que votre contrôleur est correctement connecté à votre ordinateur
•Assurez-vous que votre PC fonctionne normalement
Chez Saitek, nous aspirons à offrir à nos clients un service technique complet et soigné. Aussi, avant de nous
appeler, veuillez lire les points suivants afin de vous assurer que vous disposez de toutes les informations
nécessaires pour nous aider à vous aider.
1Connaître le problème – assurez-vous que vous avez une idée précise de votre problème et que vous
pouvez décrire les évènements qui l’occasionnent.
2Consultez le chapitre Résolution des problèmes – vérifiez que votre problème ne figure pas dans la
partie Résolution des problèmes de ce manuel.
3Connaître son matériel – si possible, soyez en possession des informations suivantes :
•La marque et le modèle de l’ordinateur que vous utilisez
•Le nom et la version du jeu que vous utilisiez quand vous avez commencé à avoir des problèmes
•La marque et le modèle de votre carte mère
•La marque et le modèle de votre carte son

4Soyez prêts – Si possible, essayez d’appeler lorsque vous êtes devant votre ordinateur avec toutes les
informations et tout le matériel nécessaires. Si vous avez un problème particulier avec un jeu ou un pro-
gramme, assurez-vous que celui-ci est chargé.
5Soyez patients
– nous faisons de notre mieux pour répondre aux demandes le plus rapidement possible.
Il sera parfois nécessaire de référer votre question à un spécialiste. Ne soyez donc pas trop impatients !
Pour contacter votre équipe locale d’assistance technique, veuillez consulter la fiche des Centres d’assis-
tance technique fournie avec votre produit.

R80 PC SPORTS WHEEL
Mit R80 PC Sports Wheel von Saitek werden Probleme wie rutschige Pedale oder Kabelgewirr einfach
abgeschafft. R80 Sports Wheel steht für Rennfahren im Formel 1-Stil. Alle Kontrollen sind per Hand erreich-
bar. Perfekt für neue Rekordzeiten!
Funktionen:
• 4 leicht erreichbare Buttons
• 2 Lenkradschalter für Gas und Bremse
• Kompaktes Design und stabile Form
• Sichere Befestigungsvorrichtung
Buttons
Lenkradschalter
für Gas und
Bremse
Befestigung
R80 PC SPORTS WHEEL

Installation des Saitek R80 unter Windows® XP
1Beenden Sie bitte alle laufenden Anwendungen an Ihrem eingeschalteten Rechner und schließen Sie
dann Ihren R80 an einen freien USB-Anschluss Ihres PCs an.
2Die Meldung Neue Hardwarekomponente gefunden wird erscheinen, um Sie darüber zu informieren,
dass Ihr Wheel korrekt erkannt und installiert wurde.
3Um zu überprüfen, ob Ihr R80 korrekt funktioniert, gehen Sie auf Start in der Windows® Taskleiste und
wählen Systemsteuerung.
4In der Systemsteuerung wählen Sie Drucker und andere Hardware und doppelklicken Sie auf das
CameController-Symbol. Im Fenster GameController, wird Ihr R80 angezeigt werden. Wählen Sie es bitte
aus.
Bitte beachten - Benutzer, die Ihre XP® Desktop Einstellungen in die klassische Ansicht geändert haben:
Um das R80 auf korrekte Funktion zu testen, klicken Sie Start auf der Windows® Taskleiste und wählen
Sie Eintellungen und Systemsteuerung. In der Systemsteuerung doppelklicken Sie das GameController
Symbol und wählen Sie im Game Controller Fenster das Saitek R80 aus.
5Anschliessend klicken Sie auf Eigenschaften und im nächsten Fenster auf Test
. Im Test überprüfen Sie,
ob alle Knöpfe und Achsen Ihres Wheel korrekt reagieren. Drehen Sie das Lenkrad bis zum Anschlag.
Der Cursor sollte somit den äussersten rechten und linken Rand des Kontrollfensters erreichen. Wenn
Sie die Knöpfe drücken, sollten jeweils die entsprechenden Indikatoren aufleuchten. Beim Betätigen der
Gas- und Bremseschaltwippen sollte sich der Schubregler-Indikator nach oben und unten bewegen.
6Nachdem Sie den R80 überprüft haben, klicken Sie zweimal auf OK, um die Installation fertigzustellen.
Und schon können Sie mit Ihrem Lieblingsspiel beginnen.
Installation des Saitek R80 unter Windows® 2000
1Beenden Sie bitte alle laufenden Anwendungen an Ihrem eingeschalteten Rechner und schließen Sie
dann Ihren R80 Wheel an einen freien USB-Anschluss Ihres PCs an.
2Der PC wird den Wheel automatisch erkennen und die entsprechenden Treiber installieren.
3Um zu überprüfen, ob Ihr R80 Wheel korrekt funktioniert, gehen Sie auf Start
in der Windows® Taskleiste
und wählen Sie Systemsteuerung.
4In der Systemsteuerung doppelklicken Sie das GameOptions-Symbol an. Im Fenster Game Optionen
wird der Wheel angezeigt. Wählen Sie dann Saitek R80 .
5Anschliessend klicken Sie auf Eigenschaften, um das Saitek R80 Eigenschaftsfenster zu öffnen und
klicken Sie auf auf Test
. Im Test überprüfen Sie, ob alle Knöpfe und Achsen Ihres R80 korrekt reagieren.
Drehen Sie das Lenkrad bis zum Anschlag. Der Cursor sollte somit den äussersten rechten und linken
Rand des Kontrollfensters erreichen. Wenn Sie die Knöpfe drücken, sollten jeweils die entsprechenden
Indikatoren aufleuchten. Beim Betätigen der Gas- und Bremseschaltwippen sollte sich der Schubregler-
Indikator nach oben und unten bewegen.
6Nachdem Sie den R80 überprüft haben, klicken Sie zweimal auf OK, um die Installation fertigzustellen.
Und schon können Sie mit Ihrem Lieblingsspiel beginnen.
Installation des R80 unter Windows® Me
1Beenden Sie bitte alle laufenden Anwendungen an Ihrem eingeschalteten Rechner und schließen Sie
dann Ihren R80 Wheel an einen freien USB-Anschluss Ihres PCs an.
2Der PC wird den Wheel automatisch erkennen und die entsprechenden Treiber installieren.
3Um zu überprüfen, ob Ihr R80 Wheel korrekt funktioniert, gehen Sie auf Start
in der Windows® Taskleiste
und wählen Sie Systemsteuerung.
4In der Systemsteuerung doppelklicken Sie das GameController Symbol an. Im Fenster Game
Controller/Spielesteuerungen wird der Wheel angezeigt. Wählen Sie dann Saitek R80 aus.
5Anschliessend klicken Sie auf Eigenschaften, um das Saitek R80 Eigenschaftsfenster zu öffnen und
klicken Sie auf Test. Im Test überprüfen Sie, ob alle Knöpfe und Achsen Ihres R80 korrekt reagieren.
Drehen Sie das Lenkrad bis zum Anschlag. Der Cursor sollte somit den äussersten rechten und linken
Rand des Kontrollfensters erreichen. Wenn Sie die Knöpfe drücken, sollten jeweils die entsprechenden

Indikatoren aufleuchten. Beim Betätigen der Gas- und Bremseschaltwippen sollte sich der Schubregler-
Indikator nach oben und unten bewegen.
5Nachdem Sie den R80 überprüft haben, klicken Sie zweimal auf OK, um die Installation fertigzustellen.
Und schon können Sie mit Ihrem Lieblingsspiel beginnen.
Installation des R80 Wheel unter Windows® 98 (Second Edition)
1Beenden Sie bitte alle laufenden Anwendungen an Ihrem eingeschalteten Rechner und schließen Sie
dann Ihren R80 an einen freien USB-Anschluss Ihres PCs an.
2Sobald der Hardware-Assistent erscheint, klicken Sie auf Weiter und folgen den
Bildschirmanweisungen.
3Wenn Sie gefragt werden, wie Sie vorgehen möchten, wählen Sie Nach dem besten Treiber für das
Gerät suchen (empfohlen) und klicken auf Weiter.
4Wählen Sie im nächsten Bildschirm die Option CD-ROM-Laufwerk, legen dann Ihre Windows® 98 (SE)
CD ein, und klicken auf Weiter.
5Folgen Sie nun einfach den Bildschirmanweisungen bis die Installation abgeschlossen ist. Dann klicken
Sie auf Fertigstellen und entfernen die CD wieder aus dem Laufwerk.
6Um zu überprüfen, ob Ihr R80 Wheel korrekt funktioniert, gehen Sie auf Start
in der Windows® Taskleiste
und wählen Sie Systemsteuerung.
7In der Systemsteuerung doppelklicken Sie das GameController-Symbol an. Im Fenster Game
Controller/Spielesteuerungen wird der Wheel angezeigt. Wählen Sie dann Saitek R80 aus.
8Daraufhin klicken Sie auf Eigenschaften, um das Saitek R80 Eigenschaftsfenster zu öffnen und klicken
Sie auf Test. Im Test überprüfen Sie, ob alle Knöpfe und Achsen Ihres R80 korrekt reagieren. Drehen Sie
das Lenkrad bis zum Anschlag. Der Cursor sollte somit den äussersten rechten und linken Rand des
Kontrollfensters erreichen. Wenn Sie die Knöpfe drücken, sollten jeweils die entsprechenden Indikatoren
aufleuchten. Beim Betätigen der Gas- und Bremseschaltwippen sollte sich der Schubregler-Indikator nach
oben und unten bewegen.
9Nachdem Sie den R80 überprüft haben, klicken Sie zweimal auf OK, um die Installation fertigzustellen.
Und schon können Sie mit Ihrem Lieblingsspiel beginnen.
FEHLER SUCHEN UND BESEITIGEN
QMein Computer erkennt das R80 Sports Wheel nicht? Was ist falsch?
APrüfen Sie die Kabel-Verbindungen. Schalten Sie Ihren PC aus, stecken Sie alles aus und schließen Sie
den Controller wieder an.
TECHNISCHER SUPPORT
Probleme – keine Angst, wir lassen Sie nicht im Stich!
Wussten Sie, dass fast alle Produkte, die als fehlerhaft an uns zurückgeschickt werden überhaupt nicht defekt
sind? Sie wurden einfach nicht richtig installiert!
Sollten Sie Probleme mit diesem Produkt haben, besuchen Sie doch bitte unsere Website oder wenden Sie
sich an einen unserer Mitarbeiter im Bereich Technischer Support. Wir helfen Ihnen gerne.
Unsere Website, www.saitek.de, wurde erstellt, damit Sie von Ihrem Saitek-Produkt die bestmögliche
Leistung erhalten. Sollten Sie trotzdem noch Probleme haben, dann stehen Ihnen unsere Produktspezialisten
in aller Welt zur Verfügung, die Sie telefonisch um Rat und Hilfe bitten können. Rufnummern und Adressen
finden Sie auf der mit dem Produkt gelieferten Liste der Zentren für Technischen Support. Wir möchten, dass
Sie viel Freude an Ihrem Gerät haben, bitte rufen Sie uns an, falls Sie Probleme oder Fragen haben.
Die Saitek-Website
Wenn Sie Zugang zum Internet haben, lassen sich viele technische Fragen oft schon durch einen Besuch auf
der Saitek-Website beantworten.
www.saitek.de

Unter der Überschrift Technischer Support finden Sie jede Menge Tipps und Informationen um das Beste aus
Ihrem Controller zu holen und mogliche Probleme zu losen, sowie die neuesten Spielkonfigurationen.
Die Website enthält auch Material, das in regelmäßigen Abständen aktualisiert wird, einschließlich
Informationen über:
•aktuelle und demnächst lieferbare Produkte
•Treiber-Upgrades
•Links zu nützlichen Websites
Wenn Sie sich an Saitek wenden müssen
Wenn Sie keinen Zugang zum Internet haben oder wenn die Website Ihre Fragen nicht beantworten kann,
dann müssen Sie sich an das Saitek-Team für Technischen Support wenden.
Aber bevor Sie das tun, hier noch ein paar Tipps, wie Sie uns helfen können Ihnen zu helfen:
•Vergewissern Sie sich, dass Sie alle in dieser Anleitung gezeigten Schritte befolgt haben
•Kontrollieren Sie, dass der Controller korrekt an den Computer angeschlossen ist
•Kontrollieren Sie, dass Ihr PC normal funktioniert
Wir bei Saitek bemühen uns allen unseren Kunden einen umfassenden und gründlichen Technischen Support
zu bieten. Folgen Sie daher, bevor Sie uns anrufen, den nachstehend aufgeführten Richtlinien, um sicher zu
sein, dass Sie alle Informationen zur Hand haben, die wir benötigen, um Ihnen helfen zu können.
1Seien Sie sich über das Problem im Klaren - Vergewissern Sie sich, dass Sie genau wissen welches
Problem Sie haben, und dass Sie die Vorgänge beschreiben können, die zu diesem Problem geführt
haben.
2Lesen Sie die Richtlinien zur Fehlersuche und -beseitigung – Kontrollieren Sie, dass Ihr Problem
nicht bereits im Abschnitt Fehlersuche und - beseitigung dieser Anleitung behandelt wird.
3Sie sollten Ihre Hardware kennen - Falls möglich sollten Sie die folgenden Informationen zur Hand
haben:
•Marke und Modell des Computers, den Sie benutzen
•Name und Version des Spiels, das Sie gespielt haben als die Probleme aufgetreten sind
•Marke und Modell des Motherboards Ihres Computers
•Marke und Modell der Soundcard Ihres Computers
4Seien Sie bitte vorbereitet - falls möglich, rufen Sie uns bitte an wenn Sie am Computer sitzen und alle
relevanten Informationen und die Hardware zur Hand haben. Wenn Sie mit einem bestimmten Spiel oder
einer bestimmten Applikation Probleme haben, sollten Sie sicherstellen, dass diese geladen ist.
5Haben Sie bitte etwas Geduld
- Wir tun unser Möglichstes, um Kundenfragen so schnell wie möglich zu
bearbeiten. Manchmal müssen wir Fragen jedoch an unsere Spezialisten weiterleiten. Bitte haben Sie
etwas Geduld!
Auf dem gelben Informationsblatt, das mit diesem Produkt geliefert wurde, finden Sie Angaben über das für
Sie zuständige nationale Saitek Support Center Support.

WHEEL A VELOCITÀ LAMPO!
Scegli l ’R80 PC Sports Wheel di Saitek e scordati i pedali scivolosi e i cavi contorti. L ’R80 Sports Wheel ti
fornisce un ’esperienza di guida assolutamente diretta con I comandi esattamente dove ti occorrono -sulla
punta delle dita -per la gara più veloce di tutti i tempi!
Caratteristiche:
• 4 pulsanti facili da raggiungere
• 2 leve a farfalla per acceleratore e freno
• Meno ingombro sulla scrivania grazie al design ultracompatto
•Meccanismo di bloccaggio facile da fissare
Pulsanti
Pannelli per
acceleratore e
freno
Morsetto
WHEEL A VELOCITÀ LAMPO!

Installazione del Saitek R80 in Windows® XP
1Con il computer acceso e tutte le applicazioni chiuse, inserite la spina del Saitek R80 in una delle porte
USB del computer.
2Visualizzate Nuovo hardware rilevato per comunicarvi la riuscita installazione del wheel.
3Per testare il corretto funzionamento del Saitek R80, fate clic su Avvio nella barra degli strumenti di
Windows® e selezionate quindi Pannello di controllo.
4Nell’elenco Pannello di controllo, selezionate Stampanti e altro hardware, poi fate doppio clic
sull’icona Periferiche di gioco. Nella finestra Periferiche di gioco selezionate Saitek R80.
Nota per gli utenti che hanno modificato le loro configurazioni di XP®
Desktop alla visualizzazione
Classica: Per controllare il corretto funzionamento del Saitek R80, fate clic su Avvio nella barra degli
strumenti di Windows® e poi selezionate Impostazioni e Pannello di controllo. In Pannello di
controllo, fate doppio clic sull’icona Periferiche di gioco, poi nella finestra Periferiche di gioco
selezionate Saitek R80.
5Fate quindi clic su Proprietà per aprire la finestra Proprietà Saitek R80. Fate clic sulla scheda Test e
provate i pulsanti e i comandi del nuovo wheel. Gira il volante in tutte le sue possibili direzioni di
movimento e il cursore dovrebbe muoversi verso destra e sinistra all’interno del riquadro. Premi tutti i
bottoni e gli indicatori dovrebbero illuminarsi a seconda del controllo che selezioni. Premi le leve del gas e
del freno e l’indicatore dovrebbe muoversi verso l’alto e il basso.
6Dopo aver testato il wheel, fate clic su OK due volte per finire. Non dovete che caricare il vostro gioco
preferito e divertirvi!
Installazione del Saitek R80 in Windows® 2000
1Con il computer acceso e tutte le applicazioni chiuse, inserite la spina del Saitek R80 in una delle porte
USB del computer.
2Il computer rileva e carica automaticamente i driver per il nuovo wheel.
3Per testare il corretto funzionamento del Saitek ST5, fate clic su Avvio nella barra degli strumenti di
Windows® e selezionate quindi Impostazioni e Pannello di controllo.
4In Pannello di controllo, fate doppio clic sull’icona Opzioni gioco, poi nella finestra Opzioni gioco
selezionate Saitek R80.
5Fate poi clic su Proprietà per aprire la finestra Proprietà Saitek R80. Fate clic sulla scheda Test e
provate i pulsanti e i comandi del nuovo wheel. Gira il volante in tutte le sue possibili direzioni di
movimento e il cursore dovrebbe muoversi verso destra e sinistra all’interno del riquadro. Premi tutti i
bottoni e gli indicatori dovrebbero illuminarsi a seconda del controllo che selezioni. Premi le leve del gas e
del freno e l’indicatore dovrebbe muoversi verso l’alto e il basso.
6Dopo aver testato il wheel, fate doppio clic su OK per finire. Non dovete che caricare il vostro gioco
preferito e divertirvi!
Installazione del Saitek R80 in Windows® Me
1Con il computer acceso e tutte le applicazioni chiuse, inserite la spina del Saitek R80 in una delle porte
USB del computer.
2Il computer rileva e carica automaticamente i driver per il nuovo wheel.
3Per testare il corretto funzionamento del Saitek ST5, fate clic su Avvio nella barra degli strumenti di
Windows® e selezionate quindi Impostazioni e Pannello di controllo.
4Nel Pannello di controllo, fate doppio clic sull’icona Periferiche di gioco, poi nella finestra Periferiche
di gioco selezionate Saitek R80.
5Fate poi clic su Proprietà per aprire la finestra Proprietà opzioni gioco. Fate clic sulla scheda Test e
provate i pulsanti e i comandi del nuovo wheel. Gira il volante in tutte le sue possibili direzioni di
movimento e il cursore dovrebbe muoversi verso destra e sinistra all’interno del riquadro. Premi tutti i
bottoni e gli indicatori dovrebbero illuminarsi a seconda del controllo che selezioni. Premi le leve del gas e
del freno e l’indicatore dovrebbe muoversi verso l’alto e il basso.
6Dopo aver testato il wheel, fate doppio clic su OK per finire. Non dovete che caricare il vostro gioco
preferito e divertirvi!

Installazione del Saitek R80 in Windows® 98 (Seconda edizione)
1Con il computer acceso e tutte le applicazioni chiuse, inserite la spina del Saitek R80 in una delle porte
USB del computer.
2Quando visualizzate Wizard Aggiungi Nuovo Hardware, fate clic su Avanti e seguite le istruzioni a
schermo.
3Al prompt, selezionate Ricerca del driver migliore per la vostra periferica (Consigliato) e fate clic su
Avanti.
4Alla schermata successiva, selezionate l’opzione drive CD-ROM, inserite il CD di Windows® 98 (SE) e
fate clic su Avanti.
5Continuate a seguire le istruzioni a schermo fino al completamento dell’installazione, fate clic su Finish e
rimuovete il CD.
6Per testare il corretto funzionamento del Saitek ST5, fate clic su Avvio nella barra degli strumenti di
Windows® e selezionate quindi Impostazioni e Pannello di controllo.
7In Pannello di controllo, fate doppio clic sull’icona Periferiche di gioco, poi nella finestra
Periferiche di
gioco selezionate Saitek R80.
8Fate quindi clic su Proprietà per aprire la finestra Proprietà Periferica di gioco. Fate clic sulla scheda
Test e provate i pulsanti e i comandi del nuovo wheel. Gira il volante in tutte le sue possibili direzioni di
movimento e il cursore dovrebbe muoversi verso destra e sinistra all’interno del riquadro. Premi tutti i
bottoni e gli indicatori dovrebbero illuminarsi a seconda del controllo che selezioni. Premi le leve del gas e
del freno e l’indicatore dovrebbe muoversi verso l’alto e il basso.
9Dopo aver testato il wheel, fate doppio clic su OK per finire. Non dovete che caricare il vostro gioco
preferito e divertirvi!
SOLUZIONE DEI PROBLEMI
QIl mio computer non riconosce il R80 Sports Wheel? cosa c’è che non va?
AControlla le connessioni dei cavi. Spegni il computer e poi stacca il periferica di gioco. Inserisci di nuovo
la spina accertandoti che sia correttamente collegata.
SUPPORTO TECNICO
Impossibile iniziare? Non preoccupatevi, siamo qui per assistervi!
Sapevate che quasi tutti i prodotti restituiti a noi come difettosi non lo sono affatto – non sono stati semplice-
mente installati correttamente.
Perciò, se avete delle difficoltà con questo prodotto, visitate il nostro sito Web o contattate uno dei nostri
addetti all’assistenza tecnica clienti che sarà lieto di assistervi.
Il nostro sito Web www.saitek.com è studiato per assistervi ad ottenere la prestazione ottimale dal vostro
prodotto Saitek. E se avete ancora dei problemi, potete consultare i nostri team di specialisti del prodotto in
tutto il mondo per richiedere consigli e assistenza. I particolari per i contatti sono forniti nell’elenco Centri
Assistenza Tecnica allegato a questo prodotto. Saitek s’impegna ad assistervi ad ottenere il meglio dal vostro
acquisto – chiamateci se avete difficoltà o per richiedere chiarimenti.
Il sito Web di Saitek
Se potete accedere a Internet, potete trovare la risposta a molte delle vostre domande tecniche visitando
semplicemente il sito Web di Saitek a:
www.saitek.com
Nella sezione dell’assistenza tecnica troverete tutte le informazioni di cui avete bisogno per ottenere il meglio
dalla periferica di gioco, risolvere qualsiasi problema e ottenere le più recenti configurazioni di gioco.
Il sito contiene inoltre materiale regolarmente aggiornato, comprendente informazioni su:
•Prodotti attuali e futuri
•Upgrade di driver
•Link a siti utili

Come contattare Saitek
Se non avete accesso ad Internet, o se il sito Web non può rispondere alla vostra domanda, rivolgetevi al
vostro team Assistenza Tecnica Saitek locale.
Prima di contattare l’Assistenza Tecnica, ecco alcuni suggerimenti per assisterci ad assistervi:
•Accertatevi di aver seguito tutte le istruzioni fornite in questo manuale
•Controllate che la periferica di gioco sia correttamente collegata al computer
•Confermate che il PC funzioni normalmente
Saitek s’impegna a fornire l’assistenza tecnica completa e particolareggiata a tutti i suoi utenti. Prima di chia-
marci, seguite le linee guida sotto per accertarvi di avere tutte le informazioni necessarie a disposizione.
1Conoscere il problema – accertatevi di avere i dati precisi sul problema che riscontrate e di saper
descrivere gli eventi che l’hanno preceduto.
2Controllare la guida per la soluzione dei problemi – controllate che il problema non sia incluso nella
sezione Risoluzione dei problemi di questo manuale.
3Conoscere l’hardware – se possibile, dovete avere le seguenti informazioni a portate di mano:
•La marca e il modello del computer usato
•Il nome e la versione del gioco usato quando avete riscontrato i problemi per la prima volta
•La marca e il modello della scheda madre del computer
•La marca e il modello della scheda audio del computer
4Essere pronti
– se possibile cercate di telefonare mentre siete seduti davanti al computer e avete tutte le
informazioni rilevanti e l’hardware a
portata di mano. Se riscontrate dei problemi con un gioco o un’applicazione particolare, accertatevi di
averlo(a) caricato(a).
5Essere pazienti
– facciamo del nostro meglio per rispondere il più rapidamente possibile alle richieste di
informazioni dei nostri clienti. A volte può essere necessario trasferire le richieste di informazioni al nostro
personale specializzato. Siate pazienti!
Per contattare il vostro Centro Assistenza Tecnica Saitek di zona contattate i dati rilevanti sulla tabella separa
-
ta dei Centri Assistenza Tecnica fornita nella confezione con questo prodotto.

VOLANTE DEPORTIVO R80 PARA PC
Con el volante deportivo R80 para PC de Saitek,olvídese de los pedales resbaladizos y de los cables enreda
-
dos.El olante deportivo R80 le ofrece la experiencia total de las carreras y un extraordinario posicionamiento
de los controles,con lo que logrará los mejores tiempos de conducción.
Funciones:
• 4 botones de fácil acceso
• 2 pedales de aceleración y freno
• Diseño ultra compacto que ocupa el mínimo espacio
• Mecanismo de fijación seguro y sencillo
Botones
Paletas para
acelerar y frenar
Sistema de
fijación
VOLANTE DEPORTIVO R80 PARA PC

Instalación del Saitek R80 en Windows® XP
1Con el ordenador encendido y todas las aplicaciones cerradas, enchufe el Saitek R80 en uno de los
puertos USB del ordenador.
2Aparecerá la ventana de Hallado nuevo hardware para informarle que el wheel ha sido instalado con
éxito.
3Para probar que el Saitek R80 funciona correctamente, haga clic en Inicio en la barra de tareas de
Windows® y luego seleccione Panel de control.
4En la lista de Panel de control seleccione Impresoras y otro hardware y luego haga clic doble en el
icono de Controladores de juego. En la ventana de Controladores de juego seleccione Saitek R80.
Nota para los usuarios que han cambiado los valores del escritorio de XP®a Classic: Para probar
que el Saitek R80 funciona correctamente, haga clic en Inicio en la Barra de tareas de Windows® y
luego seleccione Configuración y Panel de control. En Panel de control, haga clic doble en el icono
de Controladores de juego, luego en la ventana de Controladores de juego seleccione Saitek R80.
5A continuación haga clic en Propiedades para abrir la ventana de Propiedades del Saitek R80. Haga
clic en la ficha de Prueba y compruebe todos los botones y controles de su nuevo wheel. Mueve el
volante de izquierda a derecha hasta el tope. El cursor deberá llegar a los lados del cuadrado. Pulsa
todos los botones y se deberán encender los indicadores luminosos en pantalla. Pulsa las palancas de
freno y acelerador y el indicador se moverá en pantalla.
6Tras probar el wheel, haga clic dos veces en Aceptar para finalizar. ¡Ahora ya puede cargar su juego
favorito y divertirse!
Instalación del Saitek R80 en Windows® 2000
1Con el ordenador encendido y todas las aplicaciones cerradas, enchufe el Saitek R80 en uno de los
puertos USB del ordenador.
2El ordenador detectará y cargará automáticamente los controladores para el wheel.
3Para probar que el Saitek R80 funciona correctamente, haga clic en Inicio en la barra de tareas de
Windows® y luego seleccione Configuración yPanel de control.
4En el Panel de control haga clic doble en el icono de Opciones de juego y luego en la ventana de
Opciones de juego seleccione Saitek R80.
5A continuación haga clic en Propiedades para abrir la ventana de Propiedades del Saitek R80. Haga
clic en la ficha de Prueba y compruebe todos los botones y controles de su nuevo wheel. Mueve el
volante de izquierda a derecha hasta el tope. El cursor deberá llegar a los lados del cuadrado. Pulsa
todos los botones y se deberán encender los indicadores luminosos en pantalla. Pulsa las palancas de
freno y acelerador y el indicador se moverá en pantalla.
6Tras probar el wheel, haga clic dos veces en Aceptar para finalizar. ¡Ahora ya puede cargar su juego
favorito y divertirse!
Instalación del Saitek R80 en Windows® Me
1Con el ordenador encendido y todas las aplicaciones cerradas, enchufe el Saitek R80 en uno de los
puertos USB del ordenador.
2El ordenador detectará y cargará automáticamente los controladores para el wheel.
3Para probar que el Saitek R80 funciona correctamente, haga clic en Inicio en la barra de tareas de
Windows® y luego seleccione Configuración yPanel de control.
4En el Panel de control haga clic doble en el icono de Controladores de juego
y luego en la ventana de
Controladores de juego seleccione Saitek R80.
5A continuación haga clic en Propiedades para abrir la ventana de Propiedades del Saitek R80. Haga
clic en la ficha de Prueba y compruebe todos los botones y controles de su nuevo wheel. Mueve el
volante de izquierda a derecha hasta el tope. El cursor deberá llegar a los lados del cuadrado. Pulsa
todos los botones y se deberán encender los indicadores luminosos en pantalla. Pulsa las palancas de
freno y acelerador y el indicador se moverá en pantalla.
6Tras probar el wheel, haga clic dos veces en Aceptar para finalizar. ¡Ahora ya puede cargar su juego
favorito y divertirse!
Table of contents
Languages:
Other Saitek Video Gaming Accessories manuals

Saitek
Saitek R660 GT User manual

Saitek
Saitek Pro Flight Instrument Panel User manual

Saitek
Saitek Pro Flight Switch Panel User manual

Saitek
Saitek Pro Flight Rudder Pedals User manual

Saitek
Saitek X45 User manual

Saitek
Saitek Pro Flight Switch Panel User manual

Saitek
Saitek RX500 User manual

Saitek
Saitek CONTROL PAD User manual

Saitek
Saitek PZ35 User manual

Saitek
Saitek Pro Flight Switch Panel User manual