manuals.online logo
Brands
  1. Home
  2. •
  3. Brands
  4. •
  5. Saitek
  6. •
  7. Video Gaming Accessories
  8. •
  9. Saitek RX500 User manual

Saitek RX500 User manual

1
ENGLISH
D-Pad
D-Pad
L3
SELECT
L2
●
R3
START
R2
Steering: Left/Right
MODE SELECTION: AN OVERVIEW!
The RX500 powers up in Digital Mode. Press
MODE to cycle through the other modes:
• DIGITAL Mode (default) ......LED off
• DUAL SHOCK II Mode* ......LED on
• NEGCON Mode*..................LED flashing
*Hold down START and press
▲
to switch
between the Normal/Extended options.
▲
L3
SELECT
L2
●
R3
START
R2
D-Pad ■
✖
Right
stick
up
1. A LOOK AT THE BASICS
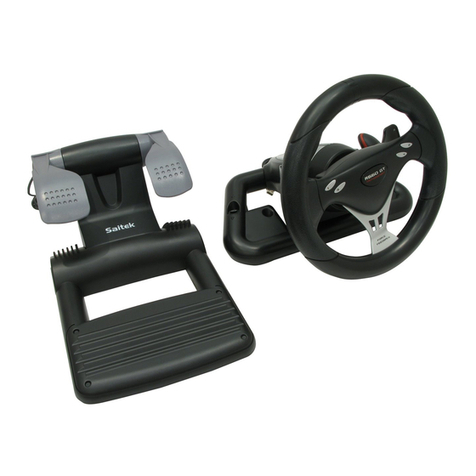
Congratulations on your purchase of Saitek’s RX500 Racing Wheel, a new and exciting
product that will change the way you view racing games! The RX500’s full analog buttons
provide the smoothest, most precise drive ever, and its analog gas and brake pedals offer
realistic and extremely accurate speed controls. The pedals also feature an extended foot rest
for total driving comfort, allowing you to rest your entire foot on the non-slip base. In addition,
the extra-long cable gives you lots of room to play!
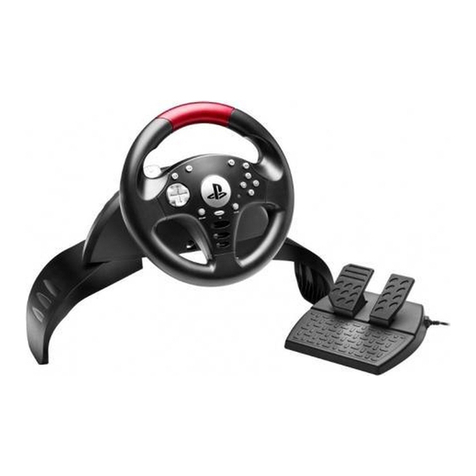
The RX500 was designed for the Sony PlayStation®2 video game console, but it’s also
compatible with the PS one™ and PlayStation®. As shown under
Features and Controls,
the
RX500 boasts 8 buttons, 2 Formula-1 style shifters, and an analog D-Pad, all conveniently
located on the wheel for easy access. In addition, the DoubleShock 2 rumble effect provides
great sensory feedback—you’ll think you’re actually out on the road! Ergonomically styled, with
a wide turning angle and a natural self-centering system, the RX500 also offers a sturdy clamp
that attaches the wheel unit to desks or tables from 1/2to 2 inches (1 to 5 cm) thick. Or, you can
Right
stick down
DUAL SHOCK II Mode
(Extended)
II
I
NEGCON Mode
(Extended)
B
L3
START
A
R3
START
NEGCON Mode
(Normal)
B
L3
D-Pad
down
(Shift
down)
A
R3
START
D-Pad up
(Shift up)
I
II
▲
L3
SELECT
L2
●
R3
START
R2
▲
START
D-Pad
D-Pad
D-Pad
down
(Shift down)
D-Pad up
(Shift up)
DUAL SHOCK II Mode
(Normal)
DIGITAL Mode
D-Pad
Steering: Left/Right
(Left Stick - standard Sony
Dual Shock II pad)
(back)
L1 R1
(back)
Steering: Left/Right
(Left Stick - standard Sony
Dual Shock II pad) Steering: Left/Right
Steering: Left/Right
(back)
L1 R1
(back)
(back)
L1 R1
(back)
(back)
LR
(back)
(back)
L
D-Pad ■
✖
R
(back)
L3 & R3 not
function in this mode
L3 & R3 not
function in this mode
L3 & R3 not
function in this mode
2
use the same clamp to attach your wheel to the add-on
piece for convenient and comfortable laptop play!
2. SELECT A MODE AND PLAY!
Before playing a game, you’ll want to configure the wheel
to fit the needs of that particular game! Since many of
today’s games use different default buttons for the same
functions, we’ve included several selectable configuration
settings so that your RX500 will cover all the possibilities!
First, locate the MODE button on the front of the wheel.
Next, consult the
Mode Selection Diagrams
to choose the
configuration settings that best match your current game,
and activate one of the following modes.
DIGITAL MODE:
• Your RX500 Wheel defaults to Digital Mode when first
powered up (the Mode LED is turned off).
DUAL SHOCK II MODE:
• Press MODE once, and the Mode LED will turn on to
indicate Dual Shock II Mode.
For
Extended
Dual Shock II Mode, hold down START
and press ▲.
NEGCON MODE:
• Press MODE again, and the Mode LED will start flashing to indicate Negcon Mode.
For
Extended
Negcon Mode, hold down START and press ▲.
Pressing MODE a third time will return you to Digital Mode, with the LED off again.
After you’ve set up your RX500 as described under
Getting Connected,
and selected your
mode as noted above, you’re ready to go!
3. HAVE QUESTIONS? HERE’S SOME HELP!
a. My RX500 isn’t functioning correctly. What’s wrong?
• Check the cable connections. Turn off the PlayStation®2/PS one™/PlayStation® and
unplug the wheel from the controller port. Then plug it back in, making certain that the
connection is snug. Disconnect the pedal unit and reconnect it, ensuring that the phone
jack snaps into place.
• Check to see that your console’s power cord is plugged in snugly, both into the unit
itself and into the wall. Consult your PlayStation®2/PS one™/PlayStation® manual for
console troubleshooting.
• Switch your game console off, and turn it back on again. While doing this, be careful
not to press any of the buttons or foot pedals, and make sure that the steering wheel is
in the center position.
b. I selected one of the modes, but the buttons aren’t responding as they should.
• Consult your game documentation. Make sure that you’ve selected the correct game
settings and mode for that particular game.
c. The gas and brake pedals don’t seem to be working.
• Check the pedal to wheel cable connection. Disconnect the pedal unit and reconnect it
again. Make sure the phone jack is securely plugged in.
• Verify that you’ve selected the correct game setting and Normal/Extended mode for
that particular game.
d. I’d like to try the laptop play option. How do I attach the add-on piece to the wheel?
• It’s easy! Simply open the clamp wide enough to slide the laptop piece and wheel
together, and then tighten the clamping mechanism onto the inside middle section of
the laptop piece—exactly as if you were clamping the wheel to the edge of a desktop.
PLAY IT SAFE!
Whether you’re in the middle of
anexcitingraceor simply outfor
a drive, remem-
ber that it’s im-
portant to be
aware of how
you are sitting
and how you’re gripping the
wheel! With both desktop and
laptop play, try not to stay in the
same position for too long, and
be sure to take breaks now and
then. Be smart—don’t take a
chanceon straining yourwrists,
hands, or fingers! Plus, a word
of caution: If you have strained
muscles, broken bones, or joint
problemsinyourfingers, hands,
or arms, do not use the wheel
withanygames thatsupportthe
vibration feature.
3
ENGLISH
Be careful not to overtighten the clamp grip!
e. The vibration feature isn’t working. Why?
• Not all games support this feature. Check your game
documentation to see if the game supports the vibra-
tion function.
4. IF YOU NEED MORE SUPPORT…
Give our website a visit at www.saitek.com. Besides
obtaining help with your technical questions, you’ll also find
up-to-date news and product information, as well as listings
of related links that are sure to interest you. And, while you’re
there, why not explore our website a little further and check out all the other products Saitek
has to offer, including a great variety of game controllers, chess computers, and other elec-
tronic products—you might just come across something you’ve never seen before!
If you need additional help with the setup or use of your RX500 Wheel, you can also obtain
comprehensive product support by contacting your nearest Technical Support Center. You’ll
find a complete listing of our worldwide affiliates on a separate sheet, included in the box with
your RX500. We’ve provided everything you might need, including e-mail addresses, mailing
addresses, and telephone numbers. In order to deal with your problems as quickly as possible,
we ask that you please follow these guidelines when contacting us:
• Have access to your Sony PlayStation®2 /PS one™/PlayStation® when you call! If you
are experiencing problems with one particular game, try to have that game loaded.
• Provide us with other relevant information, such as the game’s manufacturer, the version
number, etc.
• Describe the problem you are having and the events that led up to it, trying to be as pre-
cise as possible. Remember—the better we can understand the problem, the faster we can
find the solution!
PlayStation®2/PS one™/PlayStation® and Dual Shock are trademarks of Sony Computer Entertainment Inc.
NEGCON is a registered trademark of Namco.
HERE’S A TIP!
To have the most fun with your
RX500, look for
games that offer
vibration effects!
You’ll be amazed
at how real your
driving experience becomes
whenyoutakeadvantageofthis
special feature!

Other Saitek Video Gaming Accessories manuals

Saitek PZ35 User manual

Saitek

Saitek PZ35 User manual

Saitek Pro Flight Switch Panel User manual

Saitek

Saitek Pro Flight Switch Panel User manual

Saitek Pro Flight Switch Panel User manual

Saitek

Saitek Pro Flight Switch Panel User manual

Saitek CONTROL PAD User manual

Saitek

Saitek CONTROL PAD User manual

Saitek R660 GT User manual

Saitek

Saitek R660 GT User manual

Saitek Pro Flight Switch Panel User manual

Saitek

Saitek Pro Flight Switch Panel User manual

Saitek R80 User manual

Saitek

Saitek R80 User manual

Saitek X45 User manual

Saitek

Saitek X45 User manual

Saitek Pro Flight Rudder Pedals User manual

Saitek

Saitek Pro Flight Rudder Pedals User manual

Saitek Pro Flight Instrument Panel User manual

Saitek

Saitek Pro Flight Instrument Panel User manual

Popular Video Gaming Accessories manuals by other brands

Moza RS Series manual

Moza

Moza RS Series manual

FANATEC CSL DD quick guide

FANATEC

FANATEC CSL DD quick guide

AP MoveAndStic basic Instructions for assembly

AP

AP MoveAndStic basic Instructions for assembly

American Legend AL2100W manual

American Legend

American Legend AL2100W manual

Banzai 69987 manual

Banzai

Banzai 69987 manual

Sony PlayStation CFI-ZCA1 instruction manual

Sony

Sony PlayStation CFI-ZCA1 instruction manual

Hypersuit Hypersuit instructions

Hypersuit

Hypersuit Hypersuit instructions

SkyGolf Skytrak Connection guide

SkyGolf

SkyGolf Skytrak Connection guide

Datel Go-tcha Expedition user guide

Datel

Datel Go-tcha Expedition user guide

Thrustmaster T2PA manual

Thrustmaster

Thrustmaster T2PA manual

All In 1 Gaming Pro SE Sim Frame Assembly instructions

All In 1 Gaming

All In 1 Gaming Pro SE Sim Frame Assembly instructions

Schiit HEL manual

Schiit

Schiit HEL manual

Goodmans 373686 user manual

Goodmans

Goodmans 373686 user manual

Carmelli CHALLENGER SHUFFLEBOARD TABLE Assembly instructions

Carmelli

Carmelli CHALLENGER SHUFFLEBOARD TABLE Assembly instructions

Thrustmaster T300 RS user manual

Thrustmaster

Thrustmaster T300 RS user manual

Thrustmaster T128 user manual

Thrustmaster

Thrustmaster T128 user manual

SEM Revolution Z-7789 quick start guide

SEM

SEM Revolution Z-7789 quick start guide

DOF Reality M2 Setup instructions

DOF Reality

DOF Reality M2 Setup instructions

manuals.online logo
manuals.online logoBrands
  • About & Mission
  • Contact us
  • Privacy Policy
  • Terms and Conditions

Copyright 2025 Manuals.Online. All Rights Reserved.