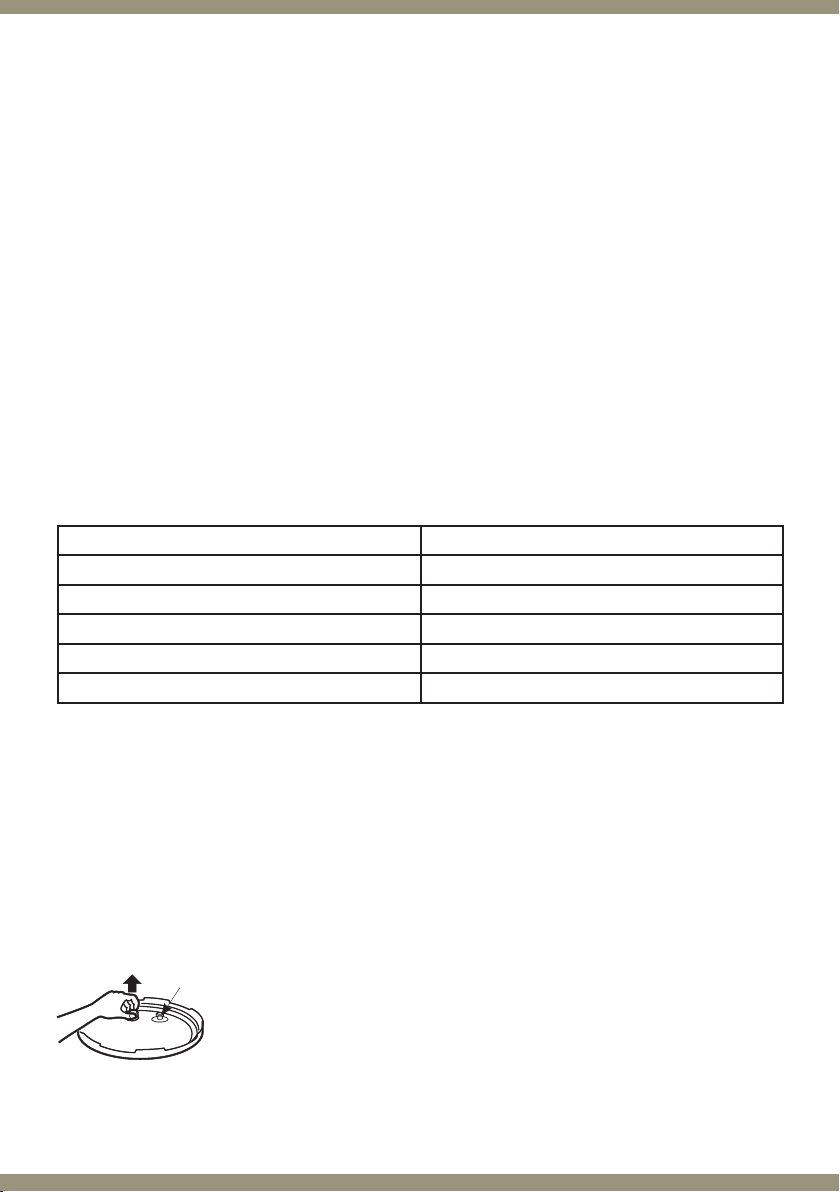
Salter EK1847 User manual

5 Litre Pressure Cooker
The fast and easy way to create perfect tasty meals


3
5 Litre Pressure Cooker
The fast and easy way to create
perfect tasty meals
“My Salter Pressure Cooker
does all the work for me...”
CONTENTS PAGE
Safety Instructions 4-5
Getting Started 6
In the Box 6
Features 6
Description of Parts 7
Instructions for Use 7
Before First Use 7
Assembling the Pressure Cooker 8
Using the Pressure Cooker 9
Cooking Food Using the
Pre-programmed Settings 9
Pre-programmed Settings
for Cooking Food 9
Removing the Lid 10
Cooking Food Using the
Manual Setting 10
Cook Food Using the
Preset Function 10
Do’s and Don’ts 10
Cleaning and Maintenance 11
Storage 11
Specications 11
Recipes 12-21
Wiring Page 23
Guarantee Page 24

4
Safety Instructions
When using electrical appliances, basic safety precautions
should always be followed.
Check that the voltage indicated on the rating plate
corresponds with that of the local network before connecting
the appliance to the mains power supply.
Children aged from 8 years and people with reduced physical,
sensory or mental capabilities or lack of experience and
knowledge can use this appliance, only if they have been
given supervision or instruction concerning use of the appliance
in a safe way and understand the hazards involved.
Children should be supervised to ensure that they do not play
with the appliance.
Unless they are older than 8 and supervised, children should
not perform cleaning or user maintenance.
This product is not a toy.
This appliance contains no user serviceable parts. If the
power supply cord, plug or any part of the appliance is
malfunctioning or if it has been dropped or damaged, only a
qualiedelectricianshouldcarryoutrepairs.Improperrepairs
may place the user at risk of harm.
Keep the appliance and its power supply cord out of reach
of children.
Keep the appliance and its power supply cord away from
heat or sharp edges that could cause damage.
Keep the power supply cord away from any parts of the
appliance that may become hot during use.
Keep the appliance away from other heat emitting appliances.
Do not immerse the appliance in water or any other liquid.
Do not operate the appliance with wet hands.
Do not leave the appliance unattended whilst connected to
the mains power supply.
Do not remove the appliance from the mains power supply by
pulling the cord; switch it off and remove the plug by hand.
Do not use the appliance for anything other than its intended use.
Do not use any accessories other than those supplied.
Do not use this appliance outdoors.
Do not store the appliance in direct sunlight or in high
humidity conditions.
Do not move the appliance whilst it is in use.
Do not touch any sections of the appliance that may

5
become hot or the heating components of the appliance, as
this could cause injury.
Do not use sharp or abrasive items with this appliance; use
only plastic or wooden spatulas.
Donotoverlltheappliance,asthismaycausefoodtoenter
the vent hole during cooking, resulting in excess pressure.
Ensure that the ingredients are below the ‘FULL’ mark.
Do not attempt to open the lid of the appliance while the
valveisoating.
Do not apply weight to the pressure release valve or cover it
with any objects.
If the appliance discharges large amounts of steam during
use, stop use immediately. The appliance will need to be
repaired in an authorised repair centre.
Do not block the steam vent hole.
The ducts in the pressure release valve that allow for the
escape of steam should be checked regularly to ensure that
they are not blocked.
When releasing pressure, always keep your hands and face
away from the steam outlet of the pressure release valve.
Ensurethatthereissufcientventilationaroundtheappliance
to allow for the escape of heat and steam.
Always unplug the appliance after use and before any cleaning
or user maintenance.
Always ensure that the appliance has cooled fully after use before
performing any cleaning or maintenance or storing away.
Never touch the exterior surface of the appliance during
operation or if it has been switched off and has been allowed
to cool; always use the handles.
Use of an extension cord with the appliance is not recommended.
This appliance should not be operated by means of an
external timer or separate remote control system.
This appliance is intended for domestic use only. It should not
be used for commercial purposes.
Caution: Do not open the lid of the appliance immediately
after cooking, as the pressure inside the pot will be very high.
Waituntilthepressurehasdecreasedsufciently.
Caution: This appliance generates heat and escaping steam
during use. Proper precautions must be taken to prevent the risk
ofburns,resoranyinjuryordamage.
Caution: Hot surface.

6
Please read all instructions carefully and retain for future reference.
Getting Started
Remove the appliance from the box.
Remove any packaging from the appliance.
Place the packaging inside the box and either store or dispose of safely.
In the Box
Pressure Cooker with Detachable Lid
Non-stick Bowl
Plastic Rice Spoon
Measuring Cup
Mains Power Lead
Instruction Manual
Features
900 W power
5 litre capacity
Removable non-stick bowl for easy cleaning
Digital display
Keep warm function
Safety pressure release valve
Stainless steel base
Allowsyoutocook:meat,sh,vegetable,rice,soupandarangeofdesserts

Description of Parts
Instructions for Use
Before First Use
Ensure that the Pressure Cooker is unplugged from the mains power supply and
turned off.
Wipe the Pressure Cooker housing and heating base with a soft, damp cloth and
dry thoroughly.
Clean the accessories in warm, soapy water, then rinse and dry thoroughly.
Do not immerse any electrical components in water or any other liquid.
CheckthatthereissufcientventilationaroundthePressureCooker.
Note: Duringtherstfewuses,theremaybeaslightodour;thisiscompletely
normal and will soon subside.
7
Measuring cup
Spoon
Floating valve
Pressure
release valve
Non-stick bowl
Lid
Handle
Control panel Sensor
Heating plate
Outer
housing
Water
collector
Lid
holder
Spatula holder
Sealant washer
Pressure
cooker
handle
Upper ring
Power cable
Heating base

8
Assembling the Pressure Cooker
Make sure that the Pressure Cooker is unplugged from the mains power supply and
turned off.
Place the non-stick bowl into the outer housing of the Pressure Cooker, turning it
slightly to ensure that it is sat perfectly.
Fix the sealant washer into the correct position on top of the Pressure Cooker
housing, then place the lid onto the Pressure Cooker and twist it anticlockwise until
it locks in place.
Make certain that the steam vent hole of the pressure release valve is not blocked.
Put the pressure release valve into the ‘seal’ position,
checkingthattheoatingvalveisinthedownposition.
Plug the Pressure Cooker into the mains power supply and turn it on by selecting
the required cooking mode.
Note: If the sealant washer is not in the correct position, steam will be able to
escape and pressure cannot build up.
Warning: Do not place food directly onto the heating base; always use the non-
stick bowl.
Pull up Floating
valve
Press down
Press down Floating
valve
Press down

9
Caution: Both the lid and any steam escaping from the pressure release valve will
get very hot during use, be careful to avoid burns.
Using the Pressure Cooker
Cooking Food Using the Pre-programmed Settings
AddthefoodtobecookedintotheassembledPressureCooker.Donotllthe
bowl more than ¾ of its Max. volume with ingredients and liquid and always check
that the bowl is at least ¼ full, to avoid damage to the product. If cooking any
foodsthatexpand,thendonotllthenon-stickbowlmorethan2
/3to allow for the
increase in volume.
Select the desired cooking mode to begin the cooking process. The display will show
the length of time that the food will be cooked for. For example, pressing the ‘Rice’
programme will display ‘010’, indicating that the food will be cooked for 10 minutes.
Pre-programmed Settings for Cooking Food
Food Pressure Cooking Time
Rice 10 minutes
Meat 15 minutes
Soup 20 minutes
Fish 25 minutes
Vegetables 30 minutes
The displayed pressurised cooking time will count down in 1 minute intervals. When
the display shows ‘000’, the pressure-cooking period has ended and cooking is
complete. The buzzer will sound 3 times and the Pressure Cooker will automatically
default to the ‘Keep Warm’ setting.
Whenthe‘KeepWarm/Cancel’LEDisashingandthedisplayshows‘b00’,the
pressure inside the cooker is still high. Do not open the lid of the Pressure Cooker at
this time.
ThepressurewillhavedecreasedsufcientlywhentheLEDstopsashingandis
constantandwhentheoatingvalvehasdropped.Setthepressurereleasevalve
to ‘Vent’ to allow the steam inside of the Pressure Cooker to escape.
To cancel the Keep Warm function, press the ‘Keep Warm/Cancel’ button once.
The display will now show ‘000’.
Note: The rate of pressure release is slower for foods such as soup.
Pull up Floating
valve

10
Removing the Lid
Unplug the Pressure Cooker from the mains power supply, then hold and turn the
lid handle clockwise until it unlocks. Remove the lid carefully.
Important: Thelidmustnotberemoveduntilthepressurehassufcientlydecreased.
Caution: Be aware of escaping steam; always keep your hands and face away
from the pressure release valve.
Cooking Food Using the Manual Settings
To manually set the Pressure Cooker, press the ‘Time Setting’ button. Pressing the
‘Time Setting’ button will set the cooking time to 1 minute. Repeatedly pressing
the ‘Time Setting’ button will increase the cooking time at 1 minute intervals, to a
maximum of 99 minutes. The cooking timer will revert back to ‘000’ after ‘099’.
After setting the cooking time, press the ‘Function/Menu’ button to begin cooking.
A red indicator light next to the ‘Function/Menu’ button will illuminate.
To cancel cooking, press the ‘Keep Warm/Cancel’ button once.
If you do not want to set the cooking time, press the ‘Function/Menu’ button to
start cooking; the display will show ‘00’.
Cook Food Using the Preset Function
The preset function allows you to delay the cooking start time.
Press the ‘Timer’ button to set the delay timer in 1 hour increments up to a
maximum of 9 hours. The display will show ‘900’. Set the cooking mode or the
pressurised cooking time as per the instructions in the ‘Cooking Food Using the
Manual Settings’ section.
The timer will start to countdown. When the timer reaches ‘0’, the Pressure Cooker
will begin cooking.
Note: To use the preset function, the Pressure Cooker must be plugged into the
mains power supply and in ‘Standby’ mode.
Do’s & Don’ts
Ensure that the appliance is unplugged from the mains power supply before cleaning.
Do not immerse the appliance in water or any other liquid.
Do not clean the Pressure Cooker housing, non-stick bowl, sealant washer or lid
with harsh or abrasive cleaners.
Do not leave rice on the keep warm setting for long periods of time as the food will
discolour and go off. The ‘Keep Warm’ function is intended for use during a meal.
Do not use the mains cable with any other appliance.
Do not use an external timer with this appliance.
Do not block the steam vent hole.

11
Cleaning & Maintenance
Ensure that the Pressure Cooker is unplugged from the mains power supply and
turned off.
Wipe the Pressure Cooker housing and heating base with a soft, damp cloth and
dry thoroughly.
Clean the accessories in warm, soapy water, then rinse and dry thoroughly.
Scrub the pressure release valve with a small brush to ensure that steam escapes
easily during cooking. It is important to constantly maintain the pressure release
valve to ensure safe operation of the Pressure Cooker.
Do not immerse any electrical components in water or any other liquid.
Do not use a scouring pad or any other abrasive detergents or materials to clean
the Pressure Cooker and accessories.
Storage
Ensure that the Pressure Cooker is cool, clean and dry.
Store in a cool, dry place.
Specications
Input: 220-240 V ~ 50 Hz
Output: 900 W

12
Ingredients
600 g diced lamb
8 medium potatoes,
peeled and diced
5 carrots, peeled
and diced
1 large onion, diced
225 ml lamb stock
(4 stock cubes)
225 ml cold water
1tbspcornower
1 tbsp olive oil
Salt to taste
Method
Preparation Time: 15 minutes
Cooking Time: 20 minutes
Switch on the Pressure Cooker and press the ‘Function Menu’ button to start
cooking. Heat the oil in the bottom of the non-stick bowl. Add the onion and lamb
and cook until the lamb is sealed on the outside.
Stir in the stock, water, carrots and salt, close the lid and secure the pressure
release valve to ‘Seal’.
Set the Pressure Cooker to the ‘Meat’ function (15 minutes cooking time).
Meanwhile, place the potatoes into a saucepan with enough water to
cover them, bring to the boil and cook until tender. This process should take
approximately the same amount of time as the stew.
When the 15 minutes are up, release the pressure release valve by changing the
valve from ‘Seal’ to ‘Vent’. Once the lid has been carefully released, mix the
cornourwithasmallamountofwaterandaddittothenon-stickbowl.Cookfora
few more minutes, add the potatoes and stir.
The lamb stew is now ready to serve.
Lamb Stew

Ingredients
600 g diced beef
8 medium potatoes,
peeled and diced
5 carrots, peeled
and diced
1 large onion, diced
225 ml lamb stock
(4 stock cubes)
225 ml cold water
1tbspcornower
1 tbsp olive oil
Salt, to taste
Method
Preparation Time: 15 minutes
Cooking time: 20 minutes
Switch on the Pressure Cooker and press the ‘Function Menu’ button to start
cooking. Heat the oil in the bottom of the non-stick bowl. Add the onion and beef
and cook until the beef is sealed on the outside.
Stir in the stock, water, carrots and salt, close the lid and secure the pressure
release valve to ‘Seal’.
Set the Pressure Cooker to the ‘Meat’ function (15 minutes cooking time).
Meanwhile, place the potatoes into a saucepan with enough water to
cover them, bring to the boil and cook until tender. This process should take
approximately the same amount of time as the stew.
When the 15 minutes are up, release the pressure release valve by changing the
valve from ‘Seal’ to ‘Vent’. Once the lid has been carefully released, mix the
cornourwithasmallamountofwaterandaddittothenon-stickbowl.Cookfora
few more minutes, add the potatoes and stir.
The beef stew is now ready to serve.
Beef Stew
13

14
Ingredients
4 sausages of
choice, sliced
400 g chopped
tomatoes
100 g green lentils
1 green pepper
1 onion
2 garlic cloves, crushed
50ml vegetable oil
200 ml hot water
½ tsp mixed dried herbs
½ tsp smoked paprika
Salt and pepper,
to taste
Method
Preparation time: 15 minutes
Cooking time: 20 minutes
Switch on the Pressure Cooker and press the ‘Function Menu’ button to start cooking.
Cube the onion and green pepper to no bigger than the kidney beans and then
crush the garlic.
Add the oil to the non-stick bowl, then add in the chopped peppers and onion.
Fry the vegetables for approximately 2 minutes, stirring occasionally. Add the
sausage slices and continue to cook whilst stirring for a further 3 minutes before
adding the garlic.
Carefully mix the lentils in the hot water and add them to the non-stick bowl; cook
for an additional 5 minutes.
Stir in the tin of kidney beans, tomatoes, dried herbs, paprika and salt and pepper,
then close the lid, checking that it is in the locked position and the that pressure
release valve is set to the ‘Seal’ position.
Press the ‘Time Setting’ button until the display shows ‘15 minutes’ and then
press the ‘Function Menu’ button to start the cooking process. When cooking is
complete, release the pressure by switching the pressure release valve to ‘Vent’
and then unlock the lid and open carefully.
The sausage casserole is now ready to serve.
Sausage Casserole

Ingredients
300 g lean minced beef
2 400 g tins chopped
tomatoes
400 g tin kidney beans,
drained
2 large onions, chopped
6 garlic cloves,
nelychopped
100 ml water
4 tbsp olive oil
3 tbsp tomato puree
3 tbsp chilli powder
2 bay leaves
1 tbsp dried basil leaves
1 tbsp ground cumin
1 tbsp salt
Method
Preparation Time: 10 minutes
Cooking time: 20 minutes
Switch on the Pressure Cooker and press the ‘Function Menu’ button to start cooking.
Place the beef mince into the non-stick bowl and brown.
Mix in 2 tbsp of olive oil, the chopped onions and garlic. Cook until the onions
have softened.
Add the remaining ingredients and stir.
Close the lid, checking that it is in the locked position and that the pressure release
valve is set to the ‘Seal’ position.
Select the ‘Meat’ function for 15 minutes.
When cooking is complete, release the pressure by switching the pressure release
valve to ‘Vent’ and then unlock the lid and open carefully.
Remove the bay leaves and serve with rice.
Chilli Con Carne
15

16
Ingredients
500 g Arborio rice
50 g fresh Parmesan
cheese, grated
850 ml chicken stock
(5 stock cubes)
200 ml dry white wine
3 tbsp unsalted butter
1 tbsp olive oil
1 large onion, chopped
Salt and pepper,
to taste
Method
Preparation Time: 10 minutes
Cooking Time: 15 minutes
Switch on the Pressure Cooker and press the ‘Function Menu’ button to start cooking.
Heat 2 tbsp of the unsalted butter and the olive oil in the non-stick bowl.
Add the chopped onion and cook until it begins to soften; be careful not to brown.
Stir in the rice to coat it with the onion and cook for a further 1 minute.
Pour in the wine and cook until the rice has mostly absorbed it, then add
approximately 1 pint of the chicken stock. Close the Pressure Cooker lid, checking
that it is in the locked position and that the pressure release valve is set to the
‘Seal’ position.
Select the ‘Rice’ function and cook for 10 minutes.
When cooking is complete, release the pressure by switching the pressure release
valve to ‘Vent’ and then unlock the lid and open carefully.
Add the remaining chicken stock, 1 tbsp of unsalted butter and cheese. Stir to
combine with the rice.
Season with salt and pepper to taste and serve.
Basic Risotto

17
Ingredients
500 g Arborio rice
50 g fresh Parmesan
cheese, grated
50 g fresh mushrooms,
chopped
850 ml chicken stock
(5 stock cubes)
200 ml dry white wine
3 tbsp unsalted butter
1 tbsp olive oil
1 large onion, chopped
Salt and pepper,
to taste
Method
Preparation Time: 10 minutes
Cooking time: 15 minutes
Switch on the Pressure Cooker and press the ‘Function Menu’ button to start cooking.
Heat 2 tbsp of the unsalted butter and olive oil in the non-stick bowl.
Add the chopped onion and mushrooms and cook until they begin to soften; be
careful not to brown.
Stir in the rice to coat it with the onion and mushrooms and cook for a further 1 minute.
Pour in the wine and cook until the rice has mostly absorbed it, then add
approximately 1 pint of the chicken stock. Close the Pressure Cooker lid, checking
that it is in the locked position and that the pressure release valve is set to the
‘Seal’ position.
Select the ‘Rice’ function and cook for 10 minutes.
When cooking is complete, release the pressure by switching the pressure release
valve to ‘Vent’ and then open then unlock the lid and open carefully.
Add the remaining chicken stock, 1 tbsp butter and cheese. Stir to combine with
the rice.
Season with salt and pepper to taste and serve.
Mushroom Risotto

18
Ingredients
2 lamb shanks
10 garlic cloves,
peeled and left whole
570 ml chicken stock
(4 stock cubes)
100 ml port
2 tbsp olive oil
1 tbsp tomato puree
1 tsp dried rosemary
1 tbsp unsalted butter
1 tbsp balsamic vinegar
Salt and pepper,
to taste
Method
Preparation Time: 10 minutes
Cooking Time: 20 minutes
Switch on the Pressure Cooker and press the ‘Function Menu’ button to start cooking.
Trim any excess fat from the lamb shanks, season them with salt and pepper and
heat the oil in the non-stick bowl.
Heat the oil in the non-stick bowl.
Add the lamb shanks to the non-stick cooking bowl and seal on all sides.
When the lamb shanks are almost completely sealed, add the garlic cloves and
cook until they are lightly browned.
Pour in the chicken stock, tomato puree and rosemary and stir until the puree dissolves.
Close the Pressure Cooker lid, checking that it is in the locked position and that the
pressure release valve is set to the ‘Seal’ position.
Select the ‘Meat’ function and cook for 30 minutes.
When cooking is complete, release the pressure by switching the pressure release
valve to ‘Vent’ and then unlock the lid and open carefully.
Remove the lamb shanks from the non-stick cooking bowl but leave the juices in to
rest for 5 minutes, then stir in the butter and vinegar until the sauce thickens.
Serve with the sauce over the lamb.
Lamb Shanks with Garlic
and Port Wine

Ingredients
250 g chestnut
mushrooms
25 g butter
300 ml cold water
3 tbsp creme fresh
1 white onion
2 cloves garlic
½ tsp dried
mixed herbs
Salt and pepper,
to taste
Method
Preparation Time: 20 minutes
Cooking Time: 35 minutes
Extra Equipment Needed: hand blender or food processor
Switch on the Pressure Cooker and press the ‘Function Menu’ button to start cooking.
Dice the onions and mushrooms and then mash the garlic.
Melt the butter in the non-stick bowl, then add the chopped onion and mushrooms
and fry them for approximately 5 minutes, until softened.
Blend in the garlic, dried mixed herbs, seasoning and cold water and stir.
Close the Pressure Cooker lid, checking that it is in the locked position and that the
pressure release valve is set to the ‘Seal’ position.
Select the ‘Timer’ setting function and cook for 10 minutes.
When cooking is complete, release the pressure by switching the pressure release
valve to ‘Vent’ and then unlock the lid and open carefully.
Leave the soup for a few minutes to cool and then blend using the hand blender
or food processor.
Stir in the crème fresh and serve.
Cream of Mushroom Soup
19

20
Ingredients
100 g short grain
rice pudding
50 g sugar
570 ml whole milk
1 tsp butter
1
/3 tsp freshly grated
nutmeg (or ½ tsp
dried nutmeg)
Method
Preparation Time: 15 minutes
Cooking time: 15 minutes + 5 minutes standing time
Switch on the Pressure Cooker and then press the ‘Function Menu’ button to
start cooking.
Melt the butter in the non-stick bowl.
Pour in the milk and allow a few minutes for it to heat up; be careful not to burn it,
then add the rice and the nutmeg, giving it a good stir.
Close the Pressure Cooker lid, checking that it is in the locked position and that the
pressure release valve is set to the ‘Seal’ position.
Select the ‘Timer’ setting function and cook for 12 minutes.
When cooking is complete, release the pressure by switching the pressure release
valve to ‘Vent’ and then unlock the lid and open carefully.
Stir in the sugar, replace the lid and cook for a further 3 minutes.
When cooking is complete, release the pressure by switching the pressure release
valve to ‘Vent’ and then unlock the lid and open carefully.
Leave to stand for up to 5 minutes to allow the rice to thicken to the desired texture
and temperature, then serve.
Rice Pudding
Table of contents