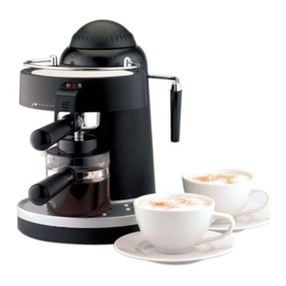
Salton CAPPUCCINO EXPRES EX-182 User manual

Model: EX-182
CAPPUCCINO EXPRÈS
ESPRESSO/CAPPUCCINO MAKER
Booklet EX-182 10/7/02 3:54 PM Page 12

IMPORTANT SAFEGUARDS
When using electrical appliances, basic safety precautions should always be
followed including the following:
1. Read all instructions.
2. Do not touch hot surfaces. Use handles or knobs.
3. Never leave the appliance unattended when in use.
4. To protect against electrical hazards, do not immerse cord, plugs, or the
appliance in water or other liquid.
5. Close supervision is necessary when any appliance is used by or near children.
6. Unplug from outlet when not in use and before cleaning. Allow to cool
before putting on or taking off parts, and before cleaning the appliance.
7. Never use the appliance without water.
8. Do not operate any appliance with a damaged cord or plug or after the
appliance malfunctions, or has been damaged in any manner. Return
appliance to Salton for examination, repair or adjustment. See Warranty.
9. The use of accessory attachments not recommended by Salton may cause
hazards.
10. Do not use outdoors.
11. Do not let cord hang over edge of table or counter, or touch hot surfaces.
12. Do not place on or near a hot gas or electric burner, or in a heated oven.
13. Extreme caution must be used when moving an appliance containing
hot liquids.
14. Prior to connecting or disconnecting plug from wall outlet, turn any control
to Off.
15. Do not use appliance for other than intended household use.
16. Scalding may occur if the Boiler Cap or Espresso Filter Holder are removed
during the brewing cycle.
17. Keep Control Knob in the ‘Off’ position when not being used.
2
SAVE THESE INSTRUCTIONS
Booklet EX-182 10/7/02 3:54 PM Page 13

POLARIZED PLUG
This appliance has a polarized plug (one blade is wider than the other).
To reduce the risk of electric shock, this plug will fit in a polarized outlet only
one way. If the plug does not fit fully in the outlet, reverse the plug. If it still
does not fit, contact a qualified electrician. Do not modify the plug in any way.
INTRODUCTION
It was about 100 years ago when the Italians introduced the first machine
that would extract the rich and robust flavour of coffee through a rapid
brewing process, aptly called "espress".
Espresso Coffee is made by rapidly forcing hot water by means of steam
pressure through the ground coffee, thus extracting the flavour.
Now that you are the proud owner of the SALTON Cappuccino Exprès ,
you can experience the taste of a delicious cup of espresso or cappuccino,
time and time again, in the comfort of your own home.
The SALTON Cappuccino Exprès retains the authenticity of the traditional
steam-activated brewing process, but simplifies the operation. A perfect cup
of espresso is assured every time. Cappuccino is a combination of half
espresso coffee and half frothy, heated (steamed) milk. Frothy milk is easily
obtained using the special Frothing Nozzle on the SALTON Cappuccino Exprès.
Espresso has no match as an after-dinner drink. It complements any meal.
When liqueurs are added to freshly brewed espresso, an altogether new taste
is obtained.
FACTS YOU SHOULD KNOW
1. The flavour of your coffee depends on the characteristics of the beans
from which it is made, the type of bean, how and where it was grown,
harvested and processed. Espresso is not a variety of coffee bean; it
describes the brewing process. The flavour of a coffee bean is determined
by many factors, but its taste and aroma are the result of the roasting
process. Most coffees purchased from the supermarket shelf are roasted
to a moderate degree. Their beans are light in colour and have a dry,
rather than an oily surface. This is known as the American roast. Coffee
beans that are roasted for a longer period of time and at higher
temperatures will be much darker in colour. A darker roasted bean tends
to have an oily surface and creates more caramelization of the sugar
3
Booklet EX-182 10/7/02 3:54 PM Page 14
and starches within the bean. The darker beans will produce a more
flavourful cup of coffee than the lightly-roasted beans.
2. A fine drip grind coffee must be used. A powdery grind is too fine for the
Salton Cappuccino Exprès. A powdery grind will cake in the basket and
block the water from flowing through.
3. You may prefer to add chicory to obtain a unique flavour.
Remember - do not use chicory separately from the roasted ground
coffee. Have the chicory ground together with your roasted coffee.
4. Cappuccino is simply a combination of espresso and hot, frothy milk.
Equal amounts of espresso and milk are recommended. Cappuccino
is usually topped with nutmeg, cinnamon or chocolate shavings.
5. Espresso coffee should be served immediately after it is made.
6. Espresso is served in demitasse cups (2 to 2 1/2oz.). A 4 or 6 oz. cup or
glass is used for cappuccino.
7. Ideally, coffee beans should be ground immediately before using.
8. To continue to preserve the rich flavour, it is best to store your ground
coffee or beans in an airtight container in the freezer of your refrigerator.
Ground coffee readily picks up other food flavours.
Know Your Salton Cappuccino Exprès
Before using your Salton Cappuccino Exprès, you should become familiar with all
of its parts. Identify all parts of your Salton Cappuccino Exprès according to the
drawing below so that you have no doubt when reading the instructions that follow.
DESCRIPTION DES PIÈCES
1. Boiler Cap
2. Control Knob
3. Filter Basket and Holder
4. Filter Holder Lock
5. Steam Tube
6. Frothing Nozzle
7. Carafe with Lid
8. Indicator Light (not shown)
9. Removable Drip Tray
4
8
1
4
6
5
2
3
7
9
Booklet EX-182 10/7/02 3:54 PM Page 15

BEFORE FIRST USE
Wash all removable parts in warm, soapy water, rinse thoroughly and dry.
Wipe the machine with a damp cloth.
Run water only (without coffee) through your Salton Cappuccino Exprès.
Follow the instructions below in the "Making Espresso Coffee" section
numbers 1-10.
MAKING ESPRESSO COFFEE
1. Make sure the Control Knob is in the Off position. Plug into a
120 volt AC outlet.
2. Unscrew the Boiler Cap by turning it counterclockwise.
3. Fill the Carafe with 2 to 4 cups of cold water using the carafe markings
for reference. When making Cappuccino add extra water to the Steam
Cloud level for 2 cups or to the bottom of the silver ring for 4 cups . Pour
the water into the Boiler. All water will be processed until the Boiler is
empty. Therefore, pour only as much water as you intend to use.
4. Screw the Boiler Cap securely in place by turning clockwise.
5. Place the Filter into Filter Holder and fill to the desired level with
Espresso coffee. NOTE: Markings inside the Filter indicate coffee level for
2 or 4 cups. Use a fine drip grind coffee. If the coffee is too fine the flow
of water through the Filter will be impeded. Never press down on the
coffee. Never fill the Filter above the 4 cup marking.
6. Brush away excess coffee from the edge of the Filter.
7. To insert Filter/Filter Holder, push upward into the machine then turn
handle to the right until locked securely into position.
8. Place the Lid on the Carafe and position under the Filter Holder.
9. Turn the Control Knob to " ". In approximately 2 minutes Espresso
coffee will start to flow into the Carafe. Warning: Do not attempt to
remove either the Boiler Cap or Filter Holder during the brewing
process. Scalding may occur.
10. When Espresso has stopped flowing, turn the Control Knob to 'Off'.
11. Remove the Carafe and pour Espresso into demitasse cups.
5
Booklet EX-182 10/7/02 3:54 PM Page 16

12. Before removing the Filter Holder or the Boiler Cap, turn the Control Knob
to the first " " to relieve the pressure in the boiler.
13. Once the steam has stopped turn the Control Knob to ‘Off’ and remove
the Filter Holder by turning the handle to the left and lowering. Place the
Filter Holder Lock over the edge of the Filter Basket and discard the
coffee grounds.
14. For additional servings turn the Control Knob to ‘Off’, remove the Boiler
Cap and refill the Boiler with water. Repeat steps 3-13.
NOTE: When making additional batches of espresso the water reservoir will
be hot after the first cycle is completed. Cold water poured into the hot
reservoir may case spattering.
MAKING CAPPUCCINO
Cappuccino is prepared by topping Espresso coffee with frothy steamed milk.
Fill a narrow pitcher half full with fresh, cold milk (the colder the better).
Low fat or skimmed milk works best.
1. Follow steps 1 through 9 for making Espresso.
2.
As soon as the Espresso starts to flow into the Carafe, begin to froth the milk.
Place the tip of the Frothing Nozzle into the pitcher, then turn the Control Knob
counterclockwise slowly to the second " " maximum position.
Move the pitcher up and down, keeping the tip of the Frothing Nozzle
just below the surface to produce the best froth and avoid splattering.
3. When the milk has been frothed, turn the Control Knob clockwise
to " " to finish brewing the espresso.
4. After the espresso has finished brewing, turn the Control Knob back to
the first " " for a few seconds to expel any milk remnants from the
Steam Tube.
5. Remove the Carafe and pour Espresso into demitasse cups.
6. Spoon frothed milk onto the Espresso. Add hot milk to fill the cup.
Sprinkle with cinnamon, nutmeg or chocolate.
7. Before removing the Filter Holder or the Boiler Cap, turn the Control Knob
to the first " " to relieve the pressure in the boiler.
6
Booklet EX-182 10/7/02 3:54 PM Page 17

8. Once the steam has stopped turn the Control Knob to ‘Off’ and remove
the Filter Holder by turning the handle to the left and lowering. Place the
Filter Holder Lock over the edge of the Filter Basket and discard the
coffee grounds.
CARE AND CLEANING
1. Unplug the appliance from the electrical outlet and allow to cool
completely before cleaning.
2. Wash the Carafe and Lid, the Filter, the Filter Holder, Frothing Nozzle and
Drip Tray in warm soapy water. Rinse in clear water and dry thoroughly.
Never wash any components in a dishwasher.
3. If the Steam Tube becomes blocked you may pull off the Frothing Nozzle
and use a pin to loosen any milk remnants from the Steam Tube. Replace
the Frothing Nozzle.
4. Wipe the outside of the unit with a damp cloth. Never immerse the
appliance in water or in any other liquid. Do not use abrasive cleaners.
DESCALING
Over a period of time, minerals and calcium found in water will accumulate in
your Cappuccino Exprès and affect its operation. The appliance should be
cleaned approximately every six months, depending on water conditions.
Use distilled vinegar in the following manner to remove the mineral deposits.
1. Make sure the appliance is cold and has been disconnected from the wall
outlet and the Control Knob is in the Off position.
2. Unscrew the Boiler Cap.
3. Fill the Carafe with white vinegar and pour into the reservoir.
4. Close the Boiler Cap securely by turning it clockwise.
5. Place the Filter and the Filter Holder into the machine. Place the Carafe on
the Drip Tray.
6. Plug into a wall outlet and turn the Control Knob to " ".
7. Let the whole quantity of vinegar run through the machine, then turn the
Control Knob to ‘Off’.
7
Booklet EX-182 10/7/02 3:54 PM Page 18

8. Turn the Control Knob slowly to the first " " to relieve the
pressure before removing the Filter Holder or the Boiler Cap.
9. Repeat the above steps using cold water to rinse away any residual
vinegar. Repeat twice.
TROUBLESHOOTING
8
PROBLEM SOLUTION
1. Coffee does not flow •Remember to fill Reservoir with water
•Check if Control Knob has been turned
to " "
•Use a coarser grind of coffee
•Reduce the amount of coffee in the Filter
Do not compact coffee in the Filter
2. Coffee is too weak or
flows too quickly •Use a finer grind of coffee
•Increase the amount of coffee in the Filter
3. Coffee flows to slowly or is
too strong •Use coarser grind
•Reduce the amount of coffee in the Filter
•Follow the Descaling instructions in
this booklet
4. Coffee flows from the edge of
the Filter Holder. •Wipe excess grinds from the Filter Holder
•Make sure the Filter Holder is installed securely
5. No steam from the
Steam Tube •Remember to fill the Reservoir
•Check if the Control Knob is in
the "steam cloud" range
•When the machine is cold, unblock
the Steam Tube using a pin. Then try again.
6. Steam escapes from the
Boiler Cap •This is the normal function of the pressure
regulating process
Booklet EX-182 10/7/02 3:54 PM Page 19

RECIPES THAT YOU'LL LOVE!
Café Chocolat
Combine equal parts of espresso with hot chocolate. Top with sweetened
whipped cream. Garnish generously with chocolate shavings and sprinkle with
cinnamon.
Café Tia Maria
Place 1 tablespoon of Tia Maria liqueur into demitasse cup, fill with espresso,
garnish with hot, frothy milk.
Café Anisette
Place 1 tablespoon Anisette liqueur into demitasse cup, fill with espresso,
garnish with a twist of lemon peel.
Café Grand Marnier
Place 1 tablespoon of Grand Marnier into a demitasse cup, fill with espresso,
garnish with whipped cream and sprinkle with orange peel.
Café Galliano
Place 1 tablespoon of Galliano liqueur into demitasse cup, fill with espresso,
garnish with twist of lemon peel.
Iced Espresso
Brew a large quantity of espresso and freeze it into ice cubes. Make another
large quantity of espresso and chill it. In very tall glasses, place several espresso
cubes and a scoop of coffee ice cream. Pour in chilled espresso. Dust with nutmeg.
Irish Coffee
A standard size coffee mug should be used. Fill coffee mug 2/3 full with
espresso. To each cup, add 2 tablespoons sugar and 2 tablespoons Irish Whisky.
Generously top with whipped cream.
9
Booklet EX-182 10/7/02 3:54 PM Page 20

Espresso Rum
Place 1 tablespoon of rum into demitasse cup, fill with espresso, top with
whipped cream and stir with a cinnamon stick.
Café Cognac
Place 1 tablespoon of cognac into a demitasse cup, fill with espresso,
add 1 tablespoon of heavy cream.
Espresso Alexander
In a standard-sized cup, combine 1 tablespoon creme de cacao and 1 tablespoon
brandy. Add 2 tablespoons heavy cream and fill with espresso. Garnish with a
heaping dollop of whipped cream and chocolate shavings.
Café Español
This is best served in a tall, long-stemmed glass, but tastes wonderful in any
glass. Rub lemon around rim of glass to moisten and then dip into a dish filled
with sugar. Using an alcohol burner or Sterno, rotate the glass over flame so the
sugar caramelises. Place spoon in glass to prevent cracking.Add 1 generous
tablespoon of brandy and 1 tablespoon of Kahlua liqueur. Pour in espresso,
stopping about 1 1/2inches from top. Add whipped cream to top of glass. Serve
on a dessert plate with spoon.
Café Israël
Follow procedure for Café Español, substituting 2 tablespoons of Sabra liqueur
for Kahlua and brandy.
10
Booklet EX-182 10/7/02 3:54 PM Page 21

A short supply cord is provided to reduce the hazards of becoming entangled
in or tripping over a longer cord. Extension cords are available and may be used
if care is exercised in their use. If an extension cord is used, the marked electrical
rating of the extension cord should be at least as great as the electrical rating
of the appliance.
LIMITED WARRANTY
SALTON warrants that this appliance shall be free from defects in material and
workmanship for a period of one year from the date of purchase. During that period
these defects will be repaired or the product will be replaced at SALTON's option
without charge. This warranty covers normal domestic usage and does not cover damage
which occurs in shipment or failure which results from alteration, accident, misuse, abuse,
glass breakage, neglect, commercial use, or improper maintenance.
TO RETURN FOR SERVICE
1. Securely package and return the product PREPAID to: SALTON CANADA,
81A Brunswick, Dollard-des-Ormeaux, Quebec, H9B 2J5
2. Be sure to enclose your name, address, postal code and description of defect.
3. To ensure prompt "In-Warranty" service, be sure to include a proof of
purchase. We recommend you take the necessary precaution of insuring
the parcel.
4. For repairs not covered by the Warranty, you will be advised of the cost
of repair in advance, and upon receipt of your cheque or money order,
the repairs will be completed and the product returned to you.
11
SALTON CANADA
81A Brunswick
Dollard-des-Ormeaux
Quebec H9B 2J5
Website: www.salton.com
Service: [email protected]
Booklet EX-182 10/7/02 3:54 PM Page 22
Table of contents
Other Salton Coffee Maker manuals

Salton
Salton Elite SECM21 Installation guide

Salton
Salton FC-1026 User manual

Salton
Salton EX-1091 User manual

Salton
Salton FC-1180 User manual

Salton
Salton SCM200 Installation guide

Salton
Salton FC1438 User manual

Salton
Salton FC-120E User manual

Salton
Salton FC1952 User manual

Salton
Salton ME5B User manual

Salton
Salton SCM100 Installation guide

Salton
Salton FC1214 User manual

Salton
Salton FC-1191 User manual

Salton
Salton SCM80 Installation guide

Salton
Salton EX-15 User manual

Salton
Salton EX1222 User manual

Salton
Salton FC-1104 User manual

Salton
Salton Elite SCM30E Guide

Salton
Salton FC-120ET User manual

Salton
Salton JUMBO java FC1667TH User manual

Salton
Salton JVPM1B User manual