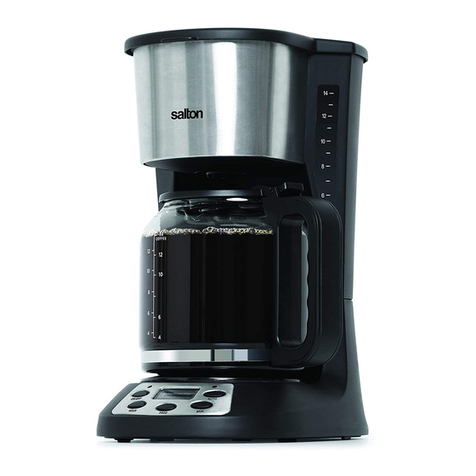
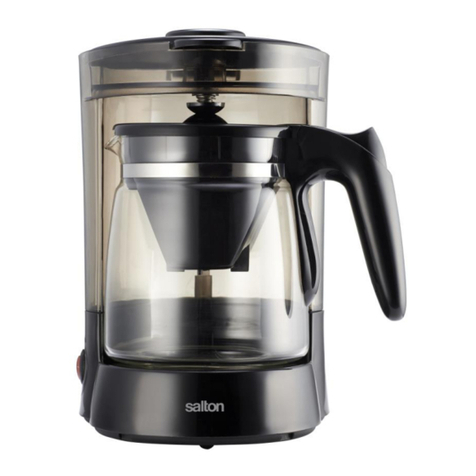
Salton FC1939 User manual

Instruction Booklet
Model: FC1939
cold brew
coffee maker
temperature
control kettle
1.7 L/Q stainless steel

IMPORTANT SAFEGUARDS
When using electrical appliances, basic safety precautions should always
be followed including the following:
1. Read all instructions.
2. Do not touch hot surfaces. Use handles or knobs.
3. To protect against electrical hazards, do not immerse cord, plugs, or
the appliance in water or other liquid.
4. Close supervision is necessary when any appliance is used by or near
children. Children should be supervised to ensure that they do not
play with the appliance.
5. This appliance is not intended for use by persons (including children)
with reduced physical, sensory or mental capabilities or lack of
experience and knowledge, unless they have been given supervision
or instruction concerning the use of the appliance by a person
responsible for their safety.
6. Unplug from outlet when not in use and before cleaning. Allow to cool
before putting on or taking off parts, and before cleaning the appliance.
7. DO NOT operate any appliance with a damaged cord or plug or after
the appliance malfunctions, or is dropped or damaged in any manner.
Return appliance to the manufacturer for examination, repair or
electrical or mechanical adjustment.
8. To disconnect ensure that the Coffee Maker is off then remove the plug
from the wall outlet. Always hold the plug, never pull the cord.
9. The use of accessories or attachments not recommended by the
manufacturermayresultinre,electricshockorinjury.
10.PlacetheCoffeeMakeronaatlevelsurface.DONOTletcordhang
over edge of table or counter, or touch hot surfaces.
11.DO NOT place on or near a hot gas or electric burner, or in a heated
oven.
12.DO NOT use appliance for other than intended use.
13.DO NOT leave unit unattended while in use.
14.DO NOT turn on the coffee maker without water or coffee in the
Carafe.
15.DO NOT immerse the Base in water or any other liquid. Wipe the
surface with a soft, damp cloth and then dry thoroughly.
16.DO NOT use outdoors. This appliance is intended for indoor and
household purposes only.
17.All servicing, other than cleaning, should be performed by an
authorized service representative. See Warranty section. All parts
must be properly assembled before use.
18.DO NOT use hot water. Use only cold or room temperature water.
2
19.Unplug the appliance from outlet before assembly, disassembly,
cleaning and storage.
20.Always unplug appliance if left unattended.
SAVE THESE INSTRUCTIONS
HOUSEHOLDUSEONLY
DESCRIPTION OF PARTS
1. Lid
2. Filter Cover
3. Coffee Filter Basket
4. Ice Basket
5. Removable Spray Tube
6. Spray Tube Connector (not shown)
7. Water/Coffee Carafe
8. Base
9. Control Panel & Display
a) Time Touch Control with 4 presets
b)On/OffTouchControl
10.Display for Brewing Time
& Countdown or Chill Cycle
11.Plug Adapter
12.Plug Connector
13.Drain Plug
14.Suction Feet
3
3
4
1
2
5
7
6
8
11
13
12
14
9b
9a
10
3
4
1
2
5
7
6
8
11
13
12
14
9b
9a
10
3
4
1
2
5
7
6
8
11
13
12
14
9b
9a
10
3
4
1
2
5
7
6
8
11
13
12
14
9b
9a
10

BEFORE FIRST USE
WashtheLid,FilterCover,CoffeeFilterBasket,IceBasket,Removable
Spray Tube and Water/Coffee Carafe in warm soapy water. Rinse and
dry thoroughly.
NEVER wash the Base in water. Wipe with a damp cloth and dry.
HOW TO USE
To Brew Coffee
1. Install the Spray Tube in the center of the Water/Coffee Carafe by
turning it clockwise on the Spray Tube Connector.
2. Important:EnsurethattheDrainPlugundertheBaseisclosed.
3. Fill the Water/Coffee Carafe with cold or room temperature water to
the desired level.
DONOTllpasttheMAXmarking.
4. PlacethelledCarafeontheBasewiththehandlefacingforward.
5. Add the ground coffee into the Coffee Filter Basket and place Basket
onto the Removable Spray Tube and press down. Ground coffee
amounts are in the chart on page 5.
6. Ensurethatthereisnogroundcoffeeonoraroundthetopofthe
Spray Tube. Place the Filter Cover onto the Spray Tube over the
Filter Basket. Press the Filter Cover down into position.
NOTE:Toavoidgroundcoffeeblockingthepump,alwaysusethe
Coffee Maker with the Filter Cover in position.
7. PlacetheLidontotheWater/CoffeeCarafebylininguptheleftarrow
ontheLidwiththecenterofthehandle(arrowmoldedinto
therim)ontheWater/CoffeeCarafe.TurntheLidclockwisetolock
into position indicated by the arrow on the right.
8. Plug the Adapter Connector into the slot at the back of the Base,
then plug the Adapter into the wall outlet. The Control Panel will
display 00:00.
9. Set the brewing strength time by tapping the Time Touch Control
on the Control Panel. There are 4 preset times for the brew strengths.
These can be used at each of the water level markings.
NOTE:See#10onpage5tosetthetimebetweeneachofthe
presets.
TIME (minutes) BREW STRENGTHS
10 light
20 medium
30 bold
40 concentrate
4

10.TaptheON/OFFTouchControltobeginthebrewcycle.
If you want to increase the brewing time by a few minutes between
each of the preset times start the brew cycle then touch the Time
Touch Control to increase the previously set time by 1
minute increments.
11.Tocancelthebrewingcycle,taptheON/OFFTouchControl
12.Whenthebrewingcyclehasnished,thedisplaywillstopthe
countdownand00:00willash,signalingthatthecoffeeisreadyto
be served or you can proceed to the Chill function. Coffee can also
be stored in the refrigerator for later use.
13.Proceed to the Chill function or unplug the unit from the wall outlet.
Ground Coffee Quantity
Unit water level markings (cups) Ground Coffee
2 4 tbsp.
3 6 tbsp.
5 9 tbsp.
MAX(7) 12 tbsp.
To Chill Coffee
1.Oncethecoffeehasbrewed,opentheLidandremovetheFilterCover
and Coffee Filter Basket.
2. Place ice in the Ice Basket, place onto the Spray Tube. Press down.
Cover with the Filter Cover and press down into position.
NOTE:TheFilterCoverallowscoffeetodistributeevenlyoverthe
ice.
3. Whenthedisplayisstillashing00:00,pressandholdtheTimeTouch
ControluntilthedisplayshowsCH:LLindicatingthatthecoffee
makerisintheChillcycle.TaptheOn/OffTouchControltostart
the Chill cycle. The Chill cycle will run for 8 minutes. The Control
Panel will display 00:00 when the Chill cycle is complete.
4. Unplug from the wall outlet.
CARE AND CLEANING
1. Discard coffee from the Coffee Filter Basket.
2. FilltheWater/CoffeeCarafewithcoldwatertotheMAXline.Setthe
timer for 10 minutes and allow the water to run through for a few
minutestocleanthepumpintheBase.PresstheON/OFFTouch
Control after 2 – 3 minutes.
5

3. Unplug the Coffee Maker from the wall outlet.
4. Remove the Carafe and empty the water.
5. Remove the Spray Tube by turning counter clockwise and lifting
straight up.
6. WashtheLid,FilterCover,CoffeeFilterBasket,IceBasket,Spray
Tube and Water/Coffee Carafe in warm soapy water. Rinse and dry
thoroughly. NEVER immerse the Base in water.
7. OnthebottomoftheBasethereisasmallTshapedsiliconeDrain
Plug, see drawing below. Hold the Base over a sink and lift the drain
plug so that the water/coffee can drain from the pump and pipes
inside the Base.
IMPORTANT: The drain plug MUST be closed after cleaning.
8. Wipe the Base with a damp cloth and dry.
NEVER run water over the base.
9. All servicing, other than cleaning, should be performed by an
authorized service representative. See Warranty section.
RECIPES
Summer Frappuccino
5 oz. (150 ml) Cold Brew concentrate
¼cup(60ml) Evaporatedmilk;almondorsoymilk
2 tbsp. (30 ml) Sugar or sweetener
Whipped cream (optional)
1. To make coffee, follow the directions in the How to Use section.
It is recommended to select the 40 minute brew time for Cold Brew
concentrate strength.
6
Drain Plug

2. Beat whipping cream until it forms stiff peaks.
3. Pour coffee, milk and sugar into a shaker. Shake until well blended
and frothy.
4. Pour coffee into a tall narrow glass and top with whipped cream.
Caramel Iced Coffee
1/2 cup (125 ml) Cold Brew concentrate
¼ cup (60 ml) Milk or heavy cream
2 tbsp. (30 ml) Caramel syrup (store bought or homemade)
Cocoa Powder (optional)
1. To make coffee follow the directions in the How to Use section.
It is recommended to select the 40 minute brew time for Cold Brew
concentrate strength.
2. Oncecoffeeisbrewedpourintoatallglasslledwithice.Addmilk
and caramel. Stir lightly.
3. Dust with cocoa powder, if desired.
Cold Brew Ice Cream
½ cup (125 ml) Cold Brew concentrate
2 cups (500 ml) Whipping cream
12 oz. (355 ml) Sweetened condensed milk
1 tsp. (5 ml) Vanilla extract or coffee liqueur
1. To make coffee follow the directions in the How to Use section. It
is recommended to select the 40 minute brew time for Cold Brew
concentrate strength.
2. Beat the whipping cream until it forms stiff peaks.
3. Inanotherbowl,mixthecoffee,milk,andavoringtogether.
4. Fold the coffee mixture into the whipped cream.
5. Place into a mold and freeze for a minimum of 3 hours.
Coffee Break
1½ oz. (45 ml) Irish cream liqueur
1 oz. (30 ml) Bold or concentrate Cold Brew coffee
1oz.(30ml) 10%coffeecream;almond,soyor2%milk
1 tsp. (5 ml) Sugar
Cold Brew ice cubes
7

1. Follow the directions in the How to Use section. It is recommended
to select the 30 or 40 minute brew time for Cold Brew bold or
concentrate strength.
2. Fill an ice cube tray with coffee and freeze. Keep enough of the Cold
Brew concentrate for the recipe above.
3. Add several Cold Brew ice cubes to a shaker. Then add the liqueur,
coffee, cream and sugar.
4. Shake vigorously for 10 seconds.
5. Strain into a tall cup.
6. Add more coffee ice cubes, if desired.
8

A short supply cord is provided to reduce the hazards of becoming
entangled in or tripping over a long co
rd. Extension cords may be used
if ca
re is exercised in their use. If an extension cord is used, the marked
electrical rating of the detachable powe
r-supply cord or extension cord
should be at least as g
reat as the electrical rating of the appliance. If
the appliance is of the g
rounded type, the extension cord should be a
g
rounded 3-wire cord. The extension cord should be arranged so that
it will not drape over the counter top or table top, whe
re it can be pulled
on by child
ren or tripped over.
This warranty does not include the cost of shipping, which is to be bo
rne by the
custome
r.
LIMITED WARRANTY
**The original sales receipt is the only acceptable proof of purchase**
Salton Appliances (1985) Corp. warrants that this appliance shall be free from defects
in material and workmanship for a period of two (2) years from the date of original
purchase. Salton Appliances (1985) Corp., at its sole discretion during this warranty
period, will repair or replace a defective product or issue a refund. Any refund to the
purchaser will be at a pro-rated value based on the remaining period of the warranty.
All liability is limited to the amount of the purchase price. This warranty covers normal
domestic usage and does not cover damage which occurs in shipment or failure
which results from alteration, accident, misuse, abuse, glass breakage, neglect,
improper maintenance, use contrary to the operating instructions or commercial use.
This warranty is not available to retailers or other commercial purchasers or owners.

TO OBTAIN PROMPT WARRANTY SERVICE:
Contact one of our many Service Centers found on our website
ww
w.salton.com/customer-care
or
Secu
rely package and return the appliance to us. Please enclose:
• Original p
roof of purchase
•
The completed form below with a $12.50 Return Shipping & Handling fee –
either a cheque, money order or credit card (A personal cheque will delay return
shipping by 2-3 weeks)
For added p
rotection, we suggest that you use an insured delivery service with
tracking information when
returning your product. Salton Appliances (1985) Corp.
will not be held
responsible for in-transit damage or for packages that are not r
eceived.
This warranty does not include the cost of shipping, which is to be bo
rne by the
custome
r.
Name
Add
ress
City
Prov/State Postal/Zip Code
Daytime Phone No.
Email
P
roduct defect:
T
ype of payment Cheque/Money Order □Visa □MasterCard □
Name on ca
rd Expiry Date CSV No
Ca
rd No.
T
o contact our Customer Service Department:
Salton Appliances (1985) Corp.
81A Brunswick,
E-mail: [email protected]
Dolla
rd-des-Ormeaux, Quebec H9B 2J5
Canada www.salton.com
Fax: 514-685-8300
Telephone: 514-685-3660 (Ext. 226)
Table of contents
Other Salton Coffee Maker manuals

Salton
Salton FC2074 User manual

Salton
Salton Elite SCM30E Guide

Salton
Salton FC1205 User manual

Salton
Salton Elite SECM21 Installation guide

Salton
Salton FC-1205 User manual

Salton
Salton FC-120ET User manual

Salton
Salton EX1222 User manual

Salton
Salton FC1952 User manual

Salton
Salton JUMBO java FC1667TH User manual

Salton
Salton FC1438 User manual

Salton
Salton EX-1016 User manual

Salton
Salton FSCM100 SPECIAL SELECT Quick reference guide

Salton
Salton FC-1191 User manual

Salton
Salton CAPPUCCINO EXPRES EX-182 User manual

Salton
Salton JVPM1B User manual

Salton
Salton FC-1026 User manual

Salton
Salton ME5B User manual

Salton
Salton FC-1180 User manual

Salton
Salton EX-1091 User manual

Salton
Salton MEPE123BT User manual