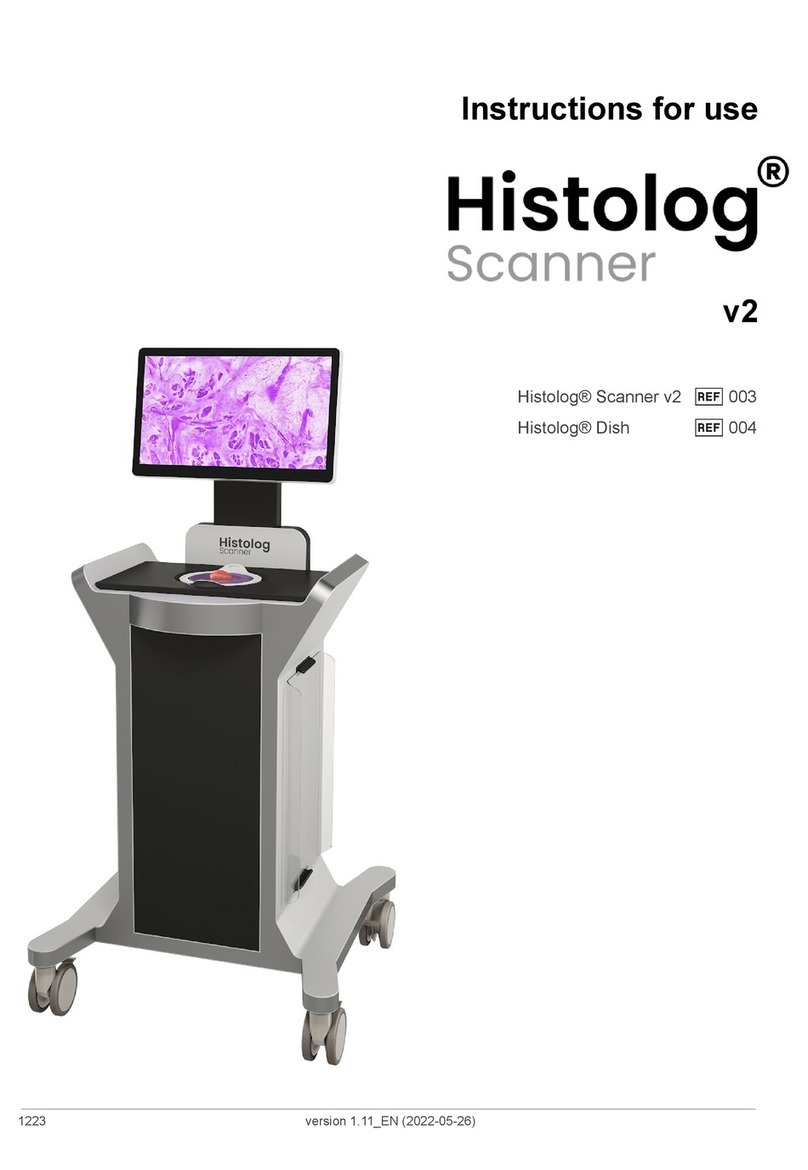
SamanTree Medical Histolog Scanner User manual

Instructions For Use
1223 version 1.5 (2019-06-21)

SamanTree Medical SA
Rue de Genève 88bis
1004 Lausanne
Switzerland
Tel: +41 21 625 0940
Copyright © 2015–2019
This publication is protected by copyright and all rights are reserved. No
part of this manual may be reproduced or transmitted in any form, or by
any means electronic or mechanical, including photocopying and
recording for any purpose other than the purchaser’s personal use
without permission of SamanTree Medical.
Histolog is a registered trademark of SamanTree Medical.
The Histolog® Scanner is protected by U.S. Patents 10,094,784 and
10,088,427.
1223 version 1.5 (2019-06-21) Page 2 | 69

1. Table of Contents
1. Table of Contents 3
2. Explanation of symbols 7
3. Introduction 9
3.1. Manufacturer 9
3.2. System Description 9
3.2.1. Summary 9
3.2.2. Accessories and other parts 10
3.2.3. Operating Principle 10
3.3. Intended use 10
3.4. Indication for use 10
3.5. Contraindications 11
3.6. Intended patient population 11
3.7. Part of the body/type of tissue interacted with 11
4. Warnings & Precautions 12
4.1. Safety Instructions 12
4.2. Warnings 12
4.3. Cautions 13
4.4. Laser safety 13
5. Device Overview 14
5.1. Overview 14
5.2. Component Description 16
5.2.1. The Histolog® Dish 18
6. Use of the Histolog® Scanner 19
6.1. Before Use 19
1223 version 1.5 (2019-06-21) Page 3 | 69

6.1.1. Installing in use location 19
6.1.2. Connecting to mains power outlet 19
6.1.3. Switching ON 19
6.1.4. Mounting Histolog® Dish 20
6.2. After Use 21
6.2.1. Switching OFF 21
6.2.2. Prepare for storage 22
6.3. Tissue Specimen Imaging 23
6.3.1. Tissue specimen staining procedure 23
6.3.2. Tissue specimen positioning 23
6.4. Histolog® Scanner Application 24
6.4.1. Gallery screen: Acquisition control panel [A] 24
6.4.2. Gallery screen: Sessions browsing and contextual data
controls [B]. 25
6.4.2.1. Exploring images and sessions in the Gallery 25
6.4.2.2. Service functionalities 27
6.4.2.3. Sessions contextual data 28
6.4.2.4. Gallery content: Single Session view 32
6.4.2.5. Gallery content: All Sessions view 35
6.4.3. Image Examiner screen 36
6.4.3.1. Image contextual data pane 37
6.4.3.2. Image Area with Navigator 38
6.4.3.3. Image toolbar 39
6.5. Use of Histolog® Scanner Application 42
6.5.1. Enter Session contextual data 42
6.5.2. Generate an image of a tissue specimen 43
6.5.2.1. Generate a Preview image 44
1223 version 1.5 (2019-06-21) Page 4 | 69

6.5.2.2. Generate an Acquire image 44
6.5.3. Open an image from the Gallery in Image Examiner screen
44
6.5.4. Navigate within an image in Image Examiner screen 44
6.5.5. Show/Hide Orientation Mark on an image 45
6.5.6. Change image Color Mode in Image Examiner screen 45
6.5.7. Save a View of a displayed image 45
6.5.8. Adjust image Brightness/Contrast 45
6.5.9. Add image description 45
6.5.10. Specify Specimen Surface Orientation for an image 46
6.5.11. Work with Annotations on an image 46
6.5.11.1. Work with Free Form Annotations 46
6.5.11.2. Work with Line Annotations 47
6.5.11.3. Work with Pinpoint Annotations 48
6.5.12. Export Gallery content to an external storage device 48
6.5.13. Delete Gallery content 50
6.5.14. Restore deleted Gallery content 50
6.5.15. Permanently delete Gallery content images 50
7. Storage 52
8. Moving 53
9. Maintenance & Cleaning 54
9.1. Maintenance 54
9.1.1. Update of Histolog® Scanner software application 54
9.1.2. Fuse replacement 54
9.2. Cleaning procedures 56
9.2.1. Cleaning the Histolog® Scanner 56
10. Disposal 57
1223 version 1.5 (2019-06-21) Page 5 | 69

10.1. Histolog® Dish 57
10.2. Histolog® Scanner 57
10.3. Histolog® Dip 57
11. Troubleshooting 58
12. Product Catalog Codes 60
13. Device specifications/Technical Information 61
13.1. Technical Specifications 61
13.1.1. Histolog® Scanner 61
13.1.2. Histolog® Dish 63
13.2. Electromagnetic Compatibility 64
13.3. Electromagnetic immunity 65
1223 version 1.5 (2019-06-21) Page 6 | 69

2. Explanation of symbols
Batch Code
Catalog Number
Serial Number
In vitro diagnostic medical device
Do not reuse
Use-by (expiry) date
Non-sterile
Quantity in package
Manufacturer
Consult Instructions for Use
Temperature limit
Atmospheric Pressure Limitation
Humidity Limitation
Laser Class 1
Standby or power indicator
1223 version 1.5 (2019-06-21) Page 7 | 69

This symbol indicates to follow the local regulations for
separate collection of Electrical and Electronic Equipment.
The device complies with European Directive 98/79/EC
Manufacturing date
Orientation mark
Non-ionizing radiation
Fragile; handle with care
This way up
Keep dry
● When followed by “ WARNING ” this symbol means
“Warning! Failure to observe could result in injury or
death.”
● When followed by “ CAUTION ”, this symbol means
“Caution! Failure to observe could result in damaged
equipment, forfeited time or effort, or the need to abort
use of the device.”
● When found on equipment, this symbol means:
“Attention: consult accompanying instructions for use”.
NOTE
A NOTE sign in this manual draws attention to useful
information regarding a function or procedure.
1223 version 1.5 (2019-06-21) Page 8 | 69

3. Introduction
This manual describes the set-up, use and maintenance of SamanTree
Medical’s Histolog® Scanner and its Histolog® Dish accessory.
It applies to Histolog® Scanner Application version 3.1 and above, until
further notice.
The Histolog® Scanner and its accessory products are designed to be
operated by a trained medical staff.
WARNING This manual contains important information for the safe
use of this product. Please read the entire manual, including
WARNINGS and CAUTIONS (Section 4of this manual), before using
this product. Failure to properly follow Warnings, Cautions and
Instructions could result in death or serious injury.
3.1. Manufacturer
SamanTree Medical SA
Rue de Genève 88bis
1004 Lausanne
Switzerland
Tel: +41 21 625 09 40
3.2. System Description
3.2.1. Summary
The Histolog® Scanner is a digital microscopy scanner that acquires and
displays images of the superficial cell layer of fresh tissue specimen.
These digital images provide high content morphological information
down to the cellular level and over very large areas.
With the Histolog® Scanner, the excised fresh tissue can be immediately
imaged and visualized without the need for freezing or fixing.
The Histolog® Scanner and its accessory products are for in-vitro
diagnostic use.
The Histolog® Scanner and its accessory products are designed to be
operated by a trained medical staff.
1223 version 1.5 (2019-06-21) Page 9 | 69

3.2.2. Accessories and other parts
The Histolog® Dish is a single-use accessory receptacle on which tissue
specimens are placed for imaging with Histolog® Scanner.
The Histolog® Dip is a fluorescent histological stain for imaging tissue
specimen with the Histolog® Scanner. It is an accessory product for the
Histolog® Scanner.
3.2.3. Operating Principle
In its operating principle, the Histolog® Scanner is similar to a standard
document scanner in the sense that it optically scans the specimen
superficial cell layer and converts it into a digital image. Image
acquisition of tissue specimen surface of the Histolog® Scanner relies
on a fluorescence confocal microscope. Image contrast originates from
fluorescence.
Tissue Specimen is positioned on a Histolog® Dish, previously mounted
on Histolog® Scanner. When a user launches the acquisition of an
image, specimen surface in contact with the optical interface of the
Histolog® Dish is digitized by the Histolog® Scanner and the resulting
image is visualized on a display monitor.
3.3. Intended use
The Histolog® Scanner is intended to be used as a tool for acquisition,
display, storage and retrieval of images of excised surgical tissue for
review by physicians, to assist in forming a clinical judgment.
The Histolog® Dish is an essential accessory to the Histolog® Scanner
that protects it from entering in direct contact with the tissue specimen
during imaging. It is not intended to be used as a receptacle for
transporting or storing tissue specimen.
The Histolog® Dip is a fluorescent histological stain for imaging tissue
specimens with the Histolog® Scanner. It is an accessory product for the
Histolog® Scanner.
3.4. Indication for use
Histolog® Scanner’s purpose is to help physicians to visualize margins
of excised tissue specimen (ex-vivo) during cancer surgery. Histolog®
Scanner can be used with any type of tissue, such as skin and breast
cancer tissues, in order to provide data to allow healthcare specialists to
form a clinical judgment when assessing resection margins.
1223 version 1.5 (2019-06-21) Page 10 | 69

3.5. Contraindications
The Histolog® Scanner is not indicated in the following cases:
● For in-vivo tissue examination
● To replace standard postoperative assessment
3.6. Intended patient population
The Histolog® Scanner and its accessory products shall not be used
directly on patients. They shall be used for examination of surgical tissue
after surgical excisions of tissue specimen.
The Histolog® Scanner and its accessory products may be used for the
examination of surgical tissue from the following patient populations:
A. Age: All
B. Weight: Non applicable
C. Health: Suspected or Diagnosed Cancer
D. Patient Condition: Non applicable
E. Ethnic group: All
3.7. Part of the body/type of tissue interacted with
The Histolog® Scanner and its accessory products do not interact with
the patient. They are designed for use on excised surgical tissue
specimen, e.g. during a tumor removal or biopsy sampling.
Users will physically contact the device only with their hands, except for
the wheel brakes which are foot activated/released.
1223 version 1.5 (2019-06-21) Page 11 | 69

4. Warnings & Precautions
4.1. Safety Instructions
Use the device only for the purpose described in this manual. Do not use
the device if it is not working properly, or if it has suffered any damage.
Misuse can cause electrocution, burns, fire and other hazards.
The device is to be delivered, commissioned, assembled, disassembled,
and decommissioned by SamanTree Medical authorized technical
personnel only.
The components located in the inner cavity of the device are not
intended to be manipulated by the user. The interior of the Histolog®
Scanner may be serviced only by SamanTree Medical authorized
technical personnel.
4.2. Warnings
WARNING
● The Histolog® Scanner and the Histolog® Dish are non sterile
devices. For use in intraoperative setting, the Histolog® Scanner
and its accessory products shall be located outside the sterile
surgical area.
● When handling potentially infectious tissue specimens, avoid skin
contact by wearing gloves or other protective equipment.
● This device is not compatible with magnetic resonance (MR) or
explosive environments.
● Handles are not provided for lifting the device, but exclusively have
a function for pushing/pulling.
● The protective earthing connection of the Histolog® Scanner is
performed through the power cord connection. If this cable is
damaged, the device must not be connected to the mains power.
● Use only power cords having adequate ratings for the Histolog®
Scanner.
● Comply with the product safety instructions described in the
Histolog® Dip Instructions For Use.
● Cleaning when device is turned ON and connected to the main
power source may be hazardous to the operator and/or destructive
to the device.
1223 version 1.5 (2019-06-21) Page 12 | 69

4.3. Cautions
CAUTION
● Do not operate the Histolog® Scanner in case of damage to the
imaging window [C1].
● Do not re-use a Histolog® Dish. A new Histolog® Dish [C2] shall
be used for every new surgical procedure.
● Do not use expired consumables with the Histolog® Scanner.
● Do not use a Histolog® Dish, if it is damaged or if its optical
interface [C2.2] is visibly dirty.
● The Histolog® Scanner is intended for use in the electromagnetic
environment specified in section 13.3 .
● Do not use this device in close proximity to sources of strong
electromagnetic radiation (e.g. unshielded intentional radio
frequency (RF) sources), as these can interfere with proper
operation.
4.4. Laser safety
CLASS 1 LASER PRODUCT
The Histolog® Scanner is a Class 1 laser product, as per IEC
60825-1:2014-05.
Laser radiation in the visible wavelength range is emitted from the
imaging window [C1] of the specimen imaging area [C] during imaging.
The Histolog® Scanner embeds a Class IIIB laser component with the
following characteristics:
Wavelength: 488 ± 5 nm
Max output power: 200 mW (CW)
Beam divergence: < 0.7 mrad
1223 version 1.5 (2019-06-21) Page 13 | 69

5. Device Overview
5.1. Overview
1223 version 1.5 (2019-06-21) Page 14 | 69

The Histolog® Scanner consists of the following components:
A. Display Monitor
B. Handles
C. Specimen Imaging Area with a Histolog® Dish
D. Cable Winder
E. Histolog® Scanner Application with its graphical user interface
F. ON/OFF Power Switch
G. USB port
H. Ethernet port
I. Lid
J. Swivel caster wheels with brakes (4X)
K. Power inlet; power cord is connected here; fuse compartment
L. Instructions for use
M. Lid storage supports
N. Device label
1223 version 1.5 (2019-06-21) Page 15 | 69

5.2. Component Description
The ON/OFF power switch [F] is located under the display monitor [A] on
the left side of the Histolog® Scanner logo panel.
A cable winder [D] located on the back of the Histolog® Scanner allows
to roll-up excess length of the power cord and secure it to the device.
The display monitor [A] serves to display the graphical user interface and
the images of the specimen. It is a touchscreen device from which the
Histolog® Scanner may be controlled.
A USB port [G] and an Ethernet port [H] are located under the display
monitor, on the right side of the logo panel. The USB port [G] may be
used to connect an external USB data storage device for exporting
Histolog® Scanner images. The Ethernet port [H] is intended for
maintenance purposes and should be used under the guidance of
SamanTree Medical authorized technical personnel only.
The Histolog® Scanner Application [E] is the software application
supplied by SamanTree Medical SA for the operation of the Histolog®
Scanner. It has a graphical user interface (GUI) through which the user
can interact with the device.
The Histolog® Scanner is equipped with four swivel caster wheels with
brakes [J]. Brakes may be applied to prevent unintended motion of the
device and must be released before moving the device.
Two handles on the sides, and one at the front [B] allow pulling and
pushing the device, when wheel brakes are released.
WARNING Handles are not intended for lifting the device, but
exclusively have a function for pushing/pulling.
The Specimen Imaging Area [C] is where Histolog® Dish is placed to
receive tissue specimen for imaging.
1223 version 1.5 (2019-06-21) Page 16 | 69

The Specimen Imaging Area [C] contains the following components:
C1 Imaging window
C2 Histolog® Dish (to be placed before use)
C3 Orientation Mark
Tissue specimen is placed over the Imaging window [C1] covered by the
Histolog® Dish, for imaging. Laser radiation in the visible wavelength
range is emitted from the imaging window [C1] of the specimen imaging
area [C] during imaging.
The specimen imaging area features a physical Orientation Mark [C3]. A
corresponding digital mark can be overlaid to the digital image displayed
by the Histolog® Scanner Application to provide information on the
tissue orientation (see section 6.5.5 of this manual).
1223 version 1.5 (2019-06-21) Page 17 | 69

The Histolog® Dish [C2] is the receptacle accessory that is placed over
the Imaging area of the Histolog® Scanner and on which the tissue
specimen is placed for imaging. It is composed of:
1. Two handles [C2.1] for manipulation;
2. An Optical Interface [C2.2] through which specimen is imaged.
1223 version 1.5 (2019-06-21) Page 18 | 69

6. Use of the Histolog® Scanner
The device is to be delivered, commissioned, and decommissioned by
SamanTree Medical authorized technical personnel only.
6.1. Before Use
6.1.1. Installing in use location
1. Move the Histolog® Scanner to desired location with level ground.
WARNING The Histolog® Scanner and the Histolog® Dish are
non sterile devices. For use in intraoperative setting, the Histolog®
Scanner and its accessory products shall be located outside the
sterile surgical area.
2. When in place, lock the wheel brakes to prevent unintended
movement of the Histolog® Scanner.
6.1.2. Connecting to mains power outlet
Connect the power cord to the local electrical mains power outlet.
WARNING
● The protective earthing connection of the Histolog® Scanner is
performed through the power cord connection. If this cable is
damaged, the device must not be connected to the mains power.
● Use only power cords having adequate ratings for the Histolog®
Scanner. Suitable power cord accessories are listed in section 12.
Product Catalog Codes .
6.1.3. Switching ON
1. Turn ON main power switch [F]. Histolog® Scanner Application [E]
initializes.
1223 version 1.5 (2019-06-21) Page 19 | 69

6.1.4. Mounting Histolog® Dish
1. Remove the Lid [I], and store it in its Lid Storage Supports [M].
2. Unpack a Histolog® Dish and mount it over the Specimen Imaging
Area [C].
CAUTION
● Do not re-use a Histolog® Dish. A new Histolog® Dish [C2] shall
be used for every new surgical procedure.
● Do not use expired consumables with the Histolog® Scanner.
● Do not use a Histolog® Dish, if it is damaged or if its optical
interface [C2.2] is visibly dirty.
1223 version 1.5 (2019-06-21) Page 20 | 69
Table of contents
Other SamanTree Medical Medical Equipment manuals
Popular Medical Equipment manuals by other brands

Aqua Creek
Aqua Creek Tidal Wave manual

Acutus Medical
Acutus Medical Qubic Force Technical manual

Chattanooga Group
Chattanooga Group INTELECT LEGEND Series user manual

MIETHKE
MIETHKE SENSOR RESERVOIR Instructions for use and Technical description

Hologic
Hologic SecurView DX Quick reference guide

OrthoSensor
OrthoSensor Knee Balancer user guide