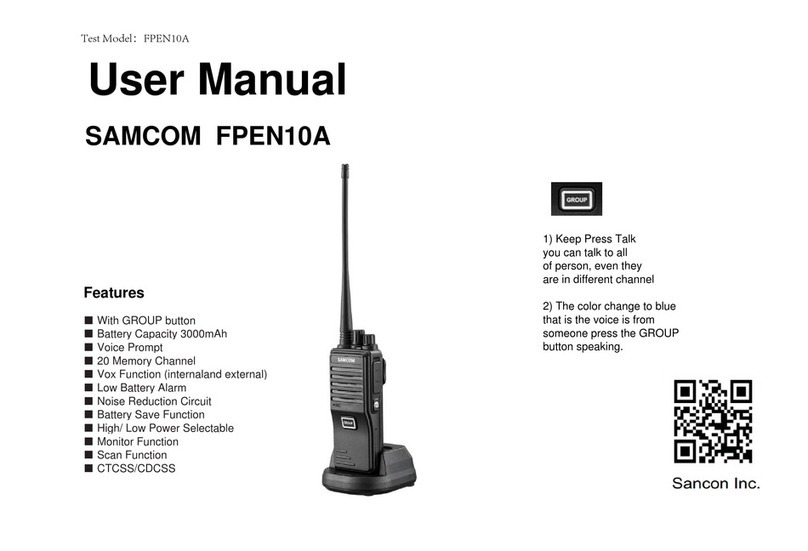
SAMCOM FPBN10A User manual

User Manual
SAMCOM FPBN10A

INDEX
User Security Information --------------------------------------------- 3
Specification ------------------------------------------------------------ 11
Feature ------------------------------------------------------------------- 11
Products Inspection --------------------------------------------------- 12
Get familiar with the transceiver ------------------------------------ 13
Battery Information ---------------------------------------------------- 14
Disassembly and Reassembly ------------------------------------- 16
Basic Function --------------------------------------------------------- 19
Table ---------------------------------------------------------------------- 25
Troubleshooting Guide ----------------------------------------------- 26
Maintenance and cleaning ------------------------------------------ 27
Maintenance and Cleaning
1. Do not lift the transceiver directly by its antenna or external
microphone.
2. Dust the transceiver with an anti-pilling cloth to prevent bad contact.
3. When the transceiver is off work, please cover the microphone cap.
4. The buttons, control knob and the casing of transceiver are easy
to become dirty after long usage, you can use a neutral detergent
(do not use strong corrosive chemicals) and wrung damp cloth to
clean it.
* The company reserves the right to change product design and specifications,
and takes no responsibility for printing errors and omissions that may occur at
the public division.
* Since technologies are developing continuously, the corresponding changes of
product design and specifications will go without notice.
* The reproduction of this manual in part or entirety without permission is strictly
prohibited.
* Our company reserves the right of final explanation to these commitments above.
27

Troubleshooting Guide
User Security Information
Problems
No Power
Battery lasts no
long after charging
It can not reach
others of a group
Solutions
Battery may have been exhausted. Please
update or recharging the battery.
Battery may not be installed correctly. Please
remove the battery and reload it.
Battery’s lifetime is due. Please update the
battery.
Battery is not charged fully, so please ensure
that the battery indicator is green when
removing it.
Make sure you are using the same frequency
and “sub-audio frequency/sub-audio digital
settings” as other members of the group.
Confirm whether you are in the valid range of
transceiver since other members of the group
may be too far away.
Handheld transceiver product safety and RF
radiation
Warning: Please read the manual carefully before
using. It contains the important safety using operation
instruction, and RF energy and control information
contributing to meet the RF radiation limitation
requirement of national and international standards.
Information provided in this manual may replace the general safety
information of the editions before.
26
There are voices
from other people
rather than group
members in the
channel.
When transmitting
voices, only a small
or even no sound
can be heard on the
other side.
Consistent noises
Please change the sub-audio frequency/sub-
audio digital settings. At this time, be sure to
change all the walkie-talkies of the group at
the same time. (Need dealers to rechange.)
Confirm whether the rotary volume knob is to
the appropriate volume.
Send the machine to dealers to check the
microphone.
Other members of the group may be too far
away and can not receive the voices you
send, please get close and try again.
3

4
Handheld Transceiver Safety Guidelines and
Instruction
To control the transceiver radiation, ensure to meet the general or
non-controlled environment radiation limitation standard, please
operate following below procedures.
Press PTT key when talking; and release PTT key when receiving.
Because measured RF energy radiation will be generated when
transmitting, so transmitting time should not exceed 50% of the
using time.
Place the tranceiver vertically on the front, make sure the
microphone (and other parts including the antenna) is no less than
1 to 2 inches (ie 2.5 to 5cm) away from your lips when transmitting
signals. It is very important to keep the correct distance from the
transceiver, since the farther away the less radiation.
If you carry the portable transceiver around your body, please put
into SAMZUK specially designed fixture, leather, box or other annex. If
not, the body by radiation will be out of range of general or non-
controlled environment RF radiation limitation that required by
Radio Authority, Ministry of Information Industry.
If you do not use any accessories, not place the transceiver on the
front specified location, please make sure that it is no less than 1
inch (about 2.5cm) away from your body when transmitting signals.
It is very important to keep the correct distance from the transceiver,
since the farther away the less radiation.
Only use the certified and provision antenna, battery and
accessories or other alternatives by Samzuk. If not, the radiation will
be out of range of RF radiation that required by Radio Authority,
Ministry of Information Industry. Below web site lists the approved
parts and accessories by Samzuk
QT & DQT tables
Frequency of 50 groups QT (Hz)
Code of 105 groups DQT
25

24
Voice compression and expansion
This feature ensures the user in a variety of noisy environments
can get a clear call. Set by the dealers in the channel through
programming software.
Scrambler
This feature is voice encryption, user no such feature can not
receive the real voice, so makes your call be kept confidential.
This feature may be set by dealers in the channel through
programming software.
DTMF encoding
This transceiver has DTMF encoding function. It can be set by
dealer througn programming software.
Electromagnetic Interference / Electromagnetic
Compatibility
Remark: Electromagnetic Interference (EMI) occurs in nearly every
electronic equipment, by not enough shielding, improper design or
incorrect electromagnetic compatibility configuration.
Not allowed to change the transmitting frequency, to increase the
transmission power (including the installation of additional RF power
amplifier).
Not allowed to use an external antenna or other transmitting
antenna.
Shall not cause harmful interference to a variety of legitimate radio
services while using, if found harmful interference, should
immediately stop using, and to take measures to eliminate the
interference before continuing.
Prohibition of interconnection with the public telephone network,
public mobile communication network and other telecommunication
networks.
Place
To avoid electromagnetic interference and other problems caused
by electromagnetic incompatibility, please turn off the transceiver
in the place where there is a sign showing “No transceiver”.
Hospitals or medical institutions may use external RF energy very
sensitive equipment.
Prohibit the use of airports and aircraft radio.
5

Medical devices
Pacemaker
Advanced Medical Technology Association of the United States
proposes holding the handheld transceiver with pacemakers should
be kept the distance of at least 6 inches (15cm). These proposals
are consistent with the provisions by the U.S. Food and Drug
Administration.
With pacemakers should observe the following
items:
When the transceiver is turned on, the distance between the
pacemaker and the transceiver at least 6 inches (15cm);
Do not put the transceiver in a breast pocket;
Please use the pacemaker the other side of the ear to listen, to
minimize potential interference;
If you suspect transceiver interference with the pacemaker,
immediately turn off it.
Hearing Aids
Some transceivers may interfere with some hearing aids. When
there is such interference, you can consult the hearing aid
manufacturer to discuss alternatives.
Busy Channel Lockout
This feature can prevent interferences to other walkie-talkies in the
same channel. If the channel has been occupied, the press of the
PTT button will bring a continuous "beep" warning tone, while the
transceiver will return to the receive mode immediately. To stop the
warning tone, please release the PTT button. Dealers can set this
function turn on or off by programming software.
Low Battery Warning
Low battery warning happens at the time when the battery needs
charging or replacement. If the battery is low, the transceiver indicator
light turns red and blinks, and a beep sound can be heard every 5
seconds. At this time, please replace the battery.
Voice Operated Transmitting (VOX)
This feature is designed to trigger the transmitting of voice by voice
itself. Dealers can choose to turn on or off the VOX feature, and set
the sensitivity of VOX through programming. With this feature,
transmitting operation is launched by the voice you said without
having to press the PTT button. The transmitting operation stops as
soon as the end of the talk.
6
Other Medical Equipments
If you use other personal medical device, consult the device
manufacturer to determine whether these devices can effectively
shield radio frequency energy. Your doctor can provide you with
such help.
Safe Driving
Check your car seat using the transceiver the relevant laws and
regulations, and follow the regulations.
If you use the transceiver while driving, please
note the following:
Concentrate on driving, pay attention to the situation of the road.
If possible, try to use the walkie-talkie-free function operation.
If the provision of using the transceiver while driving prohibited,
please drive the car to the roadside stop, and then make a call.
Call function
Hold down the scan/call button for 2 seconds, the transceiver will
send out a specific sub-tone that your companion transceiver will ring
prompted a call.
Wireclone function
Connect the copy line, hold down the scan / call button to power
on the transceiver, when you see the status indicator turns orange,
release the scanning / call button. Then press the PTT key to copy
the data channel to another radio. During the replication, copy
transceiver status indicator is flashing red and copied transceiver
status indicator is flashing green. After replication complete, copy
transceiver status indicator turns orange. If replication error occurs,
the copy transceiver status indicator flashes orange.
23

22
When the function is activated, the transceiver will check whether
there are calls on the channels that are set to be scanned. If a
channel is tested to have signals on it, it will switch to this channel
in order to receive voices (which channels can be scanned is
programmed and set by dealers).
Priority Scan
This feature allows you to scan frequently used channel. Dealers can
set priority channels by programming software. If you want more
information, please contact the dealer.
Without Priority Channel
For example: When scanning six normal
channels CH1, CH2, CH3, CH4, CH5,
CH6, it will take theorder as shown on the
right figure.
Normal channel scan
With Priority Channel
For example: When scanning five normal
channels CH1,CH3, CH4, CH5, CH6, in
which the channel CH2 is set the priority,
it will take the order as shown on the right.
Priority channel san
Scan On/Off
Hold down the scan/call button (for less than 2 seconds), the
transceiver will get into the scan mode. It will quit the mode if press
the button one more time.
Reply Option
This option means whether you need to adopt the current channel
that is being scanned to reply.
When the reply option is choosed, it will use the channel at which
the scanning stops to transmit your reply voices.
Operation warning
Car with an airbag
In the car with an airbag, do not put the transceiver
within the reach of the expansion of the airbag, because
the airbag inflates with great force. If the transceiver put
within the reach of expansion of the air bag, when the
airbag inflates, the transceiver may be driven by the
tremendous force generated, resulting in severe injuries
inside the vehicle.
Possible gas explosion
Some places have potentially explosive gas, if your
handheld transceiver can not be safely used in these
types of places (such as factory, CSA, UL or ENELEC),
please power off it before entering the places. Shall
not remove, install the battery or charge to the battery
in these areas. Because of such gases in the spark
will cause an explosion or fire resulting in casualties.
Mentioned above with a potentially explosive gas areas
include:
Fuel zone, like the area below deck on boats, and the
transmission or storage sites for fuel or chemical
agents; places where air contains particles, like
chemicals or such as straw, dust or metal powders.
Areas contain potentially explosive gases will have
general warning, but not all areas have this warning.
7

8
Fuse and blasting areas
To avoid possible interference with blasting operations,
please switch off your transceiver when get close to
blasting areas and areas where deployed some
detonators. Those places posted with the words to
switch off wireless radio, you have to turn off it.
Please observe all signs and instructions.
To prevent the magnetization
With weak external magnetic of transceiver speakers, please keep
your transceiver larger than 10cm away from TV sets, computer
monitors etc, to avoid being magnetized.
The use of QT/DQT signaling sounds like giving you a personal
channel, but as a matter of fact, your voices can still be heard by
others if their walkie-talkies adopt the same QT/DQT signaling as
you, or all of your walkie-talkies are simply without QT/DQT signaling.
Power-saving Mode
The feature can reduce the power consumption when no signal is
received or no operation, such as button pressing, switch rotating, is
going on. The feature is activated by dealers.
In this mode, if there are 10 seconds without signal sending and
receiving or button pressing, the transceiver will automatically go into
sleep mode. if there are buttons being pressed or signals received,
the transceiver will immediately be activated, and exit the power-
saving mode.
Power Adjustment
It can be programmed through PC to adjust the power of the machine
(done by dealers). Can also hold down the MONI key when power on
to switch high low power. When you hear a tick sound it is high power,
2 tick sounds heard it is low power.
Reverse Function
It can be programmed by PC to set the reverse function(setting by
dealers).Also could hold down the PTT button to switch on/off reverse
function when power on.The reverse function will be on when you hear
a tick sound,and it will be off when you hear two tick sounds .
Timeout Ban
Overtime ban is designed to prevent any caller occupy the channel for
too long, as well as to avoid any damage resulting from prolonged
transmissions. If a transmssion lasts for a time that is more than the
dealer programmed, the walkie-talkie will stop and make a warning
tone. To stop the warning tone, please release the PTT button.
Scanning
This featue is designed to catch signals on all channels. Press the
scan/call button (press and hold for less than 2 seconds), the LED
indicator flashes green, it will scan all the channels in the scan queue
one by one in order. When a channel receives a signal, the LED
indicator will turn green for long.
21

20
Volume Adjustment
As this type of transceiver has an auto-squelch
function, you will hear nothing when the power
is turned on and no call is received. You can
hold down the MONI button, and then turn the
PWR/VOL knob clockwise to increase the volume,
or counterclockwise to decrease it.
Monitoring
To monitor, you need just hold down the MONI button and adjust the channel
background noise to a comfortable level by rotating the PWR/VOL knob. It
can directly monitor the channel you care without having to wait for your call,
as long as the MONI button has been holded down.
Transmitting
First of all, hold down the MONI button and listen for a while to confirm the
channel you wanted is not busy, and then speak normally to the microphone
at the front of the transceiver, while holding down the PTT button.
The transmission indicator turns red when the PTT button is pressed.
If you speaks too loud or with your mouth getting too close with the microphone,
it may distort the sound and reduce the signal clarity on the receiving side.
Release the PTT button to listen to the partner's voices.
Receiving
Release PTT key, transceiver enter the receiving mode, the status indicator
lights green.
Please adjust the volume appropriately to achieve the best listening effect.
QT/DQT
QT/DQT signaling is mainly used to avoid receiving irrelated signals on the
same channel. If QT/DQT signaling is set, it can only receive the calls of
those who share the same channel and have the same QT/DQT signaling,
but if QT/DQT signaling is not set, you will receive all the calls on the channel.
Dealers can preset QT/DQT signaling for a channel.
Notes
Antenna
caution Not use the handheld transceiver with damaged antenna.
It will cause skin mild burns if touch the damaged antenna.
Battery
If some of your body exposed conductive material contact
the battery outside terminals, it will cause damage to
property, or burns on human body. These conductive
materials include jewelry, keys, or beaded necklace, they
will form a loop with the battery (causes short circuit),
generate considerable heat. Rechargeable battery storage
must be very careful, especially been put in the pocket,
purse or other container with metal objects. Waste batteries
should not be abandoned in a fire.
Earphone
Before using the earphone, first turn the volume down so as
to avoid excessive hearing damage.
Speaker
When the volume setting is high, the transceiver can not be
too close to your ear, otherwise it will damage hearing.
9

10
Charging Equipment Notes
1. Do not expose the charger to rain or snow.
2. Chargers by severe impact, or has been dropped, or subject to
any damaged, do not use again.
3. Can not disassemble the chargers by severe impact, or has been
dropped, or subject to any damaged.
4. Can not replace the original power cord and plug provided. If
plugs and sockets do not match, please ask the qualified
electrician to install an outlet to avoid electric shock.
5. To avoid damage to the power cord or outlet, holding and pull out
the plug from the wall socket, do not pull the power cord to pull
the plug.
6. To avoid electric shock, pulling out the charger plug from the wall
socket prior to maintenance or cleaning.
7. The use of non proposed or supply attachments may cause
fire, electric shock or personal injury.
8. Take care the power cord location, it should not be trampled, do
not stumble, will not suffer damage or compression.
9. Unless absolutely necessary, do not use extension cords.
Improper use of extension cords can cause fire or electric shock.
If you must use an extension cord, make sure:
to use the same extension cord plug pins.
plug specifications same as the charger plug.
length of 30 meters or less using 18AWG wire, the length of 45
meters or less using 16AWG wire.
10. Can not replace the charger power cord. When the power cord
is damaged, should immediately stop using the charger.
Basic Function
Operation Guide
Buttons, Control Knobs, Switches and Indicators
■
PWR/VOL (power / volume) It is used to turn on or off the power supply,
control knob and to turn up and down the volume.
■
Transmitting indicator When the PTT buttton is pressed, the
indicator turns red, which shows the walkie-
talkie is in transmitting mode.
■
Busy indicator It will turn green when the transceiver is in
monitoring mode and squelch is open.
■
PTT (push-to-talk) button It switches the machine between
transmitting and receiving states.
■
MONI (monitoring) button In receiving state, holding down this button
allows you to monitor the channel. When
the button is pressed, the busy indicator will
turn green.
■
Scan/Call button It is used to start / exit scanning or start
calling.
■
Channel selection knob It is used to select the channel you want to
use.
Power On/Off
Rotate the PWR/VOL control knob clockwise
until a “ka-ta” sound is heard to turn on the
power. When you receive calls, the knob
provides you the ability to change the
volume for your listening habits. When
shutting down the transceiver, you need to
rotate it counterclockwise until a “ka-ta”
sound is heard.
19

2. Removal of the belt clip
As for the removal of the belt clip, please refer to the installation
steps and loose the screws in conterclockwise.
Installation/Removal of External Earphone or
Microphone
1. Installation of the external earphone or
microphone
Specifications and Parameters
General Specifications
Channel capacity 16 groups of memory channels
CTCSS 50 QT
CDCSS 105 DQT
Frequency stability ±2.5PPM
Antenna Impedance(Ω) 50Ω
Operating Temperature
-20
~ +50
Power supply(V)
Battery type
7.4V DC
Li-Polymer1300 mAh
Features
■ Voice cmpander/scrambler
18
(1) Unclose the earphone cap (without removing) in the direction of
the arrow ①.
(2) Insert the earphone or microphone ③ as shown above.
2. Removal of the external earphone or microphone
You can pull out the external earphone or microphone to remove it.
Note: The use of an external earphone or microphone will affect the
waterproof performance of the transceiver.
■ Power saving /Low Battery
Alert
■ Channel Scan/ Priority Scan
■ Selectable Power H/L
■ Busy channel lockout
■ Time out timer
■ VOX: Sensitive and delay settings
■ Squelch tail elimination
11

Products Inspection
Welcome to use FPBN10A transceiver, and before using, we
recommend you:
Please open the giftbox carefully to confrim whether the items as
following table are all included; if you find any things lost or damaged,
please contact immediately with the dealer.
Standard Accessories
Installation /Removal of Antenna
1. Installation of the antenna
⑴ Plug the screw-thread end of the anenna
into the socket at the top of the transceiver.
⑵ Rotate the antenna clockwise until tightening
up , as shown below.
Items
Transceiver
Antenna
Li-polymer battery
Numbers
1
1
1
Battery charger
Adapter
Belt clip
1
1
1
2. Removal of the antenna
Rotate the antenna counterclockwise to remove it.
12
Screws for belt clip 2
Hand Strape 1
User manual 1
Note: Please refer to the color-ring label at the bottom of the
antenna for the antenna frequency band. If the label does not
indicate frequency band, you can turn to the label on the body
of the transceiver.
Installation /Removal of Belt clip
1.Installation of the belt clip
First remove the battery, and then place the clip on the rear top of
the
machine, and fix it with two screws ① by a cross-screw.
Note: Do not install the belt
clip unless the battery is off.
17

3. Place the battery or the transceiver with battery on the charger.
4. Confirm that the battery contacts are well connected with the
charger contacts, and the charge indicator light turns red, which
represent the beginning of the charging operation.
5. After a period of time, when the indicator light turns green, it shows
the completion of the charging operation.
Disassembly and Reassembly
Installation/Removal of the Battery
1. Installation of the Battery
Please make sure the transceiver is
powered off, and then hold down the
belt clip ① to open it , and insert the
two bumps on the top of the battery
into the aluminum grooves of the
transceiver in the direction of the
arrow ②, and to finish the installation,
press the bottom of the battery in the
direction of the arrow ③ until the “ka-ta”
sound is heard.
Note: If the battery is not fixed well, please remove it and reinstall.
Get Familiar with the transceiver
2. Removal of the battery
To remove the battery, please make
sure the transceiver is powered off,
and then press and hold ① to
open the belt clip so that the
battery can get out when the
buton③ has been turned upward.
Pull the battery out according to the
arrow ② after the battery hook is detached.
(1) PTT Transmitting
(3) Scan/call button
(5) Channel selection knob
(7) Speaker
(9) Status indicator
(11) Earphone cap
(2) MONI (monitor) button
(4) Antenna
(6) Power/volume switch
(8) Microphone
(10) Battery release button
(12) Earphone input
Note: When pulling out, the tilt angle of the battery with the
transceiver can not be too large, so as to avoid heavy wear and
tear between the bump at the top of the battery and the groove at
the top of the main body.
(13) Lifting rope hole
(15) Battery
(17) Charging contacts
(14) Belt clip
(16) Belt screw
13

14
Battery Information
Battery on First Use
Since batteries leave factory without a fully charging, please charge
the new batteries before using. Under normal circumstances, the
battery on first use needs 5 hours of charging. The first three times
of fully charging and discharging provides batteries the best capacity.
When you find out the battery is low, it is required to charge or
replace it.
Compatible Battery Type
Please use the specific battery for the use of other batteries
may cause explosion, resulting in bodily injury.
Safety Precautions
1. Do not dispose the batteries in the fire.
2. Do not dispose the batteries as household wastes, and it must be
collected and treated properly.
3. Do not rip off the shell from the battery without permission.
Notes:
1. When charging, the temperature should be between 5℃ ~40 ℃,
otherwise it may cause the leakage or even damage the battery.
2. Please shut down the transceiver with battery loaded before
charging it. The use of the transceiver while charging is ongoing
will affect the normal battery charging.
3. Do not put back and charge the battery that is already full, for it
will significantly reduce the cycle life.
4. Since continuous charging will shorten the life of the battery, it is
unwised to place the transceiver or battery on the charger, or take
the charger as a placement seat for the transceiver.
5. Do not charge the battery when it is wet. You should dry it first in
order to avoid any danger.
6. If the battery’s usage time is very short even when it has been
charged in completely correct way, it can be concluded that the
battery life is due and should be replaced by a new one.
Extension of Battery life
1. The performance of the battery will be reduced when the
temperature drops below 0 . In cold weather, it is advised to
spare another battery for emergency. Please do not dispose the
cold batteries that can not work at low temperature but may be
usable at room temperature.
2. It may affect the normal use or charge of the battery, if it is
covered with dust. Please clean the battery with dry cloth before
loading or charging it.
Knowledge about Battery Storage
1. Since the battery will self-discharge, please do charge it fully
before putting it aside so as to prevent damages caused by
overdischarge.
2. Please take out the battery after storage for some time to fill it, in
order to avoid the reduction of the battery capacity resulting from
overdischarge. It is proposed for lithium-ion / lithium-polymer
batteries to be filled in every 6 months of storage.
3. Please pay attention to the humidity of the battery storage
environment. Batteries are supposed to be stored in the
environment of room temperature, cool and dry air, to reduce the
self-discharge.
Charging Operation
Please use SAMZUK-specified charger to charge the battery; the indicator
light of the charger shows the completion of charging operation.
Indicator Light State
Red light Be charging
Green light Charging completed
Please do the following steps to charge:
1. Insert the AC plug of the power adapter into the AC power outlet.
2. Insert the DC plug of the power adapter into the DC jack on the
back of the charger, and the indicator will flash for a short time.
15

SAFETY TRAINING INFORMATION
Your SAMCOM radio generates RF electromagnetic en-ergy during
transmit mode. This radio is designed for and classified as
“Occupational Use Only”, meaning it must be used only during the
course of employment by individuals aware of the hazards,
Warning and the ways to minimize such hazards. This radio is
not intended for use by the “General Population” in an
uncontrolled environment.
This radio has been tested and complies with the FCC RF exposure limits for
“Occupational Use Only.” In addition, your Quansheng radio complies with the following
Standards and Guidelines with regard to RF energy and electromagnetic energy levels
and evaluation of such levels for exposure to humans:
Guidelines for Human Exposure to Radio Frequency Electromagnetic Fields.
• American National Standards Institute (C95.1–1992), IEEE Standard for Safety Levels
with Respect to Human Exposure to Radio Frequency Electromagnetic Fields, 3 kHz to
300 GHz.
• American National Standards Institute (C95.3–1992), IEEE Recommended Practice for
the Measurement of Potential y Hazardous Electromagnetic Fields— RF and Microwave.
To ensure that your exposure to RF electromagnetic energy is
within the FCC allowable limits for occupational use, always adhere
to the following
CAUTION guidelines:
• DO NOT operate the radio without a proper antenna attached, as
this may damage the radio and may also cause you to exceed FCC
RF exposure limits. A proper antenna is the antenna supplied with
KDB 865664 D01 SAR Measurement 100 MHz to 6 GHz v01r04, Evaluating Compliance with FCC

this radio by the manufacturer or an antenna specifically authorized by the manufacturer
for use with this radio.
• DO NOT transmit for more than 50% of total radio use time (“50% duty cycle”).
Transmitting more than 50% of the time can cause FCC RF exposure compliance
requirements to be exceeded. The radio is transmitting when the “TX indicator” lights red.
You can cause the radio to transmit by pressing the “PTT” switch.
• ALWAYS use SAMCOM authorized accessories (antennas, batteries, belt clips,
speaker/mics, etc). Use of unauthorized accessories can cause the FCC RF exposure
compliance requirements to be exceeded. Body-worn operations are restricted to
belt-clips, holsters or similar accessories that have no metallic component in the assembly
and that provide at least 1.5 cm separation between the device, including its antenna, and
the user's body. To provide the recipients of your transmission the best sound quality, hold
the antenna at least 5 cm (2 inches) from mouth, and slightly off to one side. The
information listed above provides the user with the information needed to make him or her
aware of RF exposure, and what to do to assure that this radio operates within the FCC
RF exposure limits of this radio.
Electromagnetic Interference/Compatibility
During transmissions, your Amcrest radio generates RF energy that can possibly cause
interference with other devices or systems. To avoid such interference, turn off the radio in
areas where signs are posted to do so. DO NOT operate the transmitter in areas that are
sensitive to electromagnetic radiation such as hospitals, aircraft, and blasting sites.
This device complies with Part 90 of the FCC rules. Operation is subject to the following two
conditions: (1) This device may not cause harmful interference, and
(2) this device must except any interference received, including interference that may cause
undesired operation.
Changes or modifications not expressly approved by the party responsible for compliance could
void the user’s authority to operate the equipment.
Note:This EUT has one voice channel per 12.5 kHz of channel bandwidth and can be capable
of supporting a minimum data rate of 4800 bits per second per 6.25 kHz of channel bandwidth
Table of contents
Other SAMCOM Transceiver manuals