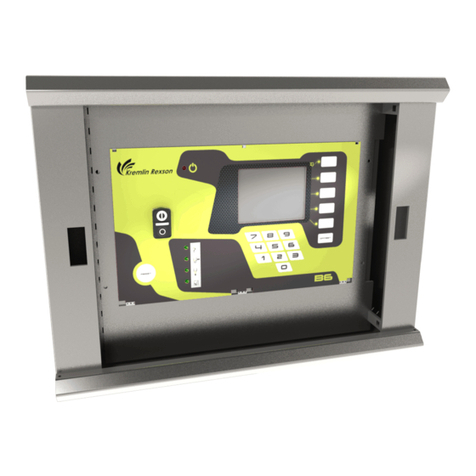
SAMES KREMLIN Inobox User manual

Index revision : A 1 7145
User manual
SAMES KREMLIN SAS - 13, Chemin de Malacher - 38240 MEYLAN - FRANCE
Tel. 33 (0)4 76 41 60 60 - www.sames-kremlin.com
Inobox
Control module

Index revision : A 2 7145
All communication or reproduction of this document, in any form whatsoever and all use or
communication of its contents are forbidden without express written authorisation from
SAMES KREMLIN.
The descriptions and characteristics mentioned in this document are subject to change without
prior notice.
© SAMES KREMLIN 2019
WARNING : SAMES KREMLIN SAS is registered with the Ministry of Labour as a training
institution.
Throughout the year, our company offers training courses in the operation and
maintenance of your equipment.
A catalogue is available on request. Choose from a wide range of courses to
acquire the skills or knowledge that is required to match your production
requirements and objectives.
Our training courses can be delivered at your site or in the training centre at our
Meylan head office.
Training department:
Tel. 33 (0)4 76 41 60 04
E-mail: formation-clie[email protected]
SAMES KREMLIN SAS operating manuals are written in French and translated into English, German, Spanish, Italian
and Portuguese.
The French version is deemed the official text and Sames will not be liable for the translations into other languages.

Index revision : 3
Inobox
Control module
1. Health and safety instructions - - - - - - - - - - - - - - - - - - - - - - - - - - - - 5
1.1. Marking . . . . . . . . . . . . . . . . . . . . . . . . . . . . . . . . . . . . . . . . . . 5
1.2. Precautions for Use . . . . . . . . . . . . . . . . . . . . . . . . . . . . . . . . . 6
1.3. Warnings . . . . . . . . . . . . . . . . . . . . . . . . . . . . . . . . . . . . . . . . . . 6
2. Introduction - - - - - - - - - - - - - - - - - - - - - - - - - - - - - - - - - - - - - - - - - 7
3. Characteristics - - - - - - - - - - - - - - - - - - - - - - - - - - - - - - - - - - - - - - - 9
3.1. Mechanical characteristics . . . . . . . . . . . . . . . . . . . . . . . . . . 9
3.2. Electrical characteristics . . . . . . . . . . . . . . . . . . . . . . . . . . . 10
3.3. Air compressed quality . . . . . . . . . . . . . . . . . . . . . . . . . . . . . 10
4. Operating principle of the Inobox - - - - - - - - - - - - - - - - - - - - - - - 11
4.1. Pneumatic Connections . . . . . . . . . . . . . . . . . . . . . . . . . . . 11
4.2. Electrical and Signal Connections . . . . . . . . . . . . . . . . . . . 12
4.3. Starting . . . . . . . . . . . . . . . . . . . . . . . . . . . . . . . . . . . . . . . . . . 13
4.4. Functions available from the Inobox control module . . . 13
5. Use of the various menus of the Inobox control module - - - - - - - 14
5.1. Start screens . . . . . . . . . . . . . . . . . . . . . . . . . . . . . . . . . . . . . . 14
5.2. Screen 1: Operating Modes Screen . . . . . . . . . . . . . . . . . . 16
5.2.1. Choice of presets . . . . . . . . . . . . . . . . . . . . . . . . . . . . . . . . . . . 16
5.3. Screen 1: Custom mode screen . . . . . . . . . . . . . . . . . . . . . 17
5.4. Screen 2: Setting of electrode supply air and fluidizing air 18
5.5. Screen 3: Counter Alarm Screen . . . . . . . . . . . . . . . . . . . . . 19
5.6. Screen 4: Cleaning screen . . . . . . . . . . . . . . . . . . . . . . . . . . 20
5.7. Screen 5: Ecran Présence Défauts . . . . . . . . . . . . . . . . . . . 21
5.8. Parameter setting screens . . . . . . . . . . . . . . . . . . . . . . . . . . 22
5.8.1. Access to the parameter setting screens. . . . . . . . . . . . . . . . 22
5.8.2. Password Input Screen . . . . . . . . . . . . . . . . . . . . . . . . . . . . . . . 22
5.8.3. Parameter setting screen 1: Equipment operating time . . . 23
5.8.4. Parameter setting screen 2: Fault History Screen . . . . . . . . . 24
5.8.5. Parameter setting screen 3: Active cleaning phase . . . . . . 25
5.8.6. Parameter setting screen 4: Parameter setting Locking /
Unlocking setpoints . . . . . . . . . . . . . . . . . . . . . . . . . . . . . . . . . . . . . . . 26
5.8.7. Parameter setting screen 5: Time Delays . . . . . . . . . . . . . . . . 27
5.8.8. Parameter setting screen: Contrast and Communication
Configuration (a CAN link is used) . . . . . . . . . . . . . . . . . . . . . . . . . . 28
5.8.9. Access code modification screen for parameter setting
screens . . . . . . . . . . . . . . . . . . . . . . . . . . . . . . . . . . . . . . . . . . . . . . . . . 29
5.9. Standby Screen / Factory Reset screen . . . . . . . . . . . . . . . 30
6. Connections - - - - - - - - - - - - - - - - - - - - - - - - - - - - - - - - - - - - - - - - 31
6.1. CAN Inputs / Outputs connector . . . . . . . . . . . . . . . . . . . . 31
6.2. Vib / Smoke connector . . . . . . . . . . . . . . . . . . . . . . . . . . . . 31
6.3. 100 / 240 VAC power supply connector . . . . . . . . . . . . . . 31

Index revision : 4
6.4. Low voltage connector to Inogun A projector
or Inogun M spray gun . . . . . . . . . . . . . . . . . . . . . . . . . . . . . . . . 31
7. Cabling - Connector Inputs / Outputs -CAN - - - - - - - - - - - - - - - - 32
8. High voltage - - - - - - - - - - - - - - - - - - - - - - - - - - - - - - - - - - - - - - - - 33
8.1. Characteristics of spray gun output voltage and current 33
9. Fault management- - - - - - - - - - - - - - - - - - - - - - - - - - - - - - - - - - - 34
9.1. Faults list . . . . . . . . . . . . . . . . . . . . . . . . . . . . . . . . . . . . . . . . . 34
9.2. Actions following a fault . . . . . . . . . . . . . . . . . . . . . . . . . . . . 36
10. Communication with the PLC in CAN - - - - - - - - - - - - - - - - - - - - 37
10.1. Characteristics . . . . . . . . . . . . . . . . . . . . . . . . . . . . . . . . . . . 37
10.2. Data exchange . . . . . . . . . . . . . . . . . . . . . . . . . . . . . . . . . . 37
10.2.1. From CAN to the Inobox module . . . . . . . . . . . . . . . . . . . . . 37
10.2.2. From Inobox to a CAN module. . . . . . . . . . . . . . . . . . . . . . . 39
11. Spare parts list - - - - - - - - - - - - - - - - - - - - - - - - - - - - - - - - - - - - - - 41
12. Revision index History - - - - - - - - - - - - - - - - - - - - - - - - - - - - - - - - 42

Index revision : A 5 7145
1. Health and safety instructions
1.1. Marking
The Inobox control module is intended to be installed in category II (according to EN 61010-1).
This marking indicates that this control module is associated equipment that can be installed in
zone 22 and which contributes to the safe operation of the Inogun M or Inogun A equipment
installed in EXplosible ATmosphere connected to it. The operation of the equipment is stipulated
in the operating manual of the projector or spray gun.
The X sign behind the EU type examination certificate number indicates that:
•this equipment is subject to a special condition of use concerning the ambient tempera-
ture of use which must be between 0°C and 40°C.
Meylan France
INOBOX TV 910029883
Admissible combinations of devices see information for use
OTP XXXXX / SOFT V. XX/XX/20XX / SXX/XXXX XXXXX
U output : 42V rms / I output : 400mA rms / F : 22.5kHz +/-20%
P input : 7 1 bar
Input : 100-240V~ 105W I
P
54
0080
II 3 (2) D [2mJ] T85°C
EN50177 type A-P EN50050 - 2 INERIS 19ATEX0021X

Index revision : A 6 7145
1.2. Precautions for Use
This document contains information that all operators should be aware of and understand
before using the Inobox control module This information highlights situations that could result in
serious damage and indicates the precautions that should be taken to avoid them. .
WARNING : Before any use of the Inobox control module, check that all operators:
• have previously be trained by the compagny SAMES KREMLIN,or by their distributors
registered by them for this purpose.
• have read and understood the user manual and all rules for installation and operation, as
laid out below.
It is the responsibility of the operators’ workshop manager to ensure these two points and it is
also his responsibility to make sure that all operators have read and understood the user
manuals for any peripheral electrical equipment present in the powdering area.
1.3. Warnings
WARNING :
This equipment can be dangerous if not used in compliance with the safety regulations.
WARNING : It is the customer’s responsibility to verify which local fire and safety standards are
applicable for use of the Inobox.
WARNING : This equipment may be hazardous if it is not used, disassembled and reassembled
in accordance with the rules indicated in this manual and in any applicable European Standard
or national safety regulations.
• The Inobox control module must not be installed outdoors.
• The ambient temperature around the Inobox control module must be no greater than
40°C.
• The Inobox module must not be altered from its original condition.
•OnlySAMES KREMLIN spare parts, or a repair performed by the SAMES KREMLIN
repair department, are able to ensure and guarantee the operational safety of the
Inobox module.
• Turn off the electrical power supply to the Inobox module before disconnecting the
connectors from the module.
• Any repairs on the Inocontroller module with the power supply still on can only be perfor-
med by personnel certified and trained for electrical repairs.

Index revision : A 7 7145
2. Introduction
The Inobox is a control module designed to pilot the Inogun M spray gun or the Inogun A pro-
jector. The function of the Inogun M spray gun or the Inogun A projector is to project the elec-
trically charged powder by means of a high voltage unit integrated in the barrel which delivers
up to 100kV and 110 μA.
The Inobox control module manages, by means of a microcontroller, the piloting of the high
voltage unit and three or four proportional solenoid valves depending on the version. In return,
a reading of the high voltage voltage and current is taken, as well as the flow or current of the
three or four proportional solenoid valves.
The Inobox is controlled manually via its display or by a PLC-type network in the case of a CAN
link.
Example:
Synoptic of an installation with an Inogun M
Inogun MPowder suctionAir supply
Fluidisation
Supply
Vibra tor Power

Index revision : A 8 7145
Presentation of the Rear Panel:
Item Description
1PLC connection
2Spray gun connection
3Vibration connection for a vibrating table
4Power supply + 100 - 240 VAC
5Earth connection terminal
6Fluidization air outlet
7Blowing air outlet
8Dilution air outlet
9Injection air outlet
10 Air supply
12345
678910

Index revision : A 9 7145
3. Characteristics
3.1. Mechanical characteristics
(1) : Level 2: Pollution either non-conducting or occasionally and temporarily conducting
caused by condensation.
WARNING : The control module must be correctly connected to the earth of the installation by
a cable or metal braid with a cross-section of 6mm2or greater.
The electrical earth contacts must be free of paint or any form of surface with a greater or lesser
degree of insulation.
Dimensions Width 210 mm x height 167 mm x depth 236.3 mm
(without connector )
Weight 3.9 kg
Protection index IP64 - Degree of pollution: 2 (1)
Box material Aluminium
Ground shield Brass stud M6
Fastening mode On cart or on rails
Ambient temperature during operations
0° C min. - 40°C max.
Maximum storage / transport temperature 70°C max.
Maximum relative humidity 93% (4 hours)
Maximum altitude 2000 m
210
167
236,3
306,3

Index revision : A 10 7145
3.2. Electrical characteristics
(*): The maximum power value is given all active functions simutaneously. (HV and Air).
3.3. Air compressed quality
Characteristics of compressed air supply according to the standard NF ISO 8573-1 :
*: Values are given for a temperature of 20 °C (68 °F) at an atmospheric pressure of 1 013 mbar
WARNING : Non-compliance with these characteristics may result in incorrect operation of
the“Inobox” control module.
Supply voltage 100 VAC to 240 VAC / 47 Hz - 63 Hz
Maximum Input Power (*) 105 W @ 240 VAC
Maximum current 0.56 A @ 230 VAC / 0.95 A @ 115 VAC
Protection circuit Fuse 1.25A 5x20 HPC
Max. output voltage 42 V rms
Max. output current 400 mA rms
Maximum frequency (to projector) 22.5 kHz +/-20% (min. 18 kHz / max. 30 kHz)
Maximum pressure supply 7bars +/-1bar
Maximum dew point at 6 bar (87 psi) Class 4 i.e + 3°C (37°F)
Maximum particle-size of solid pollutants Class 3 i.e 5 µm
Maximum oil concentration Class 1 i.e 0.01 mg/m03*
Maximum concentration of solid pollutants Class 3 i.e 5 mg/m03*

Index revision : A 11 7145
4. Operating principle of the Inobox
The Inobox control module manages the spraying air (injection, dilution, electrode blowing and
fluidization) which allows the powder supply to the Inogun M spray gun.
4.1. Pneumatic Connections
Item Icons Description Characteristics
1Air supply Hose Dia: 8/10 polyamide
2Injection air outlet
(to CS 130 powder pump) Hose D: 6/8 polyamide
3Dilution air outlet
(to CS 130 powder pump) Hose D: 4/6 polyamide
4Blowing air outlet
(from electrode Inogun A or M) Hose D: 4/6 polyamide
5
Fluidisation air outlet
(To the box or plunger tube on
the cart)
Hose D: 4/6 polyamide
54321

Index revision : A 12 7145
4.2. Electrical and Signal Connections
Item Icons Description Characteristics
1I/O- Can Connection to a PLC Coded female connec-
tor (12-pin)
2Gun Low voltage cable to spray gun
or projector
Coded male connector
(10-pin)
3Vib / Smoke Vibrator connection on vibra-
ting table
Coded male connector
(4-pin)
485 ~ 264 VAC Inobox module power cable Coded female connec-
tor (4-pin)
5
Metal cable or braid equipped
with a clamp for grounding the
Inobox
Section greater than or
equal to 6 mm2.
5
4
321

Index revision : A 13 7145
4.3. Starting
• Connect the peripheral equipment (spray gun or projector, powder pump, PLC, vibrator,
etc.) (see § 4.2 page 12).
• Connect the air and fluid supplies(see § 4.1 page 11).
• Connect the mains plug to the control module (see § 4.2 page 12).
The control module can then be started by pressing the key
The control of the Inobox module is done through the different screens or with the help of a PLC
in the case of a CAN connection.
Remarks:
If the spray gun is not connected when the module is switched on, the control module will wait
(see start screen) until a piece of equipment is connected to it.
4.4. Functions available from the Inobox control module
The control module allows the display of the various operating parameters (voltage, current,
powder flow rate, etc.) and their settings by means of the various keys available on the front
panel of the module.

Index revision : A 14 7145
5. Use of the various menus of the Inobox control module
5.1. Start screens
When the module is switched on by pressing the key , one of the following three welcome
screens appears:
• The Inobox is connected to a Inogun M spray gun.
Then after a few seconds the Inobox automatically switches to the next screen.
• The Inobox is connected to a Inogun A projector.
Then after a few seconds the Inobox automatically switches to the next screen.
DES07380
V : XXXX
INOGUN M V
DES07789
V : XXXX
INOGUN A

Index revision : A 15 7145
• The Inobox is not connected (neither to an Inogun A projector nor to a manual gun).
The module did not recognize the equipment to which it is connected (manual gun or auto-
matic projector) or that no equipment is connected.
It is therefore necessary:
1 Switch off the module
2Checkconnections.
3 Switch the module back on.
DES07790
V : XXXX

Index revision : A 16 7145
5.2. Screen 1: Operating Modes Screen
This screen is used to enter the various operating setvalues in the operating modes:
5.2.1. Choice of presets
To select the different icons, press the key
The voltage and current values of the first 3 modes are preset, the setting is locked. .
In the custom mode, the voltage and current values can be adjusted using the and
keys below the value to be changed.
The injection and dilution parameters can be adjusted for each type of part using the corres-
ponding and keys.
WARNING : When spraying is in operation with voltage at the output,
the symbol flashes. The voltage and current settings can no longer be changed.
Area Description
Area 1 Choice of presets, 4 modes are available
Area 2 Voltage setting ( available only in custom mode)
Area 3 Current setting ( available only in custom mode)
Area 4 Setting the injection air or powder flow rate
Area 5 Setting the dilution or transport air
Simple parts Complex parts Over-powder
coating parts Custom mode
DES07381
3095 kV µA%%
00
1
INOGUN M V : XXXX
1
23 4 5

Index revision : A 17 7145
5.3. Screen 1: Custom mode screen
This screen allows to enter the setvalues for using the custom mode different from the 3 previous
modes (Simple, Complex and Over-powder coating).
Press the key to access the submenu of the selected mode.
Area Description
Area 1 Custom mode
Area 2
Program selection:
99 custom programs can be set in voltage, current, injection air and
powder flow (see § 5.2 page 16).
The and keys are used to change programs
Area 3 Powder flow rate and conveying air settings for each program
Area 4
Voltage and current settings for each program.
Flashing: Spraying in progress with voltage at the output
Area 5 If both keys are pressed simultaneously, direct access to the parame-
ter setting screen (see § 5.8 page 22)
DES07385
P3
00
kV µA%%
00
1
INOGUN M V: XXXX
1
2
43
5

Index revision : A 18 7145
5.4. Screen 2: Setting of electrode supply air and fluidizing air
In the selected operating mode, the operator can set the values for electrode blow-out air and
fluidizing air. He can also activate the cleaning mode.
Note: (*) If the selected mode was different from the custom mode, zone 1 (program selection)
would not be present.
To return to the previous screen, press the key. .
Area Description
Area 1 For the selected custom program (*)
Area 2 To activate the cleaning mode, press the corresponding key,
screen 4 appears (see § 5.6 page 20)
Area 3
Setting the values for electrode blowing air and supply air
fluidization using the corresponding and keys.
The values are indicated by the green areas of the associated bar-
graphs
DES07639
P5
2
OFF
INOGUN M V : XXXX
1
32

Index revision : A 19 7145
5.5. Screen 3: Counter Alarm Screen
This screen only appears when the operator has exceeded the recommended operating time
for maintenance.
Area Description
Area 1 1st line: operating time
2nd line: scheduled maintenance time
DES07389
INOGUN M V : XXXX
3
Screen ON 3 hrs
HV ON 0 hrs
0hrs0hrshrshrs
800 hrs800 hrshrs1600hrs
3
200
2201610
1

Index revision : A 20 7145
5.6. Screen 4: Cleaning screen
When the cleaning mode is activated, the logo. turns green on the screen and the pic-
togram is animated.
To interrupt the cleaning cycle (before the programmed stop see § 5.8.5 page 25) press the key
.
To return to the previous screen (screen 2), press the key
.
WARNING : When cleaning, it is imperative to place the gun inside the booth.
Area Description
Area 1 Activating / Deactivating cleaning mode
DES07387
V : XXXX
4
ON
INOGUN M
1
This manual suits for next models
3
Table of contents
Other SAMES KREMLIN Control Unit manuals
Popular Control Unit manuals by other brands

Wilo
Wilo PLR Installation and operating instructions

Hays Fluid Controls
Hays Fluid Controls 2540 Series Installation, operation & maintenance instructions

NCD
NCD ZigBee ZSCAN16 MIRROR manual

KEYBOARDPARTNER
KEYBOARDPARTNER HX3.5 WiFi Module installation guide

Jung
Jung MSC 1000 KNX operating instructions

National Instruments
National Instruments PXIe-4302 USER GUIDE AND SPECIFICATIONS