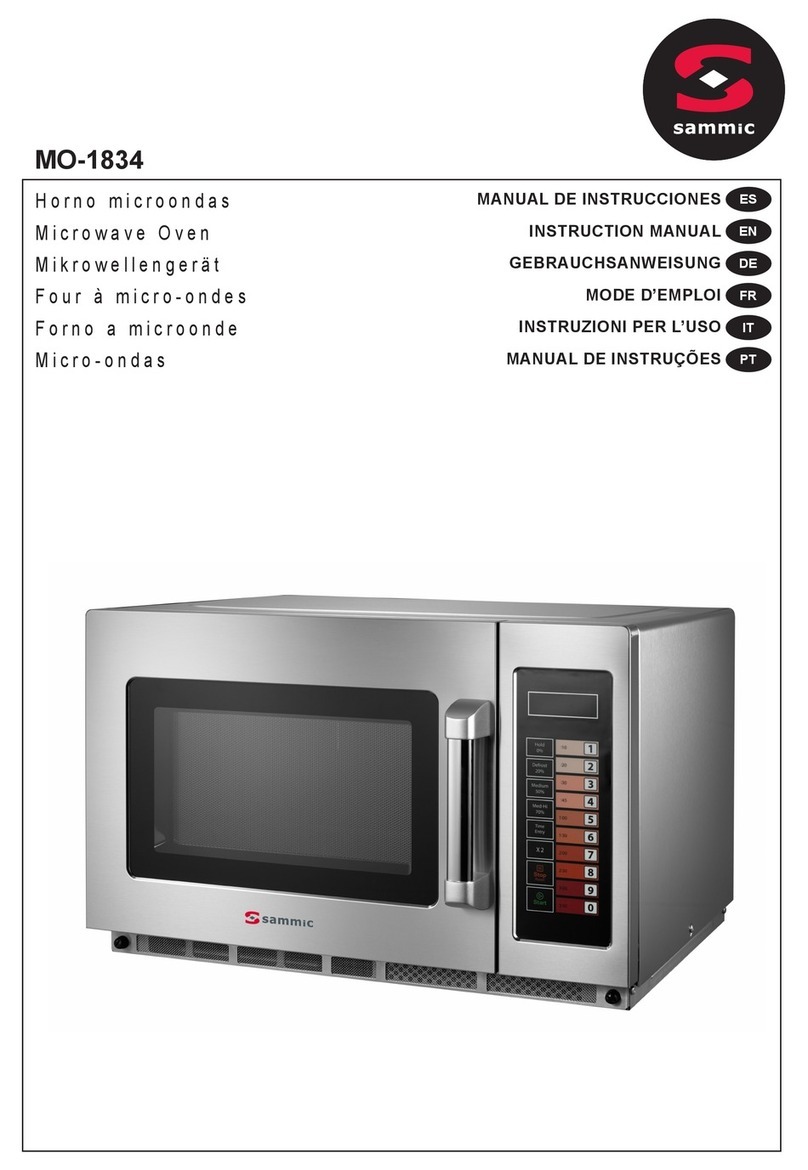
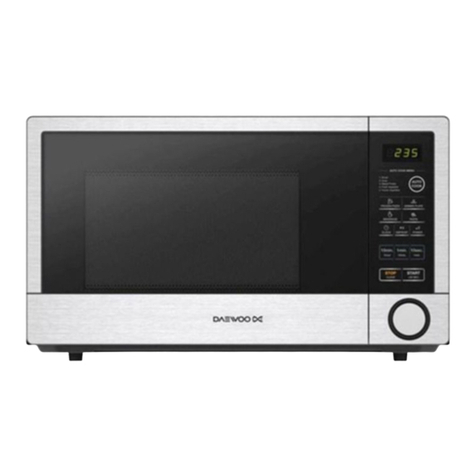
Sammic HM-1035P User manual

INSTRUCCIONES - USERS MANUAL - MODE D’EMPLOI - MANUAL DE INSTRUÇÕES
HM-1035M/P
Horno microondas
Microwave oven
Four a micro-ondes
Forno miroondas

1. LEA todas las instrucciones antes de
usar el equipo.
2. LEA Y OBSERVE las “PRECAUCIONES
PARA EVITAR UNA POSIBLE
EXPOSICIÓN A UN EXCESO DE
ENERGÍA DE MICROONDAS” en esta
página.
3. Este equipo DEBE PONERSE A TIERRA.
Conéctelo sólo a un tomacorriente
debidamente PUESTO A TIERRA.
Consulte “INSTRUCCIONES DE PUESTA
A TIERRA” en la página 5.
4. Instale o sitúe este equipo SÓLO de
acuerdo con las instrucciones de
instalación contenidas en este
manual.
5. Algunos productos como huevos
enteros y recipientes cerrados –por
ejemplo, frascos de vidrio cerrados–
pueden explotar y NO DEBEN ser
CALENTADOS en este horno.
6. Use este equipo SÓLO para el
propósito para el que fue diseñado
según se describe en este manual. No
le aplique sustancias químicas ni
vapores corrosivos a este equipo. Este
tipo de horno ha sido específicamente
diseñado para calentar, cocinar o
secar alimentos. No fue diseñado para
uso industrial ni experimental.
7. Al igual que con cualquier otro
equipo, se debe SUPERVISAR DE
CERCA el uso que hagan de él los
NIÑOS.
8. Consulte las instrucciones de limpieza
de la puerta en la página 12 de este
manual de seguridad del producto.
9. NO caliente biberones en este horno.
10. Se debe abrir los frascos de alimento
para bebés antes de calentarlos y
remover o agitar su contenido antes
de consumirlos para evitar
quemaduras.
11. NO use este equipo si su cable o
enchufe están dañados, si no está
funcionando como corresponde o si
ha sufrido algún daño o caída.
12. Este equipo, incluido el cable de
alimentación, debe ser reparado SÓLO
por personal técnico profesional. Su
reparación requiere herramientas
especiales. Solicite al servicio técnico
autorizado más cercano la revisión,
reparación o ajuste del equipo.
13. NO cubra ni bloquee el filtro ni
ninguna otra abertura del equipo.
14. NO guarde el equipo en espacios
exteriores. NO use este producto
cerca de agua, p. ej., cerca de un
fregadero, en un sótano mojado, una
piscina u otro lugar similar.
15. NO sumerja el cable ni el enchufe en
agua.
16. Mantenga el cable ALEJADO de
superficies CALIENTES.
17. NO permita que el cable cuelgue
sobre el borde de la mesa o el
tablero.
18. Use sólo para fines comerciales.
2ESPAÑOL
IMPORTANTES NORMAS DE SEGURIDAD
Reconozca este símbolo como mensaje de SEGURIDAD
ADVERTENCIA
Cuando use equipos eléctricos, debe tomar precauciones básicas para reducir el riesgo de quemaduras, electrochoque, incendio y
lesiones personales.
PRECAUCIONES PARA EVITAR UNA
POSIBLE EXPOSICIÓN A UN EXCESO
DE ENERGÍA DE MICROONDAS
A. NO intente usar este horno con la puerta abierta ya que daría lugar a una peligrosa
exposición a energía de microondas. Es importante no frustrar ni forzar los seguros de
interbloqueo.
B. NO coloque ningún objeto entre la superficie frontal del horno y la puerta ni permita que
se acumule ningún residuo de productos de limpieza ni suciedad en las superficies de
cierre.
C. NO use el horno si está dañado. Es muy importante cerrar correctamente la puerta del
horno y evitar que sufran daños:
1. la puerta (doblamiento)
2. las bisagras y los pestillos (ruptura o aflojamiento)
3. las superficies de cierre y juntas de la puerta.
D. Nadie, excepto técnicos debidamente cualificados, debe ajustar o reparar este horno.
GUARDE ESTAS INSTRUCCIONES

3
ESPAÑOL
1. No utilice el horno para freír alimentos
completamente inmersos en aceite. El
aceite podría recalentarse y su
manipulación resultaría peligrosa.
2. No utilice energía de microondas para
cocinar o recalentar huevos en su
cáscara o con la yema íntegra. La
presión puede acumularse y hacer
explosión. Antes de cocinar, perfore la
yema con un tenedor o un cuchillo.
3. Perfore la piel de papas, tomates y
alimentos similares antes de cocinar
con energía de microondas. Si la piel
está perforada, el vapor puede escapar
uniformemente.
4. No use el horno si no tiene carga o
alimentos en su cavidad.
5. Utilice solamente palomitas de maíz
que vienen en bolsas diseñadas y
rotuladas para uso en hornos
microondas. El tiempo necesario para
que empiecen a saltar las palomitas
varía de acuerdo con el vatiaje del
horno. Una vez que dejen de hacerlo,
apague el microondas. De lo contrario,
las palomitas se chamuscarán o se
quemarán. No desatienda el horno.
6. No introduzca termómetros de cocina
normales en el horno. La mayoría de
los termómetros contienen mercurio y
pueden originar arcos eléctricos o
causarle desperfectos o averías al
horno.
7. No introduzca utensilios metálicos en
el horno.
8. Nunca use papel, plástico ni ningún
otro material combustible que no haya
sido diseñado para cocinar.
9. Cuando cocine con papel, plástico u
otro material combustible, siga las
recomendaciones del fabricante acerca
del uso del producto.
10. No use toallas de papel que contengan
nailon ni ninguna otra fibra sintética.
Las fibras sintéticas, al calentarse,
pueden derretirse y prenderle fuego al
papel.
11. No caliente recipientes cerrados ni
bolsas plásticas en el horno. Los
alimentos y líquidos pueden
expandirse rápidamente y hacer que
se rompa el recipiente o la bolsa.
Perfore o abra el recipiente o la bolsa
antes de calentar.
12. Para evitar desperfectos en un
marcapasos, consulte a un médico o al
fabricante del marcapasos sobre los
efectos que sobre él pueda tener la
energía de microondas.
13. El equipo DEBE ser inspeccionado
anualmente por un servicio técnico
autorizado. Registre todas las
inspecciones y reparaciones como
material de referencia.
14. Limpie el horno regularmente y
elimine todos los restos de alimentos
depositados en el horno.
15. Para evitar que las superficies se
deterioren, mantenga el horno en
condición limpia. La limpieza poco
frecuente puede afectar adversamente
la vida útil del aparato y resultar
posiblemente en una situación
peligrosa.
IMPORTANTES NORMAS DE SEGURIDAD
ADVERTENCIA ADVERTENCIA
Para evitar el riesgo de que se incendie la cavidad del horno:
a. NO cocine demasiado los alimentos. Préstele mucha
atención al horno cuando, para facilitar la cocción, ponga
en su interior papel, plástico u otro material combustible.
b. Antes de introducir bolsas de papel o plástico en el
horno, quíteles los amarres de alambre.
c. Si se incienda algún material dentro del horno, mantenga
CERRADA la puerta del horno, apáguelo y desconecte el
cable de alimentación o interrumpa la corriente desde el
fusible o el tablero del cortacircuito.
d. NO utilice la cavidad del horno como lugar de
almacenamiento. NO deje productos de papel, utensilios
de cocina ni alimentos en la cavidad cuando no la está
usando.
Debido a su tensión superficial, los líquidos, como agua, café
o té, pueden calentarse por encima de su punto de ebullición
sin dar muestras de estar hirviendo.
No necesariamente los verá hervir o burbujear cuando
extraiga el recipiente del microondas. POR CONSIGUIENTE,
LOS LÍQUIDOS PUEDEN EMPEZAR A HERVIR Y SALPICAR AL
INTRODUCIRLES UNA, CUCHARA U OTRO UTENSILIO. Para
reducir el riesgo de sufrir lesiones:
i) No recaliente el líquido.
ii) Remueva el líquido antes de empezar a calentar y a mitad
del proceso.
iii) No utilice recipientes de lados rectos con cuello angosto.
iv) Después de calentar el líquido, deje reposar el recipiente
dentro del microondas por un breve tiempo antes
sacarlo.
v) Tenga sumo cuidado cuando le introduzca una cuchara u
otro utensilio al recipiente.
PRECAUCIÓN
Para evitar lesiones personales o daños materiales, observe las siguientes indicaciones:
GUARDE ESTAS INSTRUCCIONES
4ESPAÑOL
Desempaque del horno
• Inspeccione el horno y verifique que no tenga daños como, por ejemplo,
abolladuras en la puerta o en la cavidad.
• Si tiene abolladuras o está roto, informe de inmediato al vendedor.
Si el horno ha sufrido algún daño, no intente utilizarlo.
• Extraiga todos los materiales del interior del horno.
• Si el horno ha estado almacenado en un lugar demasiado frío, espere algunas
horas antes de conectarlo a un tomacorriente.
Interferencia de radio
El funcionamiento del microondas puede hacer interferencia con radios, televisores u
hornos similares. Reduzca o elimine la interferencia mediante el siguiente
procedimiento:
• Limpie la puerta y las superficies de cierre del horno de acuerdo con las
instrucciones en la sección Cuidado y limpieza.
• Sitúe el radio, televisor, etc. tan lejos del horno como sea posible.
• Mejore la recepción del radio, televisor, etc., mediante la correcta instalación de
una antena.
Ubicación del horno
• No instale el horno cerca o encima de fuentes de calor, p. ej., hornos para pizzas o
freidoras. Esto puede ocasionar un mal funcionamiento del microondas y acortar la
vida útil de las piezas eléctricas.
• No bloquee ni obstruya el filtro del horno. Deje libre el acceso para la limpieza.
• Instale el horno sobre la superficie superior plana del tablero.
• Coloque la etiqueta de advertencia en un lugar claramente visible y próximo al
horno microondas. (modelos de 50 Hz únicamente)
• El tomacorriente debe estar situado de modo que permita enchufar el horno desde
su ubicación.
A — Deje al menos 10,2 cm (4 pulg.) de espacio libre por la parte superior
y a los lados del horno. La circulación de aire adecuada alrededor del
horno enfría sus componentes eléctricos. Si se restringe la circulación
de aire, posiblemente no funcione correctamente el horno y se
reduzca la duración de las piezas eléctricas.
B — Deje al menos 10,2 cm (4 pulg.) entre la salida de aire, en la parte
posterior del horno, y la pared de fondo.
Espacio libre alrededor del horno
Instalación
NO rocíe con pistola NO use cacerolas metálicas
ADVERTENCIA
ADVERTENCIA
Para evitar el riesgo de electrochoque
o muerte, es necesario
poner este horno a tierra.
Para evitar el riesgo de electrochoque
o muerte, no modifique
el enchufe.
Instrucciones de puesta a
tierra
El horno DEBE ser puesto a tierra.
Ponerlo a tierra reduce el riesgo de
electrochoque ya que proporciona un
conductor de escape para la corriente
eléctrica en caso de cortocircuito. Este
horno cuenta con un cable que tiene un
hilo de tierra con enchufe de conexión a
tierra. Este enchufe debe ser conectado a
un tomacorriente correctamente
instalado y puesto a tierra.
Si no comprende cabalmente las
instrucciones de puesta a tierra, o duda
que el horno esté correctamente puesto
a tierra, consulte a un electricista o
servicio técnico profesional.
No utilice cables de extensión.
Si el cable de alimentación del producto
es demasiado corto, pídale a un
electricista profesional que instale una
caja de contacto de tres ranuras. Este
horno debe estar conectado a un circuito
aparte cuya capacidad eléctrica nominal
cumpla con las especificaciones del
producto. Si se instala el horno
microondas en un mismo circuito con
otros equipos, puede ser necesario
aumentar los tiempos de cocción y es
posible que se quemen los fusibles.
Terminal de tierra equipotencial
externo (sólo para exportación)
El equipo dispone de un terminal
secundario de puesta a tierra. Este
terminal proporciona una puesta a tierra
externa que se utiliza en forma adicional
a la clavija de puesta a tierra del
enchufe. El terminal está situado en la
parte externa del lado posterior del
horno y viene marcado con el símbolo
que aparece a continuación.

5
ESPAÑOL
Pantalla y funciones (HM-1035 P)
Tecla STOP/RESET (PARAR/RESTABLECER)
La tecla STOP/RESET (PARAR/RESTABLECER) detiene la secuencia de cocción en
progreso y debe volver a oprimirse para borrar el tiempo de cocción restante.
Cuando se utiliza la tecla STOP/RESET (PARAR/RESTABLECER) para finalizar
modificaciones de programación, se anulan las modificaciones.
Programación de tecla simple
Esta función permite programar cada tecla numérica para un ciclo de cocción
específico. Para usar esta función, sencillamente programe la tecla para la cantidad de
tiempo y nivel de potencia deseados. Oprima la tecla una vez y el horno microondas
empezará a cocinar los alimentos. Las teclas numéricas 1-10 vienen preprogramadas
de fábrica, pero se pueden modificar.
Programación
de dos teclas
Esta función admite hasta 10 entradas programadas adicionales. A cada entrada se le
asignará un número de dos dígitos. Cuando se utiliza la programación de dos teclas,
se debe oprimir una tecla dos veces en un lapso de 2 segundos para que comience el
ciclo de cocción.
Tecla QTY 2X (CTD X 2)
La tecla QTY 2X (CTD X 2) duplica el tiempo de cocción original. La tecla QTY 2X (CTD
X 2) puede utilizarse junto con la programación de tecla simple o de dos teclas. El
tiempo de cocción máximo es de 60 minutos, excepto cuando se cocina a plena
potencia (100%). En caso de plena potencia (100%), el tiempo de cocción máximo es de
20 minutos.
Cocción por etapas
La cocción por etapas es una secuencia de cocción con niveles y tiempos específicos
en los que cambia la potencia. El usuario puede programar hasta tres cambios de
niveles de potencia diferentes y la cantidad específica de tiempo de cocción de cada
nivel de potencia. Cada combinación de nivel de potencia y tiempo de cocción se
conoce como una etapa. La función de cocción por etapas sólo está disponible en los
modelos con control electrónico. El tiempo de cocción máximo es de 60 minutos,
excepto cuando se cocina a plena potencia (100%). En caso de plena potencia (100%),
el tiempo de cocción máximo es de 20 minutos.
Tecla PROGRAM (PROGRAMAR)
Esta función le permite programar una tecla numérica para un nivel de potencia y
tiempo específico de su elección durante la cocción por etapas.
Tecla POWER LEVEL (NIVEL DE POTENCIA)
La tecla POWER LEVEL (NIVEL DE POTENCIA) le permite programar un ciclo de cocción
para un nivel de potencia específico (100%, 80%, 60%, 40%).
Tecla START/
+30 SEC
(ARRANCAR/30 seg + )
La tecla START/+30 SEC (ARRANCAR/
30 seg +) se utiliza para comenzar un
ciclo de cocción y para aumentar el
tiempo de recalentamiento en
incrementos de 30 segundos.
•La tecla START/+30 SEC (ARRANCAR/
30 seg +) se utiliza para recalentar
durante 30 segundos a potencia 100%
(plena). El horno arrancará
inmediatamente y se agregarán 30
segundos a la cuenta regresiva del
tiempo cada vez que se oprima la tecla
hasta un tiempo de recalentamiento
máximo de 5 minutos.
NOTA: Sólo se puede oprimir la tecla
START/+30 SEC (ARRANCAR/30 seg +)
en el modo Ingreso de tiempo manual.

6ESPAÑOL
Tecla CHECK PROGRAM
(VERIFICAR PROGRAMAR)
Esta función le permite verificar el tiempo de cocción programado
y el nivel de potencia de cualquier tecla programada.
1. Oprima la tecla CHECK PROGRAM (VERIFICAR PROGRAMA).
• En la pantalla aparece CHECK (VERIFICAR).
2. Oprima la tecla numérica deseada.
• En la pantalla aparece PROG–XX (XX indica el número de programa).
• En la pantalla aparece STAGE-1 (ETAPA-1), luego el tiempo de cocción y el nivel
de potencia parpadean. Ejemplo: 00:30 HI (00:30 ALTA)
• En la pantalla aparece la misma información para las próximas etapas
3. Oprima la tecla STOP/RESET (PARAR/RESTABLECER) para salir de la función de
Verificación de programa.
Modo Ahorro de energía
Esta función se utiliza para ahorrar energía llevando a cabo lo siguiente:
1. Oprima y mantenga la tecla CHECK PROGRAM (VERIFICAR PROGRAMA) durante 3
segundos.
•En la pantalla aparece CHECK (VERIFICAR), el horno emite un pitido
y la pantalla se queda en blanco.
2. Para usar el horno en el modo Ahorro de energía, oprima cualquier tecla.
• En la pantalla aparece : 0 y todas las funciones del teclado serán similares a las
del modo Normal.
• Si no se toca el teclado en un lapso de 10 segundos, la pantalla se quedará en
blanco.
3. Para desactivar, oprima cualquier tecla y luego mantenga la tecla CHECK PROGRAM
(VERIFICAR PROGRAMA) durante 3 segundos.
• En la pantalla aparece CHECK (VERIFICAR) y el horno emite un pitido.
4. Oprima la tecla STOP/RESET (PARAR/RESTABLECER) para que el horno regrese al
modo de funcionamiento normal.
Función de Bloqueo de programas
Esta función bloquea el panel de control e impide el funcionamiento no deseado del
horno.
1. Oprima y mantenga la tecla STOP/RESET (PARAR/RESTABLECER) durante 3 segundos
para activarla.
• El horno emite un pitido y en la pantalla aparece : 0 junto a un gráfico de teclas.
2. Oprima y mantenga la tecla STOP/RESET (PARAR/RESTABLECER) durante 3 segundos
para desactivarla.
•El horno emite un pitido y el gráfico de teclas desaparece de la pantalla.
Función de silencio
Esta función silencia el pitido del teclado (salvo el pitido de fin de ciclo) llevando a
cabo lo siguiente:
1. Oprima y mantenga la tecla QTY 2X (CTD X 2) durante 3 segundos.
• En la pantalla aparece DOUBLE (DUPLICAR), el horno emite un sonido y en la
pantalla aparece MUTE (SILENCIO) durante 1 segundo, luego en la pantalla aparece
: 0.
2. Para desactivarla, oprima y mantenga la tecla QTY 2X (CTD X 2) durante 3 segundos.
• En la pantalla aparece DOUBLE (DUPLICAR), el horno emite un sonido y en la
pantalla aparece : 0.
Tecla DEFROST (DESCONGELAR)
Cuando se selecciona DEFROST (DESCONGELAR), el ciclo automático divide el tiempo
de descongelación en períodos alternos de descongelación y espera mediante ciclos de
encendido y apagado. El lapso máximo de descongelación es 60 minutos.
Pantalla y funciones (HM-1035 P)
Si estas funciones
son diferentes de las
que tiene su horno
Las funciones que aquí se
muestran tienen por objeto
mostrar las diversas
funciones disponibles en la
línea de productos. Si su
horno de microondas no
incluye todas las opciones
que se muestran, no se trata
de una equivocación. La
información provista aplica a
varios modelos de esta línea
de productos.

ESPAÑOL 7
Pantalla y funciones (HM-1035 P)
Pantalla de cocción
PANTALLAS DESCRIPCIÓN
Pantalla de programación
PANTALLAS DESCRIPCIÓN
Pantalla
Dependiendo del modelo, es posible que
algunas de las palabras y símbolos de la
pantalla puedan verse pero no estén
disponibles. Durante el funcionamiento
normal del horno, no todos los
elementos se mostrarán a la misma vez.
Condición de Listo
En la pantalla aparece : 0 cuando
el control del horno está listo
para aceptar entradas.
Aparece cuando el control del horno está listo para
aceptar entradas
Muestra el tiempo de cocción. Si se programa una etapa
de cocción, aparece el tiempo total de cocción.
Aparece cuando se oprime la tecla QTY2X (CTD X 2)
Estos ajustes muestran el nivel actual de potencia de
microondas utilizado.
100%
80%
60%
40%
Se muestra cuando el horno se encuentra en el modo de
programación.
Aparece cuando se oprime la tecla CHECK PROGRAM
(VERIFICAR PROGRAMA)
Se muestra cuando se programa una etapa de cocción
específica y cuando se verifica el ciclo de cocción de una
tecla programada. El horno emite un pitido cuando se
modifican los números (1 al 3).
Pantalla del horno
Control del horno
Ventana de la puerta del horno
y Luz interior

8
Para interrumpir el
funcionamiento
Abra la puerta del horno u oprima la
tecla STOP/RESET
(PARAR/RESTABLECER) para interrumpir
el funcionamiento del horno. La
pantalla continúa mostrando la cuenta
regresiva del tiempo establecido. Cierre
la puerta y oprima la tecla START/+30
SEC (ARRANCAR/30 seg +) para
reanudar el funcionamiento del horno.
Para cancelar
errores
Si el horno no cocina, oprima la tecla
STOP/RESET (PARAR/RESTABLECER) para
borrar la pantalla. Si el horno cocina,
oprima la tecla STOP/RESET
(PARAR/RESTABLECER) una vez para que
el horno se detenga, y luego otra vez
para borrar la pantalla. Si la puerta del
horno está abierta y el tiempo aparece
en la pantalla, cierre la puerta del horno
y oprima la tecla STOP/RESET (PARAR/
RESTABLECER) para borrar la pantalla.
¿Dispone mi horno de la
opción de programación
por etapas?
Ninguna tecla del horno indica la
programación por etapas (es una función
oculta). La cocción por etapas es una
función presente durante la
programación. Consulte la sección Teclas
programadas en esta página para
obtener más detalles.
Tecla QTY 2X
(algunos modelos)
Para duplicar el tiempo de cocción
temporalmente cuando se cocina más de
una porción de alimentos.
El tiempo de cocción máximo es de 60
minutos 00 segundos, excepto cuando se
cocina a plena potencia. El tiempo de
cocción máximo a plena potencia (100%) es
de 20 minutos 00 segundos.
1. Abra la puerta del horno e introduzca
los alimentos. Cierre la puerta.
• En la pantalla aparece : 0. La luz se
activará.
2. Oprima la tecla QTY 2X (CTD X 2).
• En la pantalla aparece DOUBLE
(DUPLICAR)
3. Oprima la tecla o secuencia de teclas
preprogramadas deseadas. (ejemplo:
tecla 5)
• En la pantalla aparece PROG- 05
4. El horno comenzará a cocinar los
alimentos luego de 1 segundo. El
tiempo de cocción indicado en pantalla
es la suma del tiempo de cocción
original duplicado.
Uso de los controles electrónicos del horno
(HM-1035 P)
Ingreso de Tiempo Manual
Para cocinar alimentos en un tiempo y a un nivel de potencia específicos de su
elección.
NOTA: Para utilizar el Ingreso de Tiempo, deberá primero oprimir la tecla POWER LEVEL
(NIVEL DE POTENCIA).
1. Abra la puerta del horno e introduzca los alimentos. Cierre la puerta.
• En la pantalla aparece : 0. La luz se activará.
2. Oprima la tecla POWER LEVEL (NIVEL DE POTENCIA).
• Si lo desea, oprima la tecla POWER LEVEL (NIVEL DE POTENCIA)
para modificar el nivel de potencia (algunos modelos).
• En la pantalla aparece el nivel de potencia (ejemplo: 100%).
- 100% indica un 100% de potencia de microondas, 80% indica un 80%, 60% indica
un 60% y 40% indica un 40% de potencia de microondas. Al oprimir
continuamente la tecla de nivel de potencia, el nivel de la potencia ciclará a
través de cada uno de los niveles de manera continua.
3. Ingrese el tiempo de cocción mediante las teclas numéricas.
4. Oprima la tecla START/+30 SEC (ARRANCAR/30 seg +) para
comenzar el ciclo de cocción.
• Al terminar el ciclo de cocción, el horno emite un pitido y se apaga.
Teclas programadas
Para cocinar alimentos mediante secuencias de cocción preprogramadas.
1. Abra la puerta del horno e introduzca los alimentos. Cierre la puerta.
• En la pantalla aparece : 0. La luz se activará.
2. Oprima la tecla deseada.
• Para la programación de tecla simple,
oprima solamente una tecla.
• Para la programación de dos teclas,
oprima la misma tecla dos veces.
• Si la tecla aún no ha sido
programada, en la pantalla aparece NO DATA (SIN DATOS).
3. El horno empieza a cocinar los alimentos.
• En la pantalla aparece el tiempo de cocción total.
4. Al terminar el ciclo de cocción, el horno emite un pitido y se apaga.
Ajustes de fábrica
Tecla DEFROST (DESCONGELAR)
Descongela alimentos dividiendo el tiempo total de descongelación en
períodos alternos de descongelación y esperando mediante ciclos de
encendido y apagado:
1. Abra la puerta del horno e introduzca los alimentos. Cierre la puerta.
2. Oprima la tecla DEFROST (DESCONGELAR).
• Se enciende el indicador DEFROST (DESCONGELAR) y en pantalla aparece :0.
3. Oprima la(s) tecla(s) numérica(s) para ingresar el tiempo de descongelación deseado.
4. Oprima la tecla START/+30 SEC (ARRANCAR/30 seg +).
5. El horno empieza a ciclar.
• En pantalla se muestra una cuenta regresiva que indica el tiempo de
descongelación que resta en el modo DEFROST (DESCONGELAR).
NOTA: El horno emite un pitido durante el ciclo de descongelación para indicar que es
necesario voltear o reacomodar los alimentos.
6. Abra la puerta y reacomode los alimentos. Cierre la puerta.
7. Oprima la tecla START/+30 SEC (ARRANCAR/30 seg +) para proseguir con el ciclo de
descongelación.
NOTA: Si no abre la puerta para reacomodar los alimentos, prosigue el ciclo de
descongelación.
Tecla Tiempo
1 10 seg.
2 20 seg.
3 30 seg.
4 45 seg.
5 1 min.
Tecla Tiempo
6 1 min. 30 seg.
7 2 min.
8 3 min.
9 4 min.
0 5 min.
ESPAÑOL

9
Uso de los controles electrónicos del horno
(HM-1035 P)
Teclas programadas
El horno viene dispuesto de fábrica con las teclas 1-10 preprogramadas.
Para reprogramar las teclas 1-10 o para programar las teclas 11-19 lleve a cabo lo
siguiente.
1. La puerta puede estar abierta o cerrada con la pantalla mostrando : 0.
2. Oprima la tecla PROGRAM (PROGRAMAR).
• En la pantalla aparece PROGRAM (PROGRAMAR).
3. Oprima la tecla numérica que desea programar.
• Si se programa la tecla 4, en la pantalla aparecerá PROG- - 04.
4. Oprima la tecla POWER LEVEL (NIVEL DE POTENCIA) para seleccionar
el nivel de potencia deseado.
• Si lo desea, oprima la tecla POWER LEVEL (NIVEL DE POTENCIA)
para modificar el nivel de potencia (algunos modelos).
• En la pantalla aparece POWER LEVEL (NIVEL DE POTENCIA).
- 100% indica un 100% de potencia de microondas (plena), 80%
indica un 80%, 60% indica un 60% y 40% indica un 40% de potencia
de microondas. Al oprimir continuamente la tecla de nivel de
potencia, el nivel de la potencia ciclará a través de cada uno de los
niveles de manera continua.
5. Oprima la(s) tecla(s) numérica(s) deseada(s) para programar el tiempo de cocción
deseado.
6. Oprima la tecla START/+30 SEC (ARRANQUE/30 seg +) para
guardar la programación para la Etapa 1.
• Si desea programar la Etapa 2 o la Etapa 3, repita los pasos 4
y 5.
• Si no desea programar la Etapa 2 o la Etapa 3, oprima la tecla
STOP/RESET (PARAR/RESTABLECER) para concluir la secuencia
de programación.
NOTA: Si se cierra la puerta o se oprime la tecla STOP/RESET
(PARAR/RESTABLECER) antes de finalizar la programación,
se cancelan las modificaciones y el horno microondas sale
del modo de programación.
La pantalla indica
(PROGRAMAR).
Cuando se oprime la tecla PROGRAM
(PROGAMAR), la pantalla indicará PROGRAM
(PROGRAMAR).
ESPAÑOL

10
Operación con cuadrante (HM-1035 M)
Espacio libre alrededor del horno
A — Deje al menos 10,2 cm (4 pulg.) de espacio libre por la parte superior y a los
lados del horno. La circulación de aire adecuada alrededor del horno enfría sus
componentes eléctricos. Si se restringe la circulación de aire, posiblemente no
funcione correctamente el horno y se reduzca la duración de las piezas
eléctricas.
B — Deje al menos 10,2 cm (4 pulg.) entre la salida de aire, en la parte posterior del
horno, y la pared de fondo.
NO rocíe con pistola NO use cacerolas metálicas
Para cocinar
1. Abra la puerta del horno, introduzca los alimentos y cierre la puerta.
2. Gire la maneta de nivel de potencia hasta la graduación deseada.
• El nivel de potencia se puede fijar en Low (bajo) (17%), Defrost (descongelar)
(33%), Medium (intermedio) (55%), Med. High (intermedio alto) (77%) o High
power (alta potencia) (100%).
3. Gire la maneta de selección de tiempo en sentido horario hasta que aparezca el
valor deseado.
• El tiempo de cocción se puede fijar hasta 10 minutos.
• Si va a girar la maneta de temporización por menos de 2 minutos, gírela más
allá de 2 minutos y luego devuélvala al valor deseado.
4. El horno empieza a funcionar y se inicia la cuenta regresiva del tiempo
establecido.
5. Una vez transcurrido el tiempo de cocción, se interrumpe la emisión de
microondas y suena la señal del horno.
Para interrumpir el funcionamiento
Abra la puerta del horno para interrumpir el funcionamiento o gire la maneta de
selección de tiempo en sentido antihorario hasta “0”. Para reanudar el funcionamiento
del horno microondas, cierre la puerta del horno.
Si había cambiado el tiempo a “0”, deberá reajustarlo.
Para cambiar el tiempo de cocción y cancelar errores
El tiempo de cocción y el nivel de potencia se pueden modificar en cualquier
momento durante el funcionamiento del horno. Gire la (s) maneta (s) al nuevo valor
deseado. Para fijar el tiempo de cocción en cero, gire la maneta de selección de
tiempo en sentido antihorario hasta “0”.
La opción de cuadrante está disponible sólo
en algunos modelos.
ESPAÑOL

11
Cuidado y limpieza
PIEZA RECOMENDACIÓN SOBRE EL CUIDADO Y LA LIMPIEZA
Limpie el microondas aplicándole una solución de detergente suave y agua tibia
mediante una esponja o un trapo sin asperezas. Antes de limpiar el equipo, elimine el
exceso de agua en la esponja o el trapo. Si lo desea, hierva una taza de agua en el
horno de microondas para aflojar la suciedad antes de limpiarlo.
Importante:
• No use detergentes ni limpiadores abrasivos que contengan amoniaco o cítricos.
Podrían deteriorar el acabado.
• Nunca vierta agua por la parte inferior del horno de microondas.
• No use sistemas de limpieza que utilicen agua a presión.
Interior, Exterior y la Puerta
Verifique mensualmente si existe acumulación de partículas a lo largo de la rejilla
filtradora en la parte posterior del horno. Limpie la rejilla con un paño húmedo para
garantizar el flujo adecuado del aire.
Séquela completamente
Ventiladores
del aire de
extracción
Abra la puerta del horno para desactivar el temporizador del horno. Límpielo
aplicándole una solución de detergente suave y agua tibia mediante una esponja o un
trapo sin asperezas.
Panel de control
Antes de llamar al servicio técnico
ADVERTENCIA
Para evitar los electrochoques que pueden causar lesiones personales graves o la muerte, no retire la cubierta o caja externa en
ningún momento. La cubierta o caja externa sólo debe retirarla un técnico de servicio autorizado.
PROBLEMA CAUSA POSIBLE
Cerciórese que el horno está conectado en el circuito
Cerciórese que el horno se encuentra conectado a un circuito polarizado puesto a tierra.
(Póngase en contacto con un electricista para cerciorarse)
Verifique el fusible o cortacircuito.
Verifique que la puerta esté firmemente cerrada.
El horno no funciona.
Cerciórese que el horno está encendido.
Abra y cierra la puerta del horno. Oprima la tecla nuevamente.
Si el horno tiene
desperfectos o muestra:
El control del horno está equipado con un sistema de autodiagnóstico. El sistema de
autodiagnóstico le advierte si se ha producido un error o se ha detectado un
problema.
Cuando el control electrónico indica un problema, siga los pasos listados a
continuación.
1. Registre el número que aparece en la pantalla.
2. Desenchufe el horno, espere 1 minuto y vuelva a enchufar el horno.
• Es posible que la desconexión del suministro eléctrico pueda eliminar el código
de servicio. Si el fallo persiste, póngase en contacto con un técnico de servicio
autorizado.
Si el horno no acepta entradas
cuando se oprima la tecla
Se ha intentado programar el horno por más tiempo que el permitido.
1. Oprima la tecla STOP/RESET (PARAR/RESTABLECER).
NOTA: El tiempo de cocción máximo es de 60 minutos, excepto cuando se cocina a
plena potencia (100%). En caso de plena potencia (100%), el tiempo de cocción
máximo es de 20 minutos.
Si en la pantalla del horno aparece
El horno funciona pero
los alimentos no se
calientan.
Coloque una taza de agua en el horno.
Haga funcionar el horno por un minuto a potencia plena (100%).
Si la temperatura no aumenta, el horno no está funcionando correctamente. Póngase
en contacto con un técnico de servicio autorizado.
Potencia baja (modelos con
cuadrante únicamente)
Verifique el ajuste de control del Nivel de potencia. El control debe fijarse en HIGH (alto).
ESPAÑOLc

1. PLEASE READ all the instructions
before you use the appliance.
2. PLEASE READ AND OBSERVE the
“PRECAUTIONS TO AVOID POSSIBLE
EXPOSURE TO EXCESSIVE MICROWAVE
ENERGY” on this page.
3. This equipment MUST BE EARTHED.
Only plug it into a properly EARTHED
socket head. Please read the
“EARTHING INSTRUCTIONS” on
page 5.
4. ONLY install the appliance in
accordance with the installation
instructions specified in this manual.
5. Some products such as whole eggs
and closed containers, for example,
glass containers with the lid on, could
explode and MUST NOT BE HEATED in
this oven.
6. ONLY use this appliance for the
purpose for which it was designed
and that is described in this manual.
Do not apply chemical products or
corrosive vapours to this appliance.
This type of oven has been
specifically designed to heat, cook or
dry food. It was not designed for
industrial or experimental use.
7. As with any appliance, CHILDREN
must be watched closely whenever
they use it.
8. Check the door cleaning instructions
on page 12 of this product safety
manual.
9. DO NOT heat feeding bottles in this
oven.
10. Open baby food jars before you heat
them and shake or stir the contents
before they are consumed to avoid
burns.
11. DO NOT use this appliance if the wire
or plug are damaged, if it does not
work properly or if it has been
damaged or dropped.
12. This appliance and the power cable
must ONLY be repaired by qualified
technicians. Special tools are required
to repair it. Ask your nearest
authorised technical service to repair
or make adjustments to the
appliance.
13. DO NOT cover or block the filter or
any other outlet in the appliance.
14. DO NOT store the appliance outside.
DO NOT use this product near water,
e.g. near a sink, in a damp basement,
near a swimming pool, or anywhere
similar.
15. DO NOT immerse the wire or plug in
water.
16. Keep the wire AWAY from HOT
surfaces.
17. DO NOT allow the wire to dangle over
the edge of the table or worktop.
18. For commercial use only.
2ENGLISH
IMPORTANT SAFETY REGULATIONS
Recognise this symbol as a SAFETY warning
WARNING
When you use electrical equipment, you must take basic precautions to reduce the risk of burns, electric shock, fire and personal
injury.
PRECAUTIONS TO AVOID POSSIBLE EXPOSURE TO
EXCESSIVE MICROWAVE ENERGY
A. DO NOT attempt to use this oven with the door open as this could result in harmful
exposure to microwave energy. Do not force open the safety latch.
B. DO NOT insert any object between the front of the oven and the door and do not allow
cleaning products or dirt to build up on the seal.
C. DO NOT use the oven if it is damaged. You must make sure that the oven door closes
properly and that the following elements are not damaged:
1. the door (bent)
2. hinges and latches (broken or loose)
3. locking surfaces and door seals.
D. No one, except qualified technicians, must make adjustments to or repair this oven.
KEEP THESE INSTRUCTIONS SAFE

3
ENGLISH
1. Do not use the oven to fry food
completely immersed in oil. The oil
could heat up and be dangerous to
handle.
2. Do not use microwave energy to cook
or reheat eggs in their shell or with the
yolk intact. Pressure could build up
and make them explode. Before you
cook them, perforate the yolk with a
fork or knife.
3. Perforate the skin of potatoes,
tomatoes and similar food before you
cook them in the microwave. If the
skin is perforated, steam can escape
evenly.
4. Do not use the oven without anything
in the chamber.
5. Only heat popcorn in bags specially
designed for use in microwaves. The
time required for the popcorn to
start popping varies depending on
the oven watts. Once they stop
popping, switch the microwave off.
Otherwise the popcorn will become
charred or burnt. Do not leave the
oven unattended.
6. Do not insert standard kitchen
thermometers in the oven. Most
thermometers contain mercury and
could cause electric arcs or damage
the oven.
7. Do not place metal utensils in the
oven.
8. Never use paper, plastic or any other
combustible material that is not
designed for cooking.
9. When you cook with paper, plastic or
any other combustible material, follow
the manufacturer’s instructions for
use.
10. Do not use paper towels that contain
nylon or any other synthetic fibre.
When synthetic fibres heat up they
could melt and set fire to the paper.
11. Do not heat closed containers or
plastic bags in the oven. Food and
liquid could expand quickly and break
the container or bag. Perforate or open
the container or bag before you heat
it.
12. To avoid damaging pacemakers,
consult a doctor or the pacemaker
manufacturer about the effects that
the microwave could have on it.
13. The oven MUST be inspected annually
by an authorised technical service.
Record all inspections and repairs to
keep as a reference.
14. Clean the oven regularly and remove
any traces of food left behind.
15. To avoid the surfaces deteriorating,
keep the oven clean. If the oven is not
cleaned regularly, its service life could
be affected and cause a hazardous
situation.
IMPORTANT SAFETY REGULATIONS
WARNING WARNING
To avoid the oven chamber from setting on fire:
a. DO NOT cook food excessively. Take care with the oven
when you place paper, plastic or other combustible
material inside to speed up cooking.
b. Before you place paper or plastic bags inside the oven,
remove any wire ties.
c. If any material sets on fire inside the oven, keep the oven
door CLOSED, switch it off and unplug the power cable or
cut off the power supply from the fuse or short circuit
board.
d. DO NOT use the oven chamber for storage. DO NOT leave
paper, kitchen utensils or food inside the chamber when
you are not using it.
Due to the surface tension of liquids, such as water, coffee or
tea, they could heat up above their boiling point without
showing signs of boiling.
You will not necessarily see them boiling or bubbling when
you remove the container from the microwave. LIQUIDS
COULD START TO BOIL AND SPLASH WHEN A SPOON OR
OTHER UTENSIL IS INSERTED. To reduce the risk of injury:
i) Do not reheat the liquid.
ii) Stir the liquid before you start heating it and halfway
through.
iii) Do not use containers with straight sides and a narrow
neck.
iv) After you have heated the liquid, leave the container to
stand in the microwave briefly before you remove it.
v) Take care when you insert a spoon or other utensil into
the container.
PRECAUTION
To avoid personal injury or damages to property, please follow these instructions:
KEEP THESE INSTRUCTIONS SAFE

4ENGLISH
Unpack the oven
• Inspect the oven and check that it is not damaged, for example, dents in the door
or chamber.
• If there are any dents or it is broken, contact the vendor immediately.
If the oven has been damaged, do not attempt to use it.
• Remove any material from inside the oven.
• If the oven has been stored in an excessively cold place, wait for a few hours
before you plug it in.
Radio interference
Operating the microwave could cause interference with radios, televisions or similar
oven. Reduce or eliminate interference as follows:
• Clean the oven door and seals in accordance with the instructions in the Care and
cleaning section.
• Place radios, televisions, etc. as far away from the oven as possible.
• Improve radio or television reception by installing an aerial properly.
Where to install the oven
• Do not install the oven near or on heat sources, e.g. pizza ovens or fryers. This
could cause the microwave to malfunction and reduce the service life of the
electrical parts.
• Do not block or obstruct the oven filter. Make sure there is access for cleaning.
• Install the oven on the worktop’s flat surface.
• Place the warning label in a visible place next to the microwave (50 Hz ovens only)
• The socket must be such that the oven can be plugged in from where it is
installed.
A — Leave a gap of at least 10.2 cm (4 inches) above and on each side of
the oven. A proper flow of air around the oven will cool electrical
parts down. A restricted air flow could cause the oven to malfunction
and the service life of the electrical parts to be reduced.
B — Leave at least 10.2 cm (4 inches) between the air outlet at the rear of
the oven and the wall behind it.
Free space around the oven
Installation
DO NOT use a spray gun DO NOT use metal pots
WARNING
WARNING
To avoid risk of electrocution or
death, the oven must be earthed.
To avoid risk of electrocution or
death, do not tamper with the plug.
Earthing instructions
The oven MUST be earthed.
Earthing the oven reduces the risk of
electrocution because this provides a
conductor for the supply in the event of
a short circuit. This oven has a cable
with an earth wire and an earthed plug.
This plug must be connected to a
properly installed and earthed socket.
If you do not understand the earthing
instructions or do not think that the
oven has been properly earthed, contact
an electrician or professional technical
service.
Do not use extension leads.
If the power cable is too short, ask a
qualified electrician to install a three-slot
outlet. This oven must be connected to a
separate circuit with a nominal
capacitance that meets the product
specifications. If the microwave is
installed in the same circuit as other
appliances, the cooking times may need
to be increased and the fuses could
blow.
External equipotential earthing
(only for exports)
The appliance has a secondary earthing
terminal. This terminal provides external
earthing that is used in addition to the
earth prong on the plug. The terminal is
on the outside rear of the oven and is
marked with the following symbol.

5
ENGLISH
Screen and functions (HM-1035 P)
STOP/RESET button
The STOP/RESET button stops the cooking cycle in progress and must be pressed
again to delete the remaining cooking time.
When the STOP/RESET button is used to end changes to the program, the changes are
cancelled.
Single button programming
This function allows each number button to be programmed for a specific cooking
cycle. To use this function, just program the length of time and power level required.
Press the button once and the microwave will start to cook the food. Number buttons
1-10 are preset, but you can change them.
Two button
programming
This function allows up to 10 additional programmed entries. A two-digit number will
be assigned to each entry. When two-button programming is used, the button must be
pressed twice in a period of 2 seconds for the cooking cycle to start.
QTY 2X button
The QTY 2X button doubles the original cooking time. The QTY 2X button can be used
together with single or two-button programming. The maximum cooking time is 60
minutes, except when cooking at full power (100%). When full power (100%) is used,
the maximum cooking time is 20 minutes.
Stage cooking
Stage cooking is a cooking cycle with specific levels and times in which the power is
changed. The user can program up to three different power level changes and the
specific length of time for each power level. Each power level and cooking time
combination is what is called a stage. The stage cooking function is only available in
electronic control models. The maximum cooking time is 60 minutes, except when
cooking at full power (100%). When full power (100%) is used, the maximum cooking
time is 20 minutes.
PROGRAM button
This function allows a number button to be programmed for a power level and specific
time during stage cooking.
POWER LEVEL button
The POWER LEVEL button allows you to program a cooking cycle for a specific power
level (100%, 80%, 60%, 40%).
START/
+ 30 SEC button
The START/+30 SECbutton is used to
start a cooking cycle and increase the
reheat time by 30 seconds.
•The START/+30 SEC button is used to
reheat for 30 seconds at full power
(100%). The oven will start immediately
and 30 seconds will be added to the
countdown each time the button is
pressed, up to a maximum reheat time
of 5 minutes.
Note: The START/+30 SEC button can
only be pressed in manual time input
mode.

6ENGLISH
CHECK PROGRAM button
This function allows you to check the programmed cooking time and the power level
for any programmed button.
1. Press the CHECK PROGRAM button.
•The screen displays CHECK.
2. Press the required number button.
• The screen displays PROG–XX (XX shows the program number).
• The screen displays STAGE- 1, and then the cooking time and the power level
blink. Example: 00:30 HI (00:30 HIGH)
• The same information is displayed on the screen for the next stages.
3. Press the STOP/RESET button to exit the Check program function.
Energy saving mode
This function is used to save energy:
1. Press the CHECK PROGRAM button and hold it down for 3 seconds.
•The screen displays CHECK, the oven beeps and the screen goes blank.
2. To use the oven in Energy saving mode, press any button.
• The screen displays: 0 and all of the keypad functions will be the same as the
Normal mode functions.
• If the keypad is not touched for a period of 10 seconds, the screen will go blank.
3. To disable this mode, press any key and keep the CHECK PROGRAM button held
down for 3 seconds.
• The screen displays CHECK and the oven beeps.
4. Press the STOP/RESET button so that the oven goes back to normal mode.
Program lock mode
This function locks the control panel and prevents the oven from being operated
inadvertently.
1. Press the STOP/RESET button and keep it down for 3 seconds to enable it.
• The oven beeps and the screen displays: 0 next to a button display.
2. Press the STOP/RESET button and keep it down for 3 seconds to disable it.
•The oven beeps and the button display disappears.
Silent mode
This function silences the keypad (except the end of cycle beep). Proceed as follows:
1. Press the QTY 2X buttons and keep it down for 3 seconds.
• The screen displays DOUBLE, the oven makes a noise and the screen displays
MUTE for 1 second. The then screen displays: 0.
2. To disable it, press the QTY 2X buttons and hold it down for 3 seconds.
• The screen displays DOUBLE, the oven makes a sound and the screen displays: 0.
DEFROST button
When DEFROST is selected, the automatic cycle divides the defrost time into alternate
defrost and rest periods by stopping and starting. The maximum defrost time is 60
minutes.
Screen and functions (HM-1035 P)
If these functions are
different to your oven
functions
The functions described in
this manual show the
available functions in the
product range. If your
microwave does not include
all of the options shown, this
is not a mistake. The
information provided applies
to several models in this
product range.

ENGLISH 7
Screen and functions (HM-1035 P)
Cooking screen
SCREENS DESCRIPTION
Programming screen
SCREENS DESCRIPTION
Screen
Depending on the model, some words
and symbols on the screen can be
viewed but are not available. During
normal oven operation, not all of the
elements will be shown at the same
time.
Ready
The screen displays: 0 when the oven
control is ready for inputs.
It is displayed when the oven is ready for inputs.
Shows the cooking time. If a cooking stage is
programmed, the total cooking time is displayed.
Displayed when the QTY2X button is pressed
These settings show the current microwave power level
used.
100%
80%
60%
40%
It is displayed when the oven in is programming mode.
It is displayed when the CHECK PROGRAM button is
pressed
It is displayed when a specific cooking stage is
programmed and when the cooking cycle for a
programmed button is checked The oven beeps when the
numbers are changed (1 to 3).
Oven screen
Oven control
Oven door window and inside
light

8
To stop the oven
Open the oven door or press the
STOP/RESET button to stop the oven
operation. The screen continues to
show the countdown for the time set.
Close the door and press the
START/+30 SEC button to restart the
oven.
To cancel errors
If the oven does not cook, press the
STOP/RESET button to delete the
screen. If the oven cooks, press the
STOP/RESET button once so that the
oven stops, and then again to delete the
screen. If the oven door is open and the
time is displayed on the screen, close
the oven door and press the
STOP/RESET button to delete the
screen.
Does my oven have the
stage programming
option?
No button on the oven shows the stage
programming (it is a hidden function).
Stage cooking is a function that is
present during programming. Consult
the Programming buttons on this page
for more detail.
QTY 2X button
(some models)
To double the cooking time when cooking
more than one portion of food.
The maximum cooking time is 60 minutes
00 seconds, except when cooking at full
power. When full power (100%) is used, the
maximum cooking time is 20 minutes 00
seconds.
1. Open the oven door and put the food
in. Close the door.
• The screen displays: 0. The light will
switch on.
2. Press the QTY 2X button.
• The screen displays DOUBLE
3. Press the button or sequence of preset
buttons (e.g.: button 5)
• The screen displays PROG- 05
4. The oven will start to cook the food
after 1 second. The cooking time shown
on the screen is the sum of the original
cooking time doubled.
How to use the oven electronic controls
(HM-1035 P)
Manual time input
To cook food for a specific time and at a specific power level of your choice.
NOTE: To use the Time Input, you must first press the POWER LEVEL button.
1. Open the oven door and put the food in. Close the door.
• The screen displays: 0. The light will switch on.
2. Press the POWER LEVEL button.
• If you want you can press the POWER LEVEL button to change
the power level (some models).
• The screen displays the power level (e.g.: 100%).
- 100% means 100% microwave power, 80% means 80%, 60%
means 60% and 40% means 40% microwave power. When you press the power
level button continuously, the power level will cycle through each of the levels
continuously.
3. Enter the cooking time using the number buttons.
4. Press the START/+30 SEC button to start the cooking cycle.
• When the cooking cycle finishes, the oven beeps and switches off.
Programmed buttons
To cook food in preset cooking sequences.
1. Open the oven door and put the food in. Close the door.
• The screen displays: 0. The light will switch on.
2. Press the necessary button.
• For single button programming,
only press one button.
• For two button programming,
press the same button twice.
• If the button has not yet been programmed
the screen will display NO DATA.
3. The oven starts to cook the food.
• The screen displays the total cooking time.
4. • When the cooking cycle finishes, the oven beeps and switches off.
Factory settings
DEFROST button
Defrosts food, dividing the total defrost time into alternate defrost and
rest periods by stopping and starting:
1. Open the oven door and put the food in. Close the door.
2. Press the DEFROST button.
• The DEFROST indicator switches on and the screen displays :0.
3. Press the number buttons(s) to enter the necessary defrost time.
4. Press the START/+30 SEC button.
5. The oven starts the cycle.
• The screen displays a countdown that shows the remaining defrost time DEFROST
mode.
NOTE: The oven beeps during the defrost cycle to warn that the food needs to be
turned over or repositioned.
6. Open the door and reposition the food. Close the door.
7. Press the START/+30 SEC button to proceed with the defrost cycle.
NOTE: If you do not open the door to reposition the food, the defrost cycle carries on.
Button Time
1 10 sec.
2 20 sec.
3 30 sec.
4 45 sec.
5 1 min.
Button Time
6 1 min. 30 sec.
7 2 min.
8 3 min.
9 4 min.
0 5 min.
ENGLISH

9
How to use the oven electronic controls
(HM-1035 P)
Programmed buttons
The oven comes from the factory with buttons 1-10 preset.
To reset buttons 1-10 or to program buttons 11-19 proceed as follows.
1. The door can be open or closed with the screen displaying: 0.
2. Press the PROGRAM button.
• The screen displays PROGRAM.
3. Press the number key that you want to program.
• If you program button 4, the screen will display PROG- - 04.
4. Press the POWER LEVEL button to select the necessary power level.
• If you want you can press the POWER LEVEL button to change the
power level (some models).
• The screen displays POWER LEVEL.
- 100% means 100% microwave power, 80% means 80%, 60%
means 60% and 40% means 40% microwave power. When you
press the power level button continuously, the power level will
cycle through each of the levels continuously.
5. Press the desired number buttons(s) to program the necessary cooking time.
6. Press START/+30 SEC to save the program for Stage 1.
• To program Stage 2 or stage 3, repeat steps 4 and 5.
• If you do not want to program Stage 2 or Stage 3, press
STOP/RESET to end the programming sequence.
NOTE: If you close the door or press STOP/RESET before you finish
programming, the changes are lost and the microwave exits
the programming mode.
The screen
displays
When you press PROGRAM, the screen will
display PROGRAM.
ENGLISH

10
Operation with a dial (HM-1035 M)
Free space around the oven
A — Leave at least 10.2 cm (4 inches) above and on the sides of the oven. A proper
flow of air around the oven will cool electrical parts down. A restricted air flow
could cause the oven to malfunction and the service life of the electrical parts to
be reduced.
B — Leave at least 10.2 cm (4 inches) between the air outlet at the rear of the oven
and the wall behind it.
DO NOT use a spray gun DO NOT use metal pots
To cook
1. Open the oven door, put the food inside and close the door.
2. Turn the power level dial to the required level.
• The power level can be set as Low (17%), Defrost (33%), Medium (55%), Med.
High (77%) or High power (100%).
3. Turn the time selection dial clockwise until the required value is displayed.
• The cooking time can be set up to 10 minutes.
• If you are going to turn the time dial to less than 2 minutes, turn it to past 2
minutes and then go back to the required value.
4. The oven starts operating and the countdown begins.
5. Once the cooking time has elapsed, the microwaves stop being emitted and the
oven beeps.
To stop the oven
Open the door to stop the oven or turn the time selection dial anticlockwise to “0”. To
restart the oven, close the door.
If you changed the time to “0”, you need to reset it.
To change the cooking time and cancel errors
The cooking time and power level can be changed at any time while the oven is
operating. Turn the dial(s) to the new required value. To set the cooking time to zero,
turn the time selection dial anticlockwise to “0”.
The dial option is only available in some
models.
ENGLISH
This manual suits for next models
1
Table of contents
Languages:
Other Sammic Microwave Oven manuals

Sammic
Sammic HM-2000 User manual

Sammic
Sammic MO-1000M User manual

Sammic
Sammic HM-1001 User manual

Sammic
Sammic MO-1000 User manual

Sammic
Sammic HM-1900 User manual

Sammic
Sammic MO-1817 User manual

Sammic
Sammic MO-1834 User manual

Sammic
Sammic HM-910 User manual

Sammic
Sammic HM-902 User manual

Sammic
Sammic HM-1001M User manual