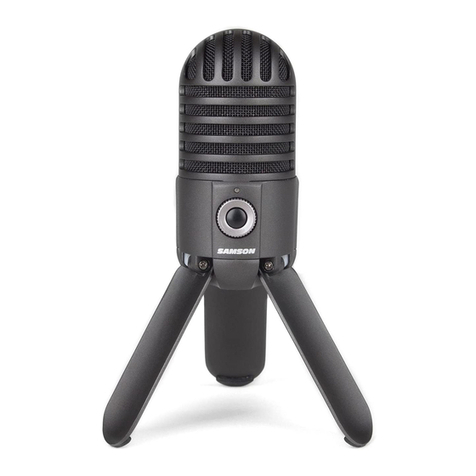
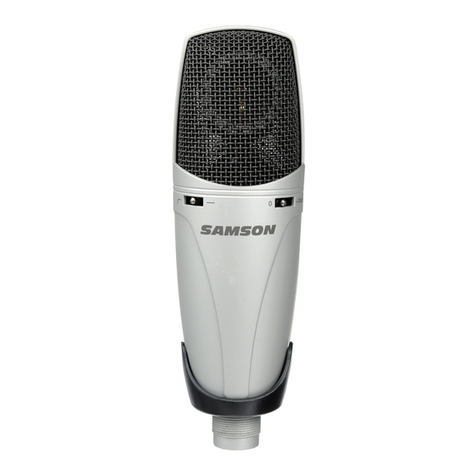
Samson Meteorite User manual

USB Condenser Microphone
Quick Start Guide


EN FR DE ES IT
Congratulations on your purchase
of the Samson Meteorite USB
studio condenser microphone.
The Meteorite represents the
culmination of Samson’s history of
building world-class microphones,
and is a product of Samson’s
position on the leading edge of
digital microphone technology.
The Meteorite is a professional
studio microphone with a large
studio condenser microphone
capsule, housed in a uniquely
designed case with a magnetic base
that allows the microphone to be easily directed at the sound source.
The microphone features high-quality on-board digital converters for
crystal clear recordings. With the Meteorite, you get everything you
need to start recording on your computer - just plug in the connected
USB cable, launch your favorite audio software, and begin recording.
With its extended frequency and fast transient
response, the Meteorite reproduces any
performance with incredible accuracy and
clarity. It is also great for VoIP, chatting and
webcasting.
Whether you’re recording your latest song
idea, a podcast, or your band’s next big
hit, the Meteorite is the simplest and most
comprehensive solution for high-quality
recording on a Mac or PC. Just plug it in and
start creating!
INTRODUCTION

MICROPHONE CALL OUTS
Status Light
Two-color LED illuminates
blue to indicate power
and flashes red when the
input signal is clipping.
Capsule
Large 14mm studio
quality microphone
capsule with Cardioid
polar pickup pattern.
Windscreen
Dual stage grille
protects the capsule
and helps reduce wind
noise and p-popping.
USB Cable
USB cable for interfacing with your
PC or Mac.
Magnetic Base
Microphone mounts
to the magnetic base
providing a full range of
motion and optimal posi-
tioning for any recording
application.

EN FR DE ES IT
Installing the Meteorite is a simple procedure that takes just a few
minutes. Simply connect the included USB cable and begin record-
ing. The following sections of this manual provide detailed instruc-
tions on setting up your Meteorite in Windows or MAC OS.
Windows
1. The first time you plug the Meteorite into a USB port, Windows
will install the universal USB drivers for that port.
2. To set the Meteorite as your default input/recording device, or to
change its settings, open the Control Panel, Hardware & Sound
settings, then click SOUND. Under Recording tab, you can se-
lect the Samson Meteorite from the list of devices and press the
Set Default button to set it as the default audio input device.
3. To set the gain of the microphone, click the Properties button,
and then select the Levels tab. Slide the control until the de-
sired level is reached. If you Find that the microphone red clip
LED is lighting frequently, turn this control down until the LED
no longer flashes red.
Apple MAC OSX
1. To start using the Samson Meteorite, simply plug it in. The LED
will illuminate to indicate it is receiving USB power. The MAC
will recognize the USB audio device and automatically install a
universal driver.
2. To select the Meteorite as the computer’s audio input, open
System Preferences from the dock or the main Apple Menu.
3. Next, open the Sound preferences, choose the Input tab and
select Meteorite. To set the gain of the microphone, adjust the
Input volume slider at the bottom of the Sound dialog box. The
Input Level meter will show the recording level.
Computer Setup

Follow this example as a typical setup to begin recording vocals:
Place the Meteorite microphone
into the desktop base. You will
feel the microphone snap into
place as a result of the
magnetic connection.
Position the
microphone so it is
facing the sound source
by rotating and tilting the
microphone on the base.
Plug the USB cable into
an available port on your
computer.
Quick Start

EN FR DE ES IT
Launch your audio software.
Select the Meteorite as the
input audio device and create
a mono track in your software
for the vocal track.
Press RECORD and start capturing your performance!
Turn the Monitor output ON to hear
the input of the microphone to the
track’s input. If using speakers, you
may want to turn the Monitor output
OFF in order to avoid feedback. Set the level of the Meteorite by
slowly raising the level of the microphone while singing or talking
into the microphone at the performance level. If you see the
peak indicator illuminate red, your
signal will be distorted. Turn the
microphone level control down until
it no longer flashes red.
Quick Start
L R
No Effects
Tracks
Mono 1
Samson Meteorite Mic
My instrument is connected with:
L R
No Effects
Tracks
Input Source:
Recording Level:
Monitor:
Mono 1 (Samson Meteorite Mic)
On

Polar Pattern. . . . . . . . . . Cardioid
Capsule . . . . . . . . . . . . 14mm condenser capsule
Frequency Response . . . . . . 20Hz - 20kHz
Max SPL. . . . . . . . . . . . 120dB
Sample Rate . . . . . . . . . . 44.1/48kHz
Bit Rate . . . . . . . . . . . . 16bit
Power Requirements . . . . . . 5V 50mA
Dimensions . . . . . . . . . . 1.96” x 2.63” (50mm x 67mm)
Weight. . . . . . . . . . . . . 0.26lb (118g)
Specications
At Samson, we are continually improving our products, therefore
specifications and images are subject to change without notice.
THIS DEVICE COMPLIES WITH PART 15 OF THE FCC RULES
CLASS B. OPERATION IS SUBJECT TO THE FOLLOWING TWO
CONDITIONS:
(1) THIS DEVICE MUST NOT CAUSE HARMFUL
INTERFERENCE, AND
(2) THIS DEVICE MUST ACCEPT ANY INTERFERENCE
RECEIVED INCLUDING INTERFERENCE THAT MAY CAUSE
UNDESIRED OPERATION. SUITABLE FOR HOME OR OFFICE
USE.

EN FR DE ES IT
Félicitations ! Vous venez d'acheter
le micro à condensateur USB
de studio Samson Meteorite. Le
Meteorite représente le point
culminant de l'histoire de Samson
dans la fabrication de micros de
classe mondiale, résultat de la place
de Samson à l'avant-garde de la
technologie des micros numériques.
Le Meteorite est un micro de studio
professionnel à grande capsule pour
micros à condensateur, enfermée
dans un boîtier de conception
exclusive, muni d'un support
magnétique permettant de tourner facilement le micro vers la source
sonore. Le micro présente des convertisseurs numériques intégrés
de grande qualité pour des enregistrements d'une pureté cristalline.
Grâce au Meteorite, vous aurez tout ce qu'il vous faut pour enregistrer
sur votre ordinateur : il suffit de brancher le câble USB connecté, de
lancer votre logiciel audio favori et de commencer l'enregistrement.
Grâce à sa réponse en fréquence étendue et
à sa réponse transitoire rapide, le Meteorite
restitue tout spectacle avec une précision et
une limpidité incroyables. Il est également
remarquable pour la Voix sur IP, le 'chat' et la
web-diffusion.
Que vous enregistriez votre dernière idée de
chanson, un podcast ou le prochain gros succès
de votre groupe, le Meteorite est la solution
la plus simple et la plus complète pour un
enregistrement de grande qualité sur Mac ou
sur PC. Il suffit de le brancher... et de créer!
INTRODUCTION

PRESENTATION DU MICRO
Témoin d'Etat
Une LED bicolore s'allume en bleu
pour signaler que l'appareil est sous
tension et clignote en rouge lorsque
le signal d'entrée est en écrêtage.
Capsule
Grande capsule de studio
de 14 mm de qualité
studio avec une forme de
capteur polaire cardioïde.
Paravent
La grille à deux étages
protège la capsule et contribue
à atténuer le souffle du vent et
les éclats dus aux "P".
Câble USB
Câble USB pour l'interfaçage à
votre PC ou Mac
Support magnétique
Le micro se fixe sur un sup-
port magnétique offrant toute
une gamme de mouvements
et un positionnement opti-
mum pour toute application
de type enregistrement.

EN FR DE ES IT
Suivez cet exemple ; c'est une configuration-type permettant de se
lancer dans l'enregistrement des voix.
Introduire le micro Meteorite
dans son support de table. Vous
sentirez le micro se mettre en
place dans un bruit sec par
raccordement magnétique.
Positionnez le micro
pour qu'il soit tourné
vers la source sonore en
le faisant pivoter et basculer
sur le support.
Branchez le câble USB
dans un port disponible de
votre ordinateur.
Prise en mains rapide

Lancez votre logiciel audio.
Sélectionnez le Meteorite comme
dispositif audio d'entrée, puis créez
une piste mono à l'aide de votre
logiciel ; c'est la piste de la voix.
Appuyez sur RECORD et commencez à enregistrer votre spectacle!
Allumez la sortie Moniteur pour entendre
le signal d'entrée du micro à l'entrée de la
piste. Si vous utilisez des haut-parleurs,
vous voudrez peut-être mettre à l'ARRET
la sortie Moniteur pour éviter l'effet Larsen. Réglez le niveau du Meteorite
en augmentant lentement le niveau du micro tout en chantant ou en
parlant dans le micro comme si vous étiez en plein spectacle. Si vous voyez
le témoin PEAK s'allumer en rouge, votre
signal présentera une distorsion. Baissez
le niveau du réglage du micro jusqu'à ce
qu'il cesse de clignoter en rouge.
Prise en mains rapide
L R
No Effects
Tracks
Mono 1
Samson Meteorite Mic
My instrument is connected with:
L R
No Effects
Tracks
Input Source:
Recording Level:
Monitor:
Mono 1 (Samson Meteorite Mic)
On

EN FR DE ES IT
Installer le Meteorite est une opération simple qui ne prend que quelques mi-
nutes. Il suffit de brancher le câble USB ci-joint et de commencer à enregistrer.
Les paragraphes qui suivent fournissent des consignes détaillées sur la configura-
tion de votre Meteorite sous Windows ou MAC OS.
Windows
1. La première fois que vous branchez le Meteorite sur un port USB, Win-
dows installera les pilotes USB universels pour ce port.
2. Pour définir le Meteorite comme étant votre dispositif d'entrée/d'enregis-
trement par défaut, ou pour modifier ses paramètres, ouvrez le Panneau
de Configuration, puis Périphériques et Son, puis cliquez sur SON. Sous
l'onglet Enregistrement, vous pourrez sélectionner le Samson Meteorite
dans la liste des périphériques et appuyer sur le bouton Par défaut pour le
définir comme le périphérique d'entrée son par défaut.
3. Pour régler le gain du micro, cliquez sur le bouton Propriétés, puis
sélectionnez l'onglet Niveaux. Déplacez le curseur jusqu'à ce que le niveau
désiré soit atteint. Si vous estimez que la LED rouge de la griffe de micro
s'allume souvent, baissez ce réglage jusqu'à ce que la LED s'arrête de
clignoter en rouge.
Apple MAC OS X
1. Pour utiliser le Samson Meteorite, il vous suffit de le brancher. La LED
s'allumera pour signaler qu'il reçoit bien du courant par le port USB. Le
Mac reconnaitra le dispositif audio USB et installera directement le pilote
universel.
2. Pour faire de votre Meteorite l'entrée audio de l'ordinateur, il faut ouvrir les
préférences du système à partir du Dock ou du menu principal Pomme.
3. Ensuite, ouvrez les Préférences de son, choisissez l'onglet et sélection-
nez Meteorite. Pour régler le gain du micro, réglez le curseur du volume
d'entrée situé en bas de la boîte de dialogue Son. La barre de mesure du
Niveau d'Entrée indiquera le niveau de l'enregistrement.
Conguration de l'ordinateur

Directivité . . . . . . . . . . . Cardioïdes
Capsule . . . . . . . . . . . . Capsule de condensateur 14 mm
Réponse en fréquence . . . . . 20Hz à 20kHz
Niv. de pression acoustique maxi 120 dB
Fréquence d'échantillonnage . . 44,1/48kHz
Débit . . . . . . . . . . . . . 16 bits
Alimentation . . . . . . . . . . 5V 50mA
Dimensions . . . . . . . . . . 1,96” x 2,63” (50 x 67 mm)
Poids . . . . . . . . . . . . . 0,26 lb (118 g)
Spécications
Chez Samson, nous améliorons nos produits en permanence.
Certaines images et spécifications sont donc susceptibles d'être
modifiées sans préavis.
CET APPAREIL EST CONFORME À LA PARTIE 15 DU RÈGLEMENT
DE LA FCC, CLASSE B. LE FONCTIONNEMENT EST SOUMIS AUX
DEUX CONDITIONS SUIVANTES : (1) CET APPAREIL NE PEUT
CAUSER D'INTERFÉRENCES NUISIBLES ET (2) IL DOIT ACCEPTER
TOUTE INTERFÉRENCE REÇUE, NOTAMMENT CELLES POUVANT
ENTRAÎNER UN DYSFONCTIONNEMENT. IDÉAL POUR TOUTE
UTILISATION AU BUREAU OU À DOMICILE.

EN FR DE ES IT
Herzlichen Glückwunsch für den Kauf
des Samson Meteorite USB Studio
Kondensatormikrofons. Das Meteorite
stellt den Höhepunkt in Samsons
Geschichte des Baus von Weltklasse
Mikrofonen dar und ist ein Produkt,
das aus Samsons führender Position im
Bereich digitaler Mikrofontechnologie
hervorgegangen ist.
Die Meteorite ist ein professionelles
Studio Mikrofon mit einer großen
Kondensatormikrofon Kapsel in Studio
Qualität, untergebracht in einem
einzigartig gestalteten Gehäuse mit
einer magnetischen Basis, mit der das Mikrofon leicht auf die Schallquelle
ausgerichtet werden kann. Das Mikrofon verfügt über qualitativ hochwertige
digitale On-Board Wandler für kristallklare Aufnahmen. Mit dem Meteorite
erhalten Sie alles, was Sie zur Aufnahme auf Ihrem Computer brauchen
- schließen Sie einfach das angeschlossene USB Kabel an, rufen Sie Ihre
bevorzugte Audio Software auf und beginnen Sie die Aufzeichnung.
Mit seinem erweiterten Frequenzbereich und
schnellem Einschwingverhalten gibt das Meteorite
jede Performance mit unglaublicher Genauigkeit
und Klarheit wieder. Es ist ebenfalls ideal für VoIP,
Chat und Webcasting.
Ob Sie Ihre neuesten Song Idee, ein Podcast oder
den nächste Hit Ihrer Band aufnehmen, Meteorite
ist die einfachste und umfassendste Lösung für
qualitativ hochwertige Aufnahmen auf einem Mac
oder PC. Einfach einstecken und erstellen!
EINFÜHRUNG

AUSSTATTUNG DES MIKROFONS
Status-LED
Die zweifarbige LED leuchtet
blau, wenn es mit Strom ver-
sorgt wird, und blinkt rot, wenn
das Eingangssignal abfällt.
Kapsel
Große 14mm Mikro-
fonkapsel in Studio
Qualität mit Nieren-
charakteristik.
Schutzvorrichtung
Dual Phase Gitter
schützt die Kapsel
und reduziert Wind-
und P-Geräusche.
USB Kabel
USB Kabel zur Verbindung mit
Ihrem PC oder Mac.
Magnetfuß
Das Mikrofon wird auf den
Magnetfuß montiert, der
eine flexible Bewegungen
und eine optimale Position-
ierung für jede Aufnahmean-
wendung ermöglicht.

EN FR DE ES IT
Folgen Sie diesem Beispiel für ein typisches Setup, um Gesang aufzunehmen:
Setzen Sie das Meteorite
Mikrofon auf die Tischbasis.
Sie werden spüren, dass das
Mikrofon durch die magnetische
Verbindung einrastet.
Positionieren Sie das
Mikrofon so, dass es frontal
zur Schallquelle gerichtet ist,
indem Sie das Mikrofon auf der Ba-
sis entsprechend drehen und neigen.
Schließen Sie das USB-Kabel
an einen freien Anschluss an
Ihren Computer an.
Quick Start Anleitung

Starten Sie Ihre Audio Software.
Wählen Sie Meteorite als Audio
Eingabegerät und erstellen Sie
in Ihrer Software eine Mono-
spur für die Vokalspur.
Betätigen Sie den AUFNAHME Knopf und beginnen Sie die Aufnahme Ihrer Performance!
Schalten Sie den Monitor Ausgang ON, um den
die Eingabe des Mikrophons auf der Spur zu
hören. Wenn Sie dabei Lautsprecher verwenden,
empfiehlt es sich, den Monitor Ausgang
auszuschalten, um irgendwelche Rückkopplungen
zu vermeiden. Stellen Sie das Aufnahmelevel ein, indem Sie beim Singen oder sprechen
in das Mikrofon in der gewünschten Lautstärke das Level des Mikrofons anpassen. Wenn
Sie sehen, dass die Peak Anzeige rot leuchtet,
wird das Signal verzerrt. Drehen Sie den Regler
des Mikrofoneingangs nach unten, bis die Peak
Anzeige nicht mehr rot blinkt.
Quick Start Anleitung
L R
No Effects
Tracks
Mono 1
Samson Meteorite Mic
My instrument is connected with:
L R
No Effects
Tracks
Input Source:
Recording Level:
Monitor:
Mono 1 (Samson Meteorite Mic)
On

EN FR DE ES IT
Die Installation des Meteorite Mikrofons ist sehr einfach. Sie nimmt nur wenige
Minuten in Anspruch. Verbinden Sie einfach das mitgelieferte USB Kabel und
beginnen Sie die Aufnahme Ihrer Performance. In den folgenden Abschnitten
dieses Handbuchs bieten wir einige detaillierte Anweisungen zum Einrichten
Ihres Meteorite Mikrofons in Windows oder MAC OS.
Windows
1. Wen Sie das erste Mal das Meteorite an eine USB Schnittstelle an-
schließen, installiert Windows die universellen USB Treiber für dieses
Port.
2. Um das Meteorite als Ihr Standard Eingabe- / Aufnahmegerät zu definie-
ren oder die Einstellungen zu ändern, öffnen Sie Systemsteuerung,
Hardware & Sound Einstellungen, und klicken Sie auf SOUND. Unter der
Registerkarte “Aufnahme” können das Samson Meteorite aus der Liste
der Geräte auswählen und klicken Sie dann den Als Standard definieren
Knopf, um das Mikrofon als Standard Audio Eingabegerät einzustellen.
3. Um die Verstärkung des Mikrofons einzustellen, klicken Sie auf Eigen-
schaften und wählen Sie dann die Registerkarte Pegel. Verschieben Sie
den Regler, bis das gewünschte Level erreicht ist. Wenn Sie sehen, dass
die rote Clip LED häufig aufleuchtet, drehen Sie diesen Regler etwas
herunter, bis die LED nicht mehr rot blinkt.
Apple MAC OSX
1. Um das Samson Meteorite zu verwenden, stecken Sie es einfach ein. Die
LED leuchtet auf um anzuzeigen, dass es über USB mit Strom versorgt
wird. Der MAC erkennt das USB Audio Gerät und installiert den univer-
sellen Treiber automatisch.
2. Wählen Sie das Meteorite als das Audio Eingabegerät des Computers.
Öffnen Sie Systemeinstellungen aus dem Dock oder aus dem Apple
Hauptmenü.
3. Öffnen Sie als nächstes die Systemeinstellung “Ton”, wählen Sie die
Registerkarte Eingabe und dann das Meteorite. Um die Verstärkung des
Mikrofons einzustellen, passen Sie den Eingangs- Lautstärkeregler am
unteren Rand der Dialogbox Sound entsprechend an. Die Anzeige des
Eingangspegels zeigt den Aufnahmepegel an.
Computer Setup

Richtcharakteristik . . . . . . . Niere
Kapsel. . . . . . . . . . . . . 14mm Kondensator Kapsel
Frequenzgang . . . . . . . . . 20Hz - 20kHz
Max SPL. . . . . . . . . . . . 120dB
Sample Rate . . . . . . . . . . 44.1/48kHz
Bit Rate . . . . . . . . . . . . 16bit
Stromversorgung . . . . . . . . 5V 50mA
Abmessungen . . . . . . . . . 1.96” x 2.63” (50mm x 67mm)
Gewicht . . . . . . . . . . . . 0.26lb (118g)
Spezikationen
Wir bei Samson verbessern ständig unsere Produkte. Daher können
Spezifikationen und Bilder ohne vorherige Ankündigung geändert werden.
DIESES GERÄT ENTSPRICHT DEM TEIL 15 DER VERORDNUNGEN DER
KLASSE B. DER BETRIEB UNTERLIEGT FOLGENDEN ZWEI BEDINGUN-
GEN: (1) DIESES GERÄT DARF KEINE GEFÄHRLICHEN STÖRUNGEN
VERURSACHEN UND (2) DIESES GERÄT MUSS STÖRUNGEN AKZEP-
TIEREN, DIE EINEN UNERWÜNSCHTEN BETRIEB DIESES GERÄTS
VERURSACHEN KÖNNEN. GEEIGNET FÜR DEN EINSATZ ZU HAUSE
UND IM BÜRO.
Other manuals for Meteorite
1
Table of contents
Languages:
Other Samson Microphone manuals

Samson
Samson C05 User manual

Samson
Samson C01U User manual

Samson
Samson SE10x User manual

Samson
Samson MTR231 User manual

Samson
Samson Q7x User manual

Samson
Samson CO1U User manual

Samson
Samson MTR201 User manual
Samson
Samson Q1U User manual
Samson
Samson CM12C Installation instructions
Samson
Samson C03U User manual