manuals.online logo
Brands
  1. Home
  2. •
  3. Brands
  4. •
  5. Samsung
  6. •
  7. Monitor
  8. •
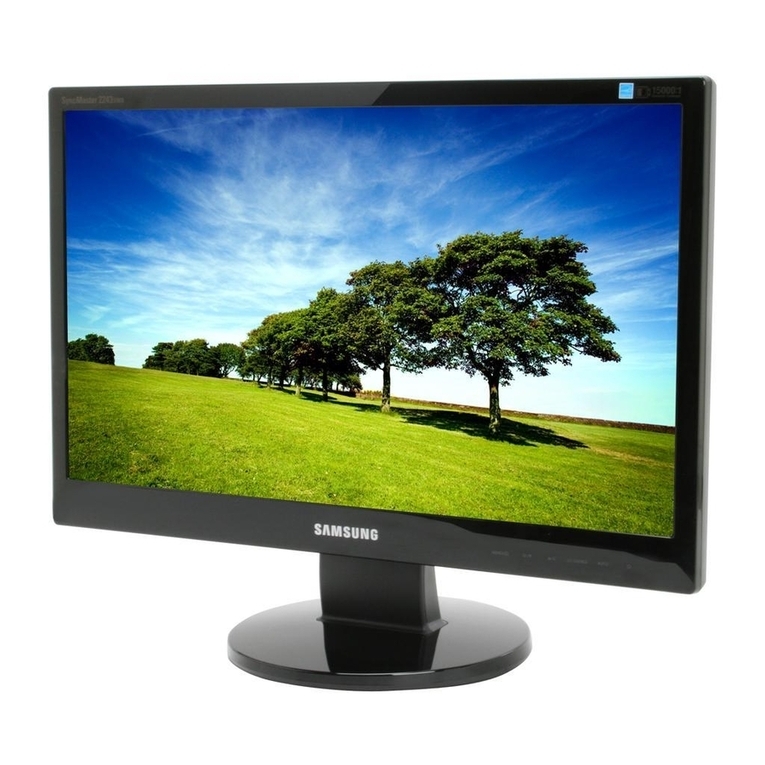
  9. Samsung SyncMaster 225MW User manual

Samsung SyncMaster 225MW User manual

Other manuals for SyncMaster 225MW

1

Other Samsung Monitor manuals

Samsung OH55D User manual

Samsung

Samsung OH55D User manual

Samsung SyncMaster 510 MP User manual

Samsung

Samsung SyncMaster 510 MP User manual

Samsung SyncMaster B1930HD User manual

Samsung

Samsung SyncMaster B1930HD User manual

Samsung SyncMaster 961GW User manual

Samsung

Samsung SyncMaster 961GW User manual

Samsung SyncMaster 570S User manual

Samsung

Samsung SyncMaster 570S User manual

Samsung SyncMaster S19B150N User guide

Samsung

Samsung SyncMaster S19B150N User guide

Samsung 913V - SyncMaster - 19" LCD Monitor User manual

Samsung

Samsung 913V - SyncMaster - 19" LCD Monitor User manual

Samsung 2233BW - SyncMaster - 22" LCD Monitor User manual
Samsung

Samsung 2233BW - SyncMaster - 22" LCD Monitor User manual
Samsung Odyssey Ark Series User manual

Samsung

Samsung Odyssey Ark Series User manual

Samsung DC43H User manual

Samsung

Samsung DC43H User manual

Samsung SyncMaster 723N User manual

Samsung

Samsung SyncMaster 723N User manual

Samsung 997MB - SyncMaster - 19" CRT Display User manual

Samsung

Samsung 997MB - SyncMaster - 19" CRT Display User manual

Samsung SyncMaster 9 Series User manual

Samsung

Samsung SyncMaster 9 Series User manual

Samsung SyncMaster 150MB User manual

Samsung

Samsung SyncMaster 150MB User manual

Samsung C43J890DK Series User manual

Samsung

Samsung C43J890DK Series User manual

Samsung SyncMaster 920LM User manual

Samsung

Samsung SyncMaster 920LM User manual

Samsung SyncMaster 151Q Quick start guide

Samsung

Samsung SyncMaster 151Q Quick start guide

Samsung PPM 50H3 User manual

Samsung

Samsung PPM 50H3 User manual

Samsung SyncMaster 913BM PLUS User manual

Samsung

Samsung SyncMaster 913BM PLUS User manual

Samsung SyncMaster 152 B User manual

Samsung

Samsung SyncMaster 152 B User manual

Samsung SyncMaster S22A650D User manual

Samsung

Samsung SyncMaster S22A650D User manual

Samsung XL30 - SyncMaster - 30" LCD Monitor User manual

Samsung

Samsung XL30 - SyncMaster - 30" LCD Monitor User manual

Samsung SYNCMASTER 320MPN-3 User manual

Samsung

Samsung SYNCMASTER 320MPN-3 User manual

Samsung 932BW - SyncMaster - 19" LCD Monitor User manual

Samsung

Samsung 932BW - SyncMaster - 19" LCD Monitor User manual

Popular Monitor manuals by other brands

ViewSonic VA926-LED user guide

ViewSonic

ViewSonic VA926-LED user guide

Furuno Mu 120c Operator's manual

Furuno

Furuno Mu 120c Operator's manual

Asus VB171D - 17" LCD Monitor Service manual

Asus

Asus VB171D - 17" LCD Monitor Service manual

AOC 9GLR Technical specifications

AOC

AOC 9GLR Technical specifications

DMG RAFFAELLO manual

DMG

DMG RAFFAELLO manual

AOC LM720 - 17" Technical specifications

AOC

AOC LM720 - 17" Technical specifications

Sony Trinitron GDM-F500 Service manual

Sony

Sony Trinitron GDM-F500 Service manual

Memorex MT1701 user guide

Memorex

Memorex MT1701 user guide

ViewSonic VE510s-4 Service manual

ViewSonic

ViewSonic VE510s-4 Service manual

Farenheit T-1503CM instruction manual

Farenheit

Farenheit T-1503CM instruction manual

Ditel DINOS DN129/AT Quick installation guide

Ditel

Ditel DINOS DN129/AT Quick installation guide

Sony SDM-S51 Specifications

Sony

Sony SDM-S51 Specifications

Kenwood DMX1025BT quick start guide

Kenwood

Kenwood DMX1025BT quick start guide

Dell S2409WFP user guide

Dell

Dell S2409WFP user guide

EverFocus EN-7517E instruction manual

EverFocus

EverFocus EN-7517E instruction manual

Dell P3222QE user guide

Dell

Dell P3222QE user guide

Panasonic TH152UX1 - 152" PLASMA TV Service manual

Panasonic

Panasonic TH152UX1 - 152" PLASMA TV Service manual

LG 50PM1M -  - 50" Plasma Panel Service manual

LG

LG 50PM1M - - 50" Plasma Panel Service manual

manuals.online logo
manuals.online logoBrands
  • About & Mission
  • Contact us
  • Privacy Policy
  • Terms and Conditions

Copyright 2025 Manuals.Online. All Rights Reserved.

ii
LCD MONITOR
quick start guide
225MW
Model
Please make sure the following items are included with your monitor.
If any items are missing, contact your dealer.
Contact a local deale
r
to bu
y
o
p
tional items.
Unpacking
Without Stand With Stand
Manual
Quick Setup Guide Warranty Card
(
Not available in all locations
)
User's Guide, Monitor Driver,
Natural Color software
Cable
SyncMaster 225MW
D-Sub Cable
A
udio Cable Power Cord
Othe
r
Remote Control Batteries
(
AAA X 2
)
Cleanin
g
Cloth
Sold se
p
aratel
y
TV Antenna Cable
(
Coaxial Cable
)
RCA Cable (Video-Yellow,
Audio-Red and White
)
Component(PR, PB, Y) Cable
S-
V
IDEO Cable Ear
p
hones/Head
p
hones SCART Cable
DVI Cable DVI to HDMI cable HDMI Cable
RCA to stereo
(
for PC
)
cable
Front
1. AUTO
2. PIP
3.
4. - +
5. MENU
6.
7. Remote Control
Sensor
8. [ ] Power button
9. Power indicator
10. Speaker
1. AUTO
(Available in PC mode only)
When the 'AUTO' button is pressed, the Auto Adjustment screen appears as shown in the
animated screen on the center.
Press to self-adjust to the incoming Analog signal. The values of fine,coarse and position
are adjusted automatically.
2. PIP - Available in PC/DVI Mode
In PC mode, turns on Video or TV screens in PIP mode.
3.
Moves from one menu item to another vertically or adjusts selected menu values.
In TV mode, selects TV channels.
4. - +
Moves from one menu item to another horizontally or adjusts selected menu values.
Adjusts the audio volume.
5. MENU
Use this button for open the on-screen menu and exits from the menu screen or closes
screen adjustment menu.
6.
Activates a highlighted menu item.
Press the button to change the input signal source.
Changing the source is allowed only in external devices that are connected to the monitor
at the time.
To switch Screen modes:
[PC] →[DVI] →[TV] →[Ext.] →[AV] →[S-Video] →[Component] →[HDMI]
>>Click here to see an animation clip
7. Remote Control Sensor
Aim the remote control towards this spot on the monitor.
8. [ ] Power button
Turns the monitor On/Off.
9. Power indicator
This will enable you to see the overall power status of the system. For more information,
see the PowerSaver section.
10. Speaker
You can hear sound by connecting the soundcard of your PC to the monitor.
See PowerSaver described in the manual for further information regarding power saving functions.
For energy conservation, turn your monitor OFF when it is not needed or when leaving it unattended
for long periods.
Rear
(The configuration at the back of the monitor may vary from product to product.)
1. POWER
zPower terminal
Connect the power cord for your monitor to the
POWER on the back of the monitor.
This product may be used with 100 ~ 240VAC(+/-
10%).
2. DVI/PC IN / HDMI/PC/DVI-D AUDIO IN
1. PC
: Connect the signal cable to the PC port on the
back of your monitor.
2. DVI-D
: Connect the DVI cable to the DVI-D port on the
back of your monitor.
3. HDMI/PC/DVI-D AUDIO IN
: Connect the HDMI/PC/DVI-D AUDIO IN terminal at
the back of your monitor to your computer’s sound
card.
3. COMPONENT IN
1. R - AUDIO - L
: Connect the port of the DVD, VCR (DVD / DTV
Set-Top Box) to the R-AUDIO-L port of the monitor.
2. PR, PB,Y
: Connect the VIDEO OUT port of the DVD / DTV
Set-Top Box to the PR, PB,Y input ports using a
component video cable (PR, PB,Y).
4. ANT IN
zConnect the CATV cable or TV antenna cable to the
"ANT IN" port on the rear side of the monitor. Make
sure to use a TV antenna cable (sold separately) as
the antenna cable.
5. HDMI IN
zConnect your headphones to the Headphone
connection terminal.
zConnect the EXT (RGB) port of the monitor to the
DVD Player using a SCART jack.
As for EXT(RGB) port of the monitor, it makes TV or
Video signal input and output.
7.
zConnect the HDMI IN terminal at the back of your
monitor to the HDMI terminal of your digital output
device using a HDMI cable.
6. EXT(RGB)
8.
zThe Kensington lock is a device used to physically
fix the system when using it in a public place.
(The locking device has to be purchased
separately.)
For using a locking device, contact where you
purchase it.
9. S-VIDEO / VIDEO / R - AUDIO - L
See Connecting the monitor for further information regarding cable connections.
1. S-VIDEO / VIDEO
: Input devices such as DVD, VCR or Camcorder
are connected to the VIDEO or S-VIDEO terminal of
the monitor using the Video or S-Video cable.
2. R - AUDIO - L
: Connect the port of the DVD, VCR (DVD / DTV
Set-Top Box) to the R-AUDIO-L port of the monitor.
Remote Control
The performance of the remote control may be affected by a TV or other electronic device operated near
the monitor, causin
g
malfunction due to interference with fre
q
uenc
y
.
1. POWER
2. Number button
3. -/--
4.
5. MENU
6. MUTE
7. Up-Down Left-Right buttons
8. ENTER
9. INFO
10. SOURCE
11. PRE-CH
12. P
13. EXIT
14. P.MODE, M/B (MagicBright™)
15. S.MODE
16. STILL
17. P.SIZE
18. SOURCE
19. TTX/MIX
20. DUAL I-II
21. SLEEP
22. PIP
23. AUTO
1. POWER
Turns the monitor On/Off.
2. Number button
Selects TV channels in the TV mode.
Used to change channels when PIP is selected and the PIP Source is set to TV.
3. -
/
--
(One/Two-Digit channel selection)
Use to select a channel numbered ten or over.
Press this button, and the "--" symbol is displayed.
Enter the two-digit channel number.
4.
A
djusts the audio volume.
5. MENU
Opens the on-screen menu and exits from the menu or closes the adjustment menu.
6. MUTE
Press to mute the sound temporarily.
Displayed on the bottom left of the screen.
Press the MUTE button again to cancel the Mute function.
A
lternatively press the buttons to cancel the Mute function.
7. U
p
-Down Left-Ri
g
ht buttons
Moves from one menu item to another horizontally, vertically or adjusts selected menu
values.
8. ENTER
A
ctivates a highlighted menu item.
9. INFO
Current picture information is displayed on the upper left corner of the screen.
10. SOURCE
Press the 'SOURCE' button to change the input signal source.
Changing the source is only allowed for external devices that are connected to the monitor
at the time.
11. PRE-CH
This button is used to return to the immediately previous channel.
12. P
In TV mode, selects TV channels.
13. EXIT
Exits from the menu screen.
14. P.MODE, M/B
(
Ma
g
icBri
g
ht™
)
Press to select a pre-defined Picture Mode of the monitor or to change the picture
atmosphere as required.
When you press this button, current mode is displayed on the lower center of the screen.
TV / AV / Ext. / S-Video / Component / HDMI : P.MODE
The monitor has four automatic picture settings that are preset at the factory.
Then press the button again to circle through available preconfigured modes.
( Dynamic →Standard →Movie →Custom )
PC / DVI Mode : M/B ( MagicBright™ )
MagicBright™ is a new feature providing the optimum viewing environment depending on
the contents of the image you are watching.
Then press the button again to circle through available preconfigured modes.
( Entertain→Internet →Text →Custom )
15. S.MODE
(
Sound Mode
)
When you press this button, current mode is displayed on the lower center of the screen.
The monitor has a built-in high fidelity stereo amplifier.
Then press the button again to circle through available preconfigured modes.
( Standard →Music →Movie →Speech →Custom )
16. STILL - O
p
erates onl
y
for the CVBS, S-
V
ideo and RF Si
g
j
20. DUAL I-II
STEREO/MONO, DUAL l / DUAL ll and MONO/NICAM MONO/NICAM STEREO can be
operated depending on broadcasting type by using DUAL button on the remote control while
watching TV.
nal SOURCEs.
Press the button once to freeze the screen. Press it again to unfreeze.
17. P.SIZE
Press to change the screen size.
- PC/ DVI mode : Wide / 4:3
- TV / Ext. / AV / S-Video mode : Auto Wide / Wide / 16:9 / Zoom1 / Zoom2 / 4:3
- Component / HDMI mode : Wide / 16:9 / Zoom1 / Zoom2 / 4:3
18. SOURCE - Ad ustable when the PIP function is ON.
Selects the Video SOURCE.
19. TTX/MIX
TV channels provide written information services via teletext.
zTeletext buttons
For more information > TTX / MIX
21. SLEEP
Turns the monitor off after a pre-determined period of time.
22. PIP - Available in PC/DVI Mode
Push the PIP button to turn PIP screen On/Off.
23. AUTO - Available In PC mode Onl
y
A
djusts the screen display automatically.