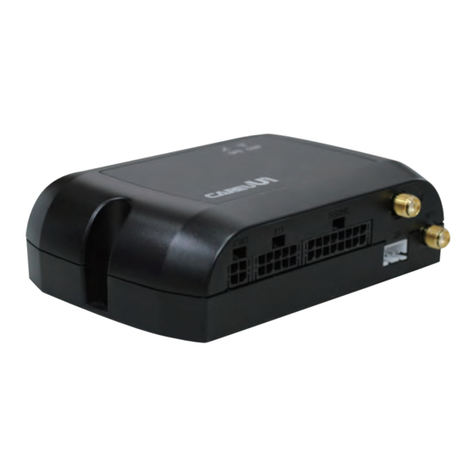
S&T CAREU U1 Lite User manual

CAREU
U1 Lite
Vehicle Tracker
User Guide
Version: 0.1
Reference No.:
Date: March 09, 2012
SYSTEMS & TECHNOLOGY
CORP.

General Information
If any breakdown occurs due to the operation of the described product or users’ improper handling
in accordance with the instructions of the document, S&T shall be liable for the General Conditions
based on the delivery of the described product and the content of the document. This product is not
designed for the use of life support appliances, devices or systems and thence a malfunction of the
product might reasonably be expected to make personal injury. S&T customers using or selling this
product for such applications will take the risk on their own; therefore, it must be agreed S&T will
be fully indemnified from any damages due to illegal use or resale. All information in this document
is subject to change without notice at any time.
Disclaimer
The information, specification, images and photos in this user guide are subject to change without
notice and without obligation to notify any person of such revision change.
Copyright
This user guide, including all photographs, illustrations and software, to name a few, is protected
under international copyright laws, with all rights reserved. This document contains confidential,
restricted and proprietary information that it has been exclusively prepared for the internal use of
certain designated S&T employees, and may not be duplicated or distributed, in whole or in part,
without the prior written consent of S&T’s authorized delegates. Any illegal copying and disclosure
of the document are absolutely prohibited, and violators are liable to the damages caused.
© Systems & Technology Corp.All Rights Reserved

Table of Contents
Chapter 1 Introduction.................................................................................................
1.1 Features...........................................................................................................
1.2 Scope...............................................................................................................
1.3 About CAREU U1 Lite .....................................................................................
1.4 Hardware Architecture .....................................................................................
1.5 Related Document...........................................................................................
Chapter 2 Taking a Tour of CAREU U1 Lite .................................................................
2.1 Dimensions......................................................................................................
2.2 Front View........................................................................................................
2.3 Rear View.........................................................................................................
Chapter 3 Getting Started with CAREU U1 Lite ..........................................................
3.1 Hardware Installation .......................................................................................
3.2 Connector Pin Assignment.............................................................................
3.3 LED Indicator .................................................................................................
3.4 USB Device Driver Installation.......................................................................
3.5 Device Configuration......................................................................................
3.6 Communication Settings................................................................................
3.7 GPS Tracking Configurations.........................................................................
3.8 Firmware Upgrade.........................................................................................
Chapter 4 Technical Specification.............................................................................
Chapter 5 Regulation ..................................................................................................


Chapter 1
CAREU U1 Lite Vehicle Tracker User
Chapter 1. Introduction
Thank you for your purchasing the CAREU U1
Lite Vehicle Tracker. We are very pleased to
introduce you our excellent product, and you will
enjoy great benefits by applying such a smart
device. The CAREU U1 Lite Vehicle Tracker is
an all-in-one device that integrates multiple
applications of GPS (Global Position System),
GSM (Global System for Mobile Communication)
and GIS (Geographic Information Systems) with
each other.
Designed with the latest GPS technology, the
CAREU U1 Lite delivers positioning message by
GSM wireless transmission to GIS platform, and
then helps back-end users proceed with the
analysis and the applications of vehicle transport,
management, anti-theft, security and tracking.
1.1 Features
• Cost effective and easy installation
• SMS, GPRS TCP/ UDP, USSD, FTP communications
• Geo-fencing reports
• Remote configuration
• Real-time tracking (time, distance interval or intelligent mode, and heading)
• Intelligent power management
• Power low/lost alarm
• Journey report wireless downloads
• GSM/GPRS simultaneously
• Mileage report
• User-defined reports
• Firmware upgrade over the air (via GPRS from FTP)
• Up to 20,000 data log capacity

CAREU U1
Lite
V
ehicle
T
racker User
Guide
Chapter 1
1.2 Scope
This document will guides you to start the CAREU U1 Lite Vehicle Tracker. However, as
this document contains basic device configuration only, please see the CAREU U1 Lite
Protocol Document for the advanced information.
1.3 About CAREU U1 Lite
The CAREU U1 Lite Vehicle Tracker transmits the wireless signals such as location,
peripheral, and vehicle control data to a control center. The onboard GPS receiver provides
users with location data including speed, direction, mileage and altitude. It uses an
onboard GSM/ GPRS module to accomplish wireless transmission.
A microcontroller can probe location and command data at regular intervals, derive actions
from location, peripheral and control data, and execute such actions.
Among the best features of the CAREU U1 Lite Vehicle Tracker, in particular, they transmit
data in ASCII mode or binary mode.
Peripheral data indicates the status of various peripherals connected to and/or controlled by
the device. The peripherals include, but not limited to, door locks/un-locks, starter interrupt,
ignition, battery, engine and panic button.
The firmware in the device applies intelligent filtering to overcome coverage limitations for
both GPS and GSM/GPRS networks.
Motion sensor controls the status of the device, whether in sleep, idle or fully-powered
mode, and thereby controls the amount of current consumed by the device.
Backup battery and tamper sensing GPS Antennas primarily indicate the loss of Main
Power and the interruption of GPS antenna connectivity.
The device supports over-the-air firmware upgrade to deliver additional functionality without
physically touching the device once installed.
In consideration of technicality and marketability, the CAREU U1 Lite has so many
excellences to be competitive enough to stand out in the market. With regard to the
technicality, the CAREU U1 Lite saves and records more data even under inactive
communication staus, and it also provides better power management, coexistence of GPRS
and SMS modes. When it comes to the marketability, the CAREU U1 Lite users are
provided with the convenience that its firmware can be upgraded through mini USB
without disassembling the device.

Chapter 1
CAREU U1 Lite Vehicle Tracker User
1.4 Hardware Architecture
As hardware is concerned, the CAREU U1 Lite is comprised of a micro-controller,
regulator, GPS receiver, GSM/GPRS modem, G-Force sensor, flash memory data
storage, I/Os interface and LED status indicators.
• Users can connect PC's HyperTerminal to the Diagnostic/setting port for the AVL
configuration.
• G-Sensor for car accident prevention, car tow-away warning and power management.
• The audio interface supports hand-free phone call.
• GPIO that connects to any customer monitoring points by door switch, anti-thief or
actuators.
• The A/D input that connects the analog signal sensor to the AVL, such as the fuel or
temperature sensor.
1.5 Related Document
[1] CAREU U1 Lite Protocol Document

CAREU U1
Lite
V
ehicle
T
racker User
Guide
Chapter 2
Chapter 2. Taking a Tour of CAREU U1 Lite
This chapter will guide you to the major connectors of the U1 Lite device.
2.1 Dimensions
Dimensions: 108mm x 72mm x 31mm

Chapter 2
CAREU U1 Lite Vehicle Tracker User
2.2 Front View
1 2
5
No.
Name
Description
1
PWR
Power Connector for Car Battery
2
I/O
Input/Output Connector including basic I/O, RS-232
3
GPS
SMA Connector for GPS External Antenna
2.3 Rear View
Mini USB Connector

CAREU U1
Lite
V
ehicle
T
racker User
Guide
Chapter 2
Chapter 3. Getting Started with CAREU U1 Lite
To install the the CAREU U1 Lite device, follow the instructions below for basic operations.
3.1 Hardware Installation
1. SIM Card Installation
• Remove the screw at the bottom of the device to open it. Then you will find the SIM
card slot inside.
• Insert your SIM card into the device with SIM card's gold area down and the
notched corner toward the notched edge of the SIM card socket. Make sure it
is installed correctly in place. Reinstall the cover.

Chapter 3
CAREU U1 Lite Vehicle Tracker User
2. GPS Antenna Connection
• Connect the GPS antenna to the SMA connector jack on the front side of the
device (circled as the illustration below) by completely screwing the GPS
antenna's plug connector.
• It is recommended that a matching torque 7-10 inch pounds (80-110 N.cm)
should be used for the SMA connector.
3. Power and I/O Cable Connection
• Connect 4-wire power cable to the power connector on the front side of the
CAREU U1 Lite device (8~30V)

CAREU U1
Lite
V
ehicle
T
racker User
Guide
Chapter 2
4. I/O Cable Connection
5. Mini USB Cable Connection
7. G-Sensor Installation Consideration
The device uses a 3-axis G-Force sensor to detect the vehicle motion and the
impact on the vehicle. The X, Y and Z axis definition will be affected by the location
of device installation.

Chapter 3
CAREU U1 Lite Vehicle Tracker User
3.2 Connector Pin Assignment
Connector Pin Definition
1. PWR Connector
Pin#
Signal Name
Description
I/O
Remark
1
DC IN
Power supply input
IDC Vin = +8 ~ +30V
Normal = 70mA @ 12V
2
GND
Signal ground
—
3
Ignition
Ignition(ACC) Input
I
DC Vin = +30 ~ +7V (Active high)
4
Output1 Open-Collector
Output1
O
Imax = 300mA
2. I/O Connector
Pin#
Signal Name
Description
I/O
Remark
1
Output 2 Open-Collector
Output 2
O
Imax = 300mA
2
GND
Signal ground
—
3
Input 2 Positive Trigger
input 2
I
DC Vin = +30 ~ +7V (Active high)
4
Input 1 Negative Trigger
input 1
I
DC VIN = +6V ~ 0V (Low Active)
5
NC Not Connected
6Analog Input 1
Analog input 1
I
DC VIN = +30V ~ 0V
7
NC Not Connected
8
NC Not Connected
9
NC Not Connected
10
NC Not Connected

CAREU U1
Lite
V
ehicle
T
racker User
Guide
Chapter 2
3.3 LED Indicator
1. GPS LED Indicator
Power Mode
GPS Status
GPS LED
Power O
f
f
N/A
O
f
f
Low Power
N/A
O
f
f
Full Power
Acquiring
Flash Red (five times/second)
Full Power
T
racking
Solid Red
2. GSM LED Indicator
Power Mode
GSM/GPRS Status
GSM LED
Power O
f
f
N/A
O
f
f
Low Power
N/A
O
f
f
Full Power
Acquiring
Flash Red (three times/
second)
Full Power
Registered
Solid Red

Chapter 3
3.4
USB Device
The CAREU
interface.
In some newer editions of Windows X
"virtual
COM port" device whereby the CAREU
XP's inbox USB drivers. While in some other earlier editions of Windows X
to manually install the USB driver for the CAREU
this section, you will be guided to
T
o install the device driver for the CAREU
to your system with an USB cable as mentioned in
section 3.1
As soon as the connection is made between the CAREU
balloon appears above the notification area saying an USB device is found.
Click on this balloon to start the
Select
No, not this time
USB Device
Driver Installation
The CAREU
U1 Lite communicates
with your host computer by either RS
In some newer editions of Windows X
P
, the CAREU
COM port" device whereby the CAREU
XP's inbox USB drivers. While in some other earlier editions of Windows X
to manually install the USB driver for the CAREU
this section, you will be guided to
how the installation can be done in both cases.
o install the device driver for the CAREU
to your system with an USB cable as mentioned in
section 3.1
.
As soon as the connection is made between the CAREU
balloon appears above the notification area saying an USB device is found.
Click on this balloon to start the
[Found New Hardware]
No, not this time
. Press the
Next
CAREU U1 Lite
V
Driver Installation
with your host computer by either RS
, the CAREU
U1 Lite
device can be installed as a
COM port" device whereby the CAREU
U1 Lite
would automatically access Windows
XP's inbox USB drivers. While in some other earlier editions of Windows X
to manually install the USB driver for the CAREU
U1 Lite
device. In the following content of
how the installation can be done in both cases.
o install the device driver for the CAREU
U1 Lite, connect the CAREU
U1 Lite
to your system with an USB cable as mentioned in
Mini USB Cable Connection
As soon as the connection is made between the CAREU
U1 Lite
and your compute
balloon appears above the notification area saying an USB device is found.
[Found New Hardware]
wizard.
Next
button to proceed.
V
ehicle Tracker User
with your host computer by either RS
-232 or USB
device can be installed as a
would automatically access Windows
XP's inbox USB drivers. While in some other earlier editions of Windows X
P, you would need
device. In the following content of
how the installation can be done in both cases.
U1 Lite
device
Mini USB Cable Connection
on
and your compute
r, a
balloon appears above the notification area saying an USB device is found.

CAREU U1
Lite
V
ehicle
T
racker User
Guide
Chapter 2
1. Automatic Installation
If the wizard prompts to help you install the software for "STMicroelectronics Virtual
COM Port". Select Install the software automatically (Recommended). Press the
Next button to proceed.
The wizard proceeds to install the driver.

Chapter 3
CAREU U1 Lite Vehicle Tracker User
The installation completes.
In [Device Manager], the CAREU U1 Lite device is included under Ports (COM & LPT) as
"STMicroelectronics Virtual COM Port". COM port number is displayed as well.

CAREU U1
Lite
V
ehicle
T
racker User
Guide
Chapter 2
2. Manual Installation
After you select No, not this time, if the wizard only prompts to help you install software
for "USB device", you need to manually install the driver. Select Install from a list or
specific location (Advanced). Press the the Next button to proceed.

Chapter 3
CAREU U1 Lite Vehicle Tracker User
Select Search for the best driver in these locations. Check Include this location
in the search. Press the Browse button to assign where your the CAREU U1 Lite
device driver locates on your local disk.
Press the OK button.
You can download the USB device driver from http://www.systech.com.tw/downloads.php.

CAREU U1
Lite
V
ehicle
T
racker User
Guide
Chapter 2
Press the Next button to proceed.
The wizard proceeds to install the driver.
Table of contents
Other S&T GPS manuals
Popular GPS manuals by other brands

Fugro
Fugro SeaSTAR 8200 HP Specifications
Garmin
Garmin G1000 Columbia 350 Cockpit reference guide
B&G
B&G LCD CHART User's guide and installation instructions
Weenect
Weenect Weenect Pets user guide
TomTom
TomTom Navigator Navigator 2 reference guide
Unizen Technologies
Unizen Technologies BLE Tag user manual
