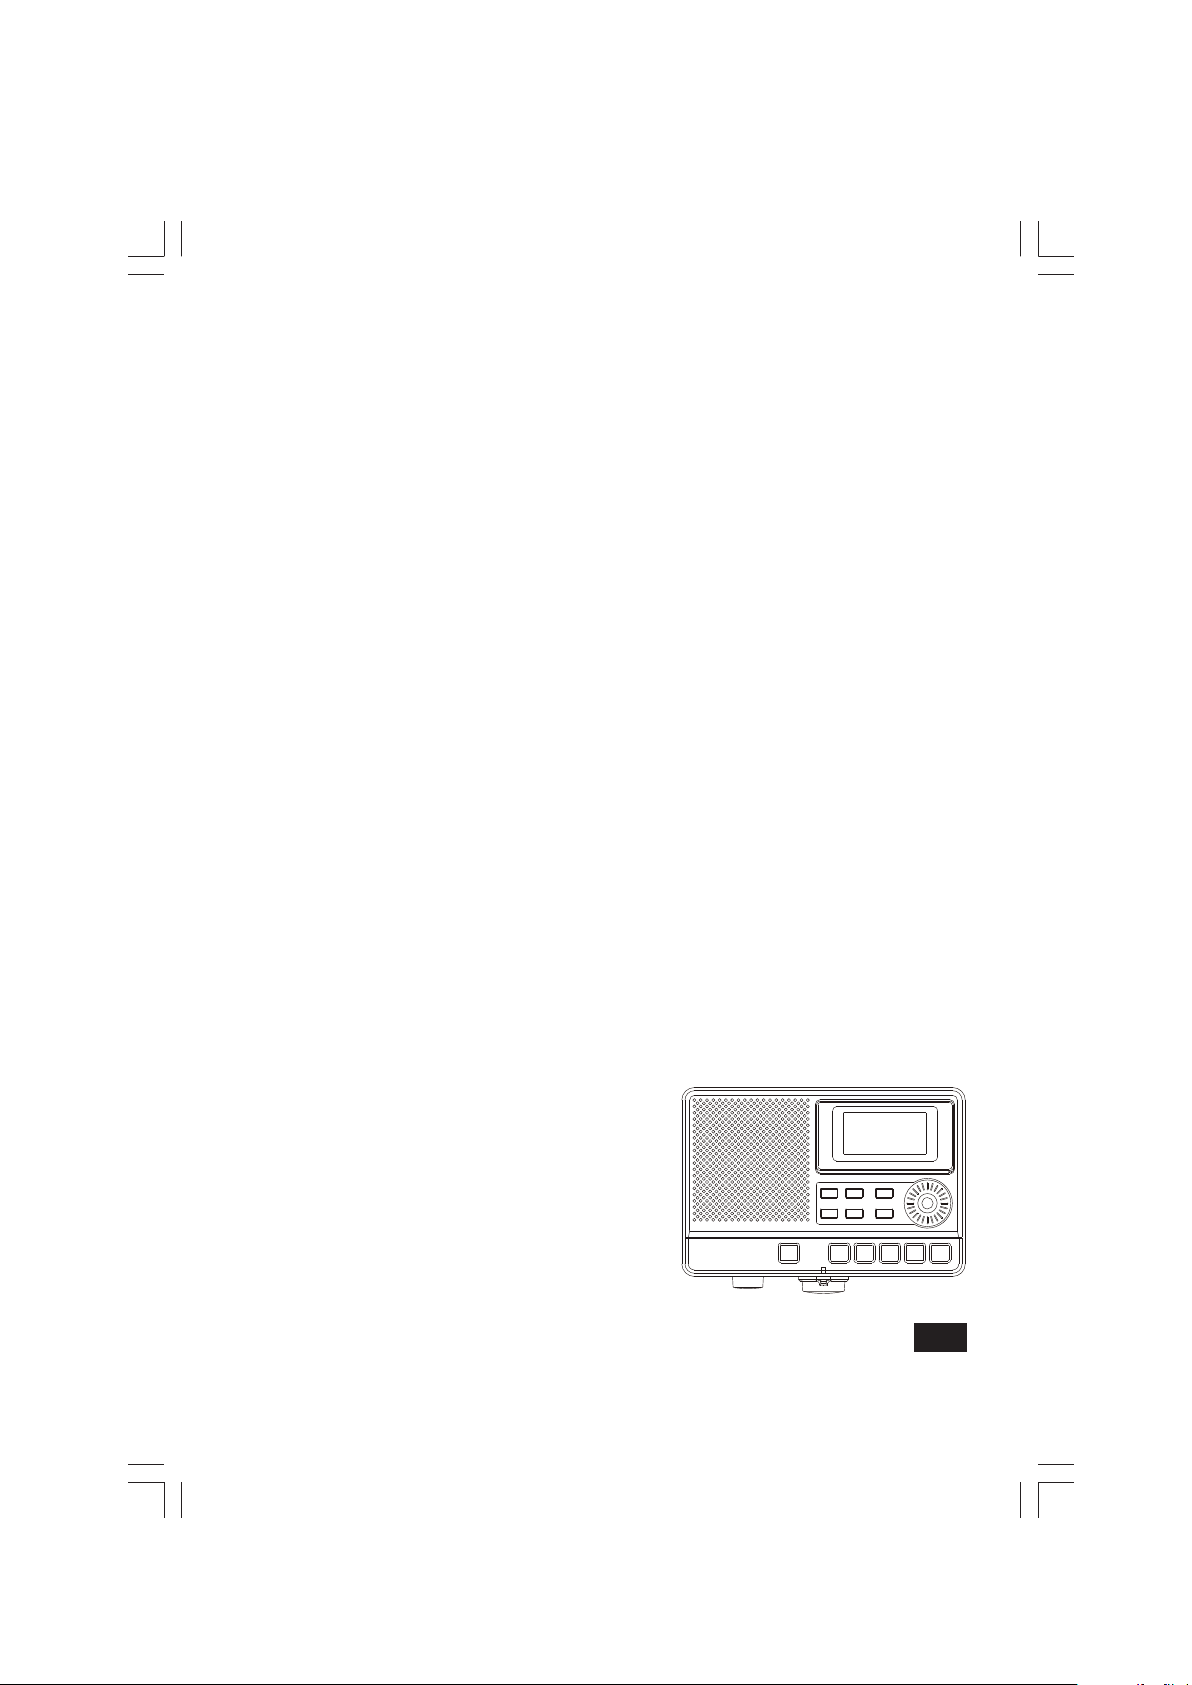
Sangean DAR-101 User manual

DAR-101
Revision 2
中文
GB

01
20
21
19
13 12 11 10 9 81415
16
17
18
1 32
4
5
6
7
22 23 24 25 26 27 28
29 30
34 33 32 31

02
GB
F
E
NL
D
Important safety instructions
1. Read and understand all safety and operating
instructions before the recorder is operated.
2. Retain instruction: The safety and operating
instructions should be retained for further reference.
3. Heed warnings. All warnings on the appliance and
operating instructions should be followed.
4. Follow all operations and use instructions.
5. Water and moisture: The appliance should not
be used near water. Do not use near a bathtub,
washbowl, laundry tub, kitchen sink, wet basement,
swimming pool, etc.
6. Unplug the recorder from the AC power outlet before
cleaning. Use only a damp cloth for cleaning the
exterior of the recorder.
7. Do not place the recorder on an unstable cart, stand,
bracket or table. The recorder may fall, causing
serious personal injury and damage to the recorder.
8. Ventilation: This recorder should be situated so that
its location or position does not interfere with its
proper ventilation. For example, the recorder should
not be used on a bed, sofa, rug or other soft surfaces
that may block the ventilation openings. It should not
be placed in a built-in situation like a cabinet that may
reduce air flow through the ventilation openings.
9. Power sources: The recorder should be operated
only from the type of power source indicated on the
marking label. If you are not sure of the type power
supply to your home, consult your recorder dealer or
power company.
10. Mains adaptor: The mains adaptor should be
positioned so it is not walked on, pinched, or items
placed on top of it. Pay particular attention to wires at
plugs, convenience receptacles, and the point where
they exit from the unit. Unplug the mains adaptor by
gripping the adaptor, not the wire. Operate the recorder
using only the current type of power source indicated.
11. Do not overload wall outlets or extension cords. This
can result in a risk of fire or electric shock. Never
insert objects of any kind into the recorder through
opening. The objects may touch dangerous voltage
points or short out parts. This could cause a fire or
electric shock.
12. If the recorder is left unattended or unused for long
periods of time, unplug it from the wall outlet. This will
prevent damage caused by lightning or power line
surges.
13. If the recorder is left unattended or used for long
periods of time, remove the batteries. The batteries
may leak and damage furniture or your recorder.
14. Do not attempt to service the recorder yourself.
Removing the cover may expose you to dangerous
voltage, and will void the warranty. Refer all servicing
to authorized service personnel.
15. Never push liquids or objects of any kind into
this recorder through opening as they may touch
dangerous voltage points or short-out parts that could
result in a fire or electric shock. Never spill liquid of
any kind on the recorder.
16. The appliance should be serviced by qualified
personnel when:
A. The mains adaptor or the plug has been damaged.
B. Objects have fallen or liquid had been spilled into
the recorder.
C. The recorder has been exposed to rain or water.
D. The recorder does not appear to operate normally
or exhibits a marked change in performance.
E. The recorder has been dropped, or the enclosure
damaged.
Controls and connections
1Speaker
2LCD display
3Pop-up LCD screen
4Menu / Esc button
5Enter button
6Tuning control
7File browser button
8Stop button
9Fast-forward button
10 Play / pause
11 Rewind button
12 Record button
13 Peak indicator
14 Power On / Off button
15 Repeat A-B
16 Playmode button
17 Source button
18 Timer record button
19 Alkaline / NiMH / NiCad rechargeable battery switch
20 SD card slot
21 Battery compartment
22 AC in
23 Digital out
24 Line in
25 Remote
26 Line out
27 Phone in
28 Phone in
29 Volume control
30 Recording level control / Balance control
31 Mic in right
32 Mic in left
33 Telephone / Music / reminder mode switch
34 Headphone jack
Battery operation
1. Remove the battery
compartment cover on the
rear of the unit by pushing
the catch downwards.
Open the battery
compartment door.

03
GB
F
E
NL
D
Before you insert the batteries, if you use non-rechargeable
batteries, make sure the NiMH / NiCad / Alkaline switch
which located inside the battery compartment is
switched to Alkaline position. If you use rechargeable
batteries, make sure to switch NiMH / NiCad / Alkaline
switch to NiMH / NiCad postion.
NOTE
2. Insert four LR6 (AA size) batteries into the spaces in
the compartment. Take care to ensure all batteries are
inserted with the correct polarity as shown on the rear
of your recorder. Close the battery compartment door.
3. When the battery capacity drops below a certain level
the low battery indicator will light. When you see this
indicator you should change the batteries as soon as it
is convenient to do so. Reduced power, distortion and a
“stuttering” sound are also signs that the batteries may
need replacing.
4. If the recorder is not to be used for any extended
period of time it is recommended that the batteries are
removed from the recorder.
We would recommend for economy that the DAR-101
is used via the mains adaptor whenever possible with
battery operation for occasional or stand-by use only.
The batteries should not be exposed to excessive heat
such as sunshine, fire or the like. After use, disposable
batteries should if possible be taken to a suitable
recycling center. On no account should batteries be
disposed of by incineration.
IMPORTANT
Using the AC adaptor
Your recorder is supplied with a Mains Adaptor.
1. Place your recorder on a flat surface.
2. Insert the adaptor plug into the AC socket located on
the right handside of the rear panel.
3. Plug the adaptor into a mains socket outlet. Whenever
the adaptor isused, the batteries are automatically
disconnected.
The AC adaptor should be disconnected from the
mains supply and the recorder when not in use.
1. The mains adaptor is used as the means of
connecting the recorder to the mains supply. The
mains socket used for the recorder must remain
accessible during normal use. In order to disconnect
the recorder from the mains completely, the mains
adaptor should be removed from the mains socket
outlet completely.
2. Noise may occur when recording with a microphone
if the unit is too close to the AC adaptor. In such
a case, keep sufficient distance between the AC
adaptor and the unit.
3. When both batteries are installed and the AC adaptor is
connected, power will be supplied from the AC adaptor.
IMPORTANT
Charging the batteries
Reduced power, distortion and a “stuttering sound” or
low battery sign “ ” flashing on the display are all the
signs that the batteries need to be recharged if you use
rechargeable batteries to power the recorder.
The batteries can be charged only when the recorder
is off. Be sure the battery type switch is set to NiMH /
NiCad position. Charge new batteries fully the first time
before first use. This can take longer depending on the
capacity of the rechargeable batteries.
NOTE
Do not use a mix of old and new rechargeable batteries.
Do not use a mix of full and empty rechargeable batteries.
Do not use batteries that have a different mAh capacity.
Do not use damaged or leaking batteries.
Setting the Clock and Date
Setting the clock time
It is important to set the clock time / date before
recording, as all the name of recorded files are created
based on the recording time and date.
NOTE
The clock display of DAR-101 can be set to 12 or 24 hour
format.
1. Press the Menu button
while the recorder is
switched on.
2. Rotate the Tuning
control until SYSTEM
SETUP is highlighted,
and press the Enter
button to enter the
setting.
3. Rotate the Tuning
control until TIME &
DATE is highlighted,
and press the Enter
button to enter the
setting. Rotate the
Tuning control until TIME is highlighted, and press the
Enter button to enter the setting.
4. Rotate the Tuning control until TIME FORMAT is
highlighted, and press the Enter button to enter the
setting. Rotate the Tuning control to select either 12
or 24 hour format as desired. Press the Enter button
to confirm the setting, and the display will revert to the
previous setting.
5. Rotate the Tuning control until TIME SET is highlighted,
then press the Enter button to enter the setting. While
the hour digit is flashing, rotate the Tuning control to
select the appropriate hour as shown on the display.
Press the Enter button when you finish the setting.
6. Rotate the Tuning control to select the appropriate
minute as shown on the display while the minute digit is
flashing. Press the Enter button to confirm the setting.
Setting the date
1. Press the Menu button while the recorder is switched
on.
2. Rotate the Tuning control until SYSTEM SETUP is
highlighted, and press the Enter button to enter the
setting.

04
GB
F
E
NL
D
Preparing recording inputs
1. Recording with the built-in MIC
Point the microphones
at the sound source
and place the unit in a
stable location where
there is little vibration.
2. Recording with external MIC
Connect external
microphones to the
MIC-L jack and MIC-R
jack at the front panel.
Point the mics at the
sound source and
place the unit in a stable location where there is little
vibration.
Built-in mics is disabled if external microphones are
plugged in.
NOTE
3. Recording an external device (LINE IN)
To record the signal
of an external source
component such as a CD
player, connect the output
of the audio device to the
LINE IN jack at the rear
panel.
4. Recording a telephone call (please refer to
later section of ‘Telephone mode’ for telephone
connection)
To record the signal of telephone calls, connect the
output of a telephone to the Telephone jack at the rear
panel.
Adjusting the recording input level
For best results, the input sensitivity and the recording
level must be set to appropriate values.
In addition to adjusting the INPUT recording level,
try changing the distance and angle between the
microphone and the sound source. The angle and
distance of the microphone can also change the
character of the recorded sound.
NOTE
1. Set the sensitivity of the external / internal
microphone
Setting the input sensitivity means
adjusting the gain of the input section
of the DAR-101, so that the signal
from the built-in mics or from the
external mics can be recorded with
minimal noise and distortion.
Press the Menu button > Press the
Enter button to get into ‘Record
Setup’ > Press Enter button to get into ’Mic Gain’ >
Select options of ‘High’ or ‘Low’.
High: Select this option if the sound source is at distant
from the DAR-101.
Low: Select this option if the sound source is close
to the DAR-101 or if you are recording a band
performance or other loud sound source.
3. Rotate the Tuning
control until TIME &
DATE is highlighted,
and press the Enter
button to enter the
setting.
4. Rotate the Tuning
control until DATE
is highlighted, then
press the Enter button
to enter the setting.
5. Rotate the Tuning control until DATE FORMAT is
highlighted, and press the Enter button to enter the
setting. Rotate the Tuning control to select your
required date format, then press the Enter button
to confirm the setting. The display will revert to the
previous setting.
6. Rotate the Tuning control until DATE SET is highlighted
and press the Enter button to enter the setting. Rotate
the Tuning control to select the desired number for
each setting, then press the Enter button to confirm
and proceed to the next setting.
Preparing for recording
Inserting and removing SD cards
1. Open the SD slot on the right side panel.
2. Insert the SD card into the slot until it clicks into place.
If you want to remove the card, press the SD card in
gently and then release it to allow it to come out.
SD cards up to 2GB and SDHC cards up to 32GB are
supported. However, there are many different card
variants available and not all cards can be guaranteed
to work with this unit.
NOTE
Preparing an SD card for use
In order to use an SD card in this unit, please format it first.
SD card format cannot be performed in DAR-101. Instead,
the unit can only erase the files in it. If SD card format is
demanded, this can be performed on your computer.
NOTE
1. Make sure an SD card is installed
and turn the power on. Press the
Menu button to enter the main menu.
2. Rotate the Tuning control until
‘System Setup’ is highlighted and
press the Enter button to enter the
setting.
3. Rotate the Tuning control until ‘SD
Card’ is highlighted and press the Enter button to enter
the setting. It shows the status of the currently inserted
SD card.
4. Press the Enter button to enter the SD card format
setting. Rotate the Tuning control to highlight YES to
start formatting.
A standard '2GB' SD card Must be formatted into FAT 16
and all the SDHC card MUST be formatted into FAT 32.
IMPORTANT
Microphones
Other audio
equipment or
external sound
source

05
GB
F
E
NL
D
When you change the setting of the’ Mic gain’, the new
setting will be shown on the display.
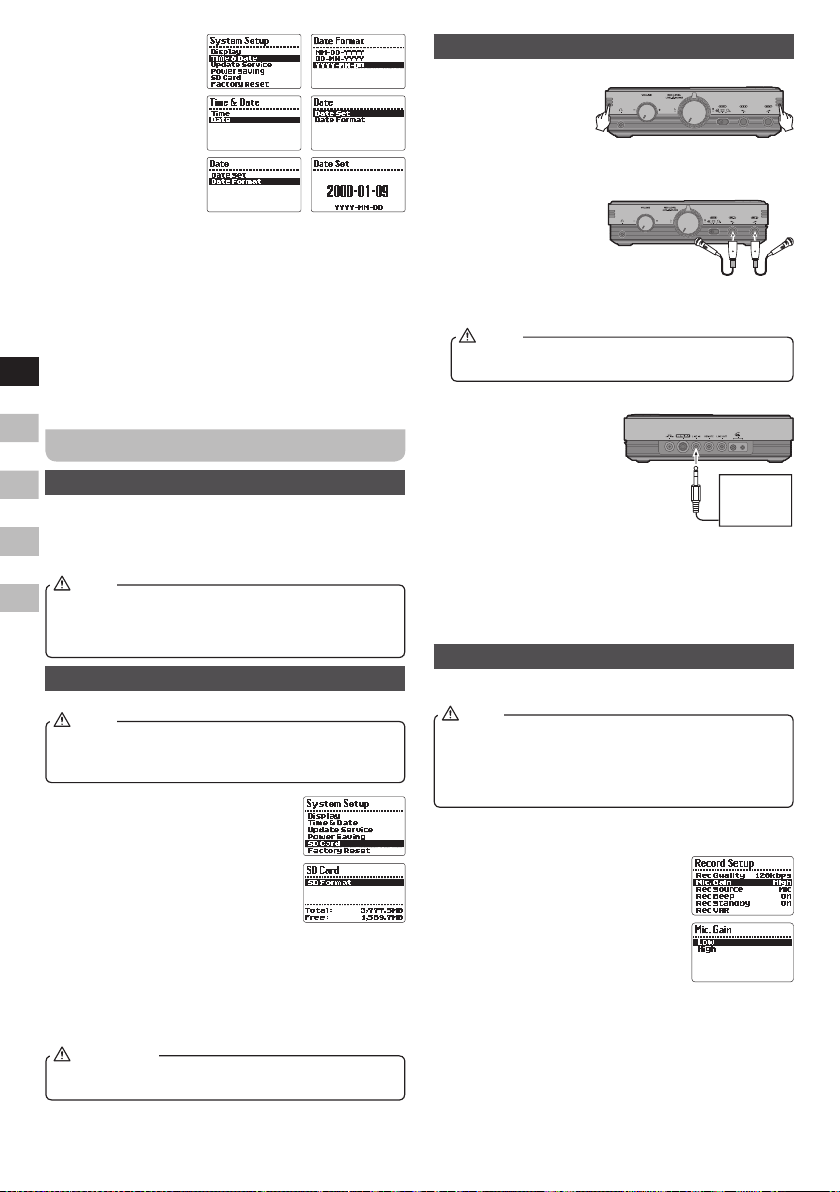
2. Adjust the recording level
●This function allows you to adjust
the volume of recording input. Press
and hold the REC button [ ]
to begin recording and the record
indicator illuminated.
When the input is too high, the PEAK indicator on the
top panel near REC button flashes red. In this case,
rotate the REC LEVEL rotary in anti-clockwise direction
till the PEAK indicator stops flashing.
●In addition, you can adjust the left / right balance of
the recording input. When recording, the input signal is
shown by the level meters on the display and the level
of the input signal from both left and right channel can
be monitored.
If the level meters for the right channel (indicating as R on
the display) moves to the right of the center on the scale,
rotate the balance control anticlockwise to increases the
recording level of left channel and vice versa.
However, normally, the cursor of balance control is highly
suggested to place in the center click to gain the same
recording level from both channels.
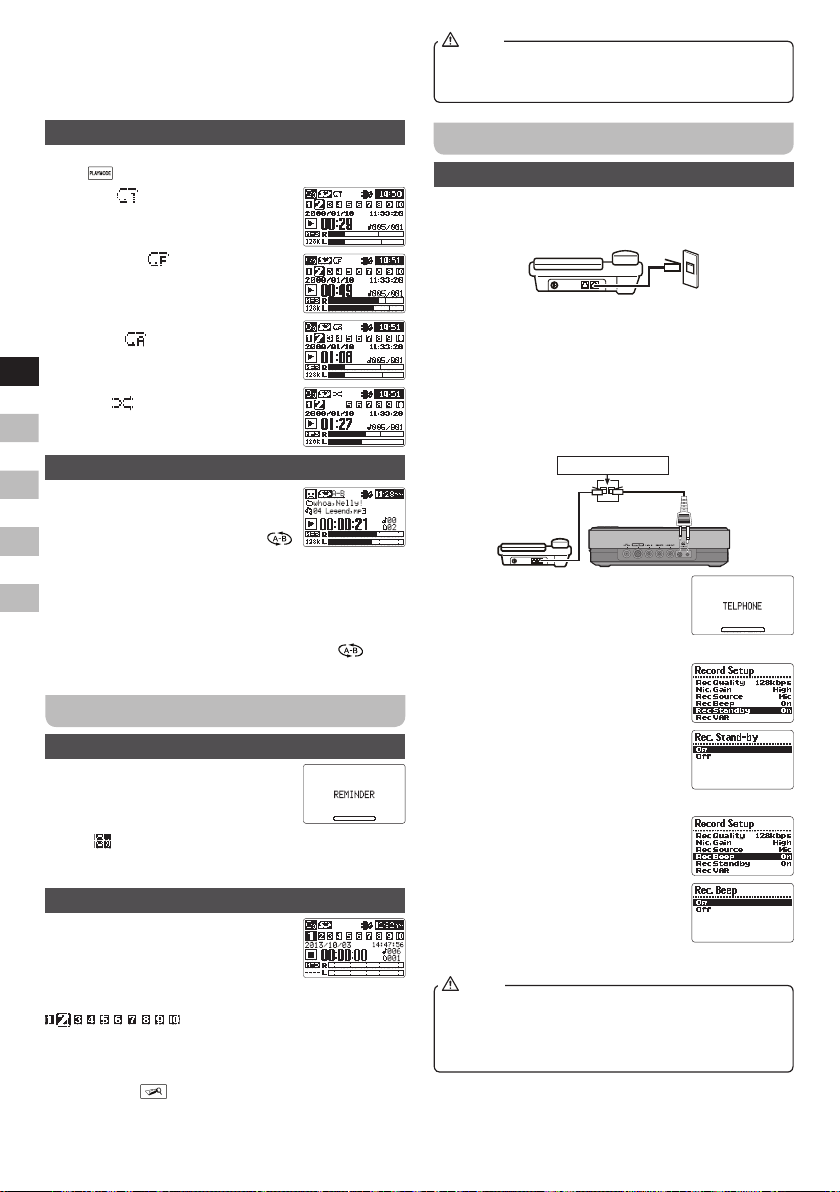
Music mode
Recording
This recorder has 3 recording modes. Slide the Telephone /
Music / Reminder switch to set the recording mode.
Different settings are required for each recording mode.
1. Press and hold the Power button to turn on the recorder.
2. Slide MODE switch to the Music mode ( ) and
‘MUSIC’ will be shown on the display.
3. Press the Rec button to begin
recording standby. ‘RECORD’ will be
shown on the display.
4. You will see ‘Source: Mic.’ flashes on
the display. Press the Source button
to select the recording input option of
mic or Line (i.e. external device).
5. Press and hold the Rec button to start the
recording. Now the Rec indicator is constantly lit in red
and the counter on the display indicates the progress
of the recording and the remainingrecording time.
6. To pause the recording, press pause button and the
Rec indicator flashes. Press the Rec button again
to restart recording in the same file.
In Music mode, you can see all the recorded files
in your SD card. To find the files recorded in Music
mode, they are saved under the folder name of
‘MIC’ or ‘LINE.’ If the files are recorded with built-
in / external mic, they are stored in the ‘MIC folder’;
whereas LINE folder stored all the recoding made
from external source device (i.e. LINE IN).
NOTE
7. To stop the recording, press stop
button and the Rec indicator
stops illuminate. The display shows
the current recorded file.
8. To check the recorded content, press the Play button to
start the playback.
Recorded file name
Recording
source Folder name File name
Microphone MIC MmmddYxx.MP3
Telephone PHONE TmmddYxx.MP3
Reminder MSG RmmddYxx.MP3
LINE IN LINE LmmddYxx.MP3
mm: indicating month, numbered from 01~12
dd: indicating date, numbered from 01~31
Y: indicating Year, A=2010 / B =2011 / C=2012...and so on.
xx: indicating each file’s serial number on a daily basis.
Playback
Listening to a particular track / Deleting a file
On the browse screen, you can view the contents of the
Music folders, which contains the audio files on the SD
card. On this screen, you can also view the information,
play and erase selected audio files.
1. Slide MODE switch to the Music
mode ( ) and press the File
browser button to enter the
browse screen. It shows the contents
of the folder that contains the file
that was played onthe home screen
before the browse screen.
2. Press the File browser button again
to move up to the root menu (i.e.
Directory).
3. To view the files in a specific file
folder in your SD card, rotate the
Tuning control until the desired file folder is highlighted.
Then press the Enter button to enter the folder, all the
files in the folder will be displayed.
4. Rotate the Tuning control to move to the audio file
that you want to play. Press the Enter button and the
display will show PLAY or DELETE. Rotate the Tuning
control to select PLAY, and press theEnter button to
start playing the file. This unit will then play subsequent
tracks from the same folder. Or select DELETE to
erase the selected file.
When playing / pausing a track, press and hold the
File browser button to delete the current track.
NOTE
5. Rotate the Volume control to adjust volume to an
appropriate level.
Controlling playback
1. Press the Play / Pause button to pause playback of the
current track. Press the Play / Pause button again to
resume from the point where it was paused.
2. Press the Rewind button to start playback of the
previous track in the list.
3. Press the Fast-forward button to start playback of the
next track in this list.

06
GB
F
E
NL
D
4. Press and hold for 2 seconds the Fast-forwarding
or Rewind button to move through the current track.
Release the button when the desired point is reached
and press the Play / Pause button to start the playback
again.
Playmode
When playing the files, press and release Playmode
button to select your desired playing options.
Repeat 1: repeatedly play the file
you are listening to.
Repeat Folder: repeatedly play the
files within the folder you are listening
to.
Repeat All: repeatedly play all the
files.
Random: your selected tracks will
be shuffled and play in random.
Repeat File within Section A–B
If you’d like to repeat a file only within
the selected section (e.g. learning
languages), during the playback, press
and release the Repeat A-B button
for the selection you’d like to start and repeat, press the
button once again for the selection you’d like to end the
repeat.
The radio will repeat the playback only within the selected
section and it will show on the display.
The cancel the repeat, simply press the button again.
The display icon will disappear.
Reminder mode
Recording
This recording mode allows you to
record voice note with built-in mic or
external microphones only.
Slide MODE switch to the Reminder
mode ( ) and ‘Reminder’ will be shown on the display.
Follow the recording steps described in recording section
in Music mode.
Playback
Playback function and repeat
options in Reminder mode are very
much the same as in Music mode.
A slight difference is the display
of recorded files. In Reminder mode, top 10 recent
recorded file are displayed on the screen in number (e.g
.) just for easy access. Rotate the
Tuning control to select the file and press the Enter to
start the playback.
If more than 10 voice notes are stored, press the File
browse button to enter the folders (i.e. MSG) for all
the recorded voice notes.
In Reminder mode, you can only see the files recorded
in Reminder mode, which are stored in a folder called
‘MSG.’
NOTE
Telephone mode
Recording
This recording mode allows you to record telephone calls.
●Before recording a telephone call, you need a telephone
patch cord which is included in your package.
●Connecting the telephone line to you DAR-101
1. Disconnect the cable of the phone line from the wall
jack.
2. Plug the supplied phone jack splitter into the wall
socket and connect the cable to the splitter.
3. Connect one side of supplied patch cord to the
splitter and the other end to the Phone-in socket at
the rear of DAR-101.
●Switch to the telephone mode and
‘TELEPHONE’ is shown on the
display. Ensure an SD card with
sufficient space is inserted correctly
in the SD card socket.
●To record a telephone call
automatically: press the Menu button
> rotate the Tuning control to choose
‘RECORD SETUP’ and press the
Enter button to select > choose
‘on’ to record incoming phone calls
automatically / choose ‘off’ to record
the calls manually following the basic
recording steps described in the Music section.
●To set beep tone to notify callers
that recording is taking place: press
the Menu button > rotate the Tuning
control to choose ‘REC BEEP’ and
press the Enter button to select
> Select ‘on’ and press the Enter
button to confirm the setting, beep
tone is activated. Choose ‘off’ to
deactivate the beep tones while
recording.
1. It may be illegal to record a call without both parties
knowledge and consent. Please check with your
local law enforcement.
2. This unit can only record phone calls from land line.
NOTE
phone jack splitter

07
GB
F
E
NL
D
Other Recording setup
Setting the recording quality
This unit allows you to set the recording quality before you
start one.
1. Press the Menu button to enter the
main menu.
2. Rotate the Tuning control until
‘Record Setup’ is highlighted and
press the Enter button to enter the
setting.
3. Rotate the Tuning control until ‘Rec
Quality’ is highlighted and press the Enter button to
enter the setting. There are 3 options of bit rate for you
to choose: 64 kbps / 128 kbps / 192 kbps. The higher
the values provide better recording quality, but they
also take up more space.
Automatic save
If you have recorded a lengthy meeting, playback the
whole clip may be troublesome if you just want to listen
again to certain sections of the recording. To prevent over-
length recording, this function allows you to automatically
save your on-going recording into different files according
to your preset recording duration.
1. In any modes, press the Menu button
to enter the main menu, and rotate
the Tuning control until RECORD
SETUP is highlighted, and press the
Enter button to enter the setting.
2. Rotate the Tuning control until REC
AUTO SAVE is highlighted, and
press the Enter button to enter the
setting.
3. Rotate the Tuning control to choose from 30mins / 1
hour / 2 hours / 4 hours, or choose none to disable
this function. And press the Enter button to confirm the
setting.
Recording with timer record
The recording function of DAR-101 can be set up with a
timer that can start recording and stop at a preset time.
1. First press the Power
button to turn on the
recorder, and switch
the mode switch to
Music mode. Press
and hold the Timer
Record button to
enter the setting.
2. Ensure an SD card
with sufficient space
is inserted correctly
in the SD card slot.
Rotate the Tuning
control until the
MODE is highlighted,
and press the Enter button to select to enter the setting.
3. Rotate the Tuning control to choose the frequency
between ONCE or DAILY, then press the Enter button
to confirm the setting.
4. Rotate the Tuning control until SOURCE is highlighted,
and press the Enter button to enter the setting. Rotate
the Tuning control to select to record from mic or line
In, then press the Enter button to confirm the setting.
5. Rotate the Tuning control until RECORD TIME is
highlighted, and press the Enter button to enter the
setting. The hour digits of the START TIME will begin
flashing. Rotate the Tuning control to select the
required record starting hour, and press the Enter
button to enter the minute setting. Rotate the Tuning
control to select the required record starting minute,
and press the Enter button to confirm the setting.
6. The hour digits of the STOP TIME will begin flashing.
Rotate the Tuning control to select the hour as required,
and press the Enter button to confirm the setting. Then
the minute digits of the stop time will begin flashing.
Rotate the Tuning control to select the minute as
required, and press the Enter button to confirm the
setting. Now the setup of timer record is complete.
When the mic is chosen as the recording source, the
recorder will automatically record from the external mic
if microphones are plugged into the mic inputs, If not,
recorder will record from the internal microphone.
NOTE
Recording monitor
You might get slight latency or a hollow echo while
recording a telephone call or from an external audio
device, this is due to interference of the built-in speaker.
To reduce this obstruct, this function allows you to disable
the built-in speaker while recording.
1. Make sure the unit is in Telephone
recording mode or you are recording
from an external audio device
(LINE IN), as recording from built-in
microphone or from external microphones will mute the
speaker automatically.
2. Press the Menu button to enter the main menu.
3. Rotate the Tuning control until ‘RECORD SETUP’ is
highlighted and press the enter button to enter the
setting.
4. Rotate the Tuning control till ‘Rec Monitor’ is highlighted
and press the Enter button to enter the setting.
5. Rotate the Tuning control to select ‘on’ to allow the
speaker output sound during recording. Choose ‘off’ to
disable speaker output during recording and a speaker
icon with a cross ( ) shows on display.
While in Telephone recording mode or you are
recording from an external audio device (LINE IN),
press the Playmode button to mute or unmute the
speaker.
NOTE
VAR function (Voice Activated Recording)
The auto record function makes it possible to have the
DAR-101 start and stop recording automatically, according
to the input signal level. When the level exceeds a certain
threshold, recording starts, and when it remains below the
threshold for a given length of time, recording stops. This
is convenient to collect ideas while composing a music
piece, or to record spoken comments at a meeting or
conference.
1. Press the Menu button to enter the main menu.

08
GB
F
E
NL
D
radios providing special Remote Switch connection.
This function allows you to record radio stations
preset in your radio. The remote switch works with the
Sangean ATS-909, CCRadio plus, and Radio Shack
DX398 (all above not supplied).
2pcs of 3.5Φmm wire (not supplied) are required for
connection. Connect Remote jack on DAR-101 to the
Remote jack of your required recording input (e.g.
ATS-909X), then use the second wire to connect the
Line in jack of DAR-101 to the Line out jack of your
recording input.
Please refer to the radio or device’s manual for proper
operation of this feature.
Advanced setting and information
Contrast & backlight
1. Press the Menu
button to enter the
main menu.
2. Rotate the Tuning
control until SYSTEM
SETUP is highlighted,
and press the Enter
button to enter
the setting. Rotate
the Tuning control
until DISPLAY is
highlighted and press the Enter button.
3. Rotate the Tuning control until LCD CONTRAST is
highlighted, and press the Enter button to enter the
setting. Rotate the Tuning control to adjust the setting
from 1 – 12.
4. Rotate the Tuning control until LCD BRIGHTNESS is
highlighted, and press the Enter button to enter the
setting. Rotate the Tuning control to adjust the setting
from 1 – 9.
Power saving
You can set the recorder to automatically turn off after a
preset time has elapsed to save the power.
power saving works when there is no ongoing playback,
recording or any other kinds of operation.
NOTE
1. Press the Menu button to enter the
main menu.
2. Rotate the Tuning control until
SYSTEM SETUP is highlighted,
and press the Enter button to enter
the setting. Then rotate the Tuning
control until POWER SAVING is
highlighted, and press the Enter
button to enter the setting.
3. Rotate the Tuning control to adjust the power saving
time from 1, 3, 5, 10, 30 and 60 minutes, and press the
Enter button to confirm the setting. Or select “Off” to
disable the function.
Software version
1. To view the software version of your recorder, press the
Menu button to enter the main menu.
2. Rotate the Tuning
control until RECORD
SETUP is highlighted,
and press the Enter
button to enter the
setting.
3. Rotate the Tuning
control until RECORD
VAR is highlighted,
and press the Enter
button to enter the
setting.
4. Rotate the Tuning control until VAR SET is highlighted,
and press the Enter button to enter the setting. Then
rotate the Tuning control to choose ON and press the
Enter button to activate the VAR function.
5. Rotate the Tuning control until VAR SENS is
highlighted, and press the Enter button to enter the
setting of VAR sensitivity.
Sensitivity can be set on LOW, MID and HIGH. High is
the most sensitive and can be used when there is little
background noise and you would like to record people in
a room, such as a meeting.
Timer play function
You can set up a specified time with the timer play
function of DAR-101, and your recorder will automatically
play your audio tracks according to your preset time.
1. Press the Menu button to enter the
main menu.
2. Rotate the Tuning control until MODE
is highlighted, and press the Enter
button to enter the setting. Choose
the setting from Once and Daily by
rotating the Tuning control and press
the Enter button Or choose OFF to
disable the timer play.
3. Rotate the Tuning control until PLAY
TIME is highlighted, and press the
Enter button to enter the setting. The
hour digit of START TIME will begin
to flash. Rotate the Tuning control
to choose the hour as required,
and press the Enter button to finish
the setting. Then the minute digit will begin flashing.
Rotate the Tuning control as before to set the minute
as required, and press the Enter button to finish the
setting.
4. Then the hour digits of STOP TIME will begin to flash.
Rotate theTuning control to set the hour as desired,
and press the Enter button. The minute digits will then
begin to flash. Rotate the Tuning control as before to
set the minute as required, and press the Enter button
to finish the setting.
5. Now you have set the timer play of your DAR-101. The
recorder will automatically start playing the files from
your SD card device when the preset time is reached.
Your preset time can be activated in power off mode.
NOTE
Using the REMOTE jack
This unit has a REMOTE jack to which you can connect

09
GB
F
E
NL
D
2. Rotate the Tuning
control to highlight
SYSTEM SETUP,
and press the Enter
button. Rotate the
Tuning control to
highlight UPDATE
SERVICE, and press
the Enter button to enter the setting.
3. Rotate the Tuning control again to highlight
SOFTWARE VERSION, and press the Enter button to
view the software version of your recorder.
4. To update your software version from the connected
storage device, choose SEARCH FOR UPDATE and
press the Enter button.
The recorder will update its software to the version in your
storage device. The display will show the files found in
your storage device for update.
System reset
If your recorder fails to operate correctly, or some digits
on the display are missing or incomplete, carry out the
following procedure.
1. Switch on your recorder, and press the Menu button to
enter the main menu.
2. Rotate the Tuning control until SYSTEM SETUP is
shown on the display, and press the Enter button to
enter the setting.
3. Rotate the Tuning control to highlight FACTORY
RESET, and pressthe Enter button to enter the setting.
Choose YES by rotating the Tuning control and press
the Enter button. The setting of your recorder will be
reset to the default value.
Headphone socket
A 3.5mm headphone socket
located on the left hand
side on the front of your
recorder is provided for use
with either headphones or
Earphone.
Inserting a plug automatically mutes the internal speaker.
Please be aware that the sensitivity of headphones can
vary widely. We therefore recommend setting volume to
a low level before connecting headphones to the unit.
It is also recommended to reduce the volume before
unplugging your headphones.
Excessive sound pressure from earphones and
headphones can cause hearing loss.
IMPORTANT
Digital output
The system can be used as
a separate external device
by connecting this output to
Hi-Fi amplify system which
equips with a digital input.
digital output is disabled while recording.
NOTE
Software upgrade
Things to do before performing software upgrade:
●Make sure connect with power supply or insert
batteries with the amount of power remaining for proper
operation during software upgrade.
●Disable all setup (including Sleep, Alarm and Timer
Record setup) to prevent activation during software
upgrade, which in turn may cause software upgrade
failure.
●If software upgrade failure occurs, upgrade cannot
be performed anymore. It is necessary to send
back to Sangean Service department for repair.
Before returning the repaired unit, please contact:
Please note that free repair service or free of charge
replacement do not cover issues regarding software
upgrade failure.
Following the procedures below:
1. Download upgrade files / firmware (DAR-101.rat) from
the link below: http://www.sangean.com Extract files of
‘nemo.bin’ and ‘Boot.sei’ and copy these files into SD
card.
2. Connect power supply or insert batteries. To prevent
from power failure, you can connect both main power
adaptor and insert batteries.
3. Insert SD card to your DAR-101.
4. Press the Power button to turn on the radio.
5. Rotate the Volume control to adjust the volume to an
appropriate level, so that you can hear the beep tone
when software upgrade complete.
6. Press the Menu
button > enter
‘System Setup’
> enter ‘Update
Service’ > enter
‘Search for update’
> press the Enter
button to proceed
upgrade procedure.
At the start of the
upgrade you hear 5
short beep tones. For
approx. 1 minute, the upgrade procedure completes
followed by a long beep tone.
Do not press any buttons or turn off the unit while
upgrading.
IMPORTANT
7. Unplug the power adaptor or remove the batteries.
8. Remove the SD card from the unit and use PC to
delete the upgrade files on the SD card to prevent files
interference with other upgrade firmware which may
cause damage of the unit.

10
GB
F
E
NL
D
Specications
Power Requirements
Mains DC: 7.5V / 0.8A
Battery 4 X 1.5V Size “AA” / UM-3 / LR6 (Alkaline / Ni-HM)
Charging current 500mA+_100mA (Ni-HM battery only)
SD card format FAT32 / FAT16 (! Not support NTFS format)
Circuit Features
Loudspeaker 8ohm 3" full range
Output Power 1W
Headphone socket 3.5mm dia. stereo
Line in socket 3.5mm dia.
MIC-IN 5mVrms to -3dBV of max recording level @ REC level at 1/2
LINE-IN 500mVrms to -3dBV of max recording level @ REC level at 1/2
LINE OUT 1Vms @ 0dB
Recording frequency response 30Hz ~ 20kHz (-3dB)
Recording peak indicating level -5dBV
Headphone OUTPUT power 3mW + 3mW
If at any time in the future you should need to dispose of this product please note that: Waste electrical
products should not be disposed of with household waste. Please recycle where facilities exist. Check with
your Local Authority or retailer for recycling advice. (Waste Electrical and Electronic Equipment Directive)
The company reserves the right to amend the specification without notice.
※ The barcode label on the product is dened as below:
Serial number
Production month
Production year
Product code
Other manuals for DAR-101
2
Table of contents
Other Sangean Recording Equipment manuals