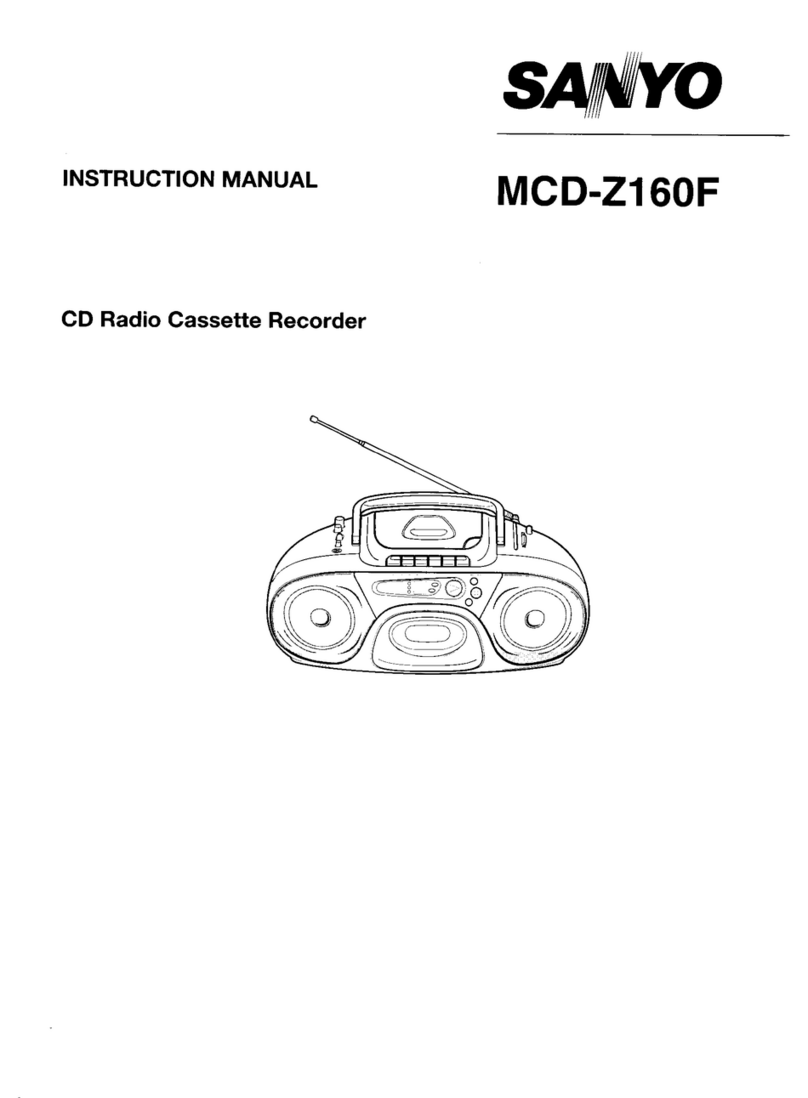
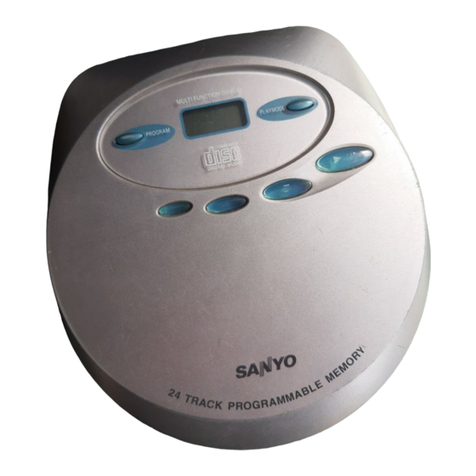
Sanyo MCD-UB685M User manual

MCD-UB685M
INSTRUCTION MANUAL
CD Portable Radio Cassette Recorder
ENGLISH
SVENSKA
ITALIANO
ESPAÑOL
PORTUGUÊS
8 - 18
19 - 29
30 - 40
41 - 50
43 - 51
52 - 61
62 - 70
71 - 79
ENGLISH
SVENSKA
ITALIANO
ESPAÑOL
PORTUGUÊS
3 - 61
62 - 88
89 - 115
116 - 142
143 - 170
171 - 197
198 - 224
ENGLISH
FRANÇAIS
SVENSKA
ITALIANO
PORTUGUÊS
8 - 34
3 - 61
62 - 88
89 - 115
116 - 142
143 - 170
171 - 197
198 - 224
FRANÇAIS
ESPAÑOLESPAÑOLESPAÑOLESPAÑOL
PORTUGUÊSPORTUGUÊS
685XEcover.indd 1 2008.7.11 4:37:13 PM

1
CLASS 1 LASER PRODUCT
LUOKAN 1 LASERLAITE
KLASS 1 LASERAPPARAT
CAUTION-INVISIBLE LASER RADIATION WHEN OPEN AND
INTERLOCKS DEFEATED. AVOID EXPOSURE TO BEAM.
ADVARSEL-USYNLIG LASER STRÅLING VED ÅBNING, NÅR
SIKKERHEDSAFBRYDERE ER UDE AF FUNKTION, UNDGÅ
UDS ÆTTELSE FOR STRÅLING.
VARNING-OSYNLIG LASER STRÅLNING NÄR DENNA DEL
ÄR ÖPPNAD OCH SPÄRR ÄR URKOPPLAD. STRÅLEN ÄR
FARLIG.
VORSICHT! -UNSICHTBARE LASERSTRAHLUNG TRITT
AUS, WENN DECKEL GEÖFFNET UND ENN
SICHERHEITSVERRIEGELUNG ÜBERBRÜCKT IST. NICHT,
DEM STRAHL AUSSETZEN.
VARO !- AVATTAESSA JA SUOJALUKITUS OHITETTAESSA
OLET ALTTIINA NÄKYMÄTTÖMÄLLE LASERSÄTEILYLLE.
ÄlÄ KATSO SÄTEESEEN.
CAUTION - USE OF CONTROLS OR ADJUSTMENTS OR PERFORMANCE OF PROCDURES
OTHER THAN THOSE SPECIFIED HEREIN MAY RESULT IN HAZARDOUS RADIATION EXPO-
SURE.
ACHTUNG – WENN ANDERE ALS DIE HIER SPEZIFIZIERTEN BEDIENUNGS- ODER
JUSTIEREINRICHTUNGEN BENÜTZT ODER ANDERE VERFAHRENS-WEISEN AUSGEFÜHRT
WERRDEN, KANN DIES ZU GEFÄHRLICHER STRAHLUNGSEXPOSITION FÜHREN.
ATTENTION – LʼEMPLOI DʼORGANES DE COMMANDE OU DE RÉGLAGE, OU LʼEXÉCUTION
DE PROCÉDURES, AUTRES QUE CEUX SPÉCIFIÉS DANS LE MODE DʼEMPLOI, PEUT PRO-
VOQUER UNE EXPOSITION DANGEREUSE AU RAYONNEMENT.
OPGELET – HET GEBRUIK VAN REGELAARS OF HET MAKEN VAN AFSTELLINGEN E.D. DIE
NIET IN DEZE GEBRUIKSAANWIJZING ZIJN BESCHREVEN KAN LEIDEN TOT SCHADELIJKE
STRALINGEN.
VARNING! OM APPARATEN ANVÄNDS PÅ ANNAT SÄTT ÄN VAD SOM BESKEIV I DENNA BRU-
KSANVISNING, KAN ANVÄNDAREN UTSÄTTAS FÖR OSYNLIG LASERSTRÅLNING, SOM ÖV-
ERSKRIDER GRÄNSEN FÖR LASERKLASS 1.
VAROITUS! LAITTEEN KÄYTTÄMINEN MUULLA KUIN TÄSSÄ KÄYTTÖOHJEESSA MAINITULLA
TAVALLA SAATTAA ALTISTAA KÄYTTÄJÄN TURVALLISUUSLUOKAN 1 YLITTÄVÄLLE NÄ-
KYMÄTTÖMÄLLE LASERSÄTEILYLLE.
CAUTELA – LʼUSO DI COMANDI, AGGIUSTAMENTI O PROCEDIMENTI DIVERSO DA QUELLO
QUI SPECIFICATO PUÒ DAR LUOGO AD ESPOSIZIONE A RADIAZIONI PERICOLOSE.
PRECAUCION – EL USO DE CONTROLES O AJUSTES, O PROCEDIMIENTOS DE OPERACI-
ON DIFERENTES DE LOS ESPECIFICADOS EN ESTE DOCUMENTO RESULTARAN EN EX-
POSICION PELIGROSA A LA RADIACION.
CUIDADO – O USO DOS CONTROLOS OU AJUSTES OU DESEMPENHOS DE PROCEDIMEN-
TOS OUTROS QUE NÃO OS ESPECIFICADOS NAS INSTRUÇÕES DE OPERAÇÃO PODEM
RESULTAR EM PERIGOSAS EXPOSIÇÕES À RADIAÇÃO.
685XE1-7.indd 1 2008.7.23 8:51:14 AM

2
[ENGLISH]
Your SANYO product is designed and
manufactured with high quality materials and
components which can be recycled and reused.
This symbol means that electrical and electronic
equipment, at their end-of-life, should be disposed
of separately from your household waste.
Please dispose of this equipment at your local
community waste collection/recycling centre.
In the European Union there are separate
collection systems for used electrical and
electronic products.
Please help us to conserve the environment we
live in!
[DEUTSCH]
Ihr SANYO Produkt wurde entworfen und
hergestellt mit qualitativ hochwertigen
Materialien und Komponenten, die recycelt und
wiederverwendet werden können.
Dieses Symbol bedeutet, daß elektrische
und elektronische Geräte am Ende ihrer
Nutzungsdauer von Hausmüll getrennt entsorgt
werden sollen.
Bitte entsorgen Sie dieses Gerät bei Ihrer örtlichen
kommunalen Sammelstelle oder im Recycling
Centre.
In der Europäischen Union gibt es
unterschiedliche Sammelsysteme für Elektrik- und
Elektronikgeräte.
Helfen Sie uns bitte, die Umwelt zu erhalten, in
der wir leben!
[FRANÇAIS]
Votre produit Sanyo est conçu et fabriqué avec
des matèriels et des composants de qualité
supérieure qui peuvent être recyclés et réutilisés.
Ce symbole signifie que les équipements
électriques et électroniques en fin de vie doivent
être éliminés séparément des ordures ménagères.
Nous vous prions donc de confier cet équipement
à votre centre local de collecte/recyclage.
Dans lʼUnion Européenne, il existe des systèmes
sélectifs de collecte pour les produits électriques
et électroniques usagés.
Aidez-nous à conserver lʼenvironnement dans
lequel nous vivons !
Les machines ou appareils électriques et
électroniques contiennent fréquemment des
matières qui, si elles sont traitées ou éliminées
de manière inappropriée, peuvent sʼavérer
potentiellement dangereuses pour la santé
humaine et pour lʼenvironnement.
Cependant, ces matières sont nécessaires au
bon fonctionnement de votre appareil ou de votre
machine. Pour cette raison, il vous est demandé
de ne pas vous débarrasser de votre appareil ou
machine usagé avec vos ordures ménagères.
[NEDERLANDS]
Sanyo producten zijn ontwikkeld en gefabriceerd
uit eerste kwaliteit materialen, de onderdelen
kunnen worden gerecycled en weer worden
gebruikt.
Het symbool betekent dat de elektrische en
elektronische onderdelen wanneer deze vernietigd
gaan worden, dit separaat gebeurt van het
normale huisafval.
Zorg ervoor dat het verwijderen van de apparatuur
bij de lokaal erkende instanties gaat gebeuren.
In de Europese Unie wordt de gebruikte
elektrische en elektronische apparatuur bij de
daarvoor wettelijke instanties aangeboden.
Alstublieft help allen mee om het milieu te
beschermen.
685XE1-7.indd 2 2008.7.23 8:51:15 AM

3
[SVENSKA]
Din SANYO produkt är designad och tillverkad av
material och komponenter med hög kvalitet som
kan återvinnas och återanvändas.
Denna symbol betyder att elektriska och
elektroniska produkter, efter slutanvändande,
skall sorteras och lämnas separat från Ditt
hushållsavfall.
Vänligen, lämna denna produkt hos Din lokala
mottagningstation för avfall/återvinningsstation.
Inom den Europeiska Unionen finns det separata
återvinningssystem för begagnade elektriska och
elektroniska produkter.
Vänligen, hjälp oss att bevara miljön vi lever i!
[ITALIANO]
Il vostro prodotto SANYO è stato costruito da
materiali e componenti di alta qualità, che sono
riutilizzabili o riciclabili.
Prodotti elettrici ed elettronici portando questo
simbolo alla fine dellʼuso devono essere smaltiti
separatamente dai rifiuti casalinghi.
Vi preghiamo di smaltire questo apparecchio al
deposito comunale.
NellʼUnione Europea esistono sistemi di raccolta
differenziata per prodotti elettrici ed elettronici.
Aiutateci a conservare lʼambiente in cui viviamo!
[ESPAÑOL]
Los productos SANYO están diseñados y
fabricados con materiales y componentes de alta
calidad, que pueden ser reciclados y reutilizados.
Este símbolo significa que el equipo eléctrico y
electrónico, al final de su ciclo de vida, no se debe
desechar con el resto de residuos domésticos.
Por favor, deposite su viejo “televisor” en el
punto de recogida de residuos o contacte con su
administración local.
En la Unión Europea existen sistemas de
recogida específicos para residuos de aparatos
eléctricos y electrónicos.
Por favor, ayúdenos a conservar el medio
ambiente!
[PORTUGUÊS]
O seu produto SANYO foi concebido e produzido
com materiais e componentes de alta qualidade
que podem ser reciclados e reutilizados.
Este símbolo significa que o equipamento eléctrico
e electrónico no final da sua vida útil deverá ser
descartado separadamente do seu lixo doméstico.
Por favor, entregue este equipamento no seu
ponto local de recolha/reciclagem.
Na União Europeia existem sistemas de recolha
separados para produtos eléctricos e electrónicos
usados.
Por favor, ajude-nos a conservar o ambiente em
que vivemos!
[SUOMI]
SANYO-tuotteesi on suunniteltu ja valmistettu
korkealaatuisista materiaaleista ja osista, joita
voidaan kierrättää ja käyttää uudelleen.
Tämä symboli tarkoittaa, että sähkölaitteet ja -osat
on niiden käyttöiän päättyessä hävitettävä erillään
kotitalouden jätteistä.
Toimita laite paikalliseen jätteenkeräys/
kierrätyskeskukseen.
Euroopan unionin alueella on erilliset
keräysjärjestelmät käytetyille sähkölaitteille ja
-osille.
Auta meitä suojelemaan ympäristöä jossa
elämme!
685XE1-7.indd 3 2008.7.23 8:51:15 AM

4
This set complies with the EMC Directive 2004/108 and with the LVD Directive 2006/95.
Dieses Gerät entspricht der EMC-Direktive 2004/108 und der LVD-Direktive 2006/95.
Cet appareil est en conformité avec la directive EMC 2004/108 et avec la directive BT 2006/95.
Dit toestel is in overeenstemming met EMC-richtlijn 2004/108 en met LVD-richtlijn 2006/95.
Detta set uppfyller EMC-direktivet 2004/108 och Lågspänningsdirektivet 2006/95.
Questo set aderisce alle direttive EMC 2004/108 e alle direttive LVD 2006/95.
Este aparato cumple con la Directiva EMC 2004/108 y con la Directiva LVD 2006/95.
Este conjunto satisfaz a Directiva EMC 2004/108 e a Directiva LVD 2006/95.
Fig. 1
1. 2. 3.
Fig. 2
21 543
6
7
8
9
10
11
12
13
14
15
16
17
18
19 20 21 22 23 24 25
26
28
OPEN
6 5
1
2
7 8
43
OPEN
27
MONO
FM MODE
BEAT CANCEL
ST
33
29
30
32
31
685XE1-7.indd 4 2008.7.23 8:51:16 AM

5
Fig. 3
Fig. 5
Fig. 4
Remote sensor
Détecteur de télé-
commande
Sensor remoto
Sensor remoto
Fig. 6 Fig. 7
Within approx.
7 meters
A 7 mètres environ
Dentro de aproxi-
madamente 7 metros
Num raio de cerca de
7 metros
12
3
4
5
6
7
8
685XE1-7.indd 5 2008.7.23 8:51:20 AM

6
Fig. 8
Fig. 9
Removing the SD card
Retrait de la carte SD
Cómo sacar la tarjeta SD
Ta ut SD-kortet
685XE1-7.indd 6 2008.7.23 8:51:24 AM

7
Fig. 11 Fig. 12
Fig. 13
Fig. 10
Video/Auxiliary equipment
Équipement vidéo/auxiliaire
Equipo auxiliar de video
Video/Equipmento Auxiliar
685XE1-7.indd 7 2008.7.23 8:51:27 AM

8
CONTROLS (Fig.1)
1. Headphones socket (PHONES)
2. CD Compartment Lid
3. USB port
4. Tuning control (TUNING)
5. Band select switch (BAND)
6. SD card loading slot
7. Frequency indicator
8. Record button (REC)
9. Play button (PLAY)
10. Rewind button (REW)
11. Fast forward button (F. FWD)
12. Stop/Eject button (STOP/EJECT)
13. Pause button (PAUSE)
14. Bass expander button (BASSXPANDER)
15. Surround button (SURROUND)
16. Volume control (VOLUME)
17. Function switch (CD/USB/SD, RADIO, LINE
IN, TAPE/OFF )
18. USB/SD function button (USB/SD)
19. Skip/Search down/File select button
(f/FILE-)
20. Memory/Folder select button
(MEMORY/FOLDER)
21. Skip/Search up/File select button
(FILE+/e)
22. CD function button (CD)
23. Repeat/Random button
(REPEAT/RANDOM)
24. Stop button (STOP n)
25. Play/Pause button (PLAY/PAUSE i)
26. Display
27. Cassette holder
28. Remote sensor (IR)
29. FM mode/Beat cancel switch
(FM MODE/BEAT CANCEL)
30. Telescopic aerial
31. Line in socket (LINE IN)
32. AC input socket (AC INPUT~)
33. Battery compartment lid
PRECAUTIONS
- The apparatus shall not be exposed to dripping
or splashing.
- No object filled with liquid, such as vase shall
be placed on the apparatus.
- Do not use where there are extremes of
temperature (below 5 oC or exceeding
35 oC).
- Because of the CD playerʼs extremely low
noise and wide dynamic range, there
might be a tendency to set the volume on
the amplifier unnecessarily high. Doing so
may produce an excessively large output
from the amplifier which could damage your
speakers.
- Sudden change in the ambient temperature
may cause condensation to form on the opti-
cal lens inside the unit. If this happens, take
out the disc, leave the unit for about 1 hour,
and then proceed to operate.
- Where the MAINS plug or an appliance
coupler is used as the disconnect device,
the disconnect device shall remain
readily operable.
- To be completely disconnect the power input,
the mains plug of apparatus shall be discon-
nected from the mains.
- Do not install this equipment in a con-
fined space, such as a book case or built in
cabinet.
- The rating label is located on the bottom of
the unit.
- The mains plug of apparatus should not be
obstructed OR should be easily accessed
during intended use.
- The ventilation should not be impeded by
covering the ventilation openings with items,
such as newspapers, table-cloths, curtains
etc.
- No naked flame sources, such as lighted
candles, should be placed on the apparatus.
- Minimum distances around the apparatus for
sufficient ventilation.
- Attention should be drawn to the environ-
mental aspects of battery disposal.
ENGLISH
685XEEn.indd 8 2008.7.23 8:39:13 AM

9
REMOTE CONTROL
Controls (Fig. 3)
1. Play/Pause button (i)
2. Stop button (n)
3. CD function button (CD)
4. Repeat/Random button
(REPEAT/RANDOM)
5. USB / SD function button
(USB/SD)
6. Batteries compartment (back of the unit)
7. Skip/Search/File select buttons
(f /FILE-, SKIP/SEARCH, FILE+/ e)
8. Memory/Folder select button
(MEMORY/FOLDER)
Inserting batteries (Fig. 4)
Install two “AAA/R03” batteries (not supplied).
Note:
Always remove batteries if the remote controller
is not to be used for a month or more. Batteries
left in it may leak and cause damage.
Remote control range (Fig. 5)
The buttons on the remote controller perform
similar function to similarly marked buttons on
the mains unit.
POWER SUPPLY
AC Power
Connect one end of the mains lead to the AC
INPUT ~ socket and the other end to an AC outlet.
Note:
- The installed batteries are automati-
cally disconnected when the mains lead is
connected to the unit.
- The FUNCTION switch is mounted on
the secondary side. The unit is not discon-
nected from mains, even switched off.
Battery power
Installing batteries
Install eight “D/R20” batteries (not supplied) as
shown in Fig. 2.
Caution on batteries
To prevent battery electrolyte leakage, which may
result in injury and damage to the unit or other
objects, observe the following precautions:
1. All batteries must be installed with the proper
polarity (see diagram on the rear of the unit).
2. Do not mix new with old or used batteries.
3. Only use batteries of the same type and
brand.
4. Remove the batteries when they are not to be
used for a long period time.
5. When the batteries have become discharged,
they must be disposed of in a safe manner
which complies with all applicable laws.
6. Battery shall not be exposed to excessive heat
such as sunshine, fire or the like.
GENERAL OPERATION
Adjusting the volume
Turn the VOLUME control.
Bass expander button
Press the BASSXPANDER button to Z ON to
enhance the bass sound.
Surround sound button
Press the SURROUND button to Z ON, a 3 di-
mensional sound effect is created.
Headphones
Connect stereo headphones (not supplied) to the
PHONES socket for monitoring or for private
listening. The speakers are automatically
disconnected when headphones are connected.
- Excessive sound pressure from earphones
and headphones can cause hearing loss.
685XEEn.indd 9 2008.7.23 8:39:14 AM

10
CD PLAY
Use compact discs bearing the symbol shown
in Fig. 6. In addition to conventional 12cm CDs,
this system can be used to play 8cm CDs without
an adapter.
1. Set the FUNCTION switch to CD/USB/SD.
2. Press the CD compartment lid (OPEN/ CLOSE
portion) to open it. “OP” appears on the dis-
play.
3. Place the disc with the label facing up on the
turntable (Fig. 7). (Place only one disc at a
time.)
4. Press the CD compartment lid (OPEN/ CLOSE
portion) to close it.
The total number of tracks on the disc appears
on the display.
5. Press the PLAY/PAUSE i button.
The current track number appears. Play starts from
the first track.
- To start play from the desired track, select the
track by using the f or e button, then
press the PLAY/PAUSE i button.
Note:
If no disc is loaded or the disc is located with the
label facing down “no” appears. If these occur,
load the disc correctly or replace the damaged
disc.
Notes on handling compact discs
- Do not expose the disc to direct sunlight,
high humidity or high temperature for ex-
tended periods of time.
- Discs should be returned to their cases after
use.
- Do not apply paper or write anything on the
disc surface.
- Handle the disc by its edge. Do not touch
the playing surface (glossy side).
- Fingerprints and dust should be carefully
wiped off the playing surface of the disc
with a soft cloth.
Wipe in a straight motion from the center to
the outside of the disc.
- Never use chemicals such as record clean-
ing sprays, antistatic sprays or fluids, ben-
zene or thinner to clean compact discs.
Temporarily stopping play
Press the PLAY/PAUSE i button, “k” ap-
pears on the display. To resume play, press the
button again.
Skip play
To skip to track 6 while track 3 is playing, press
the e button repeatedly until “06” appears
on the display. To skip back to track 3 while
track 6 is playing, press the f button repeat-
edly until “03” appears.
Search (forward/reverse)
If the e or f button is pressed during play,
the player will search at high speed in the forward
or reverse direction while the button is being
pressed. When the button is released, normal play
will continue.
6. Press the STOP n button to end disc play
back.
When the last track has been played, the player
stops automatically.
7. To turn the CD player off, set the FUNCTION
switch to TAPE/OFF .
Note:
Do not open the CD compartment during CD play.
Always press the STOP n button and wait for
the disc to stop rotating before opening the CD
compartment.
This unit can play back the CD-R/RW as well.
However, some CD-R/RW can not be played back
depending on the recording conditions.
685XEEn.indd 10 2008.7.23 8:39:14 AM

11
Various playing mode
Press the REPEAT/RANDOM button repeatedly
to select a various play mode available. Each
time the button is pressed, the mode changes
as shown below:
3. Select a track by using the f
/FILE-
or
FILE+/ e button.
4. Press the MEMORY/FOLDER button.
5. Repeat steps 3 - 4 to programme addition-
al tracks.
6. Press the PLAY/PAUSE i button to start
playback. “MEMORY” remains lit.
When all programmed tracks have been
played, the player stops automatically.
- The programme contents are retained
in memory.
- Any attempt to programme more than 20
tracks will result in “FUL” appears and
discontinuous of the programming.
- To cancel programmed play, press the STOP
n button twice during play.
Checking the programme
In stop mode when MEMORY remains lit press
the MEMORY/FOLDER button repeatedly,
the programmed details sequentially appear
on the display.
Changing a programme
To add a new track to a programme:
1. In the stop mode, press the MEMORY/FOLD-
ER button repeatedly until last programme
number is displayed.
2. Select a track as explained above.
3. Press the MEMORY/FOLDER button.
To change a track:
1. In the stop mode, press the MEMORY/FOLD-
ER button repeatedly until the programme
number to be replaced is displayed.
2. Select a track as explained above.
3. Press the MEMORY/FOLDER button.
Note:
Programmed details cannot be partially deleted
or inserted.
[CD]
“REPEAT 1” appears “REPEAT” appears
(Repeat one track) (Repeat all tracks)
“RANDOM” appears
(All tracks on the disc
are played back in
random order.)
Released
(Normal play)
[MP3 CD] [USB] [SD]
“REPEAT 1” appears
(Repeat one track)
“REPEAT FOLDER”
appears
(Repeat all tracks in
the folder)
“REPEAT” appears
(Repeat all tracks)
“RANDOM” appears
(All tracks on the disc
are played back in
random order.)
Released
(Normal play)
Note:
- Random play will not be selected during pro-
grammed playback.
PROGRAMMED PLAY
Up to 20 tracks on a disc can be programmed for
play in any order.
- To begin the programming procedure, set
function switch to “CD/USB/SD” first.
- The same track can be programmed more
than once.
- Load a disc that you want to programme be-
fore starting programmed play.
1. Press the STOP n button if necessary.
2. Press the MEMORY/FOLDER button, the
“P01” and “MEMORY” appear briefly then
“ ” appears and “MEMORY” blinks.
MEMORY
MEMORY
MEMORY
685XEEn.indd 11 2008.7.23 8:39:16 AM

12
WHAT TO DO IF...
If an abnormal display indication or an operating
problem occurs, disconnect the mains lead and
remove all batteries. Wait at least 5 seconds then
reconnect the mains lead and reinstall the batteries.
Resume the operation.
This unit can play the CD-R/RW that has re-
corded music data, MP3 or WMA (Window Me-
dia Audio) files. Before playing MP3/WMA CD,
please read the following.
MP3/WMA CD information
- MP3/WMA CD is the disc that standardized
by ISO9660, its file name must have the ex-
tension letters, “.MP3” or “.mp3”/ “.WMA” or
“.wma”.
- Standard, sampling frequency, and the bit
rate:
MP3 files:
MPEG-1 Audio
32 kHz, 44.1 kHz, 48 kHz
8 kbps ~ 320 kbps (constant bit rate or vari-
able bit rate)
WMA files:
WMA version 9
32 kHz, 44.1 kHz, 48 kHz
32 kbps ~ 192 kbps (constant bit rate or vari-
able bit rate)
WMA9 professional files, WMA9 lossless
files or DRM (copyright protection) files can
not be played.
- The directory and file names of the MP3/
WMA CD must be corresponded to the ISO
standardized files.
- Single-session disc can be played back. As
for multi-session disc, only the first session
can be played back.
- This unit can recognize up to 255 folders or
511 files per disc. The CD with 256 folders
or 512 files and over is not available to this
unit.
- MP3/WMA CD may not be played in the re-
corded order.
- Music section in “CD Extra” can be played
back, not Data section.
- “Mixed CD” cannot be played back.
- Music files recorded by “Packet Writing” can
not be played back.
MP3 CD directory sample:
Playback order: song01 v song02 v ...
vsong14
Note:
- Some MP3/WMA CDs cannot be played back
depending on the recording conditions.
- The CD-R/RW that has no music data or non-
MP3/WMA files cannot be played back.
- Do not make an empty folder. It may not work
correctly.
- In this model, recommend recording setting is
128 kbps of fixing bit rate. If files are recorded
in other bit rate (for example: 320 kbps) or in
variable bit rate, track-jump may sometimes
happen according to recording conditions.
albumF01
F01
song01.mp3
song02.mp3
song03.mp3
song04.mp3
song05.mp3
Folder number F01 There is no MP3 file.
The unit skips it.
song06.mp3
song07.mp3
song08.mp3
song09.mp3
song10.mp3
albumF02
song11.mp3
song12.mp3
F02
song13.mp3
song14.mp3
albumF04
F04
albumF03
F03
MP3 CD
MP3/WMA CD OPERATION
There are three basic methods for writing to
a CD: “Track-at-Once ”, “Disc-at-Once”, and
“Packet Writing”. Music files recorded by “Track-
at-Once” or “Disc-at-Once” can be played back
on this unit. (Note: The unit cannot play back
the music files added with “Track-at-Once”.) Mu-
sic files recorded by “Packet Writing” cannot be
played back.
685XEEn.indd 12 2008.7.23 8:39:17 AM

13
MP3 CD Play
1. Load the MP3 CD. (See page 10)
The total number of folders of the MP3 CD
appears on the display.
2. Press the PLAY/PAUSE i button to start
playback.
3. Press the MEMORY/FOLDER button,
“FOLDER” blinks on the display, then press
the f
/FILE-
or FILE+/e button to select
the desired folder.
4. When the first file number of selected folder
appears press the f
/FILE-
or FILE+/e
button to select a desired file and playback start
automatically.
5. Press the STOP n button at any time to stop
the playback.
Note:
- If there is no music data, “no” appears.
- Only select the folder in playing mode.
PROGRAMMED PLAY
Up to 20 files on a disc can be programmed for
play in any order.
- To begin the programming procedure, set
function switch to “CD/USB/SD” first.
- The same file can be programmed more than
once.
- Load a disc that you want to programme before
starting programmed play.
1. Press the STOP n button if necessary.
2. Press the MEMORY/FOLDER button, the “P01”
and “MEMORY” appear briefly then
“ ” appears and “MEMORY” blinks.
3. Select a file by using the f
/FILE-
or FILE+/e
button.
FOLDER
MP3
MEMORY
MEMORY
4. Press the MEMORY/FOLDER button, the
“P02” and “MEMORY” appear briefly then
“ ” appears and “MEMORY” blinks.
5. Repeat steps 3-4 to programme additional
tracks.
6. Press the PLAY/PAUSE i button to start
playback. “MEMORY” remains lit.
7. Press the STOP n button to stop programme
playback at any time.
To cancel programmed play, press the STOP n
button twice during play.
Checking the programme
In stop mode when MEMORY remains lit press
the MEMORY/FOLDER button repeatedly,
the programmed details sequentially appear
on the display.
Changing a programme
To add a new file to a programme:
1. In the stop mode, press the MEMORY/FOLD-
ER button repeatedly until last programme
number is displayed.
2. Select a file as explained above.
3. Press the MEMORY/FOLDER button.
To change a file:
1. In the stop mode, press the MEMORY/FOLD-
ER button repeatedly until the file number to
be replaced is displayed.
2. Select a file as explained above.
3. Press the MEMORY/FOLDER button.
Note:
Programmed details cannot be partially deleted
or inserted.
MEMORY
MP3
685XEEn.indd 13 2008.7.23 8:39:19 AM

14
U S B M E M O RY D E V I C E
OPERATION
IMPORTANT INFORMATIONS:
- Copyright protection files cannot be played
back.
- Copyright protection files on the USB memory
device are skipped automatically when
played back.
- Recommended use:
Flash memory type USB memory player
Not recommended:
Hard Disc Memory type USB player
- Some flash memory player does not play
successfully with this unit.
Before use
Open the cover of USB port/SD card. Connect
the USB memory device to the USB port of the
mains unit correctly as shown in Fig.8.
Note:
Please close the cover of USB port/SD card
when you donʼt use the USB memory device
and SD card for a long period in order to avoid
danger.
- Some USB memory devices cannot be
used.
- This unit can recognize only MP3 or WMA
(Window Media Audio) files.
- This unit can recognize up to 999 files or folders
in USB memory device.
However, some cannot be recognized
depending on the folder structure.
- It may take more time for the reading opera-
tion depending on the recording condition.
- Please refer to “MP3/WMA CD information”
on the page 12.
Basic playback
1. Set the FUNCTION switch to CD/USB/SD.
2. Press the USB/SD button to select USB.
The last folder number in the USB memory de-
vice appears.
- If the connection of the USB memory device
is failed or the unit cannot recognize the USB
memory device. “no” appears.
- If thereʼs no file in the USB memory device, or
just some empty folders in the USB memory
device, “no” appears.
3. Press the PLAY/PAUSE i button to start
playback.
4. Press the MEMORY/FOLDER button,
“FOLDER” blinks on the display, then press
the f
/FILE-
or FILE+/e button to select
the desired folder.
5. When the first file number of selected folder
appears press the f
/FILE-
or FILE+/e
button to select a desired file and playback start
automatically.
6. Press the STOP n button to end play back.
When the last file has been played, the player
stops automatically.
7. To turn the USB player off, set the FUNC-
TION switch to TAPE/OFF.
Note:
Only select the folder in playing mode.
Temporarily stopping playback
Refer to the same description of “CD PLAY” on
page 10.
PROGRAMMED PLAY
Refer to the description of “MP3/WMA CD OP-
ERATION” on page 13.
USB
FOLDER
USB
MP3
685XEEn.indd 14 2008.7.23 8:39:20 AM

15
2. Press the PLAY/PAUSE i button to start
playback.
3. Press the MEMORY/FOLDER button,
“FOLDER” blinks on the display, then press
the f
/FILE-
or FILE+/e button to select
the desired folder.
4. When the first file number of selected folder
appears press the f
/FILE-
or FILE+/e
button to select a desired file and playback start
automatically.
5. Press the STOP n button to end SD card
playback.
Temporarily stopping playback
Press the PLAY/PAUSE i button, “k” ap-
pears on the display. To resume play, press the
button again.
Programmed playback
Refer to the same description on page 13.
Removing the SD card
1. Press the STOP n button, then switch to other
function.
2. Press the card slightly into the slot to
release.
3. Pull it out. (See Fig. 9)
Removing the USB memory device
Do one of the followings:
- Press the STOP n button (or the n button on
the remote controller).
- To change to other functions.
- Turn off the power.
Note:
Do not disconnect the USB memory device dur-
ing playback. If do, the data may be damaged.
IMPORTANT INFORMATIONS
- Copyright protection files cannot be played
back.
- Copyright protection files on a SD card are
skipped automatically when played back.
SD CARD OPERATION
Before use
- Load an SD card (not supplied) with the music
files (MP3 or WMA). (See Fig. 9)
- This unit doesnʼt support the SD card or MMC
card which capacity is over 2G.
- Down load the music files (MP3 or WMA or
WAV) into the SD card (not supplied) from
your PC.
- This unit can recognize up to 511 files or 255
folders in SD card.
Note:
Some cards cannot be used depending on its
structure.
Basic playback
1. In the USB mode press the USB/SD button
again to select “SD” function. The total
number of folders on the SD card appear on
the display.
Note:
- If the connection of the SD card is
failed or the unit cannot recognize the
SD card. “no” appears.
- If thereʼs no file in the SD card, or just
some empty folders in the SD card,
“no” appears.
FOLDER
SD
SD
MP3
685XEEn.indd 15 2008.7.23 8:39:21 AM

16
Notes on handling SD cards
- Do not expose the SD card to direct sunlight,
humidity or high temperatures for extended
periods of time.
- SD cards should be returned to their cases
after use.
- Do not try to decompose the SD cards.
- Keep the original SD label and never try to
apply any new paper on it.
- Do not touch the metal terminal part of the SD
card.
LI ST E NI NG TO OT HE R
SOURCES
1. Connect the audio cable (not supplied) from
the audio output socket of a video/auxiliary
equipment to the LINE IN socket.(Stereo Mini
Plug: ø3.5) (Fig. 10)
2. Set the FUNCTION switch to LINE IN.
3. Follow the instructions supplied with the other
equipment.
LISTENING TO TAPES
1. Set the FUNCTION switch to TAPE/OFF.
2. Press the STOP/EJECT button. The cassette
holder opens.
3. Load the cassette into the cassette holder.
(Fig. 11)
After loading the cassette, push the cassette
holder back into position.
4. Press the PLAY button to begin playback.
5. Press the STOP/EJECT button to stop
playback at any time. Press it again to remove
the cassette.
When the end of the tape has been reached
the tape stops automatically.
Note:
- Use the normal tape (TYPE 1).
- Endless tapes cannot be used.
- Do not use C-100 (or longer) tapes. They
may jam in the mechanism.
Pause
Press the PAUSE button to temporarily stop
playback or recording. Press it again to resume
operation.
Fast forward and rewind
Press the F. FWD or REW button. When the
desired location has been reached, or the tape
has been wound to the end, press the STOP/
EJECT button.
Automatic stop system
At the end of the tape while recording or playing
back, the cassette deck stops automatically and
the buttons are released.
This system does not work in fast forward and
rewind operation. Be sure to press the STOP/
EJECT button when the end of the tape has been
reached.
Example (When using C-60 tape):
Press the STOP/EJECT button after approxi-
mately 2 minutes have elapsed under fast for-
ward and rewind operation.
Metal terminal part
(Back)
685XEEn.indd 16 2008.7.23 8:39:22 AM

17
RECORDING
Recording copyright material without permission
of the copyright owners is usually an infringement.
If you wish to re-record copyright material,
permission from the copyright owner is necessary.
SANYO does not approve of, and cannot be held
responsible for, any unlawful use of this machine.
Recording from CD and USB Memory
device / SD Card (Synchronous recording)
1. Load a blank cassette.
2. Set the FUNCTION switch to CD/USB/SD and
select the CD or USB or SD function.
3. Load a CD or insert an USB memory device
or a SD card.
- Select the track or file number if re-
quired.
- For programmed recording, pro-
gramme the material in advance.
4. Press the REC button. The PLAY button
is engaged simultaneously and recording
starts.
5. Press the STOP/EJECT button to stop
recording at any time. When the end of the
tape is reached, deck stop automatically and
the playback of CD or USB memory device or
SD card enters pause mode.
- When you want to record music as
you listen, press the REC button. Re-
cording starts automatically from the
beginning of the track or file.
Recording from the radio or other sources
1. Load a blank cassette.
2. Tune in the radio station to be recorded or play
other sources.
3. Press the REC button to start recording.
4. Press the STOP/EJECT button to stop
recording.
When beat is heard
Beat (a high-pitched noise) may sometimes be
heard during the recording of radio broadcasts.
If this occurs, set the BEAT CANCEL switch (the
back of the unit) to 1 or 2 position that reduces
the level of the beat noise.
LISTENING TO THE RADIO
1. Set the FUNCTION switch to RADIO.
2. Select the desired radio band with the BAND
switch.
3. Tune in a desired station by turning the
TUNING control.
4. To turn the radio off, set the FUNCTION
switch to TAPE/OFF or CD/USB/SD or LINE
IN.
To receive FM stereo broadcasts
Set the FM MODE select switch (the back of the
unit) to ST.
- If the signal from an FM stereo station is weak
and reception is poor, set the FM MODE
select switch to MONO. The reception may be
improved, but the sound will be monaural.
To improve reception
FM: Pull out the telescopic aerial and adjust
its position.
AM: Rotate the unit.
685XEEn.indd 17 2008.7.23 8:39:22 AM

18
Safeguards against accidental erasure
To protect side A, break out tab (1). To protect
side B, break out tab (2) (Fig.12).
- To erase or record a protected cassette, cover
the tab openings with adhesive tape (3).
Note:
The REC button cannot be depressed when using
a protected cassette.
MAINTENANCE
Cleaning the tape heads
To ensure continued high performance, use a
cleaning tape (available from your local audio
dealer) to clean the head block of the deck after
about every 10 hours of use.
Cleaning the CD player lens
The lens should never be touched. If dust is on
the lens, blow it off using a camera lens blower.
(Consult your dealer.) (Fig.13)
Cleaning the unit
Clean the outside of the unit with a clean soft
cloth, moistened with lukewarm water. Do not
use benzene, thinners, or alcohol for they may
mar the finish of the surfaces.
685XEEn.indd 18 2008.7.23 8:39:22 AM

19
CONTROLES (Fig.1)
1. Connexion des écouteurs (PHONES)
2. Compartiment CD
3. Port USB
4. Contrôle dʼaccord (TUNING)
5. Sélecteur de bande (BAND)
6. Connecteur du lecteur de carte SD
7. Indicateur de fréquence
8. Bouton enregistrement (REC)
9. Bouton lecture (PLAY)
10. Bouton de rembobinage (REW)
11. Bouton dʼavance rapide (F. FWD)
12. Bouton Arrêt /Eject (STOP/EJECT)
13. Bouton Pause (PAUSE)
14. Bouton amplificateur de basses
(BASSXPANDER)
15. Touche de son dʼambiance (SURROUND)
16. Contrôle du volume (VOLUME)
17. Commutateur de fonction (CD/USB/SD,
RADIO, LINE IN, TAPE/OFF)
18. Bouton de fonction USB/SD (USB/SD)
19. Bouton de sélection Skip/Recherche vers le
bas/Fichier
(f/FILE-)
20. Bouton de sélection Mémoire/Dossier
(MEMORY/FOLDER)
21. Bouton de sélection Skip/Recherche vers le
haut/Fichier
(FILE+/e)
22. Bouton de fonction CD (CD)
23. Bouton Répéter/Aléatoire
(REPEAT/RANDOM)
24. Bouton Arrêt (STOP n)
25. Bouton Lecture/Pause (PLAY/PAUSE i)
26. Affichage
27. Support de cassette
28. Capteur de la télécommande (IR)
29. Commutateur dʼannulation de battement/
mode FM (FM MODE/BEAT CANCEL)
30. Antenne télescopique
31. Connexion entrée ligne (LINE IN)
32. Connexion Courant Alternatif (AC INPUT~)
33. Compartiment des accumulateurs
PRECAUTIONS DʼEMPLOI
- Lʼappareil ne doit pas être exposé aux gouttes
et aux éclaboussures.
- Les dʼobjets remplis de liquide, comme un
vase par exemple, ne doivent être placés sur
lʼappareil.
- Ne pas utiliser avec des températures
extrêmes (en dessous de 5 oC ou au
dessus de 35 oC).
- A cause de la grande dynamique et du faible
bruit résiduel du lecteur de CD, il peut exis-
ter une tendance à augmenter le volume de
lʼamplificateur de manière abusive. Ceci peut
provoquer un signal trop important en sortie
dʼamplificateur et ainsi endommager vos en-
ceintes acoustiques.
- De brusques changements de la tempéra-
ture ambiante peuvent provoquer la for-
mation de condensation sur les lentilles
optiques à lʼintérieur de lʼunité. Si ceci se
produit, retirer le disque, laisser lʼunité en-
viron 1 heure, et lʼutiliser à nouveau.
- Si le bouton dʼallumage est utilisé pour
déconnecter lʼappareil, lʼappareil res-
tera rapidement opérationnel.
- Pour débrancher complètement lʼappareil, le
cordon dʼalimentation doit être retiré.
- Ne pas installer cet équipement dans un
local confiné tel que la bibliothèque ou le
placard.
- Lʼétiquette de notation est située sur
lʼarrière de lʼunité.
- Les branchements principaux de lʼappareil
ne doivent rester facilement accessibles du-
rant une utilisation intensive.
- La ventilation ne doit pas être entravée par
la couverture des orifices de ventilation avec
des articles, tels que des journaux, nappes
de table, rideau etc.
- Aucune source de flamme nue, telle que
bougie allumée, ne doit être placée sur
lʼappareil.
- Des distances minimales doivent être main-
tenues autour de lʼappareil pour une ventila-
tion suffisante.
- Une attention particulière doit être donnée
aux aspects environnementaux de la mise
au rebut des piles.
FRANÇAIS
685XEFre.indd 19 2008.7.23 8:37:26 AM
Table of contents
Languages:
Other Sanyo CD Player manuals

Sanyo
Sanyo MCD-ZX500F User manual

Sanyo
Sanyo MCD-ZX540F User manual

Sanyo
Sanyo CDP-4000 User manual

Sanyo
Sanyo MAX-5000 User manual

Sanyo
Sanyo MCD-Z1F User manual

Sanyo
Sanyo CDP-4800B User manual

Sanyo
Sanyo PH-DS280 User manual

Sanyo
Sanyo MCD-Z5F User manual

Sanyo
Sanyo VCD-X220 User manual

Sanyo
Sanyo CDP-244 User manual

Sanyo
Sanyo CDP-4000 User manual

Sanyo
Sanyo CDP-M450BL User manual

Sanyo
Sanyo CDP-MT500 User manual

Sanyo
Sanyo CDP-150 User manual

Sanyo
Sanyo MCD-ZX530F User manual

Sanyo
Sanyo MCD-S870F User manual

Sanyo
Sanyo Excedio CDF-201 User manual

Sanyo
Sanyo DV-S100 User manual

Sanyo
Sanyo RM-CD23 User manual

Sanyo
Sanyo MCD-Z11F User manual