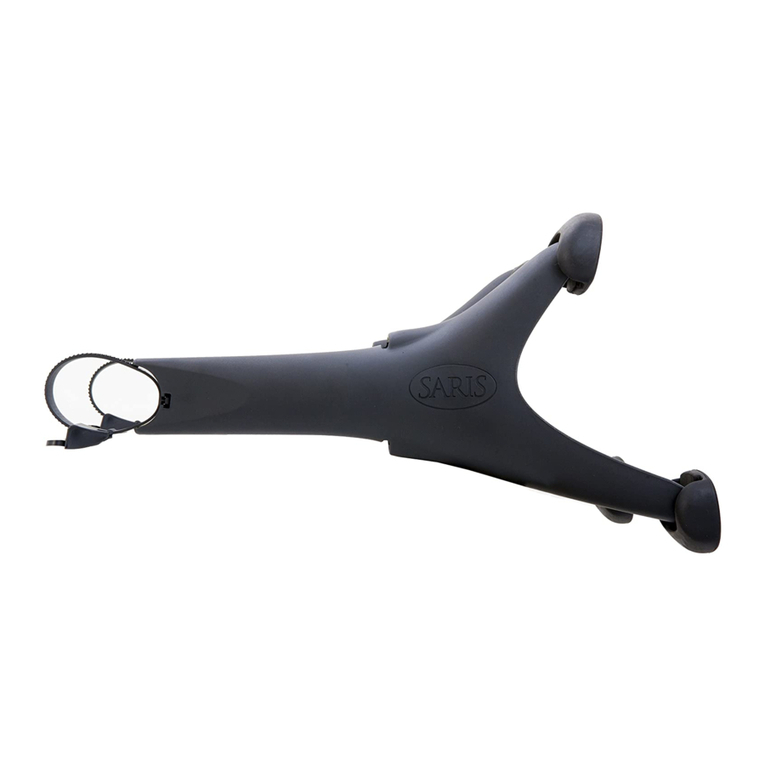
Saris Cycling Group PowerTap P1 User manual

QUICK START GUIDE
24333C_P1 Pedal User Guide.indd 1 2/2/2018 9:22:17 AM

2
Table of Contents
1. Contents
2. Installation
3. Pairing
4. Setting crank arm length
5. Calibration and manual zero
6. Battery replacement
7. Precautions
8. Warranty
© 2015 Saris Cycling Group, Inc.
5253 Verona Road
Madison, WI 53711
All rights reserved. No part of this publication
may be copied, photographed, reproduced,
translated, transmitted electronically or placed on
digital media without the prior written consent of
Saris Cycling Group, Inc.
Trademarks
Saris Cycling Group, Inc., PowerTap, and
PowerTap logo, are all registered trademarks
of Saris Cycling Group, Inc. All other product,
brand, or trade names used in this manual may
be trademarks or registered trademarks of their
respective owners.
Modifications
Saris Cycling Group, Inc. reserves the right to
make improvements and/or updates to the prod-
ucts described herein at any time without notice.
WARNING: Read this manual in it’s
entirety before using this product.
Improper use could result in dam-
age to the product or lead to injury.
24333C_P1 Pedal User Guide.indd 2 2/2/2018 9:22:17 AM

3
Table of Contents
1. Contents
2. Installation
3. Pairing
4. Setting crank arm length
5. Calibration and manual zero
6. Battery replacement
7. Precautions
8. Warranty
1. PACKAGE CONTENTS
1. Right pedal
2. Left pedal
3. Pedal washers (pair)
4. Cleats (pair)
5. Cleat mounting hardware
6. Batteries (2-AAA)
7. Pedal Identification Card
(not pictured)
2x 2x 6x2x
TOOLS REQUIRED
2.5mm hex key
6mm hex key
8mm hex key (Allen wrench)
2. PEDAL INSTALLATION
Note: PowerTap P1 pedals do not have
flats on the pedal axle.
Before installing the pedals apply a light
coat of grease to the threads on the axle.
If installing pedals to a carbon crank use
the included pedal washers. To install the
right pedal insert the RIGHT pedal into
the drive side crank arm. Use the 8mm
hex, turning clockwise, to tighten the
pedal to the torque specification recom-
mended by the crank manufacturer. To
install the left pedal insert the LEFT pedal
into the non-drive side crank arm, turning
it counter-clockwise to tighten. Use crank
manufacturer torque specification.
24333C_P1 Pedal User Guide.indd 3 2/2/2018 9:22:18 AM

4
CLEAT INSTALLATION
Note: PowerTap P1 pedals must be used
with the included cleats. They are NOT
compatible with other similar looking
cleats like Look Keo.
Align the holes on the cleat with the
embedded nuts on the sole of the shoe.
Next, install the rectangular washers
and bolts but do not fully tighten. Align
the cleat to your preferred position and
tighten each of the bolts to 4-6 ft lbs.
PEDAL INSTALLATION
8mm
IMPORTANT: Make sure cleats
engage and disengage properly
before riding.
24333C_P1 Pedal User Guide.indd 4 2/2/2018 9:22:18 AM

5
CLEAT INSTALLATION
Note: PowerTap P1 pedals must be used
with the included cleats. They are NOT
compatible with other similar looking
cleats like Look Keo.
Align the holes on the cleat with the
embedded nuts on the sole of the shoe.
Next, install the rectangular washers
and bolts but do not fully tighten. Align
the cleat to your preferred position and
tighten each of the bolts to 4-6 ft lbs.
3. PAIRING
The pedals are factory paired to each
other during the production process.
The right pedal is ‘hard paired’ or
permanently paired to the left pedal and
transmits data to it during activity. The
left pedal combines its data with the
data of the right pedal and transmits the
combined data to the display unit. When
pairing your display unit to the pedal you
will pair only to the left pedal. For pairing
instructions see your display unit.
Note: After installation and prior to first
ride perform a manual zero. (see sec-
tion 5 for manual zero instructions)
BLE and ANT+: The pedal broadcasts
data using Bluetooth Smart and ANT+
simultaneously. You can pair your pedal
to any device using either of these
wireless protocols.
4. CRANK ARM LENGTH
To set crank arm length enter the sensor
menu on your display unit and input the
crank arm length to which the pedals
are attached. Note: Default setting is
172.5mm.
5. CALIBRATION AND MANUAL ZERO
Each PowerTap P1 pedal is dynamically
calibrated during production to the high-
est standard. Calibration values cannot
be changed by the user. However, it is
recommended to zero the offset manually
before every ride.
Before performing a manual zero unclip
from the pedals and make sure there is
nothing in contact with either pedal.
Navigate to the sensor screen on the
Joule GPS+ or other display unit and
select calibration. Press the ENTER
button to set manual zero.
24333C_P1 Pedal User Guide.indd 5 2/2/2018 9:22:18 AM

6
6. BATTERY REPLACEMENT
To install or replace the battery use a
hex to remove the batter cover. Replace
battery in clean/dry conditions. Remove
old battery if necessary and replace with
new battery. Reference underside of pedal
for correct battery orientation. Reinstall
battery cover and do not overtighten.
7. PRECAUTIONS
Avoid submerging pedals in water and
direct high pressure water spray. Damag-
ing chemicals like diesel, kerosene and
other strong solvents are also potentially
damaging.
Some of the electronics inside the pedal
are sensitive to strong magnets. If your
pedals come in close contact with strong
magnets they may begin transmitting
abnormal data. If you think your pedals
were exposed to the magnetic field of a
strong magnet please contact customer
service.
WARNING: Keep pedals away from
strong magnets.
IMPORTANT:
Ensure the o-ring
clears the outer
edge of the battery
compartment during
installation.
Damage caused by batteries is not covered under the warranty of the pedals. Remove batteries
from the pedal system if they will be unused for longer than a month. Use only lithium batteries
with the pedal system. Alkaline batteries could damage the pedals.
24333C_P1 Pedal User Guide.indd 6 2/2/2018 9:22:18 AM

7
7. PRECAUTIONS
Avoid submerging pedals in water and
direct high pressure water spray. Damag-
ing chemicals like diesel, kerosene and
other strong solvents are also potentially
damaging.
Some of the electronics inside the pedal
are sensitive to strong magnets. If your
pedals come in close contact with strong
magnets they may begin transmitting
abnormal data. If you think your pedals
were exposed to the magnetic field of a
strong magnet please contact customer
service.
8. WARRANTY
The PowerTap P1 pedal is warranted to the
original retail purchaser to be free from de-
fects in materials and workmanship. Warranty
coverage is valid to the original purchaser only
and proof of purchase will be required.
Electronics - 2 years
THIS WARRANTY DOES NOT COVER:
• Normal wear and tear.
• Any damage, failure or loss caused
by accident, misuse, neglect, abuse,
improper assembly, improper mainte-
nance, or failure to follow instructions or
warnings in Owner’s Manual.
• Use of products in a manner or environ-
ment for which they were not designed.
LIMITATIONS
The foregoing warranties are in lieu of and
exclude all other warranties not expressly set
forth herein, whether expressed or implied by
operation of law or otherwise, including, but
not limited to, warranties of merchantability or
fitness for a particular purpose. Saris Cycling
Group shall in no event be liable for incidental
or consequential losses, damages or expenses
in connection with its exercise products. Saris
Cycling Group’s liability hereunder is expressly
limited to the replacement of goods not com-
plying with this warranty or, at Saris Cycling
Group election, to the repayment of an amount
of the purchase price of the exercise product
in question. Some states do not permit the
exclusion or limitation of implied warranties or
incidental or consequential damages, so the
preceding limitations and exclusions may not
apply to you.
24333C_P1 Pedal User Guide.indd 7 2/2/2018 9:22:18 AM

8
PROCEDURES
Warranty service will be performed by Saris
Cycling Group or an authorized Saris Cycling
Group Dealer. The original purchaser must
provide proof of purchase. Service calls and/or
transportation to and from the Authorized Saris
Cycling Group Dealer are the responsibility of
the purchaser.
• Saris Cycling Group will have the option
to repair or replace any product(s) which
requires warranty service.
• Saris Cycling Group will replace any unit
that is structurally defective with a new
unit or replace the unit with a unit of equal
value.
• In the event a product cannot be repaired,
Saris Cycling Group will apply a limited
credit reimbursement toward another
PowerTap product of equal or greater
value.
FCC STATEMENT
This device complies with Part 15 of the FCC
Rules. Operation is subject to the following two
conditions: (1) This device may not cause harm-
ful interference, and (2) This device must accept
any interference received, including interference
that may cause undesired operation.
The grantee is not responsible for any changes
or modifications not expressly approved by the
party responsible for compliance. Such modifi-
cations could void the user’s authority to operate
the equipment.
This equipment has been tested and found
to comply with the limits for a Class B digital
device, pursuant to part 15 of the FCC
Rules. These limits are designed to provide
reasonable protection against harmful interfer-
ence in a residential installation. This equipment
generates, uses and can radiate radio frequency
energy and, if not installed and used in accor-
dance with the instructions, may cause harmful
interference to radio communications. However,
there is no guarantee that interference will not
occur in a particular installation. If this equip-
ment does cause harmful interference to radio
or television reception, which can be determined
by turning the equipment off and on, the user is
encouraged to try to correct the interference by
one or more of the following measures:
—Reorient or relocate the receiving antenna.
—Increase the separation between the equip-
ment and receiver.
—Connect the equipment into an outlet on a
circuit different from that to which the receiver
is connected.
—Consult the dealer or an experienced radio/TV
technician for help.
IC Statement
This device complies with Industry Canada
licence exempt RSS standard(s). Operation is
subject to the following two conditions: (1) this
device may not cause interference, and (2) this
device must accept any interference, including
interference that may cause undesired operation
of the device.
CAN ICES-3(B)/NMB-3(B)
24333C_P1 Pedal User Guide.indd 8 2/2/2018 9:22:18 AM

9
FCC STATEMENT
This device complies with Part 15 of the FCC
Rules. Operation is subject to the following two
conditions: (1) This device may not cause harm-
ful interference, and (2) This device must accept
any interference received, including interference
that may cause undesired operation.
The grantee is not responsible for any changes
or modifications not expressly approved by the
party responsible for compliance. Such modifi-
cations could void the user’s authority to operate
the equipment.
This equipment has been tested and found
to comply with the limits for a Class B digital
device, pursuant to part 15 of the FCC
Rules. These limits are designed to provide
reasonable protection against harmful interfer-
ence in a residential installation. This equipment
generates, uses and can radiate radio frequency
energy and, if not installed and used in accor-
dance with the instructions, may cause harmful
interference to radio communications. However,
there is no guarantee that interference will not
occur in a particular installation. If this equip-
ment does cause harmful interference to radio
or television reception, which can be determined
by turning the equipment off and on, the user is
encouraged to try to correct the interference by
one or more of the following measures:
—Reorient or relocate the receiving antenna.
—Increase the separation between the equip-
ment and receiver.
—Connect the equipment into an outlet on a
circuit different from that to which the receiver
is connected.
—Consult the dealer or an experienced radio/TV
technician for help.
IC Statement
This device complies with Industry Canada
licence exempt RSS standard(s). Operation is
subject to the following two conditions: (1) this
device may not cause interference, and (2) this
device must accept any interference, including
interference that may cause undesired operation
of the device.
CAN ICES-3(B)/NMB-3(B)
Le présent appareil est conforme aux CNR d’In-
dustrie Canada applicables aux appareils radio
exempts de licence. L’exploitation est autorisée
aux deux conditions suivantes:
(1) il ne doit pas produire de brouillage et
(2) l’ utilisateur du dispositif doit étre prêt à
accepter tout brouillage radioélectrique reçu,
même si ce brouillage est susceptible de com-
promettre le fomctionnement du dispositif.
CAN ICES-3(B)/NMB-3(B)
24333C_P1 Pedal User Guide.indd 9 2/2/2018 9:22:18 AM

10
PowerTap
5253 Verona Road Madison WI 53711
800.783.7257 | 608-274-6550 | www.powertap.com
For Relevant Patents See www.powertap.com/patents
24333C 2/18
本產品內含射頻模組
根據 NCC 低功率電波輻射性電機管理辦法 規定:
第十二條
經型式認證合格之低功率射頻電機,非經許可,公司、商號或使用者均不得擅自變更
頻率、加大功率或變更原設計之特性及功能。
第十四條 低功率射頻電機之使用不得影響飛航安全及干擾合法通信;經發現有干擾現象時,應
立即停用,並改善至無干擾時方得繼續使用。前項合法通信,指依電信法規定作業之
無線電通信。
低功率射頻電機須忍受合法通信或工業、科學及醫療用電波輻射性電機設備之干擾。
CCAM17LP1140T8
24333C_P1 Pedal User Guide.indd 10 2/2/2018 9:22:19 AM

GUÍA DE INICIO RÁPIDO
ESP_24333C_P1 Pedal User Guide.indd 1 2/2/2018 9:11:41 AM

2
Índice
1. Contenido
2. Instalación
3. Emparejamiento
4. Ajuste de la longitud del brazo de
manivela
5. Calibración y puesta a cero manual
6. Sustitución de las pilas
7. Precauciones
8. Garantía
© 2015 Saris Cycling Group, Inc.
5253 Verona Road
Madison, WI 53711
Todos los derechos reservados. No se permite
la copia, fotografía, reproducción, traducción,
transmisión electrónica o almacenamiento
en medios digitales de ninguna parte de esta
publicación sin el consentimiento previo por
escrito de Saris Cycling Group, Inc.
Marcas registradas
Saris Cycling Group, Inc., PowerTap y el logotipo
de PowerTap son marcas comerciales registradas
de Saris Cycling Group, Inc. Todos los demás
nombres comerciales, de marcas o de productos
utilizados en este manual pueden ser marcas
comerciales o marcas registradas de sus
propietarios respectivos.
Modificaciones
Saris Cycling Group, Inc. se reserva el derecho
a introducir mejoras y/o actualizaciones en los
productos descritos en el presente manual en
cualquier momento y sin previo aviso.
ADVERTENCIA: Lea este manual de
principio a fin antes de utilizar este
producto. Un uso inadecuado podría
dar lugar a daños en el producto
olesiones.
ESP_24333C_P1 Pedal User Guide.indd 2 2/2/2018 9:11:41 AM

3
Índice
1. Contenido
2. Instalación
3. Emparejamiento
4. Ajuste de la longitud del brazo de
manivela
5. Calibración y puesta a cero manual
6. Sustitución de las pilas
7. Precauciones
8. Garantía
1. CONTENIDO DEL PAQUETE
1. Pedal derecho
2. Pedal izquierdo
3. Arandelas de pedal (pareja)
4. Calas (pareja)
5. Accesorios de montaje de las calas
6. Pilas (2 AAA)
7. Tarjeta de identificación de pedal
(no se muestra)
2x 2x 6x2x
HERRAMIENTAS NECESARIAS
Llave hexagonal de 2,5 mm
Llave hexagonal de 6 mm
Llave hexagonal de 8 mm (llave Allen)
2. INSTALACIÓN DEL PEDAL
Nota: Los pedales PowerTap P1 no tienen
pletinas en el eje del pedal.
Antes de instalar los pedales aplique un
ligero revestimiento de grasa a las roscas del
pedal. Si instala los pedales en una manivela
de carbono, utilice las arandelas de pedal
incluidas. Para instalar el pedal derecho
inserte el pedal DERECHO en el brazo de
manivela del lado de tracción. Utilice la llave
hexagonal de 8 mm, girando en el sentido de
las agujas del reloj, para apretar el pedal al
valor de par recomendado por el fabricante
de la manivela. Para instalar el pedal
izquierdo, inserte el pedal IZQUIERDO en el
brazo de manivela del lado sin tracción y gire
en sentido contrario a las agujas del reloj
para apretarlo. Utilice el valor de par indicado
por el fabricante de la manivela.
ESP_24333C_P1 Pedal User Guide.indd 3 2/2/2018 9:11:42 AM

4
INSTALACIÓN DE LA CALA
Nota: Los pedales PowerTap P1 se deben
utilizar con las calas incluidas. NO son
compatibles con otras calas de aspecto
similar como Look Keo.
Alinee los agujeros de la cala con las
tuercas incrustadas en la suela de la
zapatilla. A continuación, instale las
arandelas rectangulares y los tornillos,
pero no los apriete por completo. Alinee
la cala a su posición preferida y apriete
cada uno de los tornillos a 5,4-8,1 Nm
(4-6 ft lbs).
INSTALACIÓN DEL PEDAL
8 mm
IMPORTANTE : Asegúrese de que los
sistemas de fijación enganchan y
desenganchan antes de conducir.
ESP_24333C_P1 Pedal User Guide.indd 4 2/2/2018 9:11:42 AM

5
INSTALACIÓN DE LA CALA
Nota: Los pedales PowerTap P1 se deben
utilizar con las calas incluidas. NO son
compatibles con otras calas de aspecto
similar como Look Keo.
Alinee los agujeros de la cala con las
tuercas incrustadas en la suela de la
zapatilla. A continuación, instale las
arandelas rectangulares y los tornillos,
pero no los apriete por completo. Alinee
la cala a su posición preferida y apriete
cada uno de los tornillos a 5,4-8,1 Nm
(4-6 ft lbs).
3. EMPAREJAMIENTO
Los pedales se emparejan en fábrica entre sí
durante el proceso de producción. El pedal
derecho tiene un “emparejamiento rígido” o
permanente al pedal izquierdo y le transmite
datos durante la actividad. El pedal izquierdo
combina sus datos con los datos del pedal
derecho y transmite los datos combinados
a la unidad de pantalla. Cuando empareje la
unidad de pantalla al pedal solo emparejará
al pedal izquierdo. Para conocer las
instrucciones de emparejamiento, consulte
su unidad de pantalla. Nota : Después de
la instalación y antes de la primer paseo
realizan un cero manual. (véase la sección
5 de manuales cero instrucciones)
BLE y ANT+: El pedal transmite datos
utilizando Bluetooth Smart y ANT+
simultáneamente. Puede emparejar el pedal
a cualquier dispositivo utilizando cualquiera
de estos protocolos inalámbricos.
4. LONGITUD DEL BRAZO DE MANIVELA
Para ajustar la longitud del brazo de
manivela acceda al menú del sensor
en la unidad de pantalla e introduzca la
longitud del brazo de manivela a la que
se han fijado los pedales.Nota: El ajuste
predeterminado es 172.5mm .
5. CALIBRACIÓN Y PUESTA A CERO
MANUAL
Cada pedal PowerTap P1 se calibra
dinámicamente durante la producción
al más alto nivel. El usuario no pueda
cambiar los valores de calibración. No
obstante, es importante poner a cero
manualmente la compensación antes de
cada uso.
Antes de realizar la puesta a cero
manual, suéltese del pedal y asegúrese
de que no haya nada en contacto con
ningún pedal. Navegue a la pantalla del
sensor en el Joule GPS+ u otra unidad de
pantalla y seleccione calibración. Pulse el
botón INTRO para definir el cero manual.
ESP_24333C_P1 Pedal User Guide.indd 5 2/2/2018 9:11:42 AM

6
6. SUSTITUCIÓN DE LAS PILAS
Para instalar o sustituir la pila utilice una
llave de para quitar la cubierta para pilas.
Vuelva a colocar la batería en condiciones
limpias / secas. Saque la pila antigua en
caso necesario y sustitúyala por otra nueva.
Consulte la parte inferior del pedal para
conocer la orientación correcta de las pilas.
Vuelva a instalar la tapa de la batería y no
apriete en exceso.
7. PRECAUCIONES
Evite sumergir los pedales en agua
y pulverizar agua directamente a
alta presión. Los productos químicos
dañinos tales como gasóleo, queroseno
y otros disolventes fuertes también son
potencialmente nocivos.
Algunos de los elementos electrónicos
dentro del pedal son sensibles a campos
magnéticos intensos. Si los pedales
entran en contacto con imanes potentes
podrían comenzar a transmitir datos
anómalos. Si cree que los pedales se
han expuesto a un campo magnético o
imán potente, póngase en contacto con el
servicio de atención al cliente.
ADVERTENCIA: Mantenga los
pedales alejados de imanes
potentes.
8. GARANTÍA
El comprador original de PowerTap P1 cuenta
con la garantía de que el dispositivo no tiene
defectos en los materiales y mano de obra.
La cobertura de garantía sólo es válida para
el comprador original y será necesario un
comprobante de compra.
Electrónica: 2 años
ESTA GARANTÍA NO CUBRE:
• Desgaste normal debido al uso.
• Daños, averías o pérdidas provocados
por accidente, uso incorrecto,
negligencia, abuso, montaje incorrecto,
mantenimiento inadecuado o
incumplimiento de las instrucciones o
advertencias de este Manual de usuario.
• Uso de los productos en un entorno o
de una manera para la que no fueron
diseñados.
IMPORTANTE : Asegúrese
de que la junta tórica
despeja el borde exterior
del compartimento de
la batería durante la
instalación.
Los daños causados por las baterías no están cubiertos por la garantía de los pedales. Retire las baterías del
sistema de pedal si no las va a usar durante más de un mes. Use solo baterías de litio con el sistema de pedales.
Las pilas alcalinas pueden dañar los pedales.
ESP_24333C_P1 Pedal User Guide.indd 6 2/2/2018 9:11:42 AM

7
7. PRECAUCIONES
Evite sumergir los pedales en agua
y pulverizar agua directamente a
alta presión. Los productos químicos
dañinos tales como gasóleo, queroseno
y otros disolventes fuertes también son
potencialmente nocivos.
Algunos de los elementos electrónicos
dentro del pedal son sensibles a campos
magnéticos intensos. Si los pedales
entran en contacto con imanes potentes
podrían comenzar a transmitir datos
anómalos. Si cree que los pedales se
han expuesto a un campo magnético o
imán potente, póngase en contacto con el
servicio de atención al cliente.
8. GARANTÍA
El comprador original de PowerTap P1 cuenta
con la garantía de que el dispositivo no tiene
defectos en los materiales y mano de obra.
La cobertura de garantía sólo es válida para
el comprador original y será necesario un
comprobante de compra.
Electrónica: 2 años
ESTA GARANTÍA NO CUBRE:
• Desgaste normal debido al uso.
• Daños, averías o pérdidas provocados
por accidente, uso incorrecto,
negligencia, abuso, montaje incorrecto,
mantenimiento inadecuado o
incumplimiento de las instrucciones o
advertencias de este Manual de usuario.
• Uso de los productos en un entorno o
de una manera para la que no fueron
diseñados.
LIMITACIONES
Las garantías precedentes sustituyen y
excluyen a cualesquiera otras garantías no
establecidas expresamente en el presente
documento, tanto expresas como implícitas
previstas por la ley u otras, pero no limitadas
a garantías comerciales o adecuación
a un propósito particular. Bajo ninguna
circunstancia Saris Cycling Group será
responsable de daños, pérdidas o gastos
imprevistos o derivados en relación a sus
productos. La responsabilidad de Saris Cycling
Group se limita expresamente a la sustitución
de los productos que no cumplan esta garantía
o bajo criterio de Saris Cycling Group al pago
de una cantidad del precio de compra del
producto en cuestión. Algunos estados no
permiten la exclusión o limitación de garantías
implícitas o daños derivados o imprevistos,
por tanto es posible que las limitaciones y
exclusiones precedentes no le afecten.
ESP_24333C_P1 Pedal User Guide.indd 7 2/2/2018 9:11:42 AM

8
PROCEDIMIENTOS
El servicio de garantía será llevado a cabo
por Saris Cycling Group en un distribuidor
autorizado de Saris Cycling Group. El
comprador original debe proporcionar un
comprobante de compra. Los gastos de
las llamadas de servicio y el transporte
hacia y desde el distribuidor autorizado de
Saris Cycling Group corren por cuenta del
comprador.
• Saris Cycling Group tendrá la opción de
reparar o sustituir los productos que
requieran el servicio de garantía.
• Saris Cycling Group sustituirá cualquier
unidad estructuralmente defectuosa por
una unidad nueva o la sustituirá por una
unidad de igual valor.
• En caso de que un producto no se pueda
reparar, Saris Cycling Group aplicará un
reembolso de crédito limitado para otro
producto CycleOps PowerTap de igual
valor o superior.
DECLARACIÓN DE FCC
Este dispositivo es compatible con el Apartado
15 de FCC. El funcionamiento está sujeto
a las dos condiciones siguientes: (1) Este
dispositivo no debe provocar interferencias
molestas y (2) Este dispositivo debe aceptar
cualquier interferencia recibida, incluidas
las interferencias que pudieran provocar un
funcionamiento no deseado.
El otorgante no es responsable de los cambios
o modificaciones no aprobadas expresamente
por la parte responsable de la compatibilidad
Tales modificaciones podrían anular la
autoridad del usuario para operar el equipo.
Este equipo ha sido probado y se ha
determinado que está dentro de los límites
de un dispositivo digital de Clase B, según se
establece en el apartado 15 de la normativa
FCC. Estos límites se han diseñado para
ofrecer una protección razonable frente a
interferencias dañinas en una instalación
residencial. Este equipo genera, utiliza y
puede emitir energía en frecuencias de radio
y si no se instala y utiliza de acuerdo a las
instrucciones podría provocar interferencias en
las comunicaciones de radio. No obstante, no
hay ninguna garantía de que no se producirán
interferencias en una instalación particular. Si
este equipo provoca interferencias molestas
para la recepción de radio o televisión, lo que
se puede determinar encendiendo y apagando
el equipo, se recomienda al usuario que
intente corregir la interferencia mediante una
o varias de las siguientes medidas:
— Reoriente o reubique la antena receptora.
— Aumente la separación entre el equipo y el
receptor.
— Conecte el equipo a una toma de un
circuito distinto al que está conectado el
receptor.
— Consulte al proveedor o a un técnico de
radio/TV para solicitar ayuda.
ESP_24333C_P1 Pedal User Guide.indd 8 2/2/2018 9:11:42 AM

9
DECLARACIÓN DE FCC
Este dispositivo es compatible con el Apartado
15 de FCC. El funcionamiento está sujeto
a las dos condiciones siguientes: (1) Este
dispositivo no debe provocar interferencias
molestas y (2) Este dispositivo debe aceptar
cualquier interferencia recibida, incluidas
las interferencias que pudieran provocar un
funcionamiento no deseado.
El otorgante no es responsable de los cambios
o modificaciones no aprobadas expresamente
por la parte responsable de la compatibilidad
Tales modificaciones podrían anular la
autoridad del usuario para operar el equipo.
Este equipo ha sido probado y se ha
determinado que está dentro de los límites
de un dispositivo digital de Clase B, según se
establece en el apartado 15 de la normativa
FCC. Estos límites se han diseñado para
ofrecer una protección razonable frente a
interferencias dañinas en una instalación
residencial. Este equipo genera, utiliza y
puede emitir energía en frecuencias de radio
y si no se instala y utiliza de acuerdo a las
instrucciones podría provocar interferencias en
las comunicaciones de radio. No obstante, no
hay ninguna garantía de que no se producirán
interferencias en una instalación particular. Si
este equipo provoca interferencias molestas
para la recepción de radio o televisión, lo que
se puede determinar encendiendo y apagando
el equipo, se recomienda al usuario que
intente corregir la interferencia mediante una
o varias de las siguientes medidas:
— Reoriente o reubique la antena receptora.
— Aumente la separación entre el equipo y el
receptor.
— Conecte el equipo a una toma de un
circuito distinto al que está conectado el
receptor.
— Consulte al proveedor o a un técnico de
radio/TV para solicitar ayuda.
Declaración IC
Este dispositivo cumple con las normas
RSS exentas de licencia de Industry
Canada. El funcionamiento está sujeto a
las dos condiciones siguientes: (1) Este
dispositivo no debe provocar interferencias
y (2) Este dispositivo debe aceptar cualquier
interferencia recibida, incluidas las
interferencias que pudieran provocar un
funcionamiento no deseado del dispositivo.
CAN ICES-3(B)/NMB-3(B)
ESP_24333C_P1 Pedal User Guide.indd 9 2/2/2018 9:11:42 AM

10
PowerTap
5253 Verona Road Madison WI 53711
800.783.7257 | 608-274-6550 | www.powertap.com
Para consultar las patentes pertinentes,
visite www.powertap.com/patents
24333C 02/18
本產品內含射頻模組
根據 NCC 低功率電波輻射性電機管理辦法 規定:
第十二條
經型式認證合格之低功率射頻電機,非經許可,公司、商號或使用者均不得擅自變更
頻率、加大功率或變更原設計之特性及功能。
第十四條 低功率射頻電機之使用不得影響飛航安全及干擾合法通信;經發現有干擾現象時,應
立即停用,並改善至無干擾時方得繼續使用。前項合法通信,指依電信法規定作業之
無線電通信。
低功率射頻電機須忍受合法通信或工業、科學及醫療用電波輻射性電機設備之干擾。
CCAM17LP1140T8
ESP_24333C_P1 Pedal User Guide.indd 10 2/2/2018 9:11:43 AM
Table of contents
Languages:
Other Saris Cycling Group Bicycle Accessories manuals