Satlink WS 6951 User manual

USER‘S MANUAL


contents
1 GUIDE ...................................................................................................2
1.1 Important Safety Instructions.........................................2
1.2 Unpacking ...............................................................................2
1.3 PRODUCT OVERVIEW & ILLUSTRATION ..................3
1.4 INSTALLATION OF METER ..............................................4
2 OUTLINE .............................................................................................4
3. THE MENU OSD INSTRUCTION................................................5
3.1 Satellite Find (PIC2, 3) .......................................................5
3.1.1 Satellite(PIC 4) ..............................................................6
3.1.2 Local Frequency(PIC 5) ............................................6
3.1.3 Transponder(PIC 6) ....................................................6
3.1.4 Frequency .......................................................................6
3.1.5Symbrate ..........................................................................6
3.1.6Polarity .............................................................................6
3.1.7TONE ..................................................................................7
3.1.8Beep Tone ........................................................................7
3.1.9DiSEqC Mode ..................................................................7
3.1.10 DisEqc type & Input ................................................7
3.1.0.1 Quick Search (PIC 8) ..............................................7
3.2 CH List ......................................................................................8
3.2.1 Sort (PIC 14) ..................................................................9
3.2.2 Lock (PIC 15) ................................................................9
3.2.3 Del (PIC 16) ...................................................................9
3.2.4Sat (PIC 17) .....................................................................9
3.3EPG(PIC 18) ..........................................................................10
3.4 SAT/TP Manager (PIC 19) ............................................. 10
3.4.1 Satellite Setting ......................................................... 10
3.4.2 Auto Scan(PIC 24) .................................................... 12

3.4.3 Transponder(PIC 25) ............................................... 12
3.5 Multimedia ............................................................................13
3.6 System Setting (PIC 31) ...................................................14
4 Technical Specication ..............................................................15
5 Trouble Shooting ..........................................................................16

Digital Satellite Finder
1
1 GUIDE
1.1 Important Safety Instructions
Thank you for choosing our product. Before installation, we
would like to remind you some notes, which is very important
for operating safely and properly, as follows:
gBe sure to read this user manual before starting your
operation.
gYou must install the dish with correct direction and angle. If
the dish is not working properly, contact your local dealer.
gWhen the unit is suddenly moved to a hot area from a cold
area, it may cause some problems. In that case, turn o the
power, and turn on again after 1-2 hours.
gKeep meter placed in clean space with sucient ventilation.
gDo not cover the meter with or place it on a unit that emits
heat.
gClean the case by a soft cloth with a little washing liquid.
gDo not remove the cover.
gDo not let the unit exposed to extreme heat, cold or humid
conditions.
gNo liquids or any other materials to come inside of the unit.
WARNING:All instructions are subject to the latest version of
software without prior notice if any new functions are added
to the equipment.

Digital Satellite Finder
2
1.2 Unpacking
Open the package and make sure it includes all below items, if
any missing, please contact the reseller for replacement.
1.Digital SatelliteMeter
2.User’s manual
3.AV cable
4.Car charger cable
5.Power Adaptor
6.Strap of carrying case
Digital Satellite Finder
3
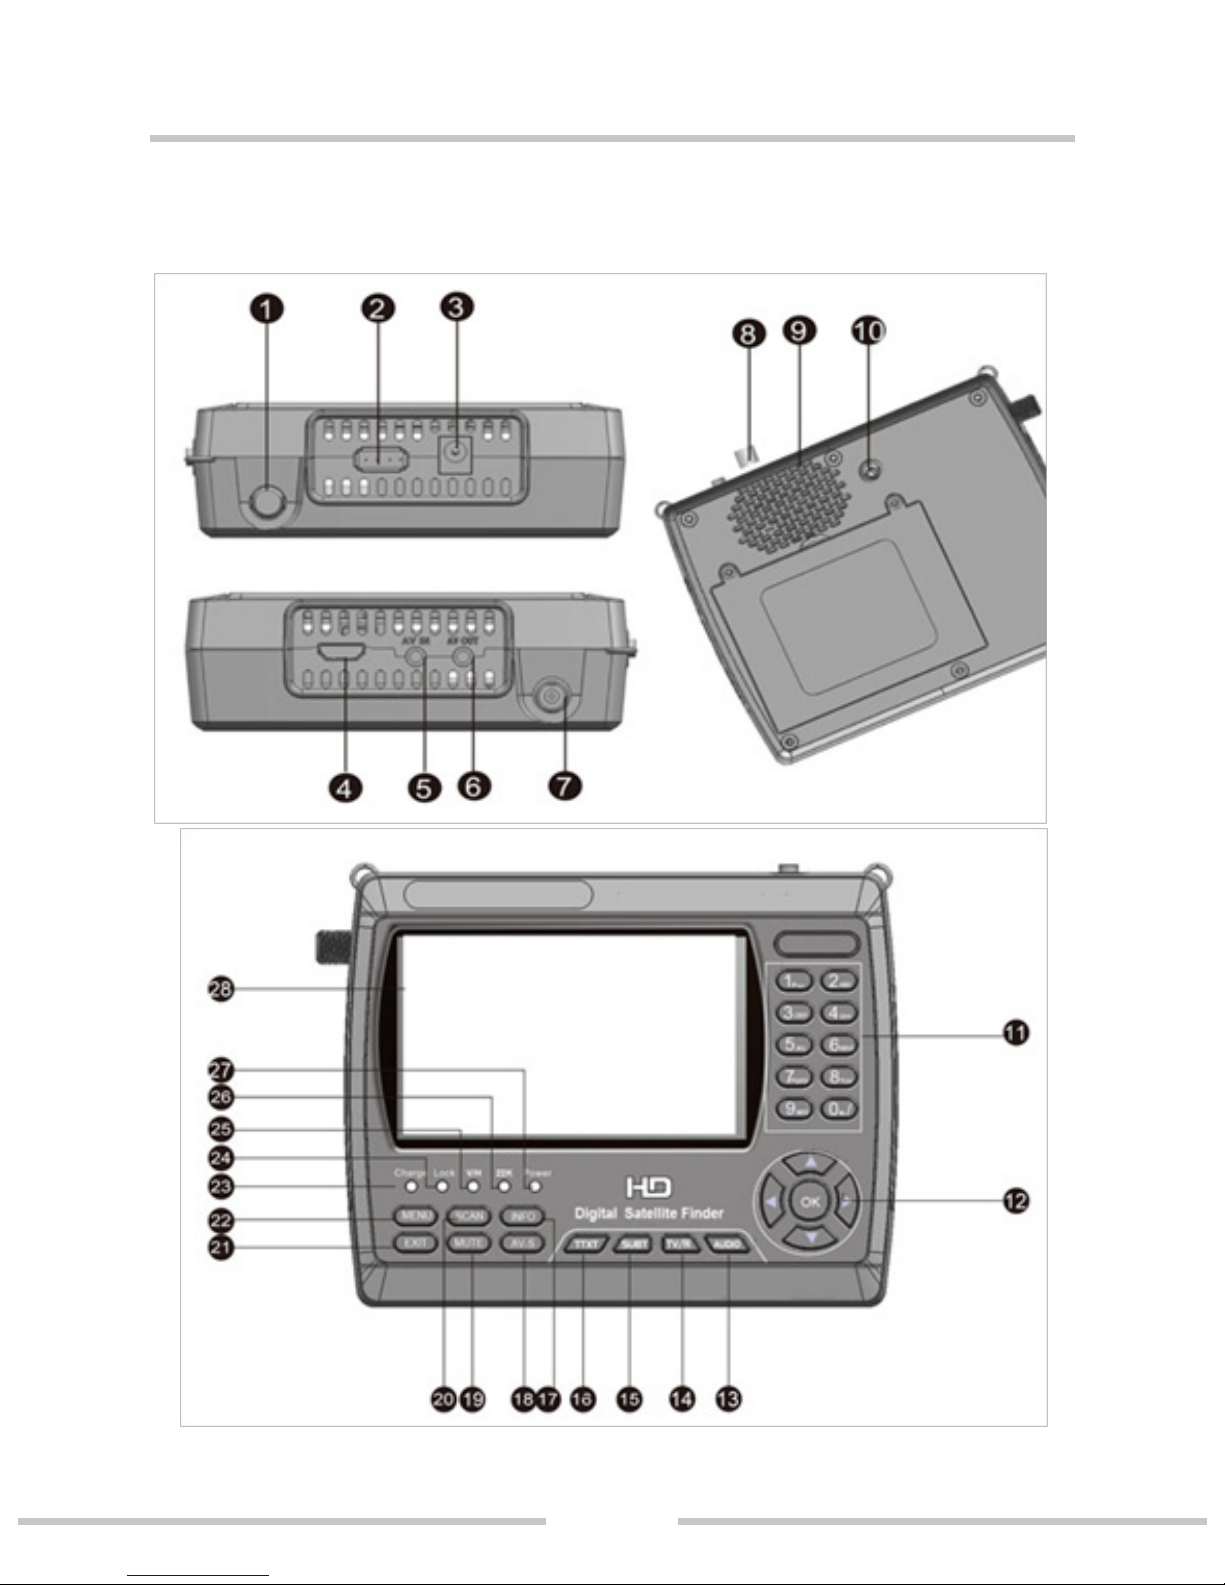
1.3 PRODUCT OVERVIEW& ILLUSTRATION

Digital Satellite Finder
4
NO Description FUNCTION
1 LNB IN Connect to satellite antenna cable
2 USB Port Connect to USB memory
3 DC Slot Connect to Adaptor Input
4 HDMI Use HDMI cable to connect for TV
5 AV IN Connect to AV port for meter
6 AV OUT Connect to AV port for TV
7 DC12V Slot DC12V OUT
8 Power witch Turn on/o meter
9 Speaker Speaker Integrated
10 Torch LED Night lighting
11 0-9 Number key to select channels or enter
programming
12 NEVIGATION
KEY Volume Control or move cursor, chan-
nel or change, conrm etc
13 BLUE &AUDIO Blue key & Audio interface
14 Orange &TV/R Orange key & TV and radio switch
15 Green & SUBT Green key & Subtitle interface
16 Red & TTXT Red KEY &Teletext interface
17 INFO INFO key
18 AV-S If we connect AV IN; switch AV in/out
for LCD and speaker
19 MUTE MUTE
20 SCAN ‘Quick Search’menu shortcut key
21 EXIT Escape from present menu and save
the settings
22 MENU Show the main menu on the screen or
jump back to previous menu in sub-
menu setting conditions
Digital Satellite Finder
5
23 Charger (Note1) Charger indicator light
24 LOCK Signal lock indicator light
25 V/H Vertical /Horizontal polarization volta-
ge output light
26 22KHZ 22Khz indicator light
27 Power Power indicator light
28 LCD TFT LCD Screen
Note1:When the adapter insert dc slot, Charge indicator is red,
when the batteries charged sucient, the charge indicator is
orange.
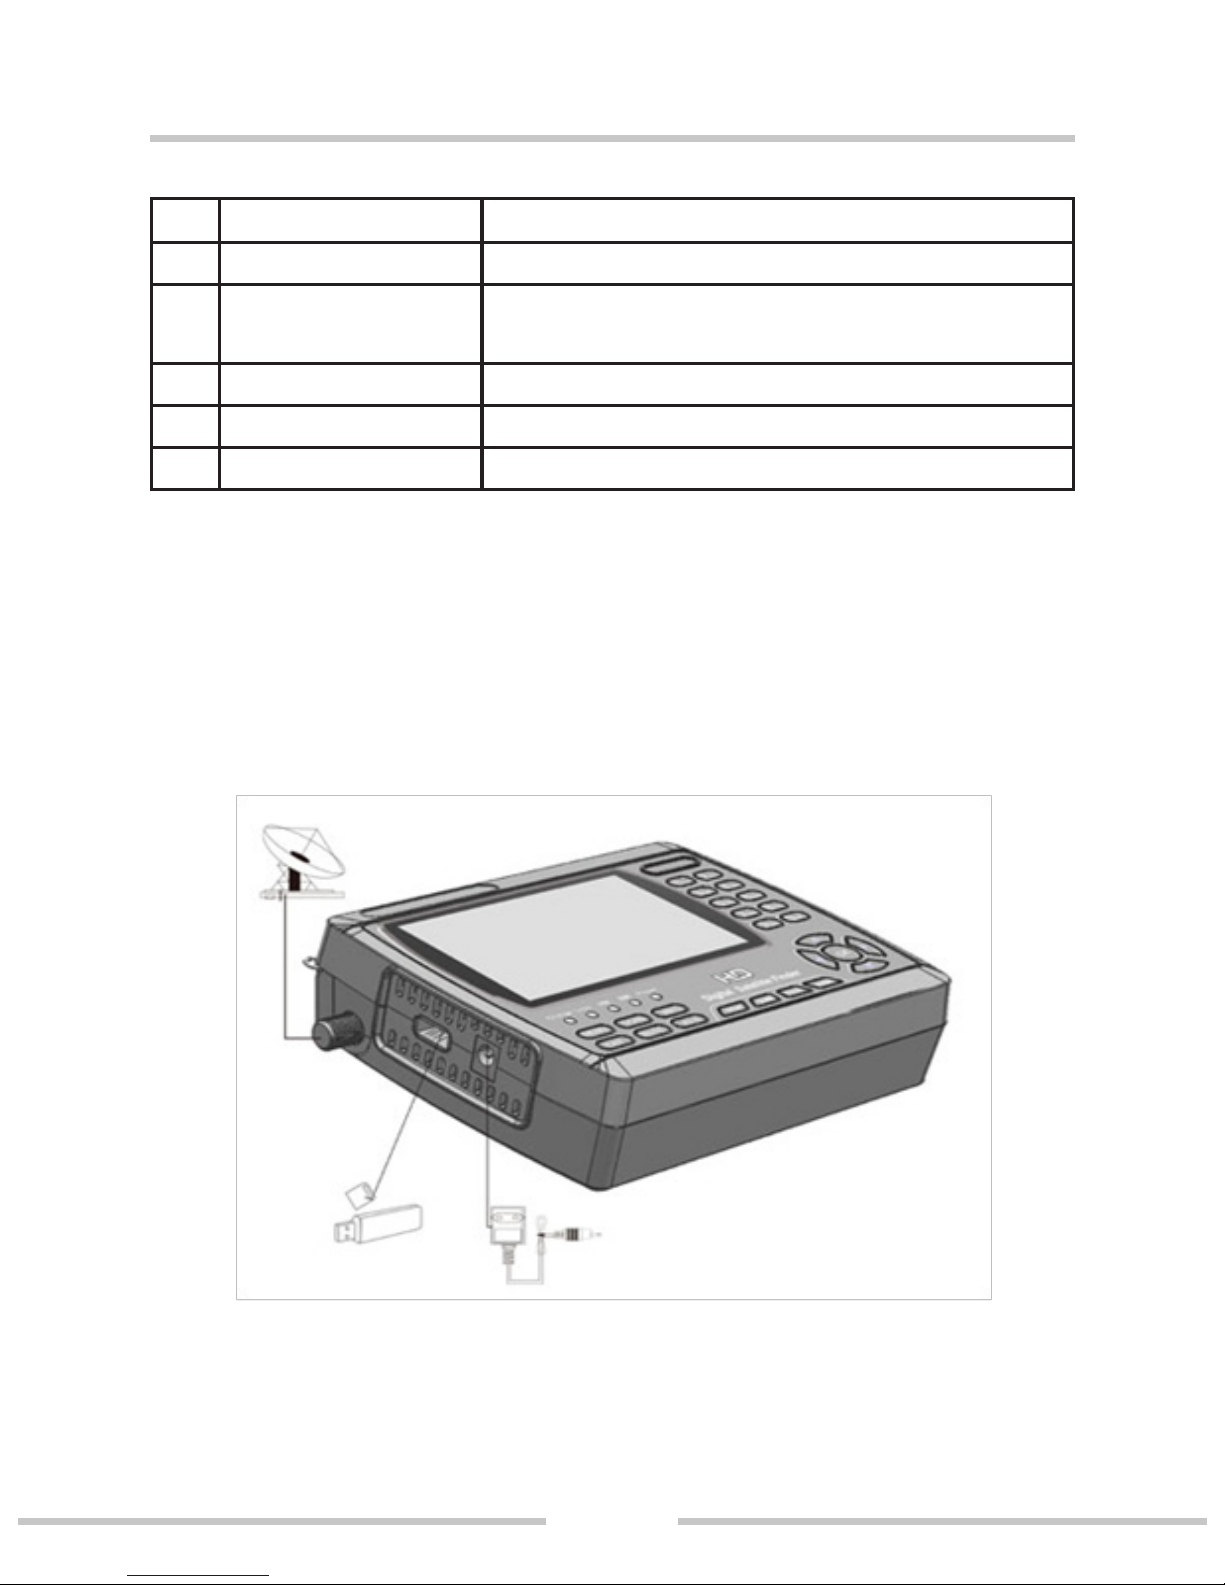
1.4 INSTALLATION OFMETER

Digital Satellite Finder
6
2.OUTLINE
g 4.3 Inch High Denition TFT LCD Screen
g Fully DVB-S/DVB-S2, MPEG-2/MPEG4 compliant
g MPEG-2 / H.264 Hardware decoding
g Digital meter for signal strength and quality
g Supports scan of Auto,Blind,Manual or NIT
g Sound and Light Alarm for Locking Signal
g Auto Calculate Angle of AZ ,EL
g Supports DISEQC 1.0/1.1/1.2 ,0/22khz Tone
g Speaker Integrated
g Support both AV out and AV in
g LNB short protect
g 7.4V/3000mAh Li-Ion Battery Included
g Software upgrade via USB port
g Easy to carry
Table of contents
Other Satlink Satellite TV System manuals

Popular Satellite TV System manuals by other brands

Megasat
Megasat Multiswitch Series Installation instruction

Philips
Philips STU 904 Instructions for use

Dish TV
Dish TV DVB-S6800PLUS Operation manual

Avermedia
Avermedia AVer3D R889 quick guide

Kathrein
Kathrein MobiSet 2 Digital CAP 600 Installation and operating manual

KVH Industries
KVH Industries TracVision R5SL user guide


