SATO MB400I User manual

Barcode Printer
Quick Guide
1234567890123456789012345678901212345678
1
23456789012345678901234567890121234567
8
1
23456789012345678901234567890121234567
8
1
23456789012345678901234567890121234567
8
1
23456789012345678901234567890121234567
8
1
23456789012345678901234567890121234567
8
1
23456789012345678901234567890121234567
8
1
23456789012345678901234567890121234567
8
1
23456789012345678901234567890121234567
8
1
23456789012345678901234567890121234567
8
1
23456789012345678901234567890121234567
8
1
23456789012345678901234567890121234567
8
1
23456789012345678901234567890121234567
8
1
23456789012345678901234567890121234567
8
1
23456789012345678901234567890121234567
8
1
23456789012345678901234567890121234567
8
1
23456789012345678901234567890121234567
8
1
23456789012345678901234567890121234567
8
1
23456789012345678901234567890121234567
8
1
23456789012345678901234567890121234567
8
1
23456789012345678901234567890121234567
8
1
23456789012345678901234567890121234567
8
1
23456789012345678901234567890121234567
8
1
23456789012345678901234567890121234567
8
1
23456789012345678901234567890121234567
8
1
23456789012345678901234567890121234567
8
1
23456789012345678901234567890121234567
8
1
23456789012345678901234567890121234567
8
1
23456789012345678901234567890121234567
8
1
23456789012345678901234567890121234567
8
1
23456789012345678901234567890121234567
8
1
23456789012345678901234567890121234567
8
1
23456789012345678901234567890121234567
8
1
23456789012345678901234567890121234567
8
1
23456789012345678901234567890121234567
8
1
23456789012345678901234567890121234567
8
1
23456789012345678901234567890121234567
8
1
23456789012345678901234567890121234567
8
1
23456789012345678901234567890121234567
8
1
23456789012345678901234567890121234567
8
1
23456789012345678901234567890121234567
8
1
23456789012345678901234567890121234567
8
1
23456789012345678901234567890121234567
8
1
23456789012345678901234567890121234567
8
1
23456789012345678901234567890121234567
8
1
23456789012345678901234567890121234567
8
1
23456789012345678901234567890121234567
8
1234567890123456789012345678901212345678

2
Preface
Thank you for purchasing the Barcode Printer, MB400i/410i.
This manual is created so that a first-time user of MB400i/410i can learn its basic operations
in a short time.
Please read this manual carefully to make full use of the functions of MB400i/410i.
Cautions
1Reproduction of all or part of this manual is prohibited.
2The content of this manual is subject to change without notice.
3This manual was created with utmost care regarding its content. However, if
you find any unclear points, errors, or omissions, please contact the retail
store or dealer where you purchased this printer.
Cautions regarding radio waves
This product is certified to meet technical standards based on the Radio Law. Therefore,
no wireless license is required to use this printer.
The following actions can be punishable by law:
•Disassembly or modification of this printer
•Removing the certification label (serial label) on this printer
Use in the following locations may drastically shorten the communication distance, or
prevent communication.
•Near a microwave oven; locations where static electricity or radio wave interference is
abundant; near wireless LAN equipment.
“Bluetooth” is a registered trademark of Bluetooth SIG, Inc. USA.
Our company is using this trademark based on a licensing
contract with this association.
Before using the wireless LAN interface, be sure to set all security-related settings for
the wireless LAN equipment according to this manual.
To customers purchasing the Bluetooth or wireless LAN options:
1st Edition Aug. 2006
3rd Edition Dec. 2013 Q01662011
© 2013 SATO Corporation

3
Table of Contents
1. Safety Precautions ........................................................................... 4
Markings and Symbols .......................................................................................... 4
Precautions in Use ................................................................................................. 8
2. Unpacking ........................................................................................ 9
3. Names of Parts .............................................................................. 10
Names and Functions of Operating Parts ............................................................ 12
4. Preparing for First-time Operation ................................................. 13
Charging the Battery Pack ................................................................................... 13
Installing and Removing the Battery Pack ........................................................... 15
Using AC Adapter ................................................................................................ 16
Loading Labels .................................................................................................... 17
•Continuous printing mode ............................................................................. 17
•Dispense mode printing ................................................................................ 19
•Switching from Dispense mode printing to Continuous printing mode .......... 21
5. Turning the Power On .................................................................... 22
6. Test Printing ................................................................................... 23
7. Operation with an RS-232C Cable ................................................ 24
8. Operation with a USB Cable .......................................................... 25
9. Operation via Infrared Communication .......................................... 26
10. Operation with Bluetooth or Wireless LAN Options ....................... 27
11. Printing ........................................................................................... 28
12. Troubleshooting ............................................................................. 30
13. Daily Care ...................................................................................... 33
14. Reference ...................................................................................... 35
Included Items ..................................................................................................... 35
Options ................................................................................................................ 35
Operation Modes ................................................................................................. 40
DIP Switch ........................................................................................................... 48
Basic Specifications of MB400i/MB410i .............................................................. 50
Preparation
Care
Reference
Troubleshooting
Operation

Safety Precautions
1
4
Symbol examples
The triangle indicates something you should take absolute care with. The
cautions are indicated concretely within the symbol. The symbol on the left
indicates a risk of electric shock.
A circle with a diagonal line indicates something you should not do. The
symbol on the left indicates that you should not try to take the unit apart.
A black circle with a picture inside indicates something you need to do. The
symbol on the left indicates that you should unplug the unit from the wall outlet.
1. Safety Precautions
In this section, safety precautions about printer operation are explained to ensure
proper care and usage. Make sure to read these carefully before using your
printer.
Markings and Symbols
The following symbols or markings are used in this manual and on the printer so that you
can properly use the printer, and to prevent any damage to property, harm or injury to
yourself and others. Make sure to read their explanations carefully to familiarize yourself
with their meanings.
This symbol indicates information that, if ignored or applied
incorrectly, creates the danger of death or serious personal injury.
This symbol indicates information that, if ignored or applied
incorrectly, creates the possibility of personal injury or property
damage.
Caution
Warning

Safety Precautions
1
5
Liquid
Do not place any container with water or chemicals, such as flower vase or cup, as
well as small metallic objects, near the printer. If any of these should drop into the
printer, immediately turn off the power and contact your nearest dealer or service
center. Continued use creates a danger of fire or electric shock.
Foreign Matter
Do not drop or insert metallic or flammable objects into the openings on the
printer (such as outlets for cables). If any of these should fall into the printer,
immediately turn off the power and contact your nearest dealer or service
center. Continued use creates a danger of fire or electric shock.
Dropping and Damage
Should the printer ever be dropped or otherwise become damaged, immedi-
ately turn off the power and contact your nearest dealer or service center.
Continued use creates a danger of fire or electric shock.
Abnormal Conditions
Continued use of the printer while it is emitting smoke or strange odors creates the
danger of fire or electric shock. Immediately turn off the power and contact your
nearest dealer or service center. Do not try to service the printer by yourself.
Disassembly
Never try to take the unit apart or modify it in any way. Doing so creates the danger of
fire or electric shock. Contact your nearest dealer or service center for checking,
adjustment, or repair.
Battery Pack
• Never try to take apart the battery pack or modify it in any way such as with
a solder iron.
• Never expose the battery to direct flame, throw it into fire, or take any
actions that may lead to shorting.
•When charging the battery pack, make sure to use the printer or the
specified battery charger.
Warning

Safety Precautions
1
6
AC Adapter/Battery Charger (Option)
•Use only the specified voltage. Using a different voltage may create the danger of
fire or electric shock.
• Use only the specified AC adapter. Using a different one may create the danger of
fire or electric shock.
• Never use the battery charger with any other battery pack except for the specified
one. Doing so can rupture the battery, cause leakage, fire or electric shock.
• Never cut, damage or modify the power cord. Also, never place heavy objects on
the power cord or heat or pull the power cord. Doing so may damage the cord and
create the danger or fire or electric shock.
• Should the power cord ever become seriously damaged (internal wiring exposed or
shorted), contact your nearest dealer or service center for repair. Continued use of
such a cord creates the danger of fire or electric shock.
• Never modify, excessively bend, twist, or pull the power cord. Doing so creates the
danger of fire or electric shock.
Warning

Safety Precautions
1
7
Location
Do not locate the printer in the area subjected to high humidity or dew. If dew forms
inside the printer, immediately turn off the printer and do not use it until it has been
dried up. Continued use creates the danger of electric shock or the printer damage.
Power
•Do not use wet hands to operate the power switch, replace the battery pack or
unplug the AC adapter or battery charger. Doing so creates the danger of electric
shock.
• The AC adapter set provided for this printer is specific to this printer. Do not use it
for other electric equipment.
Thermal Head and Stepping Motor
•The thermal head gets very hot after printing. Take care when replacing the label or
cleaning the printer just after printing to avoid burns.
• Touching the end of the thermal head with bare hands may cause injury. Take care
when replacing the label or cleaning the printer to avoid injury.
• Do not try to replace the thermal head by yourself. Doing so creates the danger of
injury, burns, or electric shock.
Easy Cutter
This part contains a blade. Take care to avoid being injured by the blade and other
sharp parts in the printer.
Replacing the Battery Pack
•Use only the specified battery pack.
• When replacing the battery pack, make sure to install the pack in the correct
orientation. Incorrectly replacing the battery creates the danger of injury or damage
to surrounding areas, explosion is caused.
• Replacing a small-size rechargeable battery (Lithium ion battery)
Apply insulation treatment for the old battery pack by sealing the contact with tape
or the like and ask our sales representative or service center for the measures to be
taken to recycle the reusable materials.
Do not place the battery pack together with other batteries such as dry batteries.
Leaving the printer unused for a long time
If you have no plan to use the printer for a long time, remove the battery pack from
the printer and unplug the AC adapter from the wall outlet.
Maintenance and Cleaning
For safe maintenance or cleaning of the printer, make sure to remove the battery
pack and the AC adapter from the printer.
Caution

Safety Precautions
1
8
Precautions in Use
Do not place the printer in a hot or cold place.
The operation temperature range is -15°C to 50°C (for wireless LAN: 0 to 50°C) where
humidity does not cause condensation. Do not place the printer in an area with high
humidity or at a temperature outside the specified range.
Do not drop or apply undue shock to the printer.
The printer is generally resistant to vibration possibly caused during normal
transportation. However, do not apply extreme vibration or shock by dropping the printer.
Do not disassemble or modify the printer.
The printer has high-precision components inside requiring fine adjustment. Do not
disassemble the printer.
Connect the correct cables to the external input terminals.
Cables of the correct specifications are required for connection to the external equipment
through the external input terminals. Contact your nearest dealer or service center if
necessary.
Use the recommended accessories.
Using optional equipment other than the specified equipment may cause a malfunction.
Always use the equipment specified in this guide.
Use the correct media.
Use the specified media. Otherwise, faulty printing or printer damage may occur.

Unpacking
2
9
2. Unpacking
Make sure you have all the printer components shown here. If any component is
missing, contact the retail store or dealer where you purchased the product from.
GWP-leaflet
Quick Guide
Printer unit
Battery pack
*The appearance of any cushioning material supplied (such as protector pads on the
printer holder) may be changed across different production batches.
Shoulder belt

Names of Parts
3
10
POWER button
LCD *1
Infrared communication sensor
PRINT button
FEED button
STATUS (LED)
Battery life indicator
(LED) *2
3. Names of Parts
Easy cutter
Main cover
Cover release lever
Dispenser unit
RS-232C cover
DC input terminal cover
Battery cover
Label dispenser
USB/DIP switch cover
Note: MB400i/MB410i series have two different models. One is the printer with the rubber
boot and another is the printer without the rubber boot. This document shows the
picture of the printer without the rubber boot.

Names of Parts
3
11
234
4
D
1
ON
110
100
90
80
70
60
*1Only provided on wireless LAN interface operating panel (manufacturer option). For
other options, see “Options” on page 35.
*2On a wireless LAN interface operating panel (manufacturer option), a CHARGE LED is
provided.
Label guide
Label width scale
Platen
Label guide stopper
DIP switch
USB connector
RS-232C connector
Label guide

Names of Parts
3
12
Names and Functions of Operating Parts
RS-232C cover:
This covers the RS-232C connector.
RS-232C connector:
Connects with a PC etc.
USB/DIP switch cover:
Covers the USB connector and DIP
switch.
USB connector:
Connects with a PC etc.
Main cover:
Open this cover to set the labels.
Cover release lever:
Use this to release the main cover.
Easy cutter:
Cuts the printed label.
Infrared communication sensor:
Contains an infrared receiver/transmitter
element.
DIP switch:
Sets the operation mode. (See P. 48)
Dispenser unit:
Move this when using Dispense mode
printing for the labels.
POWER button:
Tu r ns the power on and off.
Battery cover:
A specialized battery pack is placed
inside.
Battery life indicator (LED):
Displays the available battery power.
Label guide:
Set this to match the size of the label
width used.
Label guide stopper:
Press this toward the back to unlock the
label guide and adjust the label guide.
Label dispenser:
Printed labels are ejected here.
Label width scale:
Use this scale to match the label width
used.
DC input terminal:
Connect the AC adapter.
DC input terminal cover:
Cover for the DC input terminal.
FEED button:
Feeds the labels.
PRINT button:
Takes the printer ONLINE and OFFLINE.
STATUS (LED):
Displays the printer status. (See P. 30-31
and 41-47)

Preparing for First-time Operation
4
13
1Connect the power cord to the
charger unit, then plug it into the
outlet.
•When charging is complete, the
CHARGE lamp lights green (fully
charged).
4. Preparing for First-time Operation
Charging the Battery Pack
• Charging by installing the battery pack in the battery charger (optional)
Install the battery pack in the battery charger (optional) and charge it.
CHARGE
The optional battery charger set provided for this printer is specific to this printer.
Do not use it for other electric equipment.
Charging time
It takes about 1.5 hours for the CHARGE lamp to turn off when charging a completely
depleted battery.
2Insert the battery pack. Insert the
battery pack into the slot, with
the terminal pointing downward.
•When charging begins, the
CHARGE lamp (red) lights. When
charging is complete, the CHARGE
lamp lights green (fully charged).
3Remove the battery pack when
charging is complete.

Preparing for First-time Operation
4
14
Charging time
It takes about 5 hours for the battery remaining power display to turn off when
charging a completely depleted battery.
1Remove the DC input terminal
cover, and insert the DC output
terminal.
• Charging by installing the specialized AC adapter (optional) on the printer
This charges the battery pack while it is installed in the printer.
DC output terminal
AC adapter
DC input terminal
The AC adapter set provided for this printer is specific to this printer. Do not use it
for other electric equipment.
Note
•When the CHARGE lamp is not lit, check that the battery pack is installed securely.
The battery may not be charged when not securely installed.
•When a charged battery pack is installed, the CHARGE lamp first lights red, then lights
green.
2Plug the AC adapter into the
outlet.
When charging begins, the battery life
indicator lights red. When charging is
complete, the battery life indicator
disappears (fully charged).
*On a wireless LAN interface
operating panel (manufacturer
option), the CHARGE LED lights
red when charging begins. When
charging is complete, the CHARGE
LED turns off (fully charged).

Preparing for First-time Operation
4
15
Installing and Removing the Battery Pack
Battery pack
Hook
Te r minal
Handle
1Open the battery cover.
2While pressing the gray hook,
insert the battery pack, then
close the battery cover.
Insert the battery pack with the terminal
side toward the printer.
3To remove the battery, press the
gray hook to unlock it, then hold
the handle and pull out the
battery.
* Be sure to turn the power off before removing or replacing the battery
pack.
When the power is off, the STATUS LED turns off (see “Power OFF” on
page 22). Do not remove the battery pack until this light turns off.
Make sure to check that the STATUS LED has turned off before
removing the battery pack.
*Note that removing the battery pack by the operation above may
prevent updating the information in the printer memory.

Preparing for First-time Operation
4
16
1Remove the DC input terminal
cover, and insert the DC output
terminal into the input terminal.
Using AC Adapter
Install the specialized AC adapter (optional) on the printer for use.
The AC adapter set provided for this printer is specific to this printer. Do not use it
for other electric equipment.
•Use AC ADAPTER: Model No. TG-5001+19v
(LEAD YEAR ENTERPRISE Co.,LTD.)
DC output terminal
AC adapter
DC input terminal
2Connect the AC adapter into the
outlet.
* Be sure to turn the printer power off before detaching the DC output
terminal for the AC adapter, or disconnecting the power supply.
Note that disconnecting the power supply in ways other than described
above may prevent the printer from correctly storing any settings in
memory.
No battery pack is necessary when the AC adapter is used. When the
battery pack and AC adapter are used simultaneously, charging begins if
the battery is not fully charged. The display becomes normal when fully
charged (See P. 14).

Preparing for First-time Operation
4
17
Loading Labels
The label installation method differs by printing mode.
Continuous printing mode
Label paper Journal paper
(See figure on P. 40)
Label guide stopper
1Slide the cover release lever in
the arrow direction to open the
cover.
First, slide the dispenser unit to the
continuous printing mode position.
(See P. 21)
2While pressing the label guide
stopper, slide the label guide to
the label size to be used.
3Load the paper in the printer.
Make sure the roll is oriented correctly.

Preparing for First-time Operation
4
18
5Check that the label tip is
protruding. Then close the main
cover by pressing the middle of
the cover.
Close the main cover slowly, while
pulling the cover release lever.
4Confirm that the label roll can be
rotated easily by hand.
If rotation is labored, this can cause a
feed error. Remove the label roll and
adjust the label guide. Note that the
label guides do not require adjustment
when you are using labels with the
same width.
This completes loading the labels for continuous printing mode.

Preparing for First-time Operation
4
19
Dispense mode printing
Label paper Non-separated labels
(See figure on P. 40)
Label guide stopper
1Slide the cover release lever in
the arrow direction to open the
cover.
First, slide the dispenser unit to the
continuous printing mode position. (See
P. 21)
*Never slide the dispenser unit while
the main cover is open.
2While pressing the label guide
stopper, slide the label guide to
the label size to be used.
3Peel the label at the tip of the
label paper.
Dispense mode printing is not required
for non-separated labels.

Preparing for First-time Operation
4
20
10mm
4Load the paper in the printer.
Make sure the roll is oriented correctly.
5Confirm that the label roll can be
rotated easily by hand.
If rotation is labored, this can cause a
feed error. Remove the label roll and
adjust the label guide. Note that the
label guides do not require adjustment
when using labels with the same width.
6Check that the label tip is
protruding (10 mm or more).
Then close the main cover by
pressing the middle of the cover.
Close the main cover slowly, while
pulling the cover release lever.
7For non-separated labels, press
the FEED button to feed one
sheet, and pull upward to tear
along the perforated line.
If the labels clog at the label dispenser,
restart the label loading process from
the beginning.
Other manuals for MB400I
5
This manual suits for next models
1
Table of contents
Popular Other manuals by other brands

JUWEL Aquarium
JUWEL Aquarium SB 835 Assembly instructions
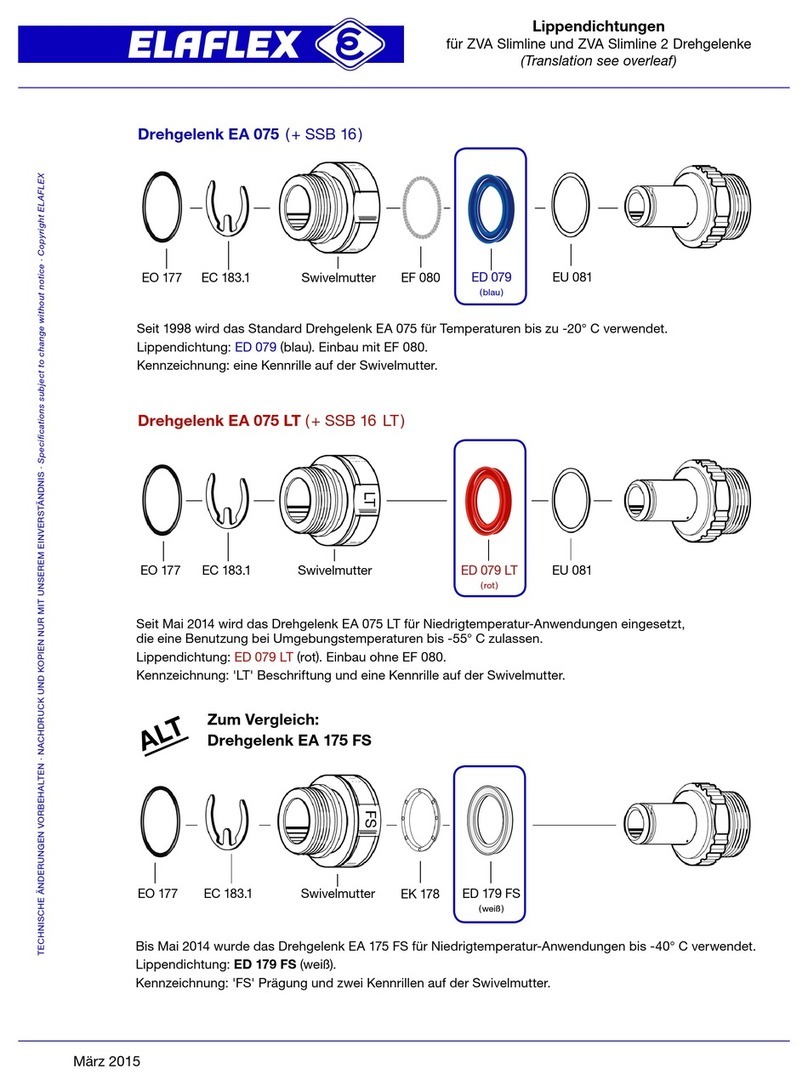
Elaflex
Elaflex Swivel EA 075 Assembling manual
Plantronics
Plantronics BLACKWIRE C210-M Quick setup guide

Oase
Oase HighLine Classic LED daylight 70 operating instructions
Soyal
Soyal AR-661UG user manual
SMC Networks
SMC Networks IDF60-20-C Operation manual
