manuals.online logo
Brands
  1. Home
  2. •
  3. Brands
  4. •
  5. Saxby Lighting
  6. •
  7. Landscape Lighting
  8. •
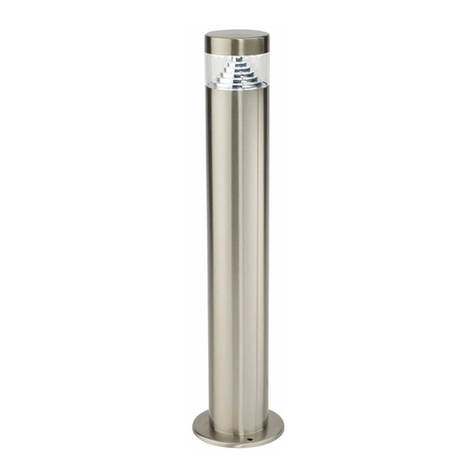
  9. Saxby Lighting Bodenn 78646 User manual

Saxby Lighting Bodenn 78646 User manual

www.saxbylighting.com
Instruction manual
78646, 78647
Bodenn
We recommend cleaning with a soft dry cloth. Do not use solvents or abrasive cleaners as these could damage the finish.
Care and Safety
Technical data
220-240V~, 50Hz
Supply
Voltage:
Bulb
Type:
78646----1.3W LED module (COB), 4000K
78647----1.3W LED module (COB), 3000K
The power supply is Double Insulated and does not require connection to an Earth circuit.
Waste electrical products should not be disposed of with household waste. Please recycle where facilities
exist. Check with your Local Authority or local store for recycling advice.
This product is not suitable for dimming.
This product is rated at IP67.
IP
67
Conformity with all relevant EC Directive requirements.
Conformity with all relevant UKCA Directive requirements.
Wiring
You have correctly identified the wires.
The connections are tight.
No loose strands have been left out of the
connection block.
Check that...
NEUTRAL
SWITCHED LIVE
BLUE (N)
BROWN (L)
SUPPLY LIGHT FITTING
For your safety, always switch off the supply before maintaining the system.
Having correctly identified the wiring from your existing light fitting, connect to the approved IP67 (or higher rated) terminal
block in the following way (recommended terminal block ref. 90131/90132)
These product contains a light source of energy efficiency class F.
For further information, please visit https://www.lighting-info.co.uk/78646
V6 29/11/2021
EU Manufacturer: Brilliant AG,
Brilliantstrasse 1, D-27442 Gnarrenburg
UK Manufacturer: BH17 7BY
Always disconnect the product from mains at least 10 minutes allowing to cool down before any maintenance or adjustment.
This LED's are protected by a plastic lens. The lens part must be replaced immediately should it
become cracked or damaged. This fitting must not be used without the plastic lens in place.
Replace Cracked Shade
Non-replaceable control gear
Non-replaceable light source
Warning
Please read these instructions carefully before commencing any work.
This unit must be fitted by a competent and qualified electrician.
Install in accordance with IEE Wiring regulations and current Building Regulations.
Check the pack and make sure you have all of the parts listed.
To prevent electrocution switch off at mains supply before installing or maintaining this fitting. Ensure other persons cannot
restore the electrical supply without your knowledge.
If replacing an existing fitting, make a careful note of the connections.
This light fitting should be connected to a circuit with a 30mA RCD fitted.s.
An appropriate outdoor mains cable must be used to power this product.
This product is desinged to be fitted horizontally and vertically in decking,walls, steps, and suitable for installation dierctly
into the ground.
Never cover the product.
This system contains non-replaceable parts and cannot be serviced. If damage occurs the part should be scrapped.
This product is not suitable for location in or near a marine environment.
This product is unsuitable for immersion in water.
Rated maximum surface temperature is 140 ºC.
This luminaire with type Z attachment, for type Z attachments: the external flexible cable or cord of this luminaire cannot be
replaced; if the cord is damaged, the luminaire shall be destroyed.
The resistant to static loads is 5KN. This product is not suitable for drive-over, carriageways, parkings, etc.
Waste electrical products should not be disposed of with household waste. Please recycle where facilities exist. Check with
your local authority or retailer for recycling advice.
Thank you for purchasing this light fitting. Please read the instruction carefully before use to ensure safe and satisfactory
operation of this product. Please retain these instruction for future reference.
Installation
Existing fittings must be completely removed before installation of a new product. Before removing the existing fitting, carefully
note the position of each set of wires.
Note that the switch is turned off before installation.
After deciding the layout of the light fitting/s, and the position of the junction box, ensure the cables are long enough to the
desired positions.
The power supply is Double Insulated and
does not require connection to an Earth circuit.
Layout
Plan the desired layout of these fittings carefully, ensuring the cables will reach the distances between the junction box and the
each LED light fitting.
Avoid locating any cables in positions that would cause a hazard. Position cables and outdoor rated junction boxes
(not supplied) away from areas where they may be at risk from being cut, trapped or damaged.
An appropriate outdoor mains cable must be used to power this product. We recommend that you use H05RN-F specification
cable (not supplied) which is an outdoor grade, rubber sheathed cable.
The mains supply cable must have a minimum cross section area of 1.0mm2.
Cables must be protected using suitable conduit or plastic trunking.
Take care not to drill into any pipes or mains cables beneath the surface during mounting holes preparation.
• Used as a deck light. See Fig 1. Carefully pull the product out of plastic housing. Select a mounting location for the
product and prepare a cut out size of D36 x 50mm.
• Used as a ground light. This product must be fitted into the supplied housing and then installed into concrete or paving
slab. It must not be installed into soil. See Fig 2. Select a mounting location for the product and prepare a cut out size of
D39 x 90mm.
• Replace fuse or circuit breaker and switch on. Your light is now ready for use.
• Form a recess to fit the housing into. The dimensions of the housing are 39mm diameter with 90mm minimum ground void.
Ensure that there is adequate drainage below the product.
• It is recommended to cut the hole slightly smaller than needed, then file the hole until the recessed unit fits snugly.
• Ensure that there is some slack cable to allow removal of the unit.
• Push the unit into the hole, and adjust the cable so it does not get snagged.
Deck cut out size: Dia 36mm
Mininium deep: 50mm
LED head unit
1.5m
Supplied housing
Deck cut out size:
Dia 39 x 90mm
Supplied housing
for ground fitting
LED head unit
1.5m
Fig 1. Fig 2.
Deck fitting Ground fitting
Walkway use only
• Ensure that adequate room is left for the cable.
• Feed the cable of each unit through the mounting holes and check the fit of the unit in the hole.
This manual suits for next models

1

Other Saxby Lighting Landscape Lighting manuals

Saxby Lighting PYRAMID User manual

Saxby Lighting

Saxby Lighting PYRAMID User manual

Saxby Lighting EL-40104 User manual

Saxby Lighting

Saxby Lighting EL-40104 User manual

Saxby Lighting Canillo 67699 User manual

Saxby Lighting

Saxby Lighting Canillo 67699 User manual

Saxby Lighting Dax CCT Bollard User manual

Saxby Lighting

Saxby Lighting Dax CCT Bollard User manual

Saxby Lighting Hades 91954 User manual

Saxby Lighting

Saxby Lighting Hades 91954 User manual

Saxby Lighting Islay 68784 Manual

Saxby Lighting

Saxby Lighting Islay 68784 Manual

Popular Landscape Lighting manuals by other brands

Hess DALVIK Series Installation and operating instructions

Hess

Hess DALVIK Series Installation and operating instructions

Volt VWL-500-4-PBK installation instructions

Volt

Volt VWL-500-4-PBK installation instructions

Cooper Lighting MCGRAW-EDISON GAR Specification sheet

Cooper Lighting

Cooper Lighting MCGRAW-EDISON GAR Specification sheet

Oase LunaLED operating instructions

Oase

Oase LunaLED operating instructions

Malibu Boats LZ14001HP instructions

Malibu Boats

Malibu Boats LZ14001HP instructions

LIGMAN MARVIK 6 installation manual

LIGMAN

LIGMAN MARVIK 6 installation manual

Volt VHS-67 Series installation instructions

Volt

Volt VHS-67 Series installation instructions

Tamlite CITY PATH Installation & operating instructions

Tamlite

Tamlite CITY PATH Installation & operating instructions

AMP Lighting MR16 HydraPro Installation & maintenance guide

AMP Lighting

AMP Lighting MR16 HydraPro Installation & maintenance guide

ARRI Arrimax 12 Brochure & specs

ARRI

ARRI Arrimax 12 Brochure & specs

LIGMAN JET 4 installation manual

LIGMAN

LIGMAN JET 4 installation manual

Intermatic AL300 Installation & operating guide

Intermatic

Intermatic AL300 Installation & operating guide

SIGNIFY HADCO iUL516 installation instructions

SIGNIFY

SIGNIFY HADCO iUL516 installation instructions

Lucci Fresco HARBOUR LARGE BOLLARD with VERSION 2... installation instructions

Lucci Fresco

Lucci Fresco HARBOUR LARGE BOLLARD with VERSION 2... installation instructions

LIGMAN NYB-30111 installation manual

LIGMAN

LIGMAN NYB-30111 installation manual

LIGMAN LA-60004 installation manual

LIGMAN

LIGMAN LA-60004 installation manual

Gardigo 70020 Instructions for use

Gardigo

Gardigo 70020 Instructions for use

Hinkley Atlantis 15602 installation instructions

Hinkley

Hinkley Atlantis 15602 installation instructions

manuals.online logo
manuals.online logoBrands
  • About & Mission
  • Contact us
  • Privacy Policy
  • Terms and Conditions

Copyright 2025 Manuals.Online. All Rights Reserved.