Page 8
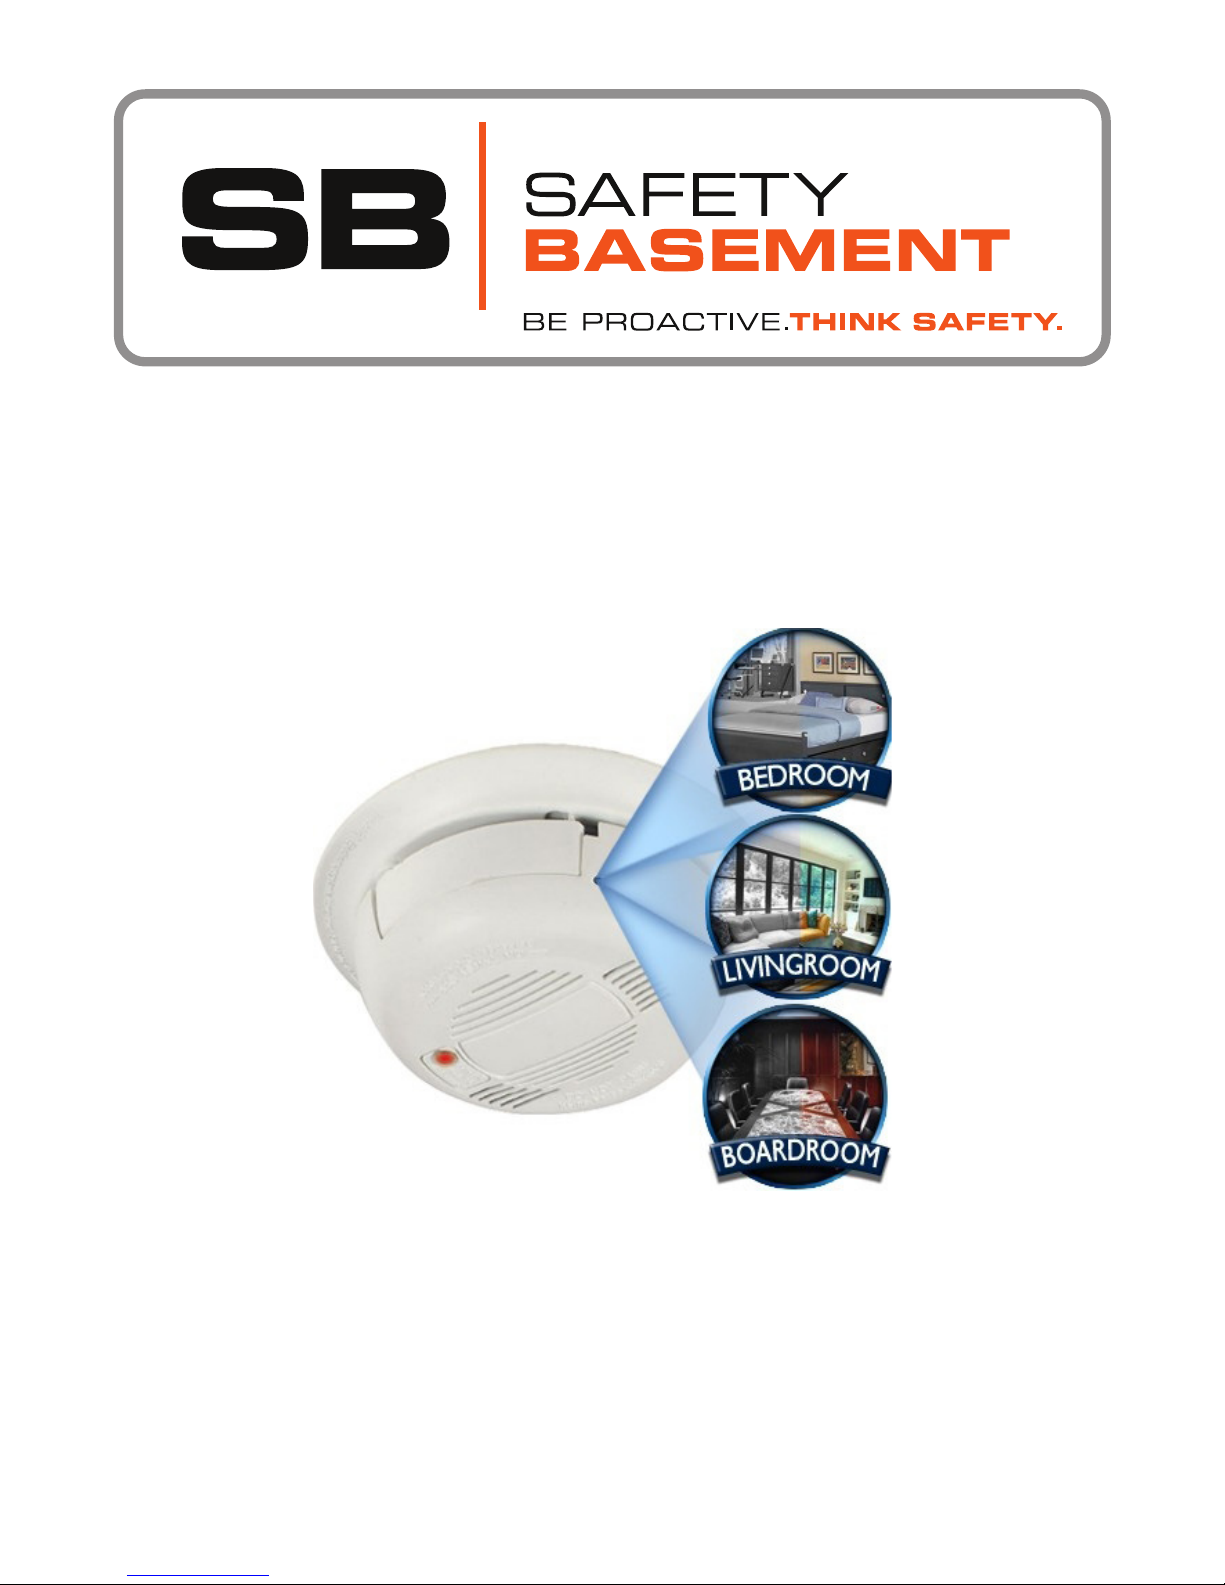
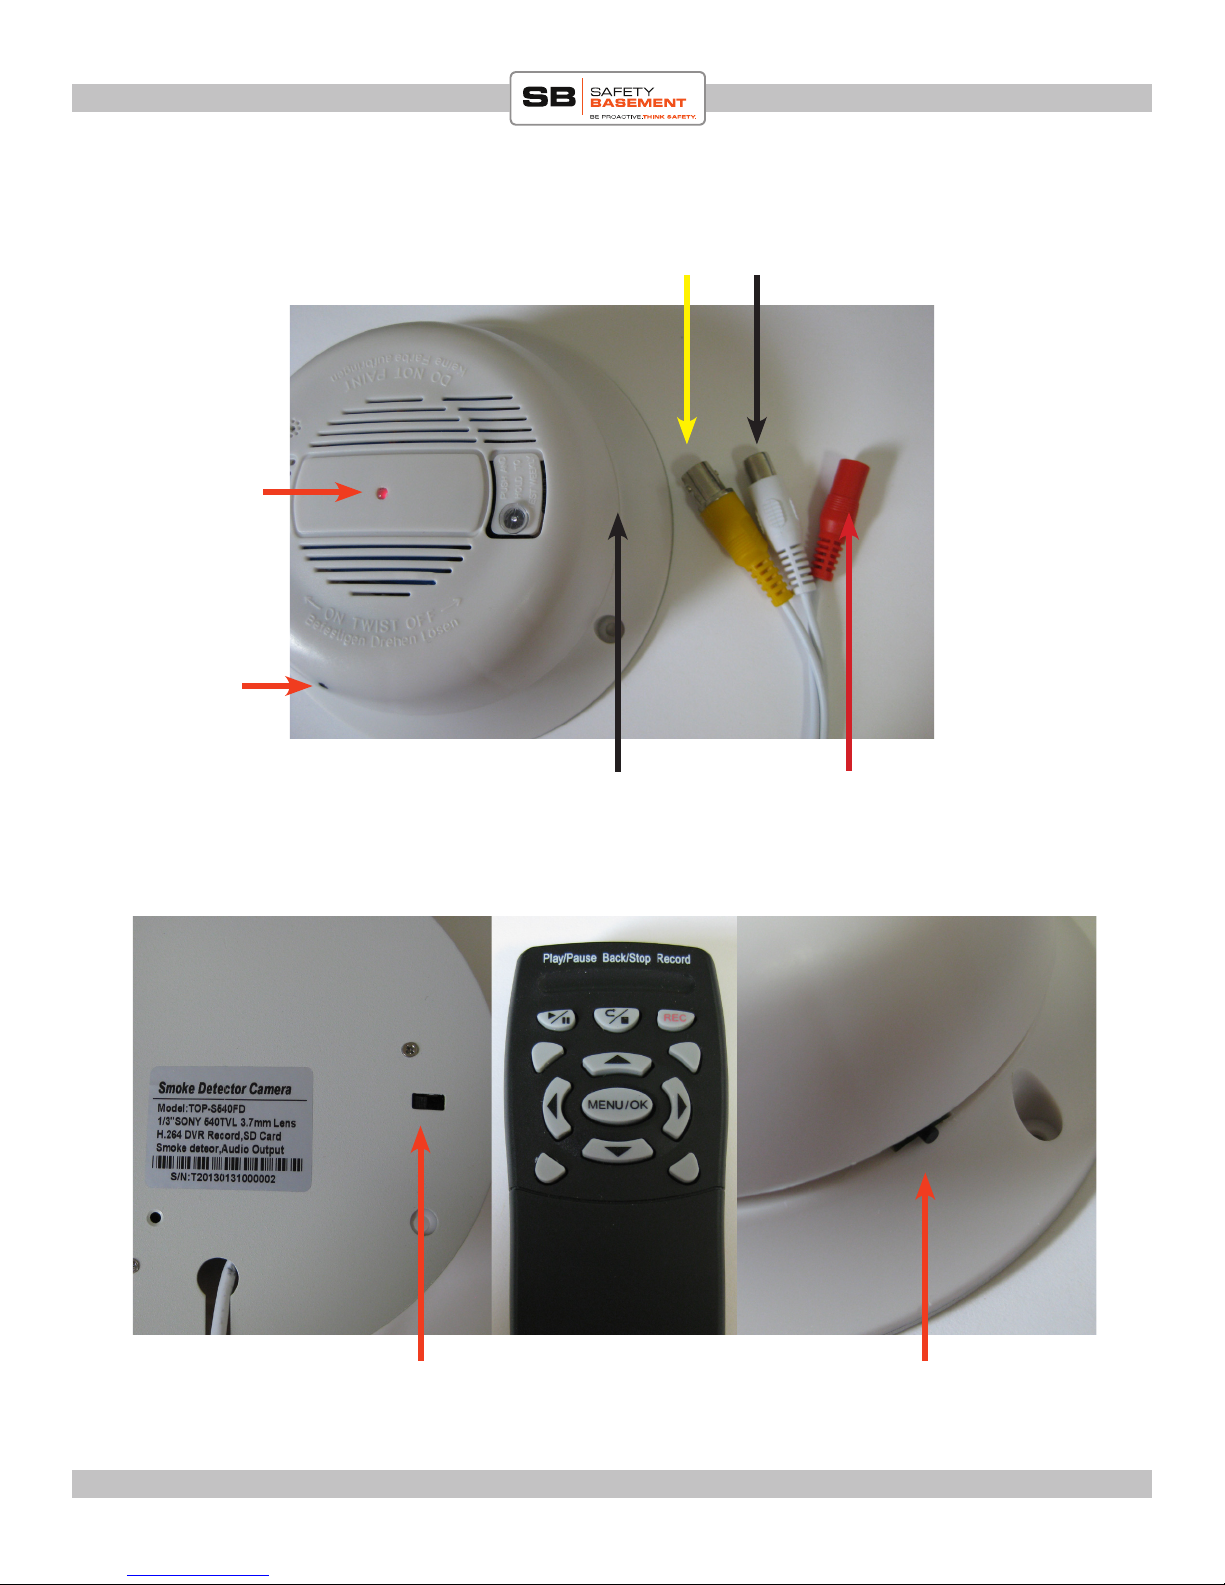
QUICK START Smoke Detector Camera : SB-SK540
www.SafetyBasement.com Phone: 877-345-2336 Fax: 888-236-2524
MANUAL RECORD SETTINGS
A manual recording is when you press the RECORD button on your remote. Your device will
immediately start recording using these settings. To stop recording, press the STOP button.
1. Highlight the Manual Record Menu and press OK to enter.
2. You can adjust the Video Size to 640x480 or 320x240. Access the options with the LEFT /
RIGHT arrows.
3. Adjust the frame rate to your preference.
4. Adjust the quality setting to your preference.
5. Set AUDIO to ON or OFF.
6. Press the BACK button to save your settings and return to the Main Menu.
SCHEDULE RECORD SETTINGS
Your device has 3 dierent Schedule Recording options; ALARM, MOTION or CONTINUE.
Each option can be set to dierent Video Size, Frame Rate and other settings. Enter each and
adjust to your preferences.
en hit the Back Button to return to the SCHEDULE RECORD menu. Note that the ALARM
icon is for ALARM, the PERSON icon is for MOTION ACTIVATION and the CLOCK icon is
for continious recording.
1. Highlight the Schedule Setup option and press OK.
2. You will see 24 Hours available to schedule on your device. Each Hour is represented by an
icon that reects the type of recording you want to do during that hour.
You may also choose the X for NO RECORDING, and the STAR for ALL OPTONS during
that hour.
3. Highlight the Schedule ON or OFF and adjust using the LEFT / RIGHT buttons.
4. Highlight each hour and use the LEFT / RIGHT arrows to choose the option for that hour.
For example, if you want NO RECORDING from 1am to 1:59am, move to the 01 HOUR
and use the LEFT / RIGHT arrrows until the icon is an X.
If you want Motion Detection from 3:00pm to 3:59pm, move to the 15 HOUR and choose
the PERSON icon.
5. To save your settings, use the Back Button to get to the Main Menu.
NOTE: Do not use the ALARM setting as it does not apply to this device. Use PERSON and
CLOCK icons in your schedule.