ScaraBot Endurance User manual

© 2020 ScaraBot Technologies GmbH All Rights Reserved 1
ScaraBot Endurance
Quick Start Guide
Release 0.0.2, March 10,2020

2 © 2020 ScaraBot Technologies GmbH All Rights Reserved
ScaraBot Endurance
ScaraBot Endurance is made of 100% high-strength and extremely light carbon fiber
composite, which brings to a curb weight of 2150g. It is a coaxial octocopter powered by
the powerful Herkules III motor controller and a flight controller base on PX4 stack
1. Landing Gear
9. Battery Connector
2. Motors
10. Remote control antennas
3. Propellers
11. Distance Sensor
4. Frame Arms
12. Remote Control Receiver
5. Hood
13. Payload Connector
6. Gimbal holder
14. XT 30 Connector. VBat Protected.
7. Aircraft Status Indicator
15. Hood fixers
8. GPS
The ScaraBot Endurance is compatible with a different variety of gimbals and payload.
This guide shows the BLG400 gimbal and Micasense Red Edge Payload in order to
demonstrate the most relevant functions.

© 2020 ScaraBot Technologies GmbH All Rights Reserved 3
Remote Controller
The standard remote control of the ScaraBot Endurance is the Herelink. It offers a signal
transmission up to 12km in EU. The Herelink integrates 3 important features of the
ScaraBot: remote control, telemetry and video link. Integrates a 5.46” touch screen on
board providing the user with the QGroundcontol as base station. Its built-in 4950 mAh
Lipo Battery allows a run time from about 6h.
1. Control Sticks
2. Control Sticks
3. Touch Screen
4. Flight mode selection
5. RTL
6. Power Button
7. Home Button
8. LEDs button
9. Not Used
10. Control Dial (Gimbal)
11. Camera Trigger
12. Omnidirectional antenna
13. Circular antenna
14. ¼” Mount
15. USB Connector
16. SD Card
Stick Mode is by default 2.

4 © 2020 ScaraBot Technologies GmbH All Rights Reserved
Payload
1. Camera holder
4. Roll Motor
7. Gimbal holder
2. Nick Motor
5. USB Connector
8. Payload Connector
3. Camera Connector
6. HDMI Connector
9. VBat Protected
Camera Control
The camera can be trigger either
direct through a RC button or
through the GCS
Gimbal Control
1. Camera trigger button
2. Camera trigger Interface
3. Image Index

© 2020 ScaraBot Technologies GmbH All Rights Reserved 5
Using ScaraBot Endurance
1. Charge the Components Batteries
Check the battery levels of the Remote control and charge it if needed.
* If the Battery values are below 30% it is advisable to charge the remote control before
using it. Turn it down and charge it as shown in the following picture.
The ScaraBot Remote controller is charged the same way a Smart Phone.
Check the Battery level of the ScaraBot Smart Battery.
1. Turn on the Remote
control
2. Check the battery
levels*
1. Turn on the Battery
2. Press this button to show the charge
Percentage.
Discharged
Charged
•This operation has to be done for every
battery pack

6 © 2020 ScaraBot Technologies GmbH All Rights Reserved
In case the Battery is not fully charged, please charge it to enjoy the most of the ScaraBot
Endurance.
* For the moment the Smart Charger can only charge two Batteries simultaneously.
2. Prepare Aircraft
Mount the Payload
1. Connect the Smart Charger to
the grid and turn it on.
2. Insert the batteries into the
Smart Charger.
3. The Batteries will be ready
once them stop blinking.

© 2020 ScaraBot Technologies GmbH All Rights Reserved 7
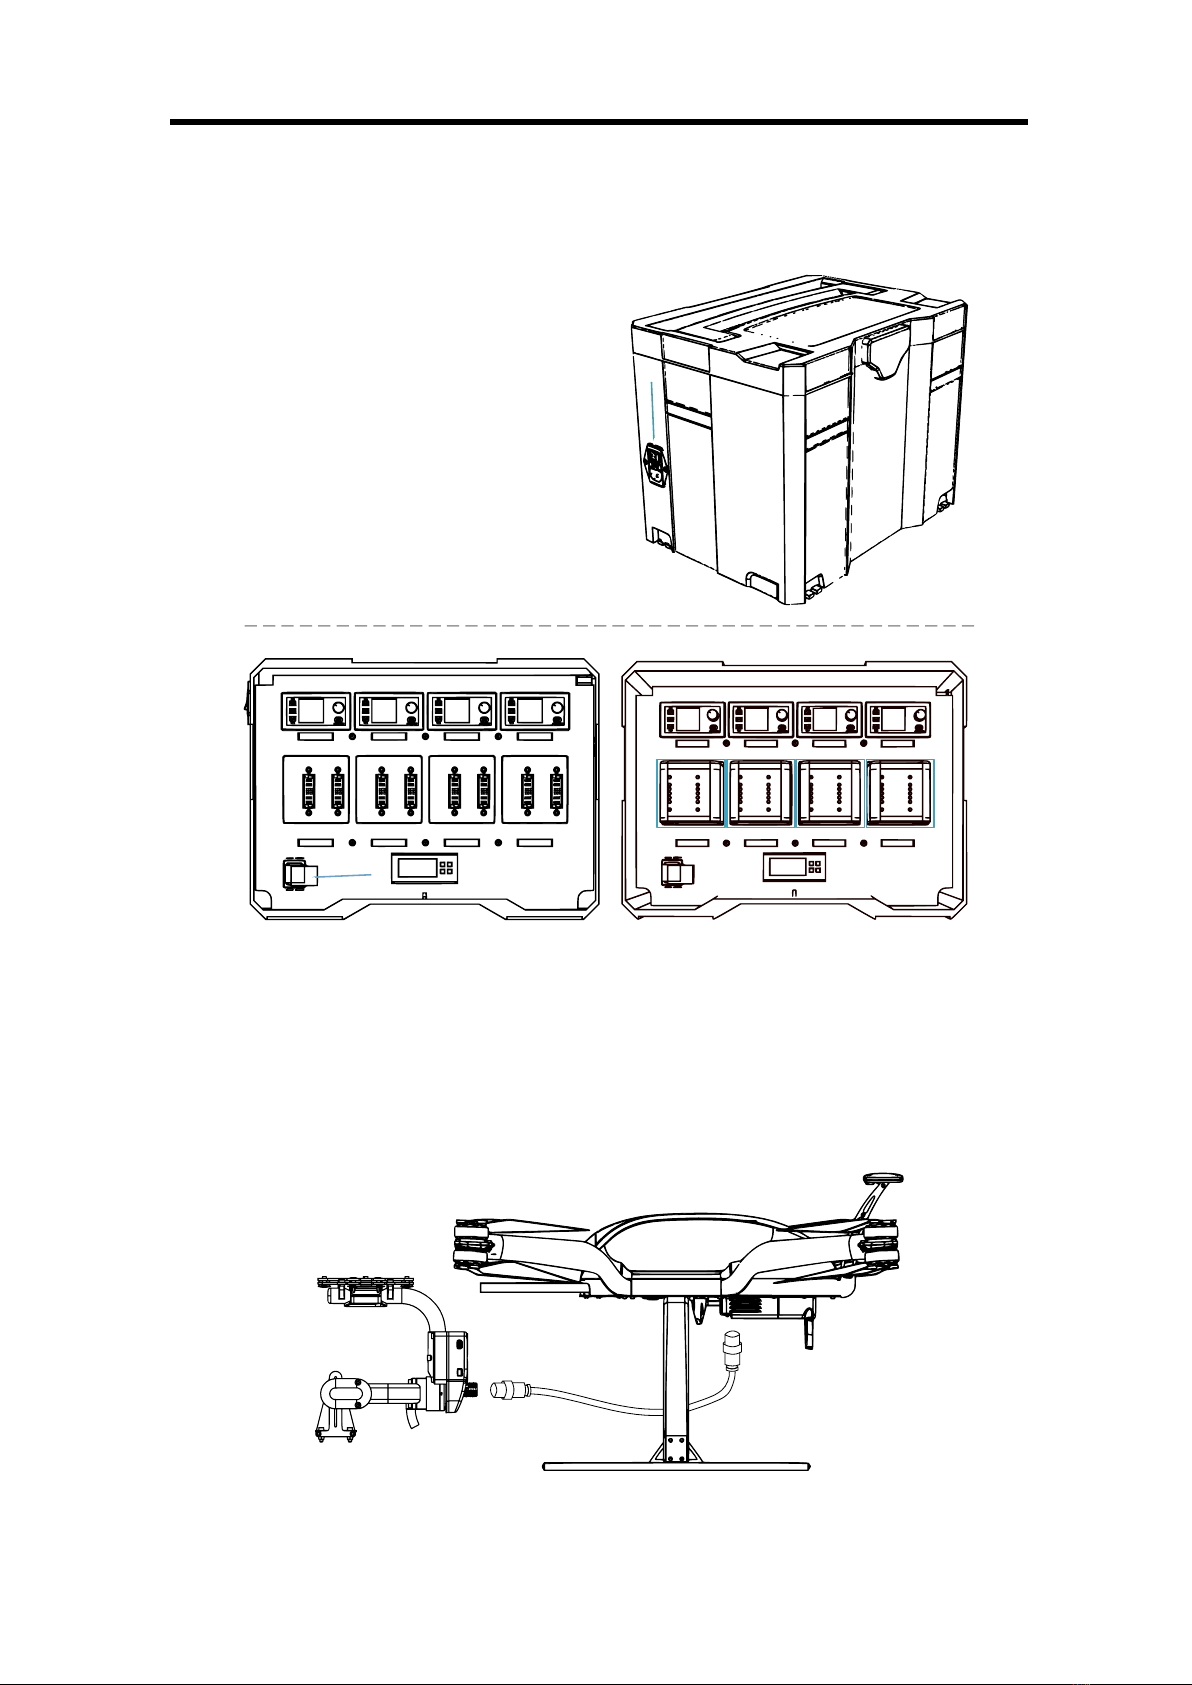
Balance the UAV.
1. Remove the Hood
2. Place the Battery on the top of the frame.
3. Lift the vehicle as shown in the picture.
4. If the UAV tilt to the front or back move the battery and/or the payload in order
to balance.
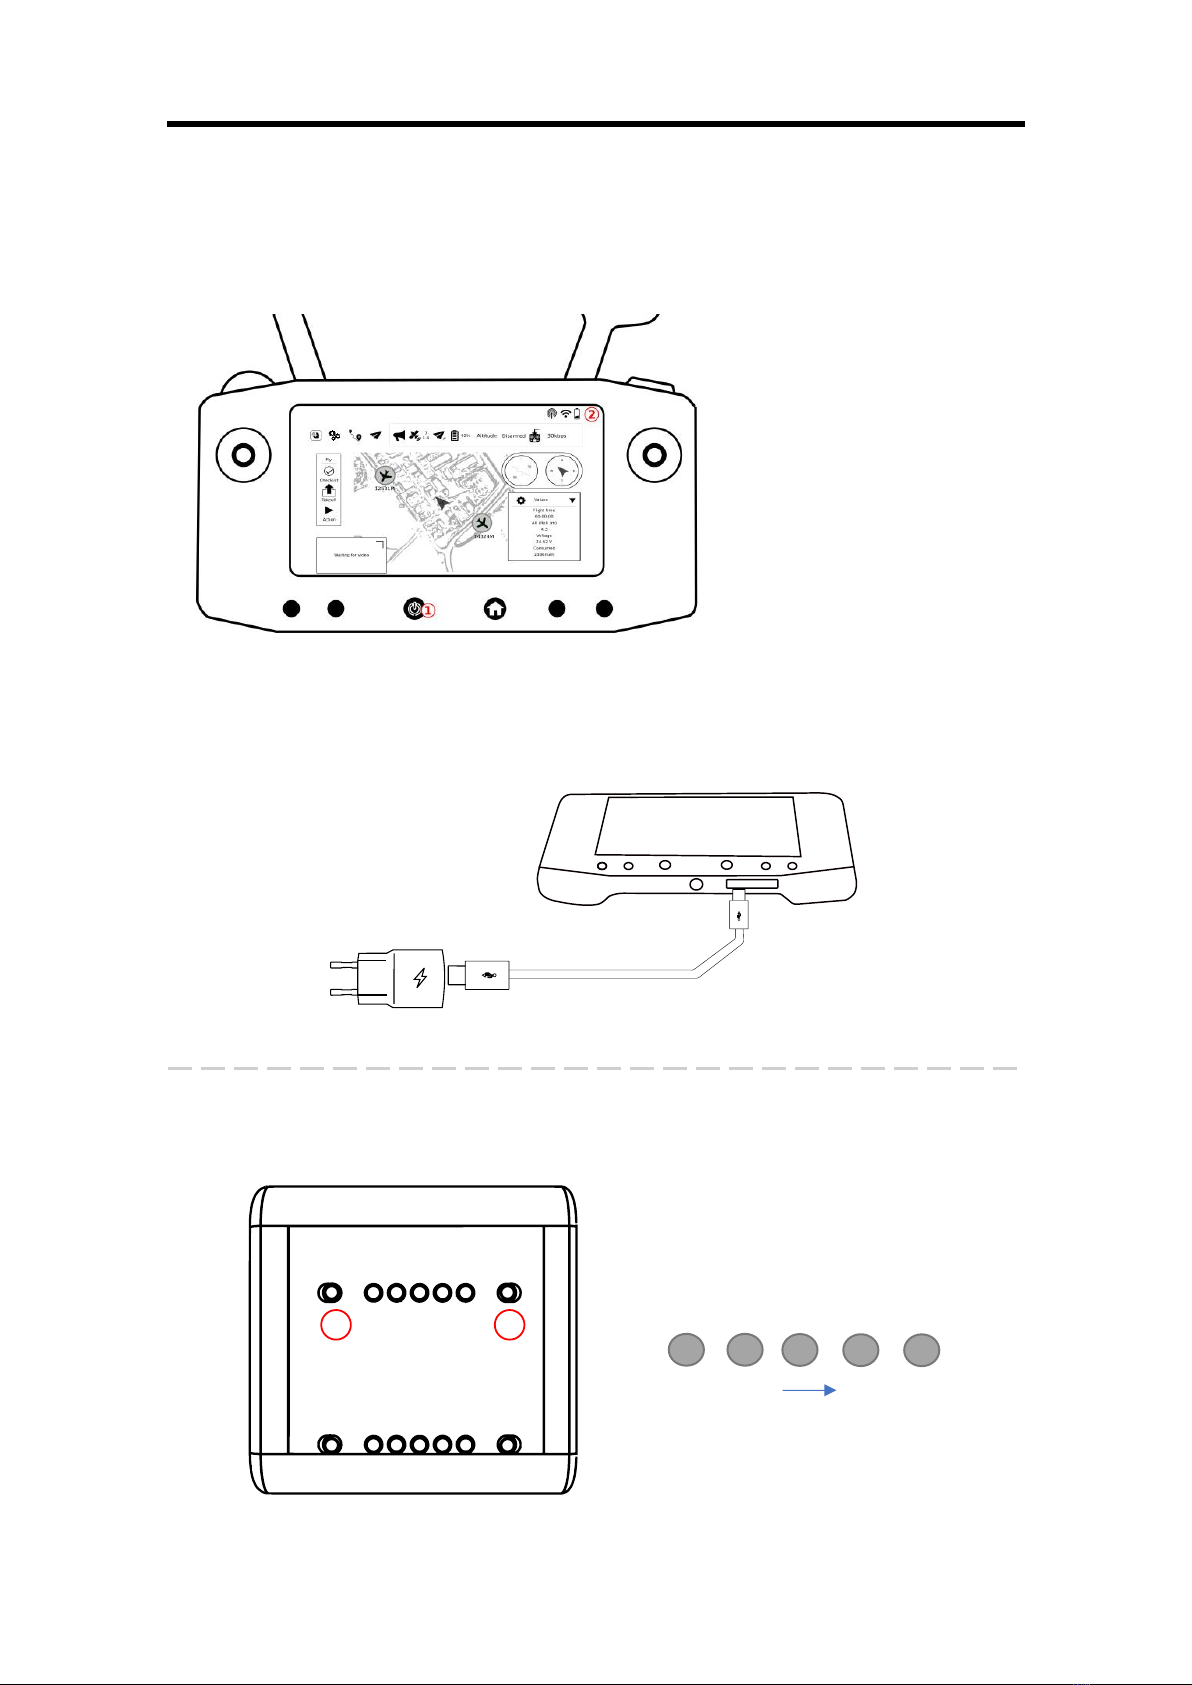
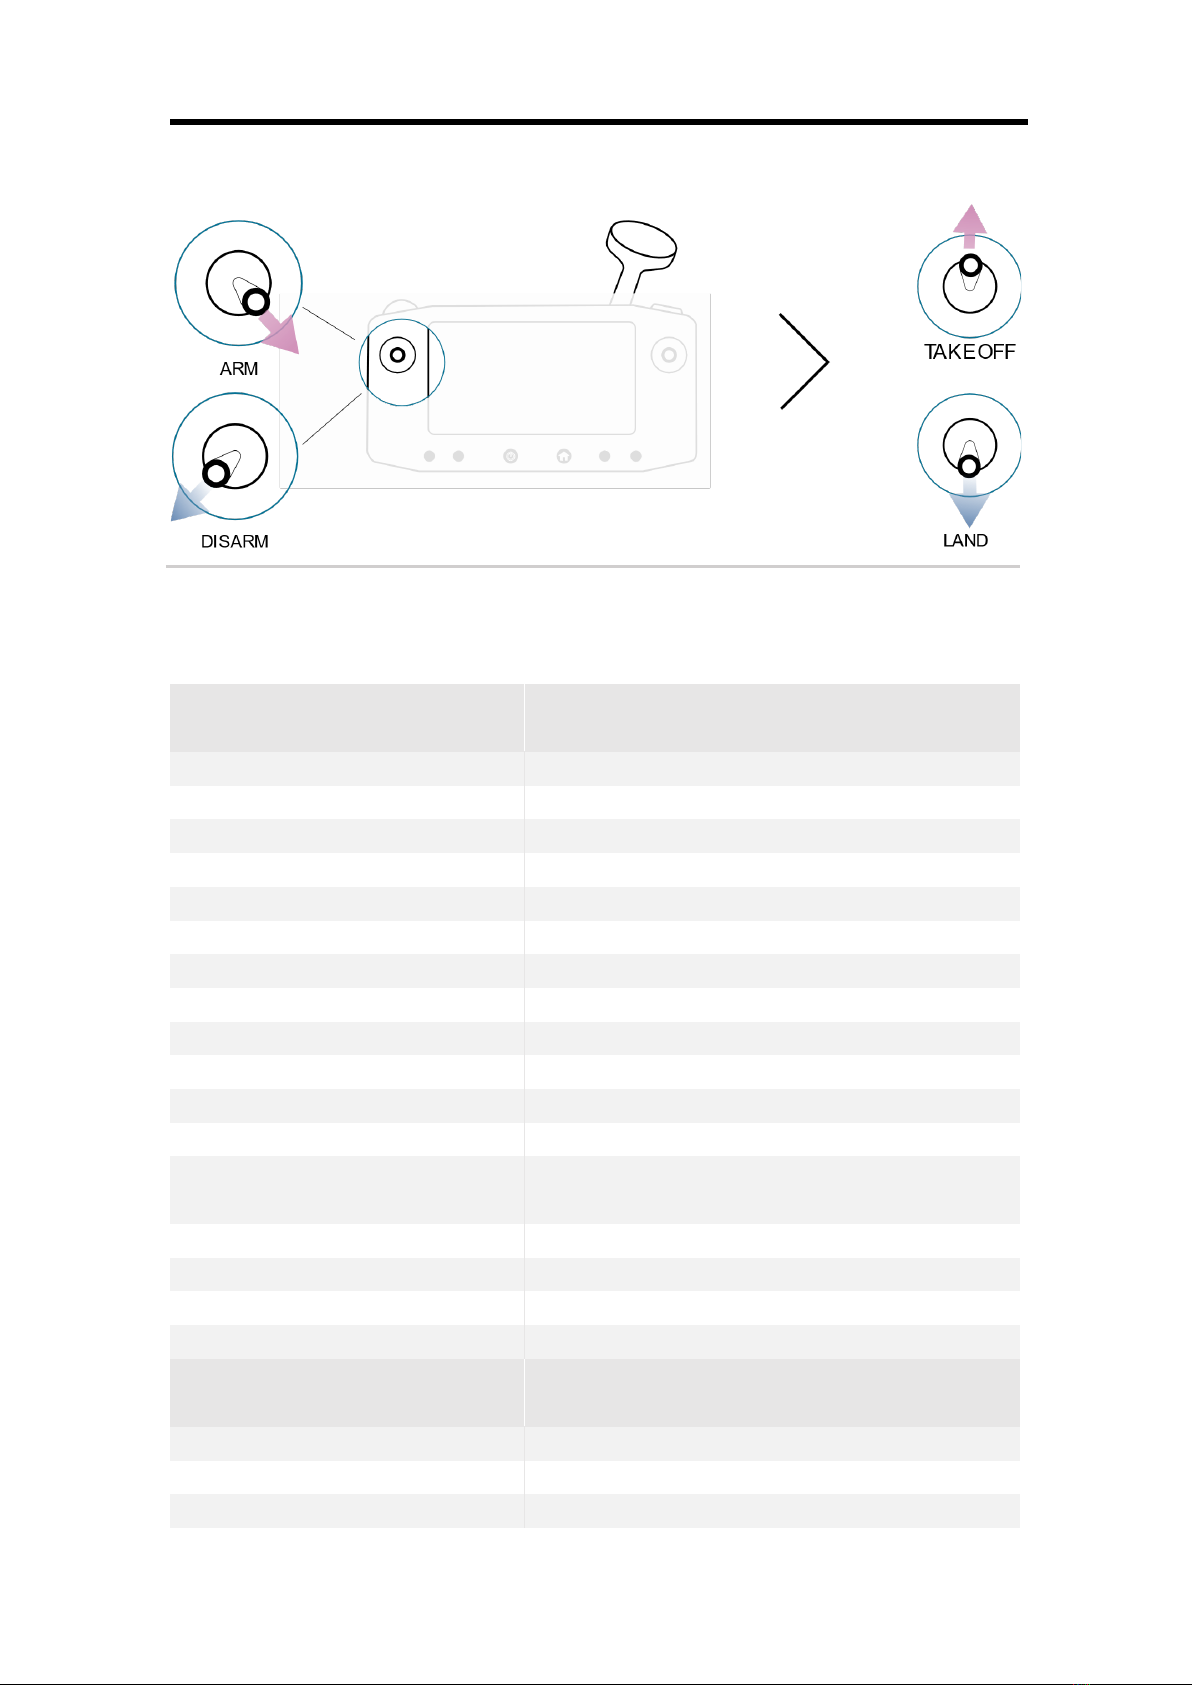
3. Prepare Remote Controller
Once the Remote control is active the connection will
automatically start. Check the connection is stablish and
before fly place the antennas correctly.
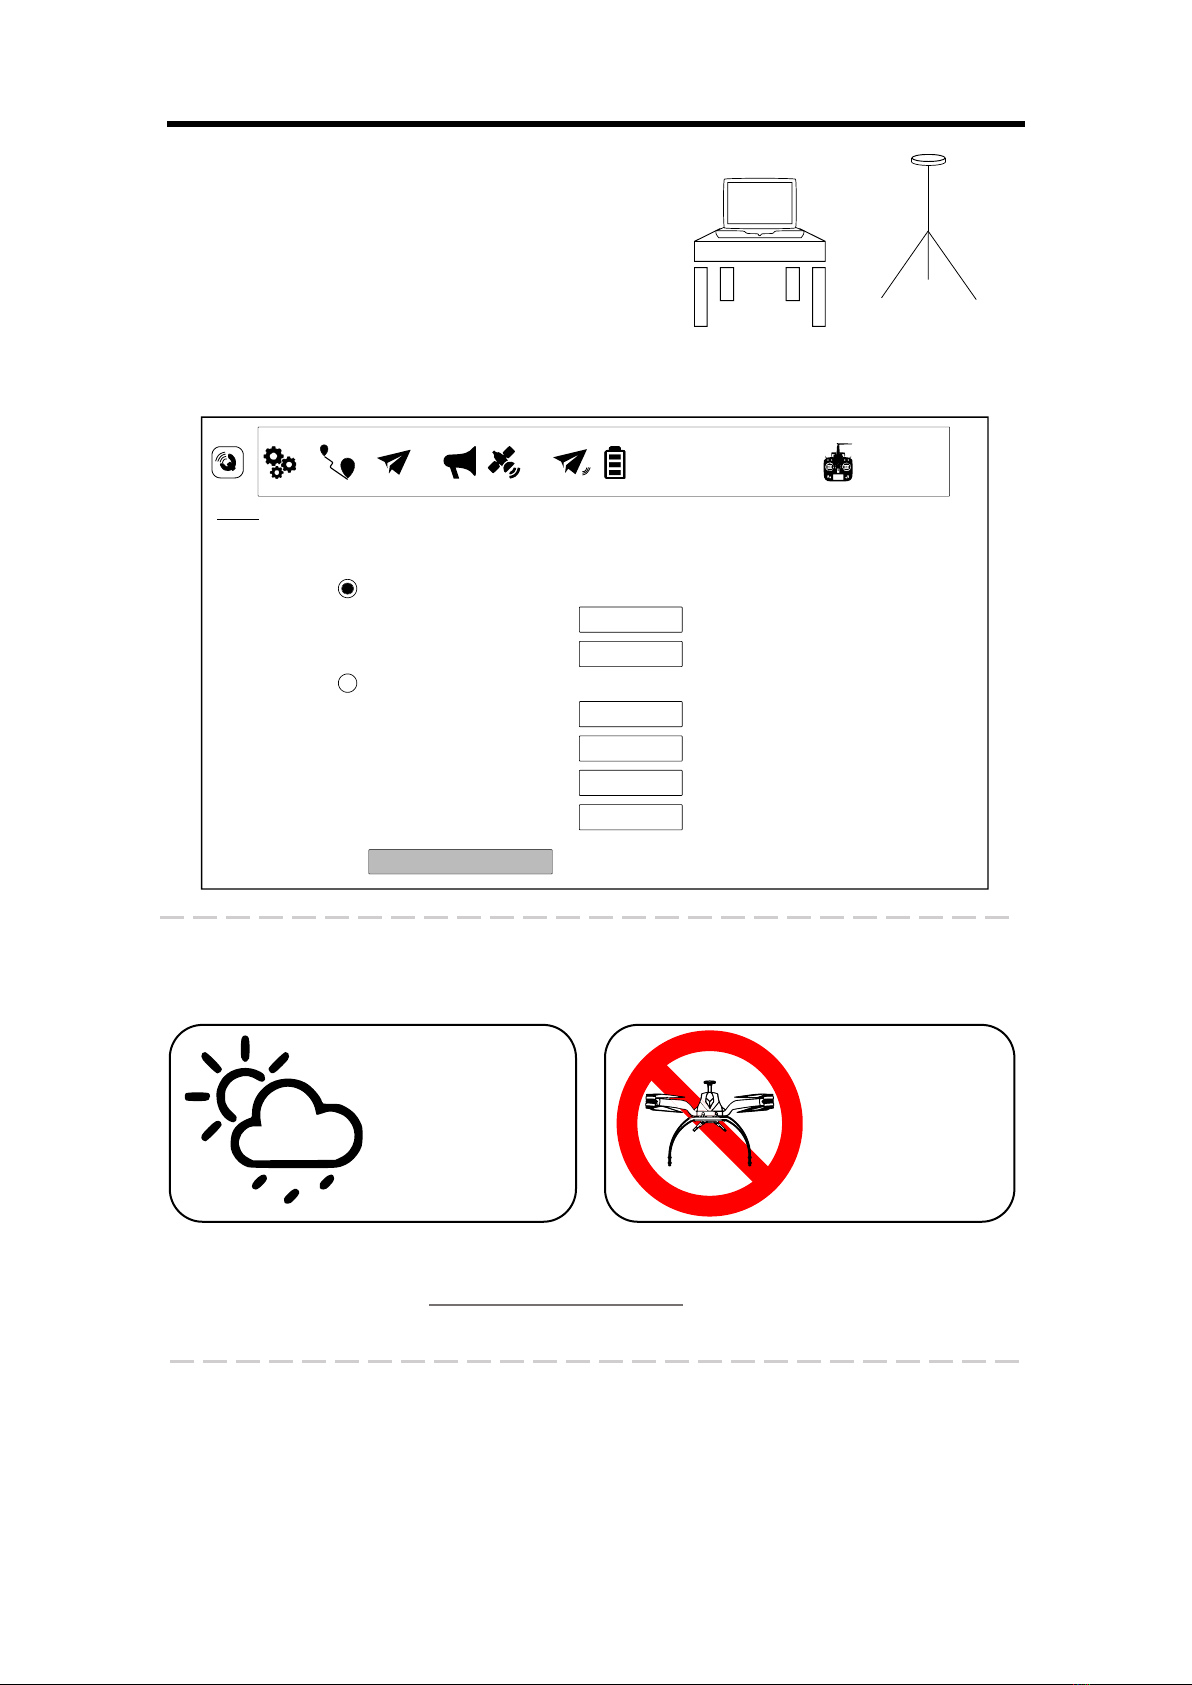
4. Before Flying
Compass Calibration
* Calibration has to be perform any time the aircraft requires it. In addition it should be
done every time the start point varies more than 100km.

© 2020 ScaraBot Technologies GmbH All Rights Reserved 8
RTK
In case the RTK version of the UAV is provided, place
it near the ground station, 2 or 3 meters above
ground to get a clear signal. It has to be also enabled
in the GCS.
Check Flight Environment
* Check no fly zones here: https://map2fly.flynex.de/. For more information refer to the
user manual.
Visual Inspection of the Vehicle
Before flying perform a visual inspection of the vehicle looking for obstruction at the rotos
or any screw or cable loose.
Before every flight
check if it is allow
to fly at the
specific location
Avoid flying under
snow, rain, fog,
over people,
streets and
industrial facilities

© 2020 ScaraBot Technologies GmbH All Rights Reserved 9
5. First Flight
Check Aircraft Status
Once the UAV is up and running check the Battery, GPS and Flight mode status.
*Check the battery is right connected and recognized. Wait until enough GPS are
available in order to set the flight mode to position.
Safety Button
QGroundControl Auto functions
*More information how the auto mode works under the ScaraBot Endurance User
Guide.
The Safety button is located at the
GPS. It is a secure measure in order
to avoid arming. Press it during 1sec
in order to enable the aircraft.

10 © 2020 ScaraBot Technologies GmbH All Rights Reserved
Manual Flight
Specifications
Aircraft
Model
ScaraBot Endurance
Package Dimensions
600x600x450mm
Diagonal Wheelbase
850mm
Number of Batteries
3
Weight
2.2Kg
Max Takeoff Weight
5Kg
Max Payload
1Kg
Max Angular Velocity
Pitch: 300°/s, Yaw: 150°/s
Max Pitch Angle
35°
Max Ascent Speed
4m/s
Max Descent Speed
3m/s
Max Speed
45 km/h (12,5m/s)
Max Service Ceiling Above Sea
Level
3000m
Max Wind Resistance
5 Bft, 11 m/s
Max Flight Time(No Payload
65min
Operating Temperature
-20 to 45°C
GPS
BeiDou, GLONASS, GPS / QZSS
Remote Control (air unit)
Dimensions
76.7x27 mm
HDMI
2 HDMI input connector
Pair
One button pairing

© 2020 ScaraBot Technologies GmbH All Rights Reserved 11
Antenna
2 x MMCX antenna interface
Operating frequency
2.4GHz ISM
Latency
Minimum of 110ms
Power consumption
Average below 4W
Transmission range
FCC 20km / CE 12km
Video resolution
720@30fps, 1080@30/60fps
Remote Control (Base Station)
Dimensions
217x106.5x31mm
Interface
MicroUSBx1TB flash, SD card up to 64GB
Remote control interface
Rocker x2, Wheel x 1, bottom key x 6,
Operating frequency
2.4GHz and 5GHz Hotspot ISM
Operating temperature
Video
5.46”. 1080, 16M colors, LCD touchscreen
Audio
Build in speaker and microphone
Modem
Bt, Wi-Fi, GPS 2.4G transmission
Battery
4950mAh lipo Battery
Antenna
Directional antenna(4.5dBi), Sectional omni
antenna(2dBi), sectional Wi-Fi build in antenna,
GPS build in antenna
Gimbal
Camera
Model
Micasense Altum
Dimensions
8.2 cm x 6.7 cm x 6.45 cm (3.2 in x 2.6 in x 2.5 in)
Weight
Altum + DLS 2: 406.5 g (14.34 oz)Altum: 357 g
(12.6 oz) DLS2: 49 g (1.73 oz)Wi-Fi Adapter: 2 g
(0.07 oz)USB stick: 9 g (0.32 oz)
Power consumption
5.5/7.0/10W (standby, average, peak)
Model
BLG400
Number of Axes:
2 or 3 Axes
Structure:
Carbon fiber composite
Empty Weight:
320-370gr
Operating modes:
Motor ON/OFF, Follow mode, Lock mode
Power supply voltage:
8-26 V (3s-6s LiPo)
Current consumption:
500mA (6S-24V)
Gimbal Dimension:
170x170x170mm
Pitch axis maximum rotation
-45 to 120°
Roll axis maximum rotation
⁻50 to 50°
Video Interface:
HDMI

12 © 2020 ScaraBot Technologies GmbH All Rights Reserved
Voltage
4.9-25.2V
Spectral bands
5.5/7.0/10W (standby, average, peak)
Sensor Resolution
2064 x 1544 (3.2 MP per EO band)160 x 120
thermal infrared
Wavelength (nm)
Blue (475 nm center, 20 nm bandwidth), green
(560 nm center, 20 nm bandwidth), red (668 nm
center, 10 nm bandwidth), red edge (717 nm
center, 10 nm bandwidth), near-IR (840 nm
center, 40 nm bandwidth)
Ground Sample Distance
5.2 cm per pixel (per EO band) at 120 m (~400 ft)
AGL81cm per pixel (thermal) at 120m
Capture Rate
1 capture per second1 (all bands), 12-bit RAW
Interfaces
Aircraft: Trigger input, top of frame out, 1 PPS
out. 3.3V isolated IO2x USB 3.0 SuperSpeed
ports for Wi-Fi or Ethernet and USB 3.0 Storage
Focal Length
8 mm (multispectral)1.77 mm (thermal)
Field of View
48º x 37º (multispectral)57º x 44º (thermal)
Storage
USB 3.0 compatible storage devices
Smart Battery
Model
ScaraBot Smart Battery 18Ah
Dimensions
185x70x72
Voltage
22.2V
Max. Discharge Current
80A
Max. Charge Current
9A
Weight
1850g
Interface
Jeita standard
Overcurrent limitation range
20-150A
Operational temperature
0-55º
Battery Charger
Model
ScaraBot Charger V1
Dimensions
315x396x296mm
Input Frequency
47 to 63Hz
Input Voltage
90 to 305 VAC
Output Voltage
25.2V
Max. Output Current
16.7A
Overall efficiency
95%
Table of contents