APP OPERATION PANEL
1. RUN THE “VS GPS” APP
①Press the button to get helpful information.
②Press the button to enter the control interface.
2. CONTROL INTERFACE
Press the button to open the remote control interface.
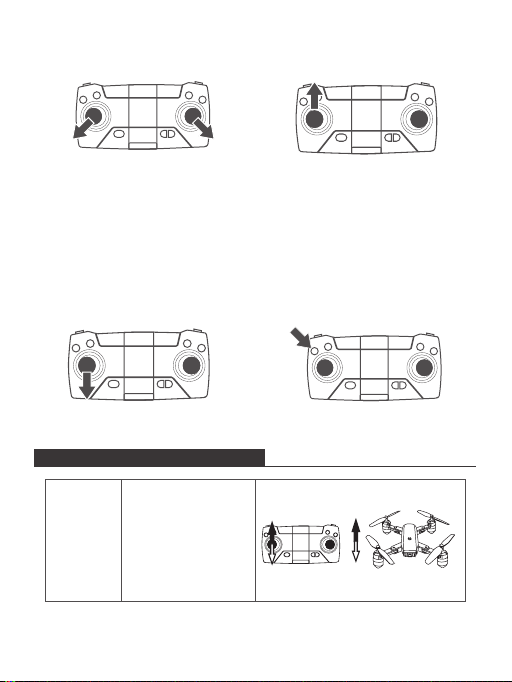
FLIGHT OPERATION GUIDE
HEADLESS MODE
The default front in the headless mode is the direction in which the drone is facing
when pairing with the remote control. If you need to change the direction the
drone is facing in the headless mode, please re-pair with the remote control.
In headless mode, the drone always moves in the direction of the remote control
joysticks, regardless of its orientation. For example, when you push the right
joystick to the right, the drone will always move to the right (regardless of which
direction the drone is facing). To enter this mode, turn on the drone, and press
the Headless Mode button on the remote control. If you want to exit this mode,
press the button again.
Note: Please be sure to align the drone facing forward and in a straight line.
Let the gyroscope automatically detect the direction to ensure proper functioning
in headless mode.
ONE-KEY RETURN
Press the One-key Return button, and the drone will fly back approximately along
its original take-off path. Press the button again to exit this mode.
ONE-KEY TAKE OFF AND LANDING
While unlocked, press the One-key Takeoff/Land button on the remote. The drone
automatically rises to a height of about 2 meters (6.5 feet). Keep flying smoothly at
this approximate height. When you press the button again, the drone will
automatically land itself slowly.
ORBIT MODE/SURROUND FLIGHT MODE
Press the Orbit Mode button. The drone will take the current flight position as the
center. Push the right joystick up and the drone will move forward to the set
radius distance. Move the right control stick left and right to start execution.
PHOTO/VIDEO
Press the Photo/Video button on the remote control, which will beep twice
to indicate the photo has been taken successfully. To record video, hold down this
button for 3 seconds. The remote control will beep, and the recording indicator
will flash slowly to indicate that recording is about to start. During the recording
process, press and hold the button for 3 seconds to stop recording.
SPEED SWITCH
The drone has three speeds and is set to low speed by default. Press the Speed
switch button once for medium speed. Press it again for high speed. A third press
will return to low speed.
Learn more
9 10


 user manual")