Sceptre E325 User manual

MQR Color Series P1
E325 Series User Guide
PACKAGE CONTENTS
SCEPTRE Display x 1
Display Base x 1
Display Neck x 1
User Guide x 1
Screw Type 1 for Display Neck (fine threaded) x 4 Type 1 Type 2
Screw Type 2 for Display Stand (thick threaded) x 4
Circular Metal Plate x 1
Power Cord x 1 (Attached)
Warranty Card x 1
Display Remote Control (AAA Batteries included) x 1
ATTACHING & REMOVING THE BASE
1. Place the display unit flat on a table. Afterwards attach the plastic base onto the neck by form fitting the
circular hole. Remember the plastic base should have more area facing the front of the neck. Fit the
metal plate onto the bottom of the base by matching the 3 holes. Screw in the 4 thick threaded screws to
secure the metal plate to the plastic base. The stand installation is now complete.
2. To install or remove the stand, screw in or remove the 4 screws indicated in the picture and the stand will
come off.
3. To finalize your installation of the Display, please read the following:
a. If you are placing the Display on a stand, we would recommend you to use a Display safety
strap (not included) in order to minimize the possibility of the Display toppling over.
b. If you are mounting the Display on the wall
c. Make sure the wall is structurally safe for the weight of the Display
d. Make sure the wall mount kit is compatible with the Display
e. Read and follow all instructions provided by the wall mounting kit.
f. Securely install all screws and connections.

MQR Color Series P2
Rear View Mounting Pattern
Mounting Specification: 200mm x 100mm using screw size M4. Length of screw should not
exceed 6mm. Please Note: The 6mm length of screw refers to how deep the screw can go inside
the mounting holes. When you’re buying screws, you should add the original 6mm to the
thickness of your mounting plate in order to get the total screw length.
Connecting Your Cables
The following picture offers a suggestion for connecting most of your audio video equipment.
TV Tuner is optional. It may or may not be equipped in your product. Please check with the authorized seller, authorized
distributor or Sceptre Customer Service for further information.

MQR Color Series P3
Ready to Watch Some TV? (Optional)
1. Make sure your power cable is connected and the standby red light in the front of the
HDTV is lit up.
2. Check all your connection cables off the side or the back of your HDTV and also your
AV devices. Make sure they are all connected securely.
3. Turn on your HDTV and other AV devices if necessary.
4. Press the button on the side of the HDTV or the SOURCE button on the remote
control and select the correct source according to the Connecting pages.
If You’ve Connected Antenna to the HDTV…
If an antenna or cable (without a cable box) is connected to your TV’s tuner, you will need to go
through an INITIAL SETUP process in order to watch the HDTV.
1. Press MENU to open the menu
2. Use the ◄ or ► button to select the CHANNEL icon and press ENTER.
3. Use the ▲ or ▼ buttons to highlight the signal type and press ◄ or ► to select your
connection either AIR or CABLE.
4. Use the ▲ or ▼ buttons to select AUTO CHANNEL SEARCH and press ENTER to scan
for channels.
5. Once the scanning finishes, you can begin to watch HDTV

MQR Color Series P4
If You’ve Connected Cable or Satellite Set-top Boxes to the HDTV…
1. Press the button on the side of the HD Display or the SOURCE button on the
remote control and you will see the picture above.
2. Use ▲▼ buttons to select the source you want to switch to and press the ENTER
button in the middle of the ▲▼ buttons.
3. If you have connected coax cable (the cable with a needle in the middle and a ring
to tighten the connection) from the box to the TV, you’ll need to change to the
correct channel. Make sure your source is TV and press 3 and ENTER on the
TV’s remote. If that does not work you’ll need to connect your Satellite or Cable
Company for support.
Please Note:
Not all broadcasts are in High Definition (HD). Please refer to your local
broadcasting stations for more information.
The HD Display’s tuner is designed for HD Display therefore requires a
stronger signal than normal Displays.If you cannot achieve that signal level
with your antenna or cable, your HD Display might lose picture or sound.
HDMI 2 doubles as a MHL enabled port, so if you have a cell phone that
supports the Mobile High-definition Link, you can purchase a MHL cable
and connect it to HDMI 2.
HDMI2 supports MHL devices such as ROKU MHL streaming stick
device.
Recycling Information
Dispose unwanted electronics and batteries through an approved recycler.
For TVs please visit the web at http://www.earth911.com/recycling-guide/how-to-recycle-large-
electronics/
For Batteries please visit the web at http://www.call2recycle.org/

MQR Color Series P5
SCEPTRE Remote Control
Please insert two AAA batteries into the remote control. Make sure that you match the (+) and (-)
symbols on the batteries with the (+) and (-) symbols inside the battery compartment. Afterwards,
re-attach the battery cover.
Please note:
Only use AAA batteries.
Do not mix new and old batteries. This may result in cracking or leakage that may pose a
fire risk or lead to personal injury.
Inserting the batteries incorrectly may also result in cracking or leakage that may pose a fire
risk or lead to personal injury.
Dispose the batteries in accordance with local laws and regulations.
Keep the batteries away from children and pets.
If the remote control is not used for a long time, remove the batteries.
Keep the remote control away from moisture, sunlight, and high temperatures.
This remote control follows SONY’s universal remote code. To find the actual code you need to
consult your cable or satellite tech support.

MQR Color Series P6
GENERAL Display FUNCTION BUTTONS
1. POWER –Turns the Display on or off.
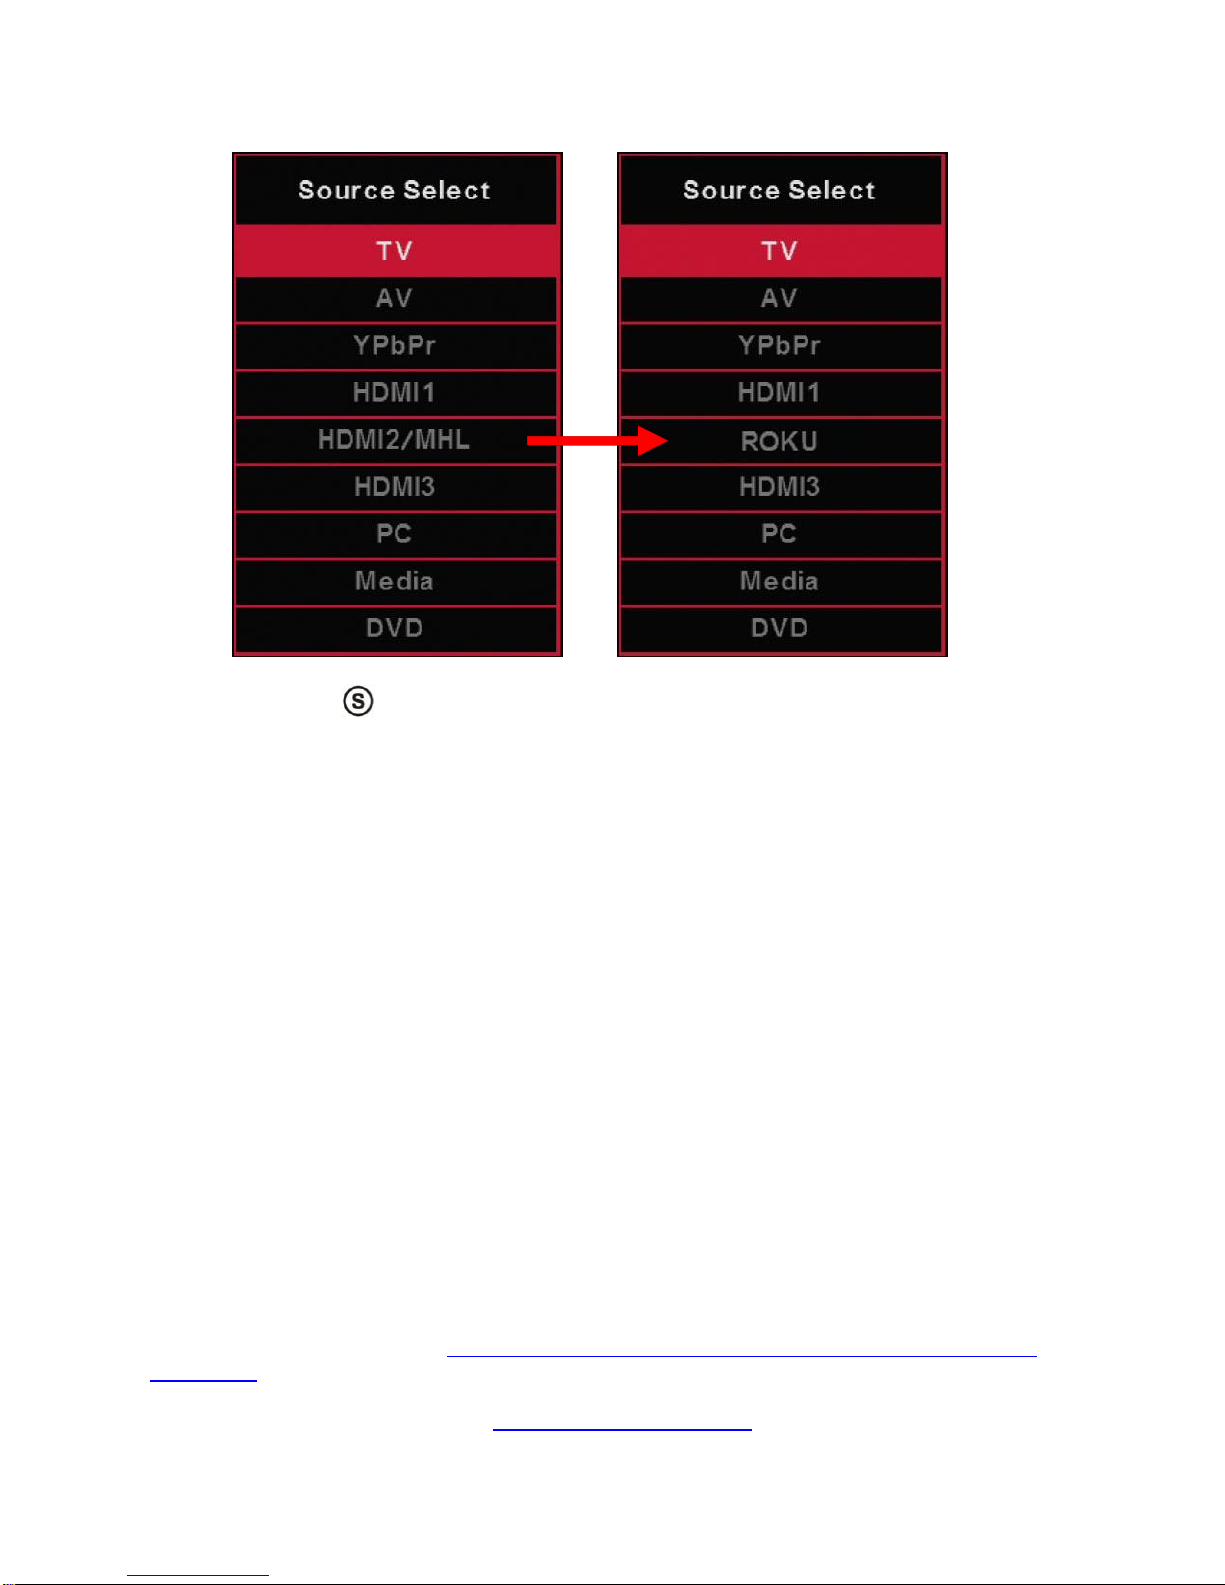
2. SOURCE –Press this button to cycle through the INPUT source.
3. CC –Cycles between different closed captioning modes.
4. MTS –Selects stereo, mono, or second audio programming.
5. MUTE –Turns the sound off from the Display. To unmute either press VOL(+) or press the MUTE button
again.
6. NUMBER BUTTONS (0-9) –Press 0-9 to select a TV channel directly when you are watching TV. The
channel will change after 2 seconds. For switching DVD chapters over 100 the 0 button acts as the 100
button, so press the 0 button twice to get that chapter. (Optional)
7. (-)–Inserts the dash for selecting digital channels directly.
8. R –Returns to the previous channel. For switching DVD chapters over 100 the R button acts as the 100+
button, so press the R button and the number you want to switch to. For example for chapter 125 you
would press R and 2 and 5 for the combination of 125.
9. GUIDE –Opens the current digital channel information guide (antenna only).
10. INFO –Shows the display info.
11. ▲/▼/◄/►/ENTER – These directional buttons allow you to move around in the Display’s menu and the
DVD’s menu. Press the ENTER button when you want to select a particular option.
12. MENU –Brings up the main Display menu on the screen.
13. EXIT –Exit the main Display menu on the screen.
14. VOL(+) / VOL(-) –Press the VOL buttons to increase or decrease the sound level.
15. ASPECT –Selects different viewing modes of the Display.
16. FREEZE –Press this button to freeze the picture on the screen.
17. SLEEP –Turns the Display off in a specific set of time dependent on your selection.
18. CH(+)/CH(-) –Press the CH buttons to go through the channel list.
19. PICTURE –Selects various preset picture settings.
20. SOUND –Selects various preset sound settings.
21. FAVORITE –Gives you, the favorite channels list.
22. ADD/DEL –This button adds or deletes a channel from the favorite channels list.
DVD FUNCTION BUTTONS
23. AUTO EJECT –Press this button to open or close the DVD player.
24. D.MENU –Shows the menu of the DVD disc.
25. DVD –Press this button to go to the DVD source.
26. USB –Launches the USB reader function for the pictures and music.
27. ►/║ –Play/pause button in DVD mode.
28. ■ –Stop button in DVD mode.
29. REPEAT –Press this button for repeat the program.
30. AB –Press this button for repeat play point A and B
31. PREVIOUS CHAPTER –Press this button to select the DVD’s previous chapter.
32. REWIND –Press this button to reverse the DVD movie to a previous scene.
33. FAST FOWARD –Press this button to fast forward the DVD to the next scene.
34. NEXT CHAPTER –Press this button to select the DVD movie’s next chapter.
35. D.SETUP –Press this button to setup the disc in DVD mode.
36. TITLE –Press this button to go to the title menu if the DVD you’re watching has a title page.
37. SUBTITLE –Displays the subtitle.
38. AUDIO –Press to select Display sound option.
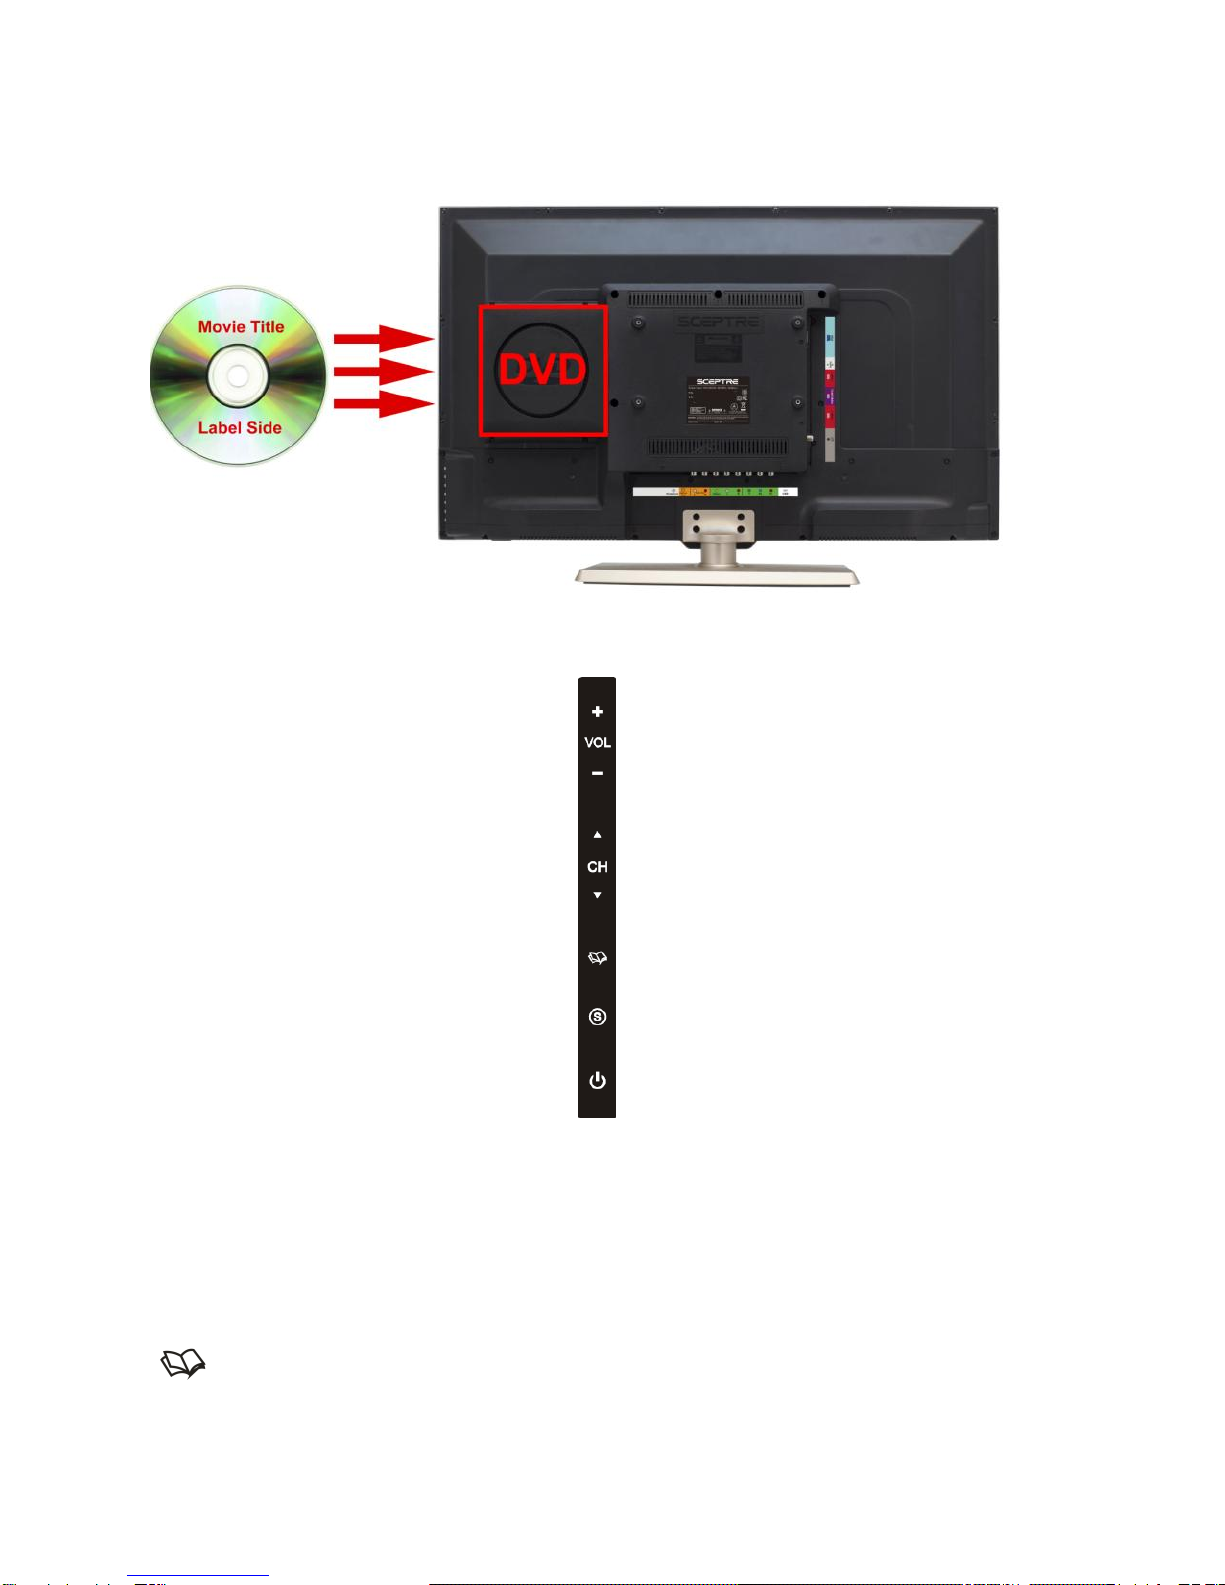
Please Note:
To insert, eject a disc from the DVD player, to use any functions on the DVD you must press
the DVD button first.
This display does not support QAM function. You need to have a digital cable box in order to
receive cable channels.
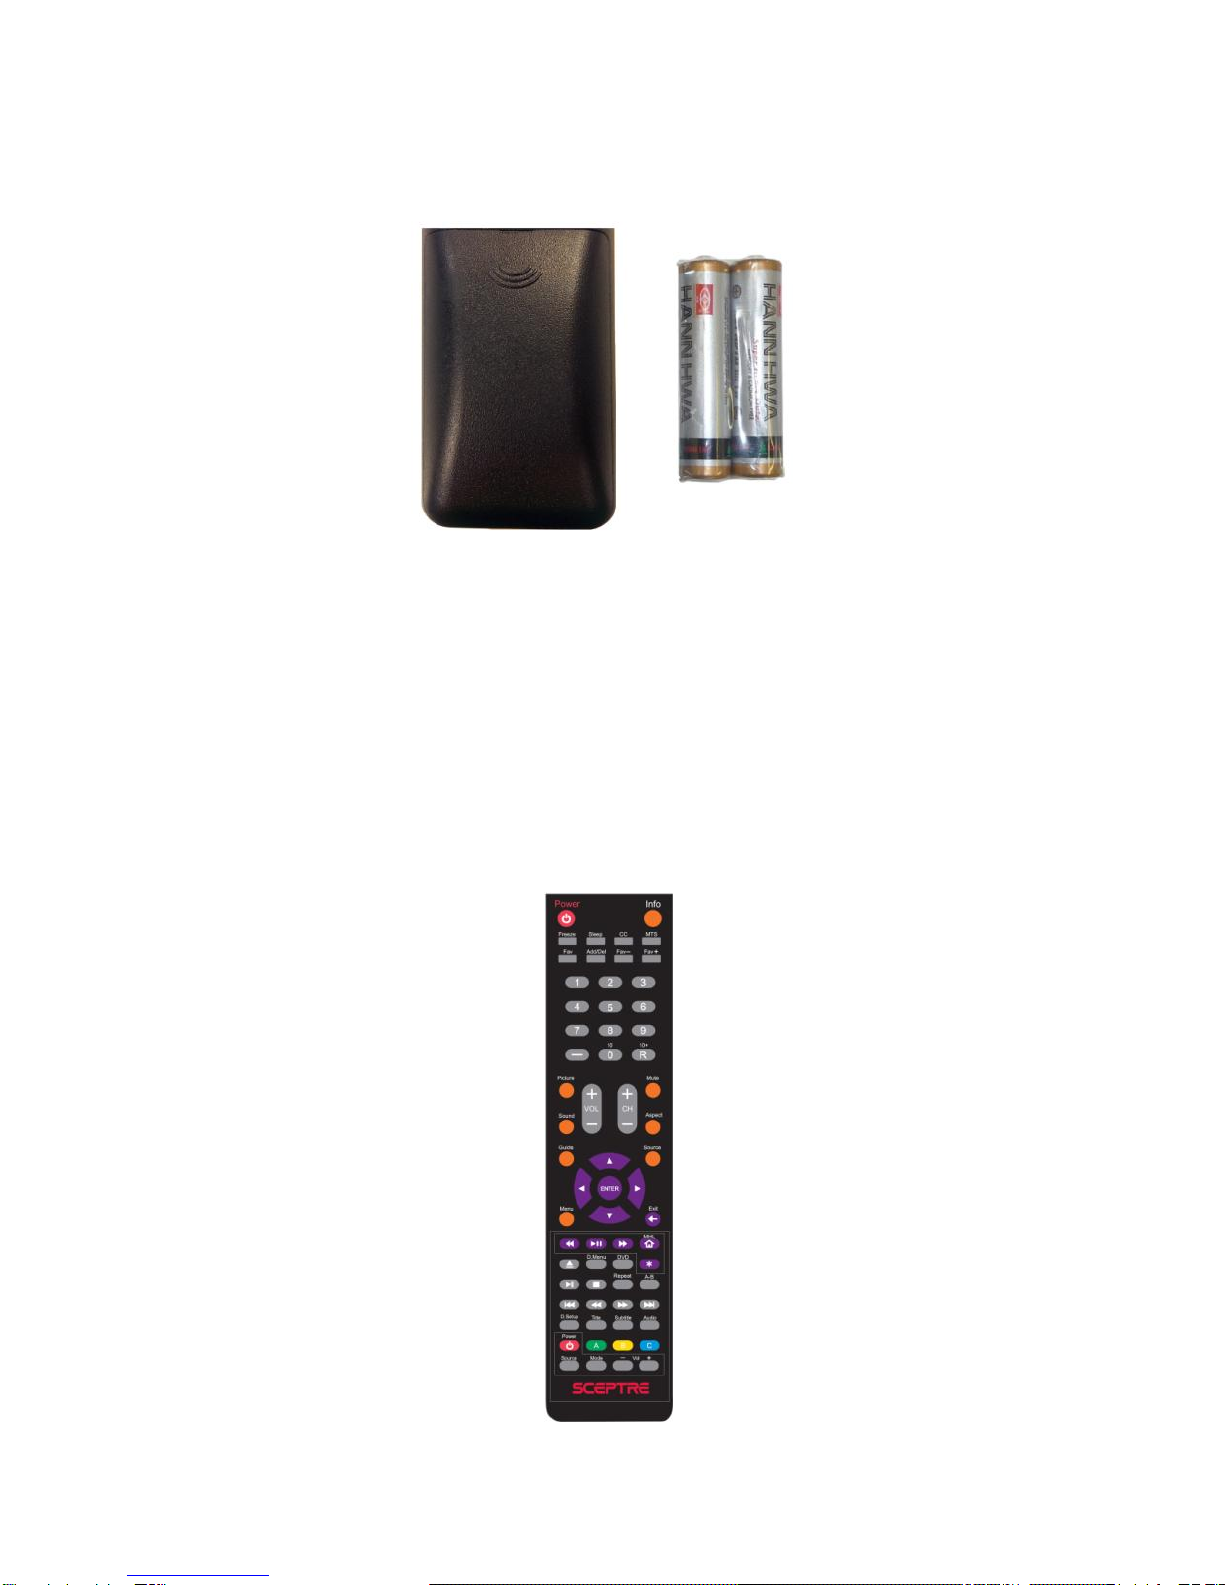
The remote picture might be different from the actual remote. Please refer to the user manual
on our website http://www.sceptre.com

MQR Color Series P7
INSERTING A DVD
With the display turned on and the DVD button pressed from the display remote, you can now insert the
DVD disc you want to play. When you are facing the front of the display, insert the DVD disc with
the side that is labeled with the movie title facing away from you.
Side Control Buttons
1. VOL(+) –This button increases the Display’s volume. If a sub-menu is active, pressing this button
will move the select right.
2. VOL(-) –This button decreases the Display’s volume. If a sub-menu is active, pressing this button
will move the selection left.
3. CH(▲)–This button changes the Display channel up. If the OSD is active, this button functions as
up for the menu.
4. CH(▼)–This button changes the Display channel down. If the OSD is active, this button functions
as down for the menu.
5. –This button activates the On Screen Display (OSD). If a sub-menu is active, pressing this
button will exit the OSD.

MQR Color Series P8
6. –This button switches between all the different sources of the Display. When the OSD is active,
this button acts as the enter button and confirms the menu selection.
7. –Turn on the Display by pressing the button once. Press the button again to turn off the Display.
DVD Drive Buttons
1. EJECT –Press this button to eject the DVD disc.
2. PLAY / PAUSE –Press this button to play the DVD disc or to pause the DVD disc.
Call Us If You Need Help!
Products are often returned due to a technical problem rather than a defective product that may result in
unnecessary shipping charges billed to you. Our trained support personnel can often resolve the problem
over the phone or email. For more information on warranty services or repairs after the warranty period,
please contact our support department at the number below.
For technical help, contact our Technical Support Group via email or phone. Please have your Product
Number (P/N), Serial Number (S/N), and date of purchase available before you call.
Operation Hours : Mon - Fri at 8:30 AM –5:30 PM (PST)
Tech Support E-mail: SceptreTS@Sceptre.com
Customer Service Email: SceptreCS@Sceptre.com
TEL : 1800-788-2878
Other manuals for E325
2
Table of contents
Other Sceptre LCD TV manuals

Sceptre
Sceptre X408BV-FHD User manual

Sceptre
Sceptre X370BV-FHD User manual

Sceptre
Sceptre UMS Series User manual

Sceptre
Sceptre X20 User manual

Sceptre
Sceptre X195 User manual

Sceptre
Sceptre X405BV-FHD 1080P Installation guide

Sceptre
Sceptre E505 User manual

Sceptre
Sceptre X270 User manual

Sceptre
Sceptre X37SV-Komodo User manual

Sceptre
Sceptre X460 User manual