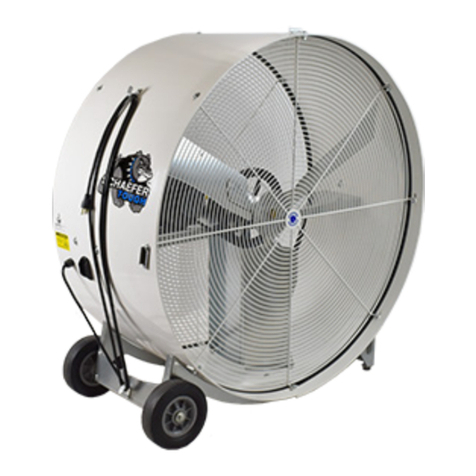
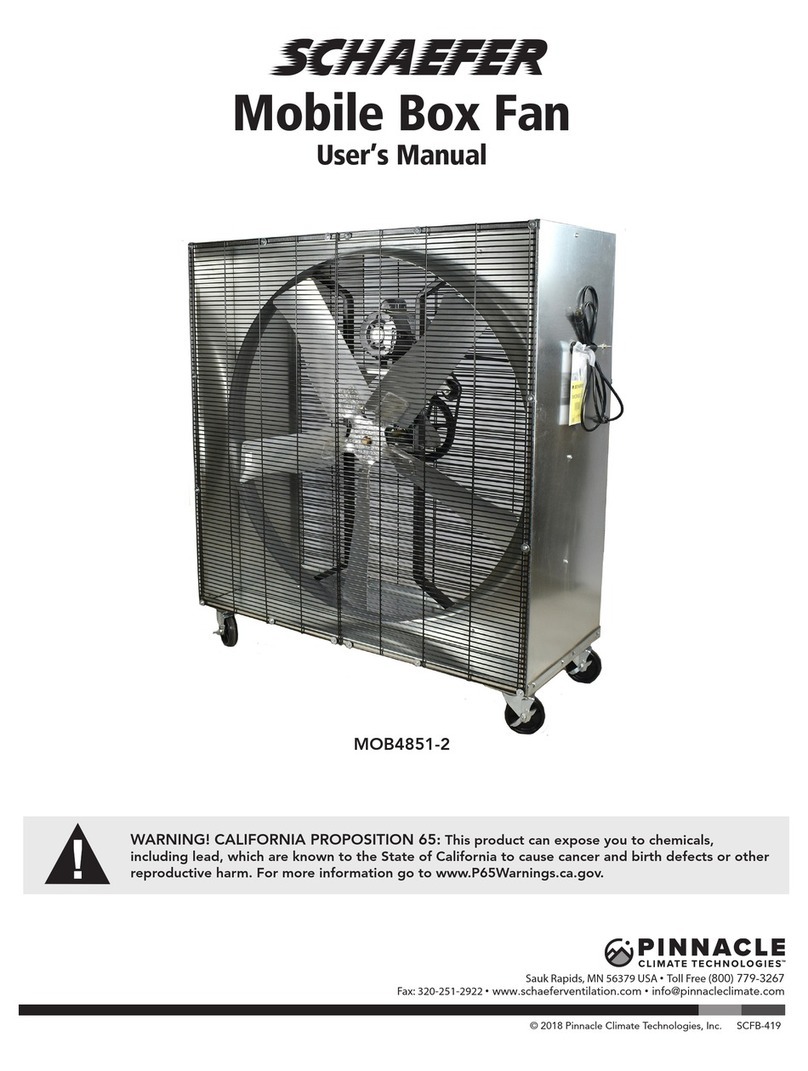
Schaefer MOB36612-2 User manual

Mobile
Box
Fan
MOB36612-2 / MOB42634-2 / MOB4861-2
800-779-3267
©2010 Schaefer Ventilation Equipment
OPERATOR'S MANUAL

About this Manual . . . . . . . . . . . . . . . . . . . . . . . . .2
Safety Recommendations . . . . . . . . . . . . . . . . . . . .2
Safety Information . . . . . . . . . . . . . . . . . . . . . . . . .3
Setup and Operation . . . . . . . . . . . . . . . . . . . . . . . .4
Maintenance . . . . . . . . . . . . . . . . . . . . . . . . . . . . . .4
Troubleshooting . . . . . . . . . . . . . . . . . . . . . . . . . . .5
Parts Identification . . . . . . . . . . . . . . . . . . . . . . . . .5
Parts List . . . . . . . . . . . . . . . . . . . . . . . . . . . . . . . .6
Warranty . . . . . . . . . . . . . . . . . . . . . . . . . . . . . . . . .7
Table of Contents
2
About this Manual
THANK YOU!
Thank you for purchasing this quality product. We believe you will find our Mobile Box Fan to be an effective source for
cooling. The intent of this manual is to serve as a reference for simple maintenance and questions regarding your product.
Important! Before operating the Mobile Box Fan, carefully read and follow these instructions.
Important! Pay particular attention to all SAFETY information.
All information, illustrations and specifications in this manual are based on the latest product information available at
the time of printing. We reserve the right to make changes at any time without notice.
Safety Recommendations
• This is an electric device with moving components. There is the possibility of fire, electric shock, or injury to persons.
Ensure all the safety recommendations are adhered to in order to minimize this risk.
• Comply with all local and national electrical codes.
• Disconnect all power and unplug the unit before you inspect, clean or perform maintenance on any components.
• Do not allow electrical cord connections to fall or lay in water.
• A GFCI (Ground Fault Circuit Interrupter) is recommended for use with this product.
• If an extension cord must be used, be sure it is properly rated for this product.
• Do not operate without guards in place.

Safety Information
3
Follow Safety Instructions
Carefully read all safety messages in this manual and the safety decals on your equipment. Follow all recommended
precautions and safe operating practices.
Keep safety decals in good condition. Replace missing or damaged safety decals.
Decal Description
This diagram shows the proper location of the safety decals as shipped from the factory. Make sure the decals are easy to
see at all times.
- back of fan, with guards removed -
AIR FLOW

Unpack your Mobile Box Fan
• The unit is shipped fully assembled and strapped to a pallet. Inspect the unit and note any suspected damage when
accepting delivery.
• Remove the straps and lift the unit from the pallet.
Caution: This unit is very heavy. When removing this unit from the pallet manually, several people should assist to
avoid injury.
Inspect your Mobile Box Fan
• Visually inspect the unit for any damage that may have occurred during shipping.
• Contact your shipper immediately if any damage is found.
The unit is ready for operation
• Shut down the unit when it is no longer needed.
• Unplug the unit from the electrical outlet.
Setup and Operation
4
Maintenance
Note: The fan unit you have purchased is built with heavy duty components, designed to give you many years of
performance. Like anything else that is mechanical, your fan unit will require a small amount of periodic maintenance to
assure maximum efficiency.
Our fans utilize motors that have totally sealed bearings. Periodically remove dust and grime that has accumulated on the
motor, fan blade, and guard. Pressure washing the unit will void the warranty. Performing this small amount of
maintenance will keep your fan unit running as efficiently as when it was brand new.
Bi-annually
7000 hours
Annually
Clean motor, fan blade and guards.
• Disconnect power.
• Use an air hose to remove dust.
• Use a damp cloth to remove grime and grease.
•Pressure washing will void the warranty.
Grease the pillow block bearings.
• Use a grease gun and lithium-based / Shell #2 grease.
• Insert 4 grams into each grease zerk every 7000 hours
of run time.
•Do not overgrease.
Check belt tension (MOB36612-2 and MOB4861-2).
• Correct adjustment is 3/4" deflection at 10 lbs of force.
• Belt tension is adjusted automatically by the assembly.
Over time, the belt will become worn and the tensioner
will no longer be able to pull the belt tight enough. When
this happens, the belt will need to be replaced.
Please see page 6 for specific MOB42634-2 instructions.
Grease zerks
Belt tensioner assembly

5
Troubleshooting
Symptom Possible causes Corrective action
Fan not operating 1. Ensure you have power 1. Plug fan in
2. Ensure wiring is done properly 2. Ensure wiring is correct
3. Blown fuse or tripped breaker 3. Replace fuse or reset breaker
4. Fan blade contacting fan housing 4. Realign fan blade in fan housing
5. Fan control defective 5. Repair or replace control
6. Motor defective 6. Repair or replace motor
Fan operating - insufficient airflow
1. Guard dirty 1. Clean guard
2. Incorrect belt tension 2. See Maintenance Table - Belt tension
Excessive fan noise 1. Fan blade contacting fan housing 1. Realign fan blade in fan housing
2. Motor bearing defective 2. Repair or replace motor
Excessive vibration 1. Motor loose in mount 1. Tighten fasteners
2. Fan blade damaged 2. Replace fan blade
3. Motor shaft bent 3. Repair or replace motor
4. Fan shaft bent 4. Replace fan shaft
5. Pillow block bearings defective 5. Replace pillow block bearings
2. FAN SHAFT
3. BELT
4. MOTOR/SHAFT
MOUNTING PAN
1. PILLOW BLOCK
BEARINGS
9. MOTOR
5. UPRIGHT
6. VENTURI
7. PULLEYS
8. BLADE
10. GUARD
11. BRACKET
13. HANDLE
14. TOGGLE SWITCH
15. POWER CORD
STRAP
16. POWER CORD
12. WHEEL
Parts Identification

6
Parts List
MOB36612-2 36" Mobile Box Fan,
6-wing, 1/2 HP, 2-speed
ITEM NUMBER DESCRIPTION
1 PBBA205-16 Pillow Block Bearing
2 FS1X15.5 Fan Shaft, 1"x151/2"
3 AX-36 V-Belt, Cogged
4 MSMP-P Motor/Shaft Mounting Pan
5 36UPRIGHT Motor Mount Upright for 36"
6 36VENTURI 36" Orifice
7 AK-104C Fan Shaft Pulley, 1" Bore
7 AK-23 Motor Pulley, 5/8" Bore
8 GFB-366 36" Galvanized Fan Blade, 6-wing
9 CS202 Motor, 1/2 HP, 115V, 2-speed
10 36FGO-P 36" Guard
11 BFWB Box Fan Wheel Bracket
12 WC-CASTERLGLK Large Locking Caster, 5"x11/4"
12 WC-CASTER5 Large Caster, Non-locking, 5"
13 0HANDLE Handle
14 TOGGLESWITCH Toggle Switch
15 FHS-STS 12" Blue Velcro Strap
16 WC-POWERCORD 9' Power Cord
MOB42634-2 42" Mobile Box Fan,
6-wing, 3/4 HP, 2-speed
ITEM NUMBER DESCRIPTION
1 PBBA205-16 Pillow Block Bearing
2 FS1X15.5 Fan Shaft, 1"x151/2"
3 AX-42 V-Belt, Cogged
4a P-MM Universal Motor Mount Plate
4b UBRACKET Universal U-Bracket
5 42UPRIGHT Motor Mount Upright for 42"
6 42VENTURI 42" Orifice
7 AK-104C Fan Shaft Pulley, 1" Bore
7 AK-21 Motor Pulley, 5/8" Bore
8 GFB-426 42" Galvanized Fan Blade, 6-wing
9 CS342 Motor, 3/4 HP, 115V, 2-speed
10 42FGO-P 42" Guard
11 BFWB Box Fan Wheel Bracket
12 WC-CASTERLGLK Large Locking Caster, 5"x11/4"
12 WC-CASTER5 Large Caster, Non-locking, 5"
13 0HANDLE Handle
14 TOGGLESWITCH Toggle Switch
15 FHS-STS 12" Blue Velcro Strap
16 WC-POWERCORD 9' Power Cord
MOB4861-2 48" Mobile Box Fan,
6-wing, 1 HP, 2-speed
ITEM NUMBER DESCRIPTION
1 PBBA205-16 Pillow Block Bearing
2 FS1X15.5 Fan Shaft, 1"x151/2"
3 AX-41 V-Belt, Cogged
4 MSMP-P Motor/Shaft Mounting Pan
5 48UPRIGHT Motor Mount Upright for 48"
6 48VENTURI 48" Orifice
7 AK-104C Fan Shaft Pulley, 1" Bore
7 AK-20 Motor Pulley, 5/8" Bore
8 GFB-486 48" Galvanized Fan Blade, 6-wing
9 CS596 Motor, 1 HP, 115V, 2-speed
10 48FGO-P 48" Guard
11 BFWB Box Fan Wheel Bracket
12 WC-CASTERLGLK Large Locking Caster, 5"x11/4"
12 WC-CASTER5 Large Caster, Non-locking, 5"
13 0HANDLE Handle
14 TOGGLESWITCH Toggle Switch
15 FHS-STS 12" Blue Velcro Strap
16 WC-POWERCORD 9' Power Cord
The MOB42634-2 does not utilize 4. Motor/Shaft Mounting Pan (MSMP-P). Instead, it uses the two parts listed
above. Follow the annual maintenance instructions below to adjust the belt tension.
4a. UNIVERSAL MOTOR
MOUNT PLATE
4b. U-BRACKET
Annually Check belt tension (MOB42634-2).
• Correct adjustment is 3/4" deflection at 10 lbs of force.
• Adjust as needed by raising or lowering the motor mount
plate. Follow these steps:
1. Loosen the U-brackets.
2. Raise or lower the motor mount plate as needed.
3. Re-tighten the U-brackets.
7
Warranty
All information, illustrations and specifications provided here are based on the latest product information
available at the time of printing. Product specifications subject to change.
Schaefer Ventilation Equipment, LLC
Schaefer Limited Warranty Policy
Schaefer Ventilation Equipment, LLC (SVE) provides the following limited warranty from the date of purchase to
the original purchaser of our products:
I. Two-year coverage (unless otherwise indicated below) applies to all products, components and
assemblies provided by SVE that prove to be defective in material or workmanship. Any such defective
product will be repaired or replaced at SVE's option, with the defective product returned upon approval
to SVE, F.O.B Schaefer Ventilation Equipment, LLC, Sauk Rapids, Minnesota.
II. This warranty does not cover:
a. Failure, damage or malfunction as a result of:
i. Improper installation or installation not in accordance with installation instructions.
ii. Operating conditions that vary from SVE's operating instructions.
iii. Misuse, abuse, negligence, alteration, or accident.
iv. Transporting the product.
v. Improper operation or lack of appropriate or regular maintenance of the product.
b. Loss of time, inconvenience, loss of use of the product or other consequential or incidental
damages.
c. Parts that need replacement due to normal wear and tear.
d. Superficial or cosmetic rust or corrosion.
e. Any product whose name plate has been removed.
Products with warranty periods that differ from the standard 2-year warranty are as follows:
• Poly Housings 25 years
• Fiberglass Housings 15 years
• Low-intensity Tube Heater Exchange Tubes 5 years
• K-Series, 2-Stage, Compact and Stainless Steel Tube Heaters 1 year
• Quartz and Zubri Heaters 1 year
• Shutter Motors and Aluminum Riveted Fan Blades 1 year
• HotZone® Electric Elements 120 days
• Quartz Bulbs 90 days
• Evaporative Cooling Pads 90 days
• Economy Line Fans 90 days
• Any product or part noted as an exception to the standard 2-year warranty in the product's
operating manual.
SVE reserves the right to add or delete products from this exception list at any time.
THERE ARE NO WARRANTIES OF MERCHANTABILITY OR FITNESS OF USE.
SVE reserves the right to change product design and specification without prior notice or liability.
The above constitutes the sole warranty offered by Schaefer Ventilation Equipment, LLC.
Effective Date: February 1, 2009

800-779-3267
www.schaeferfan.com
©2010 Schaefer Ventilation Equipment 1-11-10/M-MOB
This manual suits for next models
2
Table of contents
Other Schaefer Fan manuals

Schaefer
Schaefer Versa-Kool Series User manual

Schaefer
Schaefer 20CFO-SWDS User manual

Schaefer
Schaefer TW30W User manual

Schaefer
Schaefer VersaMist PVM18 User manual

Schaefer
Schaefer Waycool WC-1HP-DHL User manual

Schaefer
Schaefer VAF1500A User manual

Schaefer
Schaefer MOB4851-2 User manual

Schaefer
Schaefer WayCool 1HP - Series User manual

Schaefer
Schaefer VAF3000A User manual

Schaefer
Schaefer WMTA24-B User manual