General Safety Information:
- Before operating this fan, check for worn, damaged, or missing parts and replace or
repair as needed.
- To avoid risk of fire, electric shock or personal injury, disconnect from power source
before servicing.
- This fan is intended for general use only. Do not use near hazardous or explosive
materials or vapors.
- Never insert fingers or any other objects through the guards when fan is in operation.
- Never operate fan without guards in place.
- Certain versions of this fan have guards that are not OSHA compliant. These units are
designed to be intrinsically safe, however, never allow children near fan when in
operation.
- Fan must be on a stable, flat surface when in operation to avoid possible overturning.
- Unplug the fan before moving from one location to another.
- All Warning and Caution labels must be kept in good condition and be replaced if not
clearly readable.
- Carefully read all safety messages in this manual and on your equipment safety labels.
- Follow recommended precautions and safe operating practices.
Initial Setup and Assembly:
- CAUTION: This fan assembly is heavy. Do not attempt to lift the fan without assistance.
- Visually inspect the unit for any damage that may have occurred during shipping.
- Contact your shipper immediately if any damage is found.
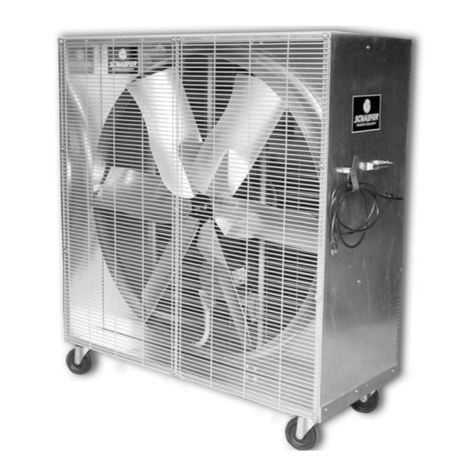
- The fan is shipped fully assembled.
Operation:
- Locate fan in desired location, connect the power cord and turn on.
- Fan must be located at least 4 feet from wall or obstructions to allow for proper
operation of fan.
- Starving the fan of air may cause the motor to overheat and cause the unit to shut off.
- Fan motor is thermally protected and will shut off if overheated. Turn unit off and allow
motor to cool before restarting.
Stacking Tabs:
CAUTION- Stacking tabs are designed for storage use only. Fans must be properly
secured for transport.
Cleaning and Maintenance:
WARNING: UNPLUG FAN FROM POWER SOURCE BEFORE SERVICING.
- Some maintenance procedures will require removal of fan guarding. ONLY remove the
front (outlet) guard.
- After servicing, guards and other safety devices must be reinstalled per their original
condition.
- Excessive dust and debris may cause overheating and reduced fan performance.
- Keep guards, motor and blades clean by vacuuming or wiping with a damp cloth.
- Do not use harsh chemicals or cleaners to clean any part of the fan.
- Pressure washing the unit will void the warranty.
- Sealed motor bearings are pre-lubricated and do not require servicing.
- Belt-drive fans require additional periodic maintenance:
- Grease pillow block bearings every 800 hours.
- Check belt for signs of wear or cracking. Replace belt if necessary.
- Check belt for proper tension. Proper tension is 1/8” deflection at 4 lbs of force.
SYMPTOM POSSIBLE CAUSES CORRECTIVE ACTION
Fan does
not operate
1. Fan not plugged in 1. Check power cord connection
2. Blown fuse or tripped circuit breaker 2. Replace fuse or reset circuit breaker
3. Defective on/off switch 3. Repair or replace switch
4. Defective motor 4. Repair or replace motor
5. Fan blade contacting housing 5. Realign fan blade in fan housing
Insufcient
airow
1. Guards excessively dirty 1. Clean inlet and outlet guards
2. Blade and motor excessively dirty 2. Clean blade and motor
3. Loose or worn belt 3. Adjust belt tension, replace if necessary
Excessive
noise
1. Fan blade contacting housing 1. Realign fan blade in fan housing
2. Defective motor bearings 2. Repair or replace motor
3. Defective pillow block bearings 3. Replace pillow block bearings
4. Loose guards 4. Tighten guard fasteners
Excessive
vibration
1. Damaged fan blade 1. Replace fan blade
2. Motor shaft bent 2. Repair or replace motor
3. Fan shaft bent 3. Replace fan shaft
4. Defective pillow block bearings 4. Replace pillow block bearings
5. Motor loose 5. Realign if necessary and tighten fasteners
Every 800 hours of operation
Grease the bearings:
While slowly turning the bearing, use
1-2 shots of a lithium base NLGI #2
grease from a hand operated grease
gun to adequately fill the bearing
30-50% full.
Note:
Verify that the grease seals on both sides of the bearing are intact and not showing signs of
displacement or deformation once greasing activities have been completed. Over-greasing
bearings will cause premature failure of bearings if seals are compromised.
Troubleshooting Guide:
