Scientifica XY Stage Manual instruction

Manual XY Stage
Setup and Operation Manual
Revision 2.0
Manual Part No: MS-2100-MANUAL

© Scientifica Ltd
1A Kingfisher Court, Brambleside, Bellbrook Industrial Estate,
Uckfield, TN22 1QQ, United Kingdom
Tel +44 (0) 1825 749 933
Fax +44 (0) 1825 749 934
info@scientifica.uk.com

Contents
Note: This manual describes the features, functions and operation of
the Manual XY Stage. Before use, carefully read this manual, directions,
all precautionary information and specifications.
1.0 Product Introduction .....................................................................1
1.1 Handling Scientifica equipment – precautions..............................1
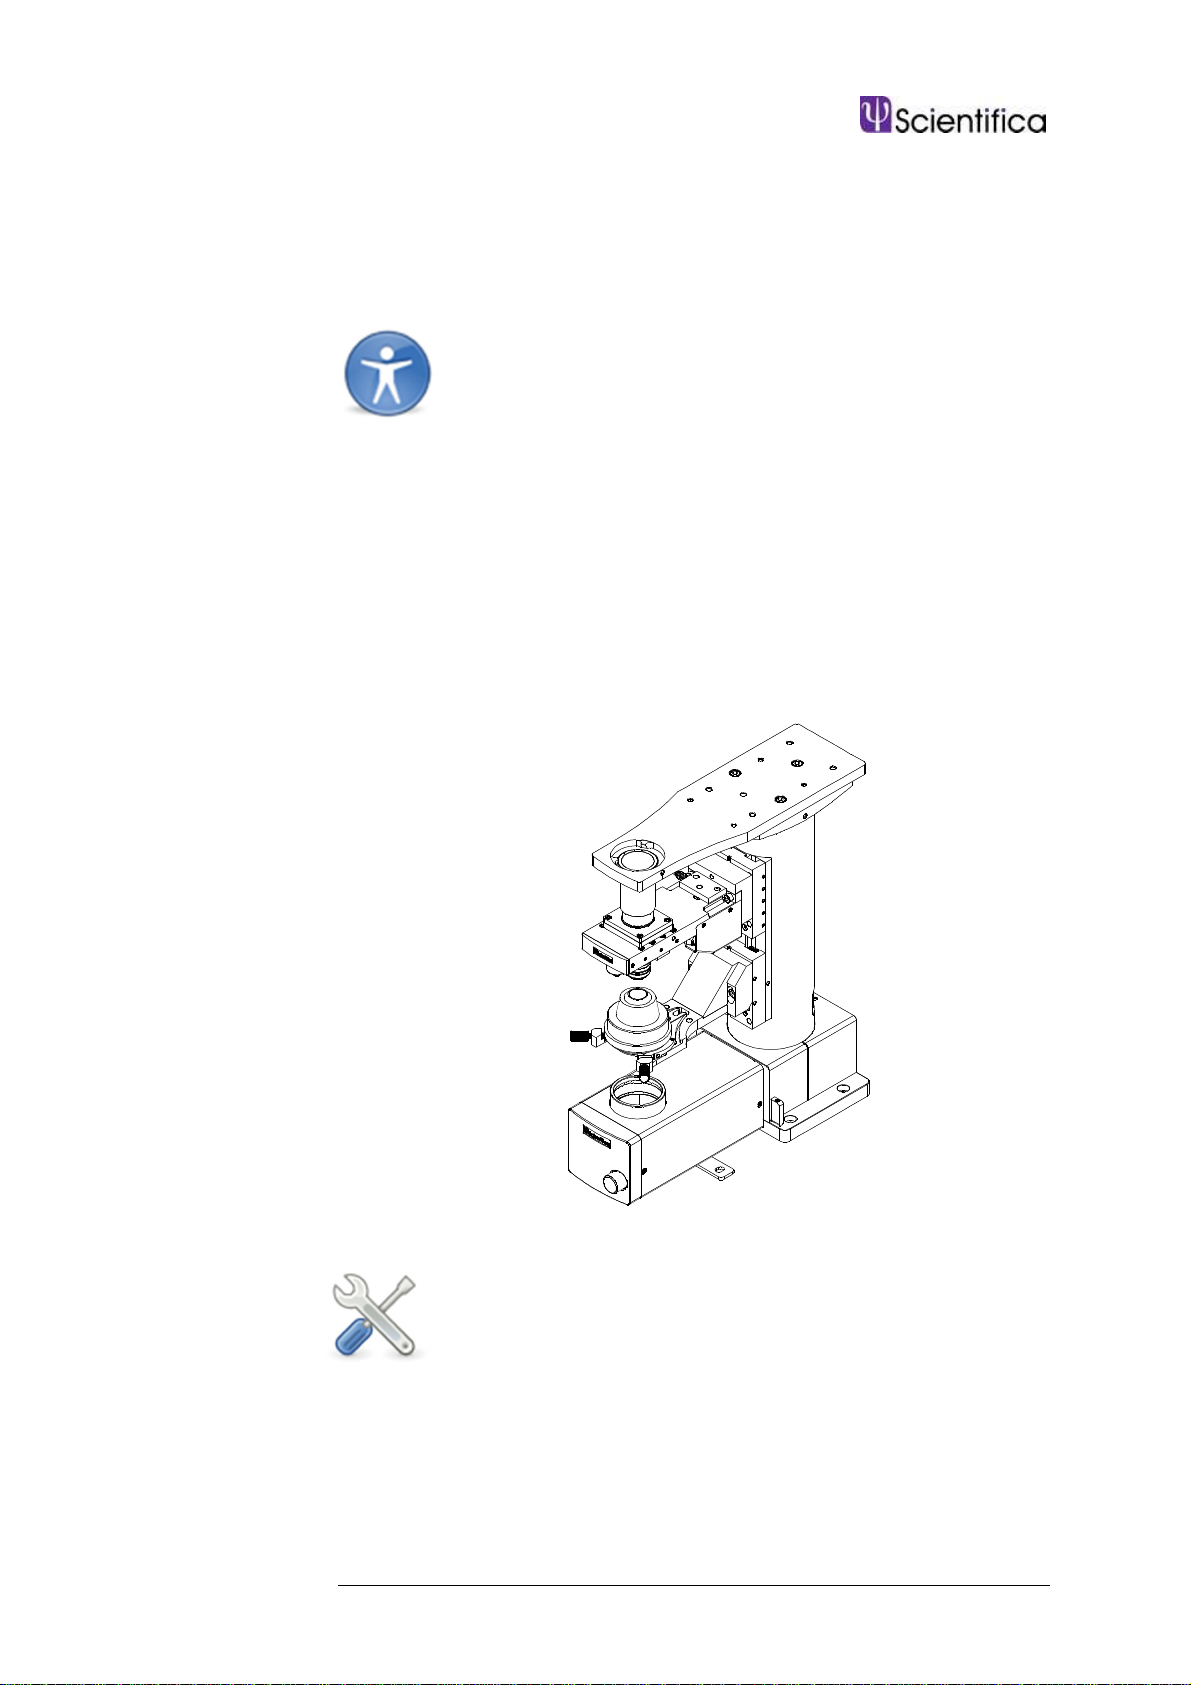
1.2 The Manual XY Stage..................................................................1
1.2.1 Product overview ..................................................................1
1.2.2 Product walkthrough .............................................................2
2.0 Packing List ...................................................................................3
2.1 Standard items.............................................................................3
3.0 Initial Setup....................................................................................4
3.1 Removing the shipping brackets..................................................4
3.2 Attach micrometers......................................................................5
3.3 Mounting the XY Stage................................................................6
3.3.1 Mounting the XY Stage to an anti-vibration table...................6
3.4 Mounting a microscope to the stage ............................................7
3.4.1 Conventional mounting of microscopes to the XY Stage.......7
3.4.2 Alternative mounting of microscopes to the XY Stage...........8
4.0 Maintenance...................................................................................9
4. 1 Cleaning .....................................................................................9
4. 1 Troubleshooting..........................................................................9
5.0 Specifications..............................................................................10
6.0 Warranty, Technical Queries and Returns................................. 12
7.0 About Scientifica .........................................................................13

1.0 Product Introduction |1
1.0 Product Introduction
1.1 Handling Scientifica equipment – precautions
This section contains important safety information related to general use
of the XY Stage. The XY Stage is a piece of scientific equipment and as
such requires care when handling.
• Before use, carefully read the instructions, including all warnings and
cautions.
• Inspect the product, and connectors before each use. Do not use any
equipment that appears damaged.
• There are no user serviceable parts inside unit.
Other important safety information appears throughout the manual.
Adjustment or removal of any screws or components
other than those noted in this manual can adversely
affect the performance and operation of your equipment
and may invalidate your warranty.
1.2 The Manual XY Stage
1.2.1 Product overview
The Manual XY Stage is a translation stage for moving microscopes in X
and Y. The XY Stage provides 50 mm of travel in X and Y with 20 nm
resolution. Due to its large load carrying capacity the microscope stage
can be used with almost any Zeiss, Leica, Nikon or Olympus inverted or
upright microscopes; a variant is also available for use with Scientifica’s
own Slicescope microscope (see Section 6, Figure B)
The XY Stage can be used in conjunction with a number of Scientifica
fixed position mounting options, such as Post and Platforms or the
Sliceplatform. It can be used as an alternative to the Moveable Top
Plate or Motorised Moveable Top Plate style mounting system when the
user’s preference is to keep the sample stationary and move the
microscope.

|2
1.2.2 Product walkthrough
Figure A: XY Stage with key components indicated
1 XY Stage
2 Y micrometer
3 X micrometer

2.0 Packing List |3
2.0 Packing List
Carefully remove and identify all of the components as listed below. If
any of items are missing, contact Scientifica Ltd or your local distributor.
Please retain the packaging for storage or future transportation of the
system.
In the unlikely event of the shipping packaging being damaged, notify
your shipping department immediately. The shipping department may
wish to notify the carrier at this point.
2.1 Standard items
1 x Manual XY Stage
1 x Stage Protective Membrane*
1 x Hex Key Set
1 x Screw Kit
*
Please note: When purchased for use with other manufacturer’s microscopes the XY Stage
will be shipped with the protective membrane already in place.

3.0 Initial Setup |4
3.0 Initial Setup
Please remember: adjustment or removal of any
screws or components other than those noted in this
manual can adversely affect the performance and
operation of your equipment and may invalidate your
warranty.
If you are unsure of the components discussed here, please review the
schematic in section 1.2.2 or contact a Scientifica representative.
3.1 Removing the shipping brackets
All stages will be shipped with red brackets to prevent component
damage in transit. Before proceeding, remove the red shipping brackets
from the sides of the XY Stage using the supplied hex key set.
Important: Retain these brackets for future transit or
return of the equipment. Component damage is highly
likely if these are not fitted during shipping.
There are six countersunk holes on each side of the stage (12 in total)
securing the brackets in place; these can be removed using a 4 mm
Allen key.
Be careful not to let the XY stage move from its
standing position while removing the bolts, this can
cause the brackets to bend.

3.0 Initial Setup |5
3.2 Attach micrometers
Loosen grub screw on the Y Axis and insert a micrometer (Fig A). For left-
handed users, remove the blanking cap on the left-hand side and follow the
same process.
Figure A: Y Axis micrometer
Loosen screws in pinch block on the X Axis and insert a micrometer (Fig
B). Tighten once in place.
Figure B: X Axis micrometer

3.0 Initial Setup |6
3.3 Mounting the XY Stage
3.3.1 Mounting the XY Stage to an anti-vibration table
The XY Stage is fixed to an anti-vibration table using the mounting holes
in its lower section, marked ‘A’ and ‘B’ in Figure C.
The XY Stage is attached to the anti-vibration table using either ¼ x 20
or M6 x 12 screws, depending on the thread of the table.
Figure C: View of XY stage exposing
mounting holes (marked 'A' and 'B' )
The XY Stage needs to be translated using the micrometers to reveal
the mounting holes.
1. Using the micrometer, move the stage backwards in the Y axis to
reveal the mounting holes on the front edge of the lower surface
(marked ‘A’ above). Insert the screws into the slots and lightly
tighten.
2. Translate the stage forward to reveal the mounting holes at the
opposite end of the stage (marked ‘B’ above). Insert and fully
tighten the screws supplied.
3. Move stage backwards again and fully tighten the mounting
screw on the front edge of the XY stage.
Note: Mounting holes are provided for both metric and
imperial tables so typically only two holes on each side of
the stage will match – these are enough to securely mount
the stage
FRONT REAR
B
A

3.0 Initial Setup |7
3.4 Mounting a microscope to the stage
The XY Stage is compatible with microscopes from all major
manufacturers. The majority of these will bolt directly down onto the XY
Stage from above. A variety of hole patterns are featured on the top
plate to accommodate the requirements of these microscopes.
Note: A small number of microscopes need very
specific instructions for mounting. If the following
instructions do not suit your microscope – contact
Scientifica for help.
3.4.1 Conventional mounting of microscopes to the XY Stage
Scientifica’s SliceScope can be secured to the XY Stage using the six
mounting holes indicated in Figure D: Demonstrating holes for mounting
a SliceScope to the XY Stage.
•Four M6 x12 through the base (A)
•Two M6 x10 through the brackets on either side of the
substage optics (B)
Figure D: Demonstrating holes for mounting a SliceScope to the XY Stage
Note: Most other manufacturer’s microscopes can be
mounted in a similar fashion, using their respective mounting
holes.
B
A
A

3.0 Initial Setup |8
3.4.2 Alternative mounting of microscopes to the XY Stage
Compatibility with some microscopes requires the top plate of the XY
Stage to first be removed so that the microscope can be secured to the
stage from below. This provides an alternative way of attaching the
microscope to the XY Stage in the absence of dedicated mounting holes
accessible from above.
As an example, in the case of a Zeiss FS2 microscope, the following
steps must be carried out:
1. Remove the top plate from the stage of the XY Stage by
unscrewing the 6 x M6 screws securing it in place.
2. Carefully turn the microscope onto its rear to expose four rubber
feet.
3. Remove rubber feet and corresponding crosshead screws from
the base.
4. Align the four counter-bored screw holes of the XY Stage top
plate with the four threaded holes in the microscope base,
exposed in the previous step.
5. Attach the plate to the microscope using four M4 x16 mm
screws.
6. Turn the microscope (with top plate attached) upright again and
place it on the lower stage of the XY Stage.
7. Finally, align the mounting through-holes on the XY Stage top
plate with the M6 threaded holes in the lower stage.
8. Secure in place using the M6 screws previously removed.

4.0 Maintenance |9
4.0 Maintenance
WARNING: Do not tamper with any fixings other than
those indicated in the manual for mounting purposes.
There are no user serviceable parts within the XY Stage.
4. 1 Cleaning
Use a soft cloth dampened with water or a mild detergent to wipe over
the unit.
•Do not saturate the unit.
•Never allow fluid to enter the unit.
•Do not use any type of abrasive pad or material to clean the unit.
4. 1 Troubleshooting
1.Movement not smooth
•Remove micrometres from the XY Stage and check to see if the
screw housing has been damaged by over tightening.
•Check to see if the micrometre rotates smoothly outside the XY
Stage.
•Move stage slowly back and forth without micrometres in place
to check for irregular movement.
2. No movement
•Check shipping plates have been removed.
•Check micrometres are properly in place and have been
tightened.

|10
5.0 Specifications
Number of axes 2
Travel 50 mm
Temperature range Operation 15 to +40ºC
Storage 0 to +60ºC
Bearings Crossed roller
Dimensional diagram:
Figure A: XY stage top plate dimensions*
*Dimensions and mounting holes will vary depending on the microscope being mounted,
as each top plate is made specific to the microscope.

|11
Figure B: SliceScope XY Stage dimensions

6.0 Warranty, Technical Queries and Returns |12
6.0 Warranty, Technical Queries and Returns
All Scientifica manufactured equipment is warranted against defects in
material and workmanship for a period of two years after date of
delivery. During the warranty period, Scientifica Ltd will repair or, at its
option, replace parts which prove defective when the instrument is
returned to Scientifica Ltd in the UK or to your local representative. The
warranty will not apply if the instrument has been damaged by accident,
misuse, or as a result of modification by persons other than Scientifica
Ltd personnel.
Before returning an instrument, please obtain a returns number from
your local representative or Scientifica Ltd in the UK.
Please refer to our terms and conditions of sales for information on our
legal obligations. However, we pride ourselves on going beyond the call
of duty and seek to remedy where we can and in a timely manner.
For any warranty queries please contact your local distributor or
Scientifica Ltd directly.
Tel: +44 (0)1825 749933
E-mail: [email protected]m

7.0 About Scientifica |13
7.0 About Scientifica
Scientifica specialises in the manufacture and distribution of innovative,
superior equipment for electrophysiology researchers, based on
principles of careful design and solid engineering.
By responding to the unique demands placed on the equipment of
electrophysiologists and thinking laterally around these challenges,
we've developed an impressive product range used in laboratories
throughout the world, including many top universities, research centres
and pharmaceutical companies.

© Scientifica Ltd
1A Kingfisher Court, Brambleside, Bellbrook Industrial Estate,
Uckfield, TN22 1QQ, United Kingdom
Tel +44 (0) 1825 749 933
Fax +44 (0) 1825 749 934
info@scientifica.uk.com
Table of contents
Popular Power Tools Accessories manuals by other brands

Woodland Mills
Woodland Mills MULTILANDER PRO LOGGING Operator's manual

Clarke
Clarke CPS85R Operation & maintenance instructions

Milwaukee
Milwaukee 48-03-3035 Operator's manual

MEKANIKA
MEKANIKA ADVANCED SPOILERBOARD KIT manual

VERITAS
VERITAS 05P30.04 manual

Magnum Industrial
Magnum Industrial MI-99265 Assembly and installation instructions