la traspirabilità. Si raccomanda di seguire le istruzioni seguenti
di manutenzione per rendere ottimale la durata del tessuto:
– Togliere periodicamente depositi di polvere, macchie e altro
tipo di sporco per evitare che anche dopo la pulizia rimangano
tracce visibili.
– È importantissimo assicurarsi che la copertura sia perfet-
tamente asciutta prima di chiudere l’ombrellone. Durante i
mesi di non utilizzo l’ombrellone deve essere riposto in un
ambiente asciutto.
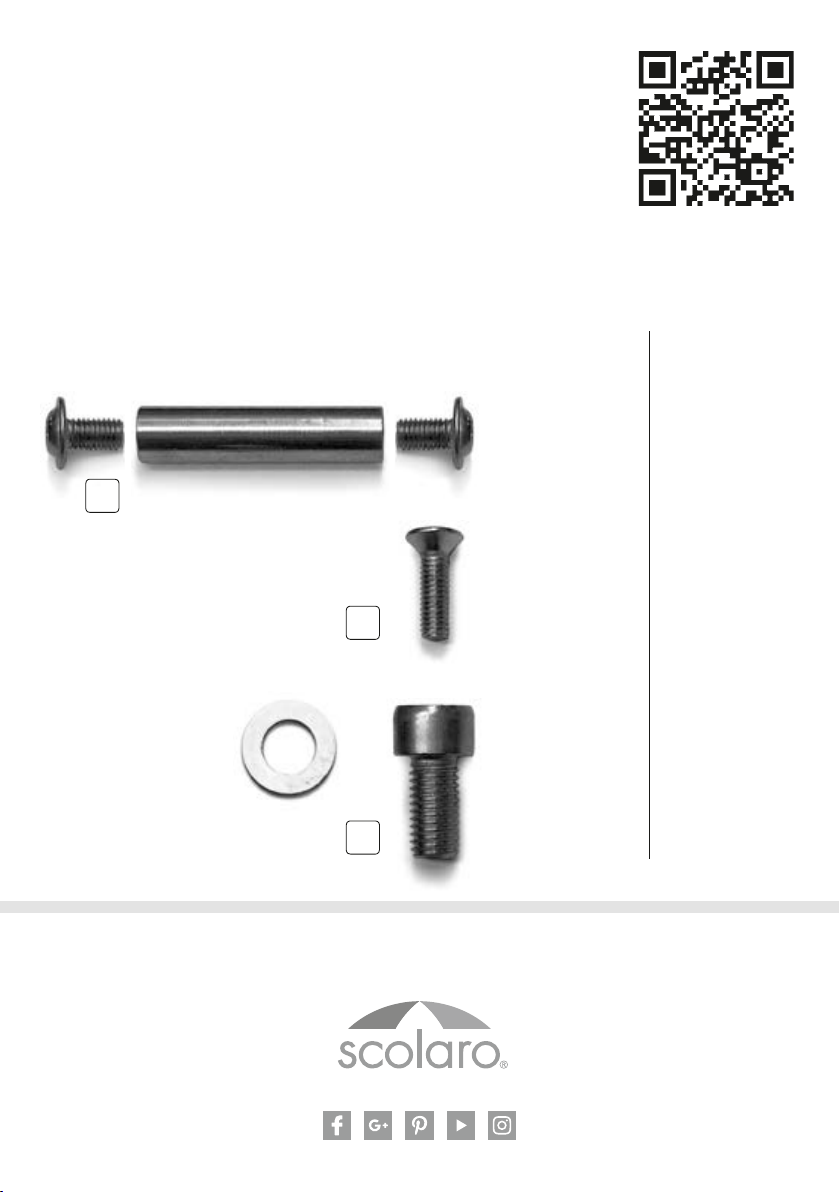
COMPONENTI
•
Le parti in acciaio, la viteria e gli accessori sono zincati antiruggi-
ne. Per garantire e assicurare una maggiore durata del prodotto
è consigliabile comunque porre l’ombrellone e la base al riparo
durante i mesi invernali o durante i periodi di non utilizzo.
• Durante ogni stagione verificare periodicamente lo stato e
la funzionalità dei componenti soprattutto dopo un periodo
lungo dove l’ombrellone non sia stato utilizzato.
ASSISTENZA + GARANZIA
• Durante il periodo di garanzia, in caso di danno derivante da
difetto di fabbricazione, la ditta Scolaro fornisce assistenza,
fornitura pezzi di ricambio gratuitamente oppure, dove neces-
sario, la sostituzione dell’ombrellone completo.
•
Trascorso il periodo di garanzia, la ditta Scolaro può fornire un
servizio di assistenza attraverso i nostri rivenditori di zona o
direttamente per molti anni successivamente alla vendita, quale
fornitura prezzi di ricambio e possibilità di eseguire riparazioni.
• Per maggiori informazioni su garanzia o materiali vi preghiamo
di vistare il nostro sito web (www.scolaro-parasol.it) oppure
consultare il catalogo.
DIRECTIONS FOR USE 1e n
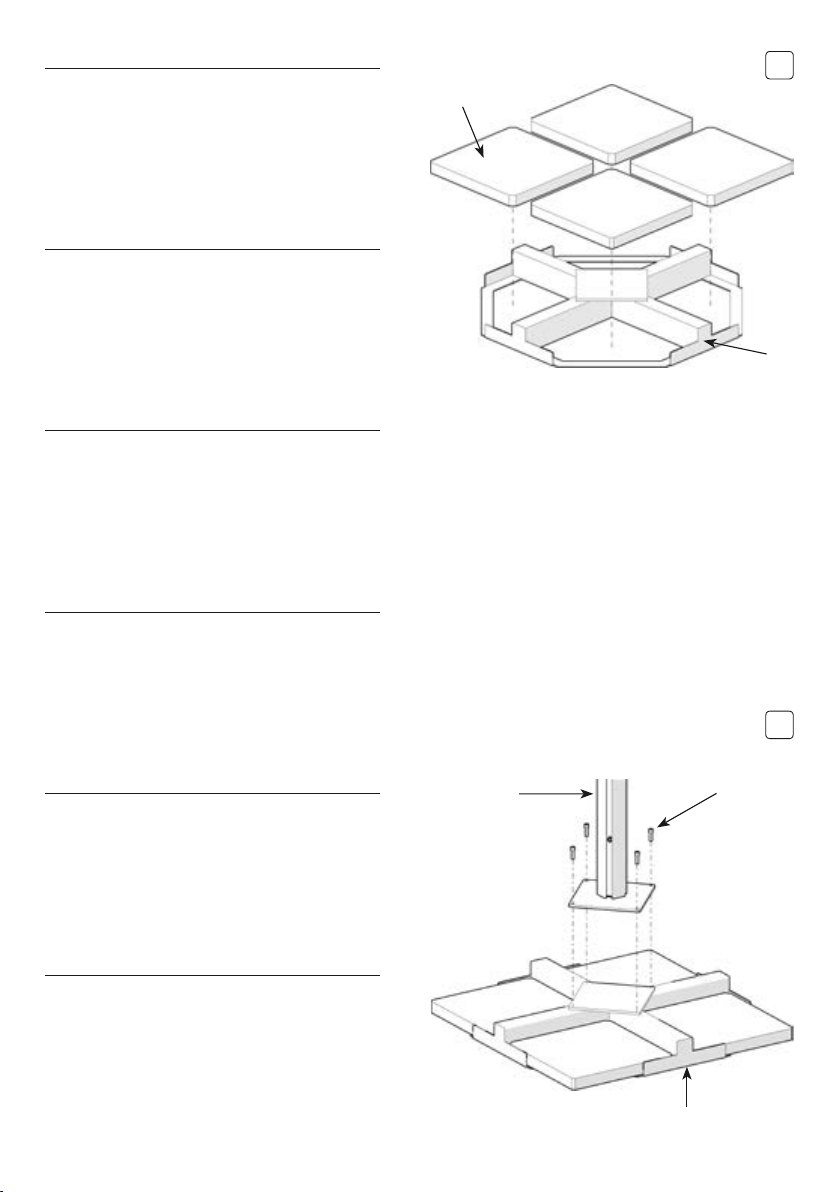
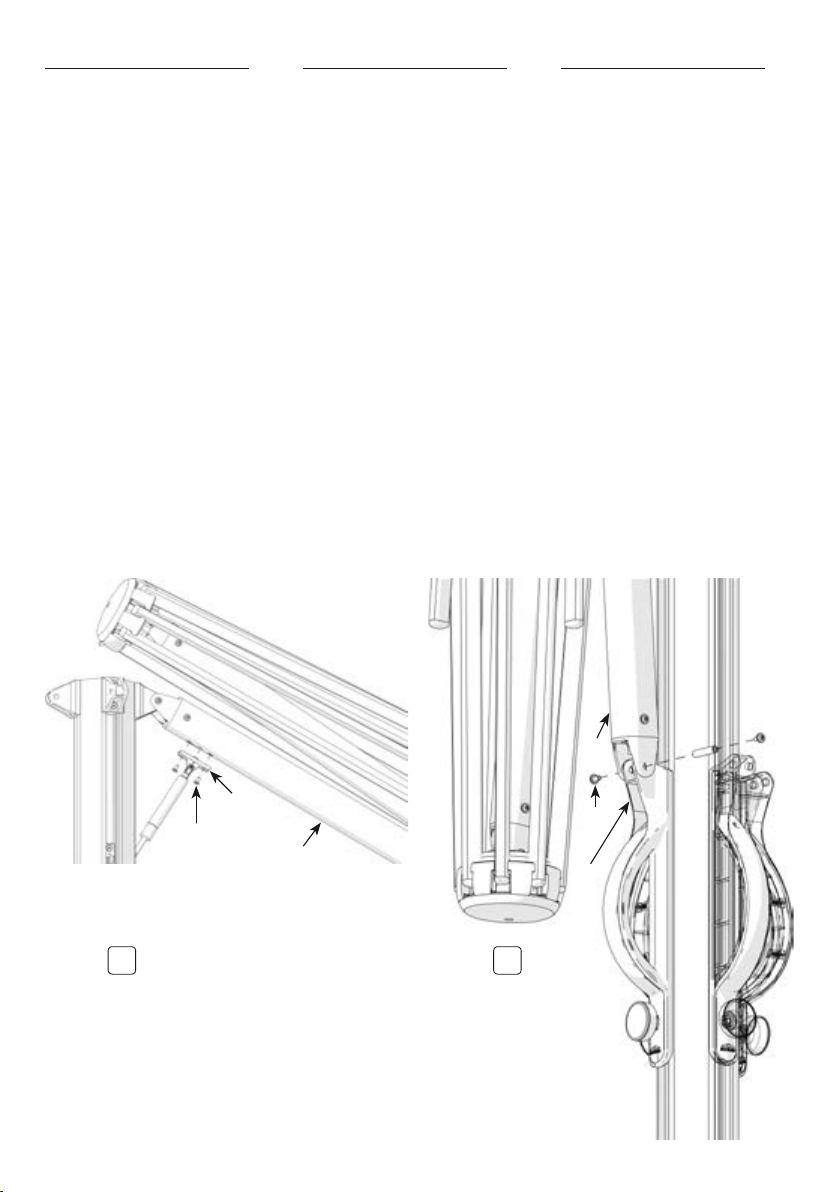
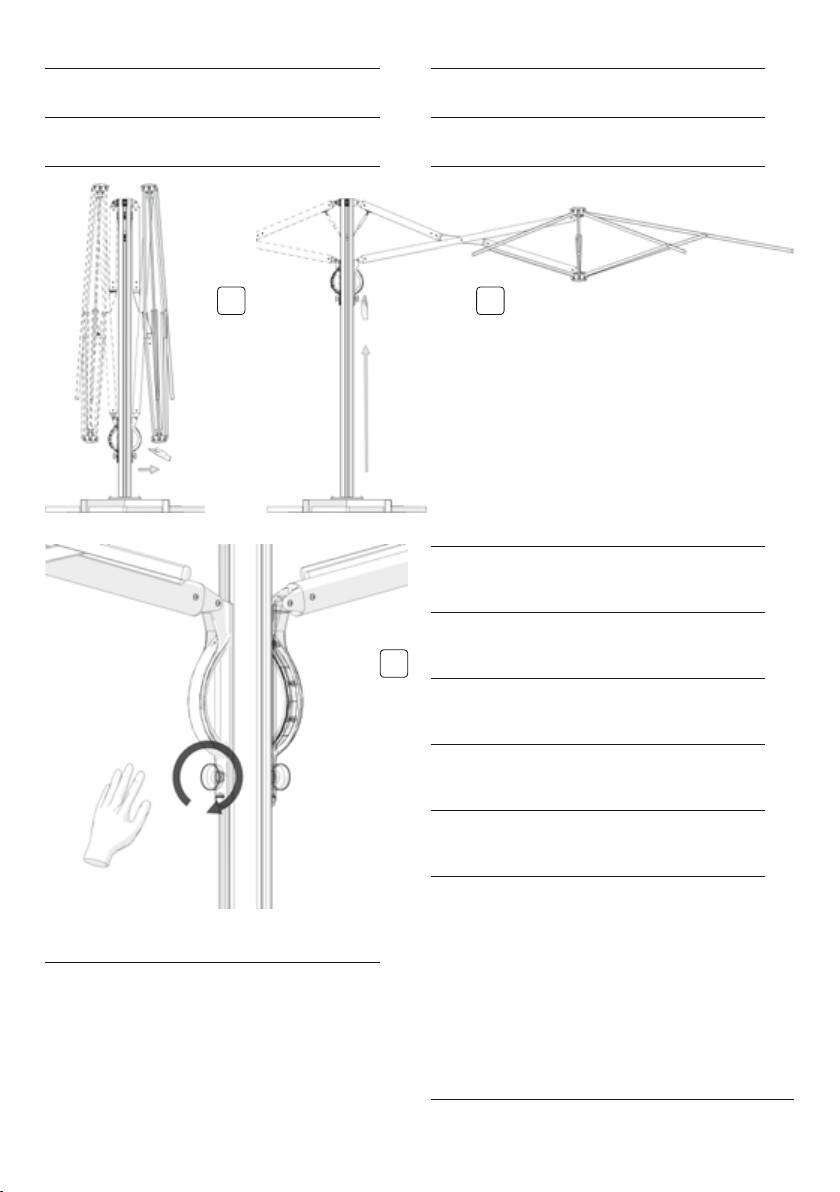
1. Take the parasol string away, move the ribs to make easier
the opening.
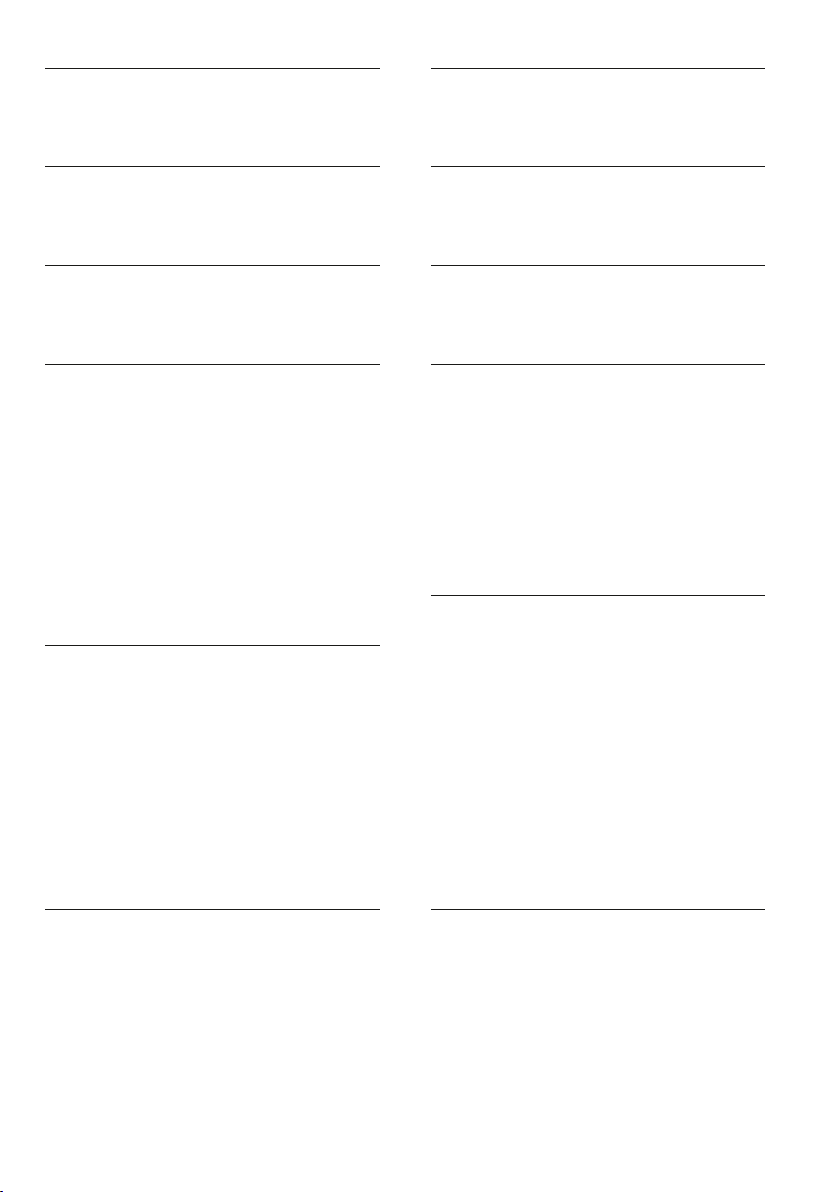
2. For this parasol a ballast of 260 kg is required. The cement
plates or pots can be found easily or are available in our range
of optional items. See items:
BC5050 - BC5151 - BC5151G - BV5050G - BV5050B.
In case of particular environments or special atmospheric condi-
tion it could be necessary to increase the ballast. ADDITIONAL
INFORMATION IN THE DEDICATED BROCHURE SECTION. The
company Scolaro, its staff and all retailers are at your disposal
for any further information and technical assistance.
• Before use, directions and assembling instructions, which
are inside the package, have to be kept and read carefully.
• The base has to be ballasted. An insufficient weight will seri-
ously compromise the stability of the parasol.
• To avoid damage or personal injury, parasol must be closed
and removed from the support when unattended and/or in
windy conditions. Remember always that the parasol is not
a fixed construction.
The company Scolaro cannot be held responsible for damage
to goods supplied, persons or property resulting from misuse
and failure to follow instructions and guidelines on indications.
MAINTENANCE
FABRIC
• The fabric is waterproof and anti mould treated to reject water,
spots and grant transpiration. Please follow our maintenance
instruction to grant the long lasting of the fabric:
– Remove often dust deposits, spots and any type of dirt in
order to avoid trails after cleaning.
– It’s very important to close the parasol only when it is perfectly
dry. During the winter and when the parasol is not employed,
it has to be stored in dry environment.
COMPONENTS
• The steel components, screws and accessories are anti rust
treated. Anyway for a long lasting of the parasol, during the
winter and when the it is not employed, the parasol has to
be stored in dry environment.
•
During ever y season it is necessar y to check the functionality
of all components, especially after a long period of non-employ.
ASSISTANCE + WARRANTY
• During the warranty period, in case of damages caused by
production faults, the company Scolaro grants as sistance,
supplies spare parts without any charge, or, if necessary,
replaces the complete parasol.
•
After the warranty period, the company Scolaro can grant as-
sistance through its resellers or also directly for many years
after the sale, by supplying spare parts or repairing the parasol.
•
For further information about warranty or materials, please visit
our website (www.scolaro-parasol.it) or consult our catalog.
GEBRAUCHSANWEISUNGEN - ANWEISUNGEN
1D
1. Schirmbaendel abnehmen und Streben bewegen um die Oeff-
nung zu erleichtern.
2. Fuer die Schirm eist ein Ballast con 260 Kg erforderlich. Es
koennen Kiesbetonplatten oder Beton toepfe eingesetzt wer-
den, die leicht auffindbar sind oder, die auch wir als Optional
anbieten. Siehe Art:
BC5050 - BC5151 - BC5151G - BV5050G - BV5050B.
Bei besonderen Einsaetzen oder klimatischen Faktoren koennte
es notwendig sein den Ballast zu verstaerken. ZUSAETLICHE
INFORMATIONEN IM PROSPEKTABSCHNITT. Die Firma Scolaro,
Mitarbeiter und Fachhaendler stehen jederzeit fuer weitere In-
formationen und technische Hilfe zur Verfuegung.
• Vor dem Gebrauch, Gebrauchsanweisungen und Montagean-
leitungen, die in der Verpackung enthalten sind, aufmerksam
lesen und danach auf bewahren.
• Der Staender muss mit dem empfohlenen Ballast beschwert
werden. Falls unzureichend beschwert, wird die Stabilitaet
des Schirmes ernsthaft gefaehrdet.
•
Um Schaden und Verletzungen zu vermeiden, muss der Schirm
bei starkem Wind immer geschlossen und vom Gestell abge-
nommen werden. Schirm nie unbeaufsichtigt geoeffnet lassen.
Immer bedenken, dass der Schirm keine feste Konstruktion ist.
Die Firma Scolaro ist bei Missbrauch und Nichtbefolgung der
Anleitungen und Anweisungen nicht fuer Schaeden an Eigentum
und Personen verantwortlich.
WARTUNG
STOFF
• Der Stoff ist wasser- und schimmelfest behandelt, ist schmutz-
abweisend und luftdurchlaessig. Bitte nachstehend aufgefu-
ehrte Hinweise befolgen:
– Entfernen Sie oefters Staub, Flecken und jeglichen Schmutz
damit keine Spuren nach der Reinigung uebrigbleiben.
– Bitte schliessen Sie den Schirm nur wenn der Stoff vollkom-
men trocken ist. Waehrend der Wintermonate und wenn nicht
eingesetzt, muss der Schirm trocken aufbewahrt werden.
BESTANDTEILE
• Stahlbestandteile, Schrauben und Zubehoer sind rostfrei be-
handelt. Um eine lange Dauer des Produktes zu gewaehrleisten
empfehlen wir allerdings den Schirm waehrend der Wintermo-
naten und wenn nicht eingesetzt trocken aufzubewahren.
• In jeder Saison und vor allem wenn der Schirm seit langem
nicht verwendet wird, muessen alle Bestandteile vor dem
Einsatz kontrolliert werden.
KUNDENDIENST + GARANTIEN
• Waehrend der Garantiefrist und im Falle von Beschaedigungen,
die von Herstellungsfehlern abhaengen, liefert die die Firma
Scolaro kostenlos Ersatzteile oder, falls noetig, ersetzt den
kompletten Schirm.
• Nach Ablauf der Garantiefrist kann die Firma Scolaro direkt
oder durch Fachhaendler Kundendienst anbieten. Ersatzteile
koennen auch nach vielen Jahren geliefert werden. Es besteht
auch die Moeglichkeit die Schirme zu reparieren.
• Für weitere Informationen zu Garantie oder Material besuchen
Sie bitte unsere Website (www.scolaro-parasol.it) oder befra-
gen Sie unseren Katalog.
MODE D’EMPLOI - INSTRUCTIONS 1F
1. Ôter le cordon du parasol et mouvoir les baleines pour faciliter
l’ouverture du parasol.
2. Pour ce parasol il faut un ballast de dalles en ciment ou vases
qu on peut trouver facilement ou aussi acheter chez nous.
Voire Art:
BC5050 - BC5151 - BC5151G - BV5050G - BV5050B.
En cas de milieux ou conditions atmospheriques particulaires il
faut augmenter le ballast. INFORMATIONS SUPPLÉMENTAIRES
DANS LA SECTION DU CATALOGUE DÉDIÉ. La maison Scolaro,
nos collaborateurs et revendeurs sont à votre disposition pour
tous renseignements et assistance technique.
• Lire attentivement les instructions et le mode d’emploi et les
conserver.