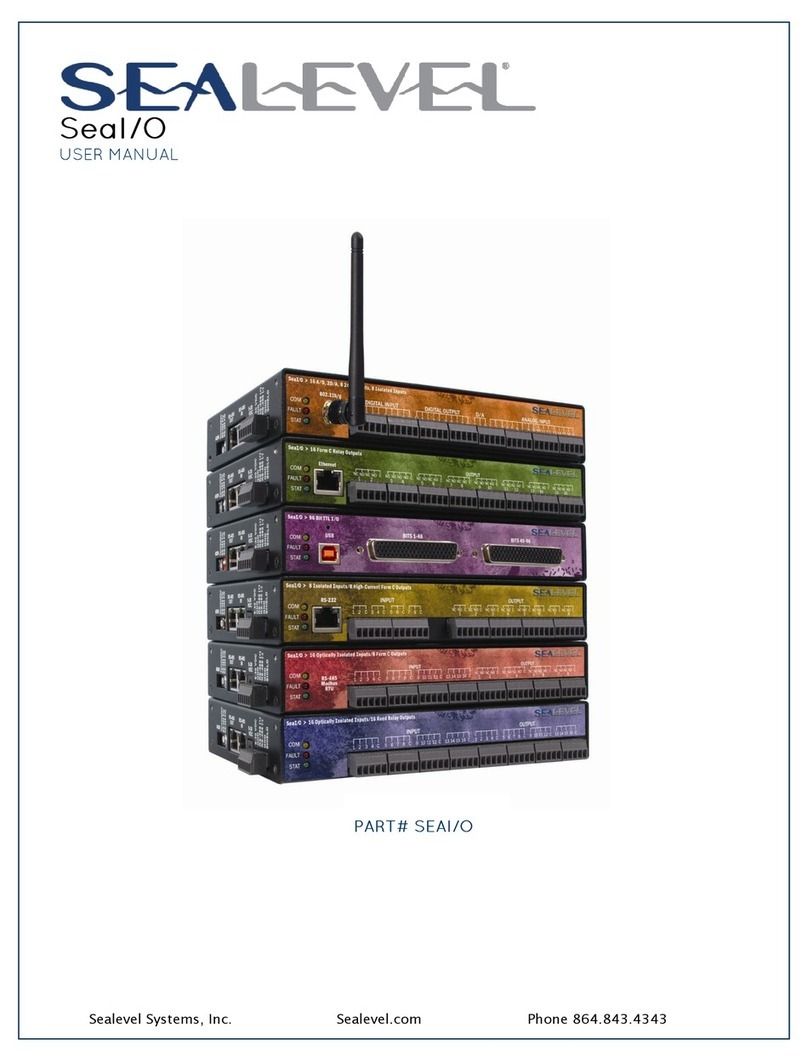
SeaLevel Seal/O Series User manual

1
© Sealevel Systems, Inc. SeaI/OUSBSERIAL | SL9177 04/2022
SeaI/O USB Serial
User Manual | SEAI/OUSBSERIAL

2
© Sealevel Systems, Inc. SeaI/OUSBSERIAL | SL9177 04/2022
Contents
CONTENTS........................................................................................................................................................................................................................................2
INTRODUCTION...............................................................................................................................................................................................................................3
SEAI/O HARDWARE OVERVIEW..................................................................................................................................................................................................4
BEFORE YOU GET STARTED..........................................................................................................................................................................................................5
HARDWARE DESCRIPTION...........................................................................................................................................................................................................7
POWER OPTIONS............................................................................................................................................................................................................................8
SOFTWARE INSTALLATION.........................................................................................................................................................................................................10
PHYSICAL INSTALLATION...........................................................................................................................................................................................................11
TECHNICAL DESCRIPTION..........................................................................................................................................................................................................12
SPECIFICATIONS...........................................................................................................................................................................................................................18
MOUNTING OPTIONS...................................................................................................................................................................................................................19
ACCESSORIES ..............................................................................................................................................................................................................................20
APPENDIX A - TROUBLESHOOTING.........................................................................................................................................................................................22
APPENDIX B –HOW TO GET ASSISTANCE ............................................................................................................................................................................ 23
APPENDIX C –ELECTRICAL INTERFACE.................................................................................................................................................................................24
APPENDIX D - ASYNCHRONOUS COMMUNICATIONS ........................................................................................................................................................ 25
APPENDIX E –PCB SILK SCREEN............................................................................................................................................................................................26
APPENDIX F –COMPLIANCE NOTICES ....................................................................................................................................................................................27
WARRANTY...................................................................................................................................................................................................................................28

3
© Sealevel Systems, Inc. SeaI/OUSBSERIAL | SL9177 04/2022
Introduction
SeaI/O™ USB serial expansion modules provide an easy way to add RS-232 or RS485 serial ports to a Relio
industrial computer, SeaPAC touchscreen computer, stack of SeaI/O modules, or anywhere serial devices need
to be connected via an available USB port.
Available in four and eight port models, the serial ports appear as standard COM ports to the host system
enabling compatibility with legacy software. SeaI/O USB serial modules support data rates to 921.6K bps and
are designed with a statemachine architecture that greatly reduces the host CPU overhead when communicating
over multiple ports simultaneously. Status LEDs integrated into the RJ45 connectors display transmit and
receive data activity.
With the unique VersaCom multi-interface connector design, both RS-232 and two-wire RS-485 signals are
always present and active on the RJ45 serial connectors. Simply select the appropriate pin out for RS-232 or
two-wire RS-485 on each individual port. There are no internal jumpers or switches to set, so field installation
and service is easy.
The USB serial modules are powered from your 9-30VDC source or your choice from several Sealevel power
supply options. For conveniently powering serial peripherals, the supplied power is fused and connected to pin
5 on each of the RJ45 serial connectors. A high-retention USB type "B" connector helps to prevent accidental
disconnection of the USB cable.
An RS-485 pass-through connector on the side of the SeaI/O USB serial modules provides additional I/O
capabilities using SeaI/O "N" series expansion modules. Up to 246 additional SeaI/O expansion modules can be
added and are available with Reed and Form C relays, optically isolated inputs, TTL interfaces, A/D and D/A
functionality.
This manual covers the installation and operation of these SeaI/O products:
USB Serial Expansion Modules
SeaI/O-641U –4-Port RS-232 RJ45 Serial Interface
SeaI/O-647U –4-Port RS-232, RS-485 RJ45 VersaCom Serial Interface
SeaI/O-681U –8-Port RS-232 RJ45 Serial Interface
SeaI/O-687U –8-Port RS-232, RS-485 RJ45 VersaCom Serial Interface

4
© Sealevel Systems, Inc. SeaI/OUSBSERIAL | SL9177 04/2022
SeaI/O Hardware Overview
SeaI/O Base and Expansion Modules
In general, SeaI/O data acquisition modules provide powerful digital, analog, and serial expansion to any host
computer. Multiple modules can be daisy chained using convenient pass-through connectors to create a
versatile distributed control and monitoring network. For ease of installation, multiple modules can be combined
in a local stack or separated up to 4000 feet using the RS-485 expansion interface.
The first SeaI/O module connected to the host computer is considered the Base module and connects to the
host via one of the following interfaces:
•E-Series –Ethernet Modbus TCP
•U-Series –USB Modbus RTU
•M-Series –RS-485 Modbus RTU
•S-Series –RS-232 Modbus RTU
SeaI/O USB serial expansion modules only connect to the host via USB and will operate as a Base module when
connected to digital and analog SeaI/O N-series Expansion Modules.
After the Base unit is installed, up to 246 additional SeaI/O N-Series expansion modules can be added to create
an I/O network. These expansion modules interface via RS-485 and can be located local to the Base SeaI/O
module or remotely located up to 4000 feet away. Local installations (<10’ of cabling) should use the 5” CAT5
RS-485 pass-through cable (Item# CA239) included with each N-series module to connect together two or more
modules. Remote expansion modules (>10’ of cabling) should use twisted pair wiring connected via the
removable screw terminal connectors.
For local installations, power to the expansion modules is supplied from the base module via the pass-through
connectors. For remote devices, separate power is required at each expansion module. Refer to the Power
Options chapter of this manual for more information on SeaI/O power requirements and power supply sizing.
Communicating Via Modbus Commands
Sealevel SeaI/O modules are designed to integrate seamlessly into existing Modbus networks. The supported
command set will vary depending on the SeaI/O model used. While SeaI/O USB serial expansion modules do
not require any Modbus commands to operate, they do pass through all Modbus RTU commands to other
connected SeaI/O modules and Modbus compliant devices.
The SeaI/O Modules manual covers digital and analog I/O modules and details the supported Modbus command
set. The official Modbus specification can be found at www.modbus.org.

5
© Sealevel Systems, Inc. SeaI/OUSBSERIAL | SL9177 04/2022
Before You Get Started
What’s Included
All SeaI/O USB serial expansion modules are shipped with the following items. If any of these items is missing
or damaged please contact Sealevel for replacement.
•SeaI/O USB Serial Expansion Module –(one of the following models)
➢SeaI/O-641U –4-Port RS-232 RJ45 Serial Interface
➢SeaI/O-647U –4-Port RS-232, RS-485 RJ45 VersaCom Serial Interface
➢SeaI/O-681U –8-Port RS-232 RJ45 Serial Interface
➢SeaI/O-687U –8-Port RS-232, RS-485 RJ45 VersaCom Serial Interface
•Item# CA179 –72” USB ‘A’ to ‘B’ Device Cable
•Item# LB116 –RS-232 RJ45 Serial Loopback
•Item# LB115 –RS-485 RJ45 Serial Loopback (only VersaCom models)
Each SeaI/O module is shipped with 4 adhesive rubber feet that can be attached to the bottom of the enclosure
to enhance the stability in table mount applications.
Advisory Conventions
Warning
The highest level of importance used to stress a condition where damage could result to the product,
or the user could suffer serious injury.
Important
The middle level of importance used to highlight information that might not seem obvious or a
situation that could cause the product to fail.
Note
The lowest level of importance used to provide background information, additional tips, or other non-
critical facts that will not affect the use of the product.

6
© Sealevel Systems, Inc. SeaI/OUSBSERIAL | SL9177 04/2022
Power Supplies
SeaI/O USB serial expansion modules are powered from your 9-30VDC source or from a variety of Sealevel
power supply options. Refer to the Power Options chapter of this manual for power supply sizing considerations
when powering multiple SeaI/O modules.
Loopback Adapters
All SeaI/O USB serial expansion modules include an RJ45 RS-232 serial loopback adapter (Item# LB116) that is
useful for testing the data signals on RS-232 ports. SeaI/O USB serial models with RS-485 VersaCom ports also
include an RJ45 RS485 loopback cable (Item# LB115) that is useful for testing the data signals between a pair
of RS-485 ports.
WinSSD is a full featured asynchronous serial diagnostic utility for Windows that allows you to modify default
parameters, perform loopback tests, toggle modem control signals, and transmit test pattern messages.
WinSSD is available as a standalone utility and is included with Sealevel’s SeaCOM, SeaLINK and SeaMAC
software suites.

7
© Sealevel Systems, Inc. SeaI/OUSBSERIAL | SL9177 04/2022
Hardware Description
SeaI/O RS-232 Serial Expansion Modules
Models
•SeaI/O-641U USB to 4-Port RS-232 RJ45 Serial Interface
•SeaI/O-681U USB to 8-Port RS-232 RJ45 Serial Interface
Features
•Utilizes high speed UARTs with 128-byte Tx FIFOs and 384-byte Rx FIFOs
•Provides four or eight RJ45 RS-232 serial ports with Tx/Rx status LEDs
•Integrates transmit and receive LED indicators on each port
•Input power via terminal block or barrel connector
•USB 1.1 compliant, USB 2.0 compatible
•High-retention USB type “B” connector prevents accidental disconnection of USB cable
Power Requirements
•9-30VDC @ 1.5W
SeaI/O RS-232/485 VersaCom Serial Expansion Modules
Models
•SeaI/O-647U USB to 4-Port RS-232/485 RJ45 VersaCom Serial Interface
•SeaI/O-687U USB to 8-Port RS-232/485 RJ45 VersaCom Serial Interface
Features
•Utilizes high speed UARTs with 128-byte Tx FIFOs and 384-byte Rx FIFOs
•Provides four or eight RJ45 RS-232 serial ports with Tx/Rx status LEDs
•Integrates transmit and receive LED indicators on each port
•VersaCom design allows RS-232 or two-wire RS-485 selection via cabling on each individual port
•Input power via terminal block or barrel connector
•USB 1.1 compliant, USB 2.0 compatible
•High-retention USB type “B” connector prevents accidental disconnection of USB cable
Power Requirements
•9-30VDC @ 2.5W

8
© Sealevel Systems, Inc. SeaI/OUSBSERIAL | SL9177 04/2022
Power Options
All SeaI/O modules are powered from a 9-30VDC source using either the DC jack or screw terminals on the side
of the unit. Sealevel offers several power supply choices to make connection easy (see Accessories chapter at
the end of this manual).
If the SeaI/O USB serial expansion module will be used alone, the recommended “single-unit” power supply
(Item# TR112) rated at 24VDC @ 250mA is a perfect fit. Skip ahead to the Software Installation chapter of this
manual.
One of the primary features of SeaI/O modules is their ability to be powered from a single input source, which is
then shared with other SeaI/O expansion modules via pass-through connectors or screw terminals located on
the left side of the modules. If you are connecting multiple SeaI/O modules together, refer to the rest of this
chapter for power supply sizing considerations.
SeaI/O Expansion Power Connection
Each SeaI/O product, including the expansion modules, contains an onboard switching regulator power supply
rated for 9-30VDC. For local installations (less than 10’ apart), expansion module power is usually supplied from
the Base module via the pass-through connectors. The number of expansion modules that can be driven from
the Base module depends on the power source and number/type of expansion modules. Refer to the chart below
for power requirements. For expansion modules mounted remotely (greater than 10’ apart), separate power is
required at each expansion module.
SeaI/O Expansion Power Requirements
The following table shows the maximum power requirements for each SeaI/O digital and analog expansion
module.
Model Number
Max Power
SeaI/O-410N
1.4W
SeaI/O-420N
2.0W
SeaI/O-430N
0.4W
SeaI/O-440N
2.5W
SeaI/O-450N
3.8W
SeaI/O-470N
1.5W
SeaI/O-520N
3.5W

9
© Sealevel Systems, Inc. SeaI/OUSBSERIAL | SL9177 04/2022
TTL Expansion Power Requirements
The SeaI/O-462N and SeaI/O-463N use 74ABT245 octal bi-directional transceivers to provide TTL input/output
capabilities and can sink 64mA and source 32mA. Each bit is pulled to +5V through a 10K ohm pull-up resistor
to insure each bit is at a known state when not driven. The supply current and maximum output power for the
TTL expansion modules is shown in the table below.
Model Number
Max Power
SeaI/O-462N
0.5W
SeaI/O-463N
0.5W
Output Power
+5VDC @ 1A (5W) Maximum
Sample Power Calculation
A typical application for SeaI/O products would use one Base module and several Nseries expansion modules
in a local “stack” configuration. In this arrangement, with power applied to the Base module through either the
DC jack or screw terminal connector and passed-through to the expansion modules, attention should be given
to ensure the input power to all connected modules is adequate.
Example:
Power (W)
Base Module: SeaI/O-641U 1.5
Expansion 1: SeaI/O-410N 1.4
Expansion 2: SeaI/O-440N 2.5
5.4W Power Required
In this application, the Sealevel Item# TR112 “wall wart” power supply is a good choice since it is low-cost and
supplies 24VDC @ 250mA (6W).
A complete listing of recommended power supplies is provided in the Accessories chapter at the end
of this manual.

10
© Sealevel Systems, Inc. SeaI/OUSBSERIAL | SL9177 04/2022
Software Installation
SeaMAX Software Installation
Windows Installation
Do not connect the SeaI/O module to the host until the software has been fully installed.
Only users running Windows 7 or newer should utilize these instructions for accessing and installing
the appropriate driver via Sealevel’s website. If you are utilizing an operating system prior to Windows
7, please contact Sealevel by calling 864.843.4343 or emailing support@sealevel.com to receive
access to the proper driver download and installation instructions.
1. Begin by locating, selecting, and installing the correct software from the Sealevel software driver
database.
2. Type in or select the part number (#641U, 647U, 681U or 687U)) for the adapter from the listing.
3. Select “Download Now” for SeaMAX for Windows.
4. The setup files will automatically detect the operating environment and install the proper
components. Follow the information presented on the screens that follow.
5. A screen may appear with text similar to: “The publisher cannot be determined due to the
problems below: Authenticode signature not found.” Please click the ‘Yes’ button and proceed
with the installation. This declaration simply means that the operating system is not aware of
the driver being loaded. It will not cause any harm to your system.
6. During setup, the user may specify installation directories and other preferred configurations.
This program also adds entries to the system registry that are necessary for specifying the
operating parameters for each driver. An uninstall option is also included to remove all
registry/INI file entries from the system.
7. The software is now installed, and you can proceed with the physical installation of your SeaI/O
USB serial expansion module.
Windows NT is not USB aware and thus cannot support this device.

11
© Sealevel Systems, Inc. SeaI/OUSBSERIAL | SL9177 04/2022
Physical Installation
SeaI/O USB serial expansion modules can be connected to any spare USB port.
Do not connect the SeaI/O module to the host until the software has been fully installed.
1. Connect the SeaI/O USB serial expansion module to your 9-30VDC source or optional Sealevel power
supply. Refer to the Power Options chapter of this manual for power requirements.
2. Connect the SeaI/O USB serial expansion module to a USB port with the supplied USB device cable.
3. The software drivers installed during setup will automatically recognize and configure the device.
4. You should see one or more “New Hardware Found” windows, indicating the actual device being created.
The installation will repeat twice for each COM port (a total of 8 times on 4-port models, and 16 times on
8-port models). This is a limitation in the way Windows installs external serial devices.
5. Next, view your system’s Device Manager.
6. You should have new COM: ports in the Ports (COM & LPT) Device Class indicating the installation was
successful.
7. You can access your new COM: port by using the assigned COM: identifier. This assignment will vary
from system to system.
8. To verify operation, use Sealevel Systems supplied WinSSD diagnostic utility. WinSSD is available as a
standalone utility and is included with Sealevel’s SeaCOM, SeaLINK and SeaMAC software suites.
Your SeaI/O serial expansion module is now ready for use.

12
© Sealevel Systems, Inc. SeaI/OUSBSERIAL | SL9177 04/2022
Technical Description
The SeaI/O USB serial expansion modules utilize USB UARTs. These chips feature programmable baud rate,
data format, 128-byte Dual Port TX Buffer, and 384-byte Dual Port RX Buffer. The transceivers support data rates
up to 921.6K bps. and integrated status LEDs on each RJ45 serial port display transmit and receive data activity.
Common Features
All SeaI/O USB serial expansion modules include the same connectors on the left side –RJ45 RS-485 pass-
through connector, 1.3mm 9-30VDC barrel connector, and a 6-position removable screw terminal:
USB Interface & LED
A high-retention USB Type “B” connector helps to prevent accidental disconnection of the USB cable. A green
status LED next to the USB connector (labeled ‘PWR’) lights to indicate the module is properly connected to an
input power source.

13
© Sealevel Systems, Inc. SeaI/OUSBSERIAL | SL9177 04/2022
Connector Pin Assignments (RJ45) –RS-232
The SeaI/O 641U and 681U utilize the RS-232 connector pin out. Integrated status LEDs on each RJ45 serial port
display transmit and receive data activity.
Name
Pin #
Mode
NC
No Connect
1
RTS
Request To Send
2
Output
TX
Transmit Data
3
Output
GND
Ground
4
PWR
Power Output
5
RX
Receive Data
6
Input
CTS
Clear To Send
7
Input
NC
No Connect
8
DCD, DSR, and RI are inputs that are not brought out on the RJ45 connector. DSR and DCD are biased
active, and RI is biased inactive.

14
© Sealevel Systems, Inc. SeaI/OUSBSERIAL | SL9177 04/2022
Connector Pin Assignments (RJ45) –RS-232/485 VersaCom
The SeaI/O 647U and 687U utilize the RS-232/485 VersaCom connector pin out. Integrated status LEDs on each
RJ45 serial port display transmit and receive data activity.
Name
Pin #
Mode
D+
RS-485 Data +
1
RTS
Request To Send
2
Output
TX
Transmit Data
3
Output
GND
Ground
4
PWR
Power Output
5
RX
Receive Data
6
Input
CTS
Clear To Send
7
Input
D-
RS-485 Data –
8
DCD, DSR, and RI are inputs that are not brought out on the RJ45 connector. DSR and DCD are biased
active, and RI is biased inactive.
Interface Selection
With the unique VersaCom multi-interface connector design, both RS-232 and two-wire RS-485 signals are
always present and active on the RJ45 connectors. Simply select the appropriate pin out for RS-232 or two-wire
RS-485 on each individual port. The unused interface on each connector should be left unconnected. All inputs
have appropriate biasing to keep them in an inactive state. If the unused interface pins are connected to a cable,
the outputs will attempt to drive the lines while the inputs will attempt to interpret any voltage on the line as data,
which can limit cable length and may result in communication failures.

15
© Sealevel Systems, Inc. SeaI/OUSBSERIAL | SL9177 04/2022
SeaI/O Pass-Through Connector
All SeaI/O USB serial expansion modules include an RS-485 pass-through connector on the left side of the unit
that is internally connected to the same pins on the removable screw terminals. This offers two convenient
options for adding SeaI/O digital and analog expansion modules. The image on the following page shows the
pass-through connector and removable screw terminals.
For connecting several SeaI/O modules together in a “stack,” all N-series expansion modules ship with an
expansion and strap kit (Item# KT122) that includes four metal straps, four #4-40 screws, and a 5” RJ45 RS-485
interconnect cable (Item# CA239). The metal straps allow you to securely connect multiple SeaI/O modules
together. The interconnect cable can be used to connect SeaI/O modules together via the RJ45 pass-through
connectors, providing an easy method to cascade RS-485 signals and power from one module to the next.
For expansion modules that are less than ten feet from a base unit, a standard RJ45 CAT5 patch cable may be
used. For SeaI/O modules greater than ten feet apart, use twisted-pair cable connecting the data lines to the
screw terminals instead. If RJ45 connectors are preferred, be sure to connect only the data lines (pins 4 & 5).
Modules greater than ten feet apart must have separate power supplies. Refer to the Power Options
chapter of this manual for recommendations.

16
© Sealevel Systems, Inc. SeaI/OUSBSERIAL | SL9177 04/2022
RS-485 Biasing and Termination
All RJ45 RS-485 inputs have the appropriate biasing to keep them in an inactive state when not connected to a
cable. When cabling for RS-232 signals, be sure to leave the RS-485 pins unconnected. If the unused interface
pins are connected to a cable, the outputs will attempt to drive the lines while the inputs will attempt to interpret
any voltage on the line as data, which can limit cable length and may result in communication failures.
120Ωtermination resistor always present between
Data+ and Data-
510ΩBiasing pull-up resistors on Data+
510ΩBiasing pull-down resistors on Data-
RS-485 networks should have termination enabled on each end of the network. SeaI/O USB serial modules
have appropriate biasing and termination enabled. Pull-up and pull-down resistors should also be enabled
on the last device on the RS-485 network.
Power on Pin 5
For conveniently powering serial peripherals, the input power is fused and connected to pin 5 on each of the
RJ45 serial connectors. Each serial port utilizes an auto-resetting fuse rated at 500mA. All powered serial
peripherals must have the same input voltage and be within the 9-30VDC range. The input current must be rated
higher than the combined current requirement of the SeaI/O USB serial expansion module and any devices
powered by the serial ports and the RS-485 pass-through connector.

17
© Sealevel Systems, Inc. SeaI/OUSBSERIAL | SL9177 04/2022
Optional RJ45 to DB9 RS-232 Adapter
Preconfigured for use with Sealevel USB RJ45-enabled serial adapters, the RJ45 to DB9 modular adapter (Item#
RJ9P-232) converts the RJ45 RS-232 pin out to a DB9 male RS-232 serial port. Standard CAT5 patch cables can
be used to extend the serial port up to 50 feet away from the RJ45 port. The pin out for the RJ9P-232 is shown
below.

18
© Sealevel Systems, Inc. SeaI/OUSBSERIAL | SL9177 04/2022
Specifications
Temperature Range
Specification
Operating
Storage
Temperature Range
-0º to 70º C
-50º to 105º C
Physical Dimensions
Length
Width
Height
7.5”
5.1”
1.3”
19.05 cm
12.95 cm
3.30 cm
Manufacturing
All Sealevel Systems, Inc. printed circuit boards are built to UL 94V0 rating and are 100% electrically tested.
These printed circuit boards are solder mask over bare copper or solder mask over tin nickel.

19
© Sealevel Systems, Inc. SeaI/OUSBSERIAL | SL9177 04/2022
Mounting Options
SeaI/O Mounting Kit
Expanding your I/O count is as simple as adding N-
Series expansion units to the Base SeaI/O module
(or other N-series modules). Each NSeries module
includes an expansion and strap kit (Item# KT122),
which includes a 5” CAT5 interconnect cable, four
metal straps, and four #440 metal screws. The
image shows a SeaI/O stack configuration using
the expansion kit.
DIN Rail Mounting
All SeaI/O modules are available with a factory
installed DIN-rail mounting clip. Alternatively, DIN-
rail mounting clips can be ordered as a field
upgrade kit (Item# DR104). The bracket with clip is
easily attached using two included #4-40 Phillips
head machine screws.
Table/Wall Mounting
The flush mount bracket kit (Item# KT123) is
extremely versatile and can be used to mount
SeaI/O modules from the top, bottom, or back edge.
Individual modules or a stack of SeaI/O modules
can be mounted flat to a tabletop, underneath a
counter, or inside an enclosure. The kit can be used
to mount SeaI/O modules flat to a wall, or along the
back edge, similar to DIN-rail mounting options.
Universal Mounting Bracket
The universal mounting bracket (Item# KT125) can
be used as a “backpack” to mount power supplies
and other devices to SeaI/O modules. The bracket
has holes for both 75mm and 100mm VESA
mounting options. The universal arrangement of
slots and holes accept bolt sizes to M4 and can be
used for virtually any mounting configuration.

20
© Sealevel Systems, Inc. SeaI/OUSBSERIAL | SL9177 04/2022
Accessories
Depending upon your application, you are likely to find one or more of the following items useful for
interfacing SeaI/O serial expansion modules. All items can be purchased from our website
(http://www.sealevel.com) or by calling 864-843-4343.
Power Supplies US Options
•TR112 –120VAC to 24VDC 250mA “Wall Wart” Power Supply with 1.3mm Plug (for single SeaI/O
module)
•TR109 –120VAC to 24VDC 500mA “Wall Wart” Power Supply with 1.3mm Plug (for multiple
SeaI/O modules)
•TR108-US –100-250VAC to 24VDC 36W 1.5A “Desktop” Power Supply with
1.3mm Plug, includes (CA248) Nema 5-15P 6’ US Power Cord
•PS101 –100-240VAC to 24VDC 7.5W 300mA DIN Rail Mount Power Supply
(connects via screw terminals, no wire included)
•PS103 –100-240VAC to 24VDC 50W 2.1A DIN Rail Mount Power Supply
(connects via screw terminals, no wire included)
International Options
•TR108-AU - 100-250VAC to 24VDC 36W 1.5A “Desktop” Power Supply with
1.3mm Plug, includes (CA187) “AS 3112” 6’ Australian Power Cord
•TR108-EC - 100-250VAC to 24VDC 36W 1.5A “Desktop” Power Supply with
1.3mm Plug, includes (CA188) “Schuko” 6’ Continental European Power Cord
•TR108-UK - 100-250VAC to 24VDC 36W 1.5A “Desktop” Power Supply with
1.3mm Plug, includes (CA189) “BS 1363” 6’ UK Power Cord
•TR108 –100-250VAC to 24VDC 36W 1.5A “Desktop” Power Supply with 1.3mm Plug, requires IEC
country-specific Power Cord
Mounting Options
•KT122 –Expansion & Strap Kit. Includes 5” RS-485 Interconnect Cable (item# CA239), four metal
straps, and four #4-40 metal screws, for connecting two SeaI/O modules together in a “stack”
•KT123 –Flush Mount Bracket Kit. Includes two metal brackets and four #4-40 metal screws, for
mounting SeaI/O modules or stacks in a variety of positions and locations
•KT125 –Universal Mounting Bracket. Includes metal mounting bracket and four #4-40 metal
screws, for mounting devices to SeaI/O modules or mounting SeaI/O modules to VESA mounts
and other devices.
This manual suits for next models
4
Table of contents
Other SeaLevel Control Unit manuals
Popular Control Unit manuals by other brands

EUCHNER
EUCHNER HBLS 072725 manual

Acoustic Research
Acoustic Research ARS500 Hi-RES Series owner's manual

Johnson Controls
Johnson Controls VMA 1410 Overview and Engineering Guidelines

National Instruments
National Instruments FlexRIO PXI-79 R Series installation guide

Eaton
Eaton MMX-COM-PC Instruction leaflet

DOMIQ
DOMIQ Base Installation leaflet