manuals.online logo
Brands
  1. Home
  2. •
  3. Brands
  4. •
  5. Sealey
  6. •
  7. Drill
  8. •
  9. Sealey GENERATION Series User manual

Sealey GENERATION Series User manual

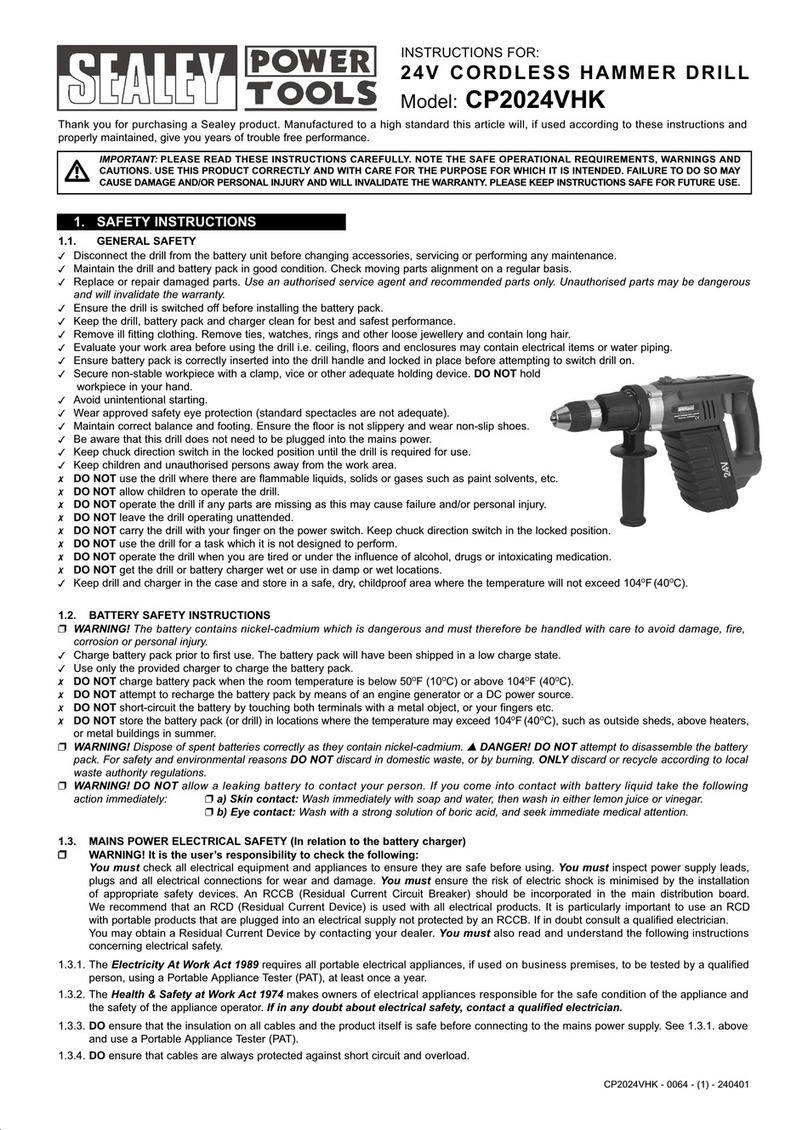
Thank you for purchasing a Sealey Product. Manufactured to a high standard this product will, if used
according to these instructions and properly maintained, give you years of trouble free performance.
IMPORTANT: PLEASE READ THESE INSTRUCTIONS CAREFULLY. NOTE THE SAFE OPERATIONAL REQUIREMENTS,
WARNINGS AND CAUTIONS. USE THIS PRODUCT CORRECTLY AND WITH CARE FOR THE PURPOSE FOR WHICH
IT IS INTENDED. FAILURE TO DO SO MAY CAUSE DAMAGE AND/OR PERSONAL INJURY AND WILL INVALIDATE
THE WARRANTY. PLEASE KEEP INSTRUCTIONS SAFE FOR FUTURE USE.
1. SAFETY INSTRUCTIONS
!Follow workshop Health & Safety rules, regulations and conditions when using drill.
"WARNING! Disconnect from air supply before changing accessories or servicing.
!Maintain the drill in good condition and replace any damaged or worn parts. Use
genuine parts only. Unauthorised parts may be dangerous and will invalidate the warranty.
"WARNING! Check correct air pressure is maintained and not exceeded. We recommended 90 psi.
!Keep air hose away from heat, oil and sharp edges. Check air hose for wear before each
use and ensure that all connections are secure.
!Wear approved safety gloves, eye and ear protection. If dust is generated wear respiratory protection.
!Keep drill bits clean and sharp for best and safest performance.
!Maintain correct balance and footing. Ensure the floor is not slippery and wear non-slip shoes.
!Secure unstable workpiece with a clamp, vice or other suitable holding device.
!Ensure the chuck is securely fastened to the spindle and the drill bit is secure in the chuck.
!Avoid unintentional starting.
!Keep children and unauthorised persons away from the work area.
#DO NOT hold the workpiece by hand. Use clamps or a vice to secure the workpiece.
$DO NOT use the drill for a task it is not designed to perform.
"WARNING! DO NOT use drill if damaged or thought to be faulty. Contact your local service agent.
$DO NOT use drill unless you have been instructed in its use by a qualified person.
$DO NOT drop, throw or abuse the drill.
$DO NOT carry the drill by the air hose, or yank the hose from the air supply.
$DO NOT operate drill if you are tired or under the influence of alcohol, drugs or intoxicating medication.
$DO NOT carry drill with your hand on the trigger in order to avoid unintentional starting.
$DO NOT direct air from the air hose at yourself or others.
!When not in use disconnect from air supply and store in a safe, dry, childproof location.
GSA27 - 1 - 130307
GENERATION SERIES 13MM REVERSIBLE
AIR DRILL WITH KEYLESS CHUCK
INSTRUCTIONS FOR MODEL NO: GSA27
2. INTRODUCTION & SPECIFICATION
Chuck size . . . . . . . . . . . . . . . . . . . .13mm
Free speed . . . . . . . . . . . . .600 to 700rpm
Air consumption . . . . . . . . . . . . . . . 4.5cfm
Operating pressure . . . . . . . . . . . . . .90psi
Air inlet size . . . . . . . . . . . . . . . . . 1/4”BSP
Weight . . . . . . . . . . . . . . . . . . . . . . . 1.5kg
Noise Power . . . . . . . . . . . . . . . . . .96.9dB
Noise Pressure . . . . . . . . . . . . . . .107.9dB
Fully polished finish with exhaust through handle base for reduced noise emission. Unit features
encaged planetary gear drive assembly. Rotor runs on high quality ball bearings for long life and
reliability. Fully reversible drive with finger-tip control set above trigger. Fitted with Jacobs keyless
chuck for fast bit changes. Supplied with side handle. Contoured soft-grip handle gives added comfort
and control.
3.1. Air Supply (Recommended hook-up is shown in fig. 1.)
3.1.1. Ensure drill air valve (or trigger) is in the "off" position before connecting to the air supply.
3.1.2. You will require an air pressure of 90psi and an air flow of 4.5cfm.
3.1.3. "WARNING! Ensure the air supply is clean and does not exceed 90psi. Too high an air
pressure or unclean air will shorten the life of the drill due to excessive wear, and may
be dangerous, causing damage and/or personal injury.
3.1.4. Drain the air tank daily. Water in the air line will damage the drill.
3.1.5. Clean compressor air inlet filter weekly.
3.1.6. Line pressure should be increased to compensate for unusually long air hoses (over 8 metres).
The minimum hose size should be 1/4” I.D. and fittings must have the same internal bore.
3.1.7. Keep hose away from heat, oil and sharp edges. Check hose for wear and make certain
that all connections are secure.
3.2. Couplings
Vibration may cause failure if a quick change coupling is connected directly to the drill.
To overcome this, connect a leader hose to the drill. A quick change coupling may then be
used to connect the leader hose to the air line recoil hose. (See figs. 1 & 2).
"WARNING! Disconnect drill from air supply before changing accessories, servicing or
performing maintenance. Replace or repair damaged parts. Use genuine parts only.
Unauthorised parts may be dangerous and will invalidate the warranty.
5.1. If the air system does not include an oiler, lubricate the drill daily with a few drops of Sealey
air tool oil dripped into the air inlet.
5.2. Clean the drill after use.
5.3. Loss of power or erratic action may be due to the following:
a) Excessive drain on the air line. Moisture or restriction in the air pipe. Incorrect size or
type of hose connectors. To remedy, check the air supply and follow instructions in
Section 3.
b) Grit or gum deposits in the drill. If your model has an air filter (located in the area of the
air inlet), remove and clean it. Flush the drill out with gum solvent oil or an equal mixture
of SAE No 10 oil and paraffin. Allow to dry before use.
5.4. For a full service contact your local Sealey service agent.
5.5. When not in use, disconnect from air supply, clean and store in a safe, dry, childproof location.
3. PREPARING DRILL FOR USE
4. OPERATING INSTRUCTIONS
6. DECLARATION OF CONFORMITY
"WARNING! Ensure you read, understand and apply safety instructions before use.
4.1 Take hold of the drill with one hand and wrap thumb and forfinger around the back part of
chuck. Spin front part of chuck anticlockwise with other hand to open the jaws to the size of
the drill bit to be used.
4.2. Insert drill bit and rotate front part of chuck until it starts to grip the drill bit. Grip rear part of
chuck and turn front part of chuck clockwise until the bit is firmly locked in place. Rotate
whole chuck to check that bit is running true.
fig. 1
We, the sole importer into the UK, declare that the product listed here is in conformity with the
following standards and directives. The construction file for this product is held by the
Manufacturer and may be inspected, by a national authority, upon request to Jack Sealey Ltd.
For Jack Sealey Ltd. Sole importer into the UK of
Sealey Power Tools.
13mm Reversible Air Drill
With Keyless Chuck
Model: GSA27
98/37/EC Machinery Directive
93/68/EEC Marking Directive
13th March 2007
Declaration of Conformity
Signed by Tim Thompson
fig. 2
GSA27 - 1 - 130307 GSA27 - 1 - 130307
Risk of Hand Arm Vibration Injury.
The GSA27 Reversible Air Drill, when operated in accordance with these instructions and tested in accordance with EN 28662-1:
1993 results in the following vibration emission declared in accordance with BS EN12096: 1996.
Measured vibration emission value:........................0.3m/s2 Uncertainty: ............................................0.12m/s2
These values are suitable for comparison with emission levels of other tools that have been subject to the same test.
This tool may cause hand-arm vibration syndrome if its use is inadequately managed.
Recommended Measures to reduce risk of hand-arm vibration syndrome: This item represents a low Hand Arm Vibration risk
to users. The calculated maximum usage period exceeds 8 hours. We recommend appropriate safety equipment is utilised and
regular breaks for the operator are employed to reduce any residual risk of fatigue or repetitive strain injury.
4.3. Connect the drill to the air hose as in Section 3.
4.4. The drill direction is changed by switching the reverse lever
behind the trigger form side to side. Check that the drill
is set to operate in the required direction.
4.5 To adjust the position of the side handle
loosen the sleeve directly above the grip
with an 18mm spanner. Rotate the grip
to the position required and retighten.
4.6 Depress the trigger to operate the
drill.
DO NOT allow drill to free run for
an extended period of time as this will
cause accelerated wear.
5. MAINTENANCE

This manual suits for next models

1

Other Sealey Drill manuals

Sealey SM96 User manual

Sealey

Sealey SM96 User manual

Sealey SD750.V2 User manual

Sealey

Sealey SD750.V2 User manual

Sealey MAG35110VLP User manual

Sealey

Sealey MAG35110VLP User manual

Sealey CP1801V.V3 User manual

Sealey

Sealey CP1801V.V3 User manual

Sealey PDM125B.V2 User manual

Sealey

Sealey PDM125B.V2 User manual

Sealey SDS850 User manual

Sealey

Sealey SDS850 User manual

Sealey SA27.V2 User manual

Sealey

Sealey SA27.V2 User manual

Sealey GDM90B User manual

Sealey

Sealey GDM90B User manual

Sealey GDM150B User manual

Sealey

Sealey GDM150B User manual

Sealey Power Tools SA620.V2 User manual

Sealey

Sealey Power Tools SA620.V2 User manual

Sealey SUPER TORQUE CP3014vHK User manual

Sealey

Sealey SUPER TORQUE CP3014vHK User manual

Sealey SDM30.V2 User manual

Sealey

Sealey SDM30.V2 User manual

Sealey SDE1050.V3 User manual

Sealey

Sealey SDE1050.V3 User manual

Sealey SDM150 User manual

Sealey

Sealey SDM150 User manual

Sealey SA27.V3 User manual

Sealey

Sealey SA27.V3 User manual

Sealey GSA241 User manual

Sealey

Sealey GSA241 User manual

Sealey SDE650 User manual

Sealey

Sealey SDE650 User manual

Sealey GDM50B User manual

Sealey

Sealey GDM50B User manual

Sealey Siegen Tools S01047.V2 User manual

Sealey

Sealey Siegen Tools S01047.V2 User manual

Sealey MAG60110VHD User manual

Sealey

Sealey MAG60110VHD User manual

Sealey GDM790BR User manual

Sealey

Sealey GDM790BR User manual

Sealey SA24.V3 User manual

Sealey

Sealey SA24.V3 User manual

Sealey CP6004 User manual

Sealey

Sealey CP6004 User manual

Sealey SD800.V3 User manual

Sealey

Sealey SD800.V3 User manual

Popular Drill manuals by other brands

Makita DA6301 instruction manual

Makita

Makita DA6301 instruction manual

Hilti SF 2H-A operating instructions

Hilti

Hilti SF 2H-A operating instructions

Black & Decker LDX220 instruction manual

Black & Decker

Black & Decker LDX220 instruction manual

Black & Decker KR911 Original instructions

Black & Decker

Black & Decker KR911 Original instructions

Makita BHP343 instruction manual

Makita

Makita BHP343 instruction manual

VARO POWERplus POW302 manual

VARO

VARO POWERplus POW302 manual

Stanley SCD12 instruction manual

Stanley

Stanley SCD12 instruction manual

Bosch 2-26 E Original instructions

Bosch

Bosch 2-26 E Original instructions

Bosch GSR18V-490 Operating/safety instructions

Bosch

Bosch GSR18V-490 Operating/safety instructions

MBW HORNET 30/27 Operators & service manual

MBW

MBW HORNET 30/27 Operators & service manual

DeWalt DW509 user manual

DeWalt

DeWalt DW509 user manual

Milwaukee 545 S instructions

Milwaukee

Milwaukee 545 S instructions

DeWalt D25333 manual

DeWalt

DeWalt D25333 manual

RIDGID R7000 Operator's manual

RIDGID

RIDGID R7000 Operator's manual

Euroboor ECO.32+ user manual

Euroboor

Euroboor ECO.32+ user manual

HAKKEN SPN-202Ui instruction manual

HAKKEN

HAKKEN SPN-202Ui instruction manual

Hitachi FDS 12DV Handling instructions

Hitachi

Hitachi FDS 12DV Handling instructions

Milwaukee 4270-20 Operator's manual

Milwaukee

Milwaukee 4270-20 Operator's manual

manuals.online logo
manuals.online logoBrands
  • About & Mission
  • Contact us
  • Privacy Policy
  • Terms and Conditions

Copyright 2025 Manuals.Online. All Rights Reserved.