IMPORTANT: PLEASE READ THESE INSTRUCTIONS CAREFULLY. NOTE THE SAFE OPERATIONAL REQUIREMENTS, WARNINGS AND
CAUTIONS. ALSO CONSULT YOUR VEHICLE MANUFACTURER’S HANDBOOK AND TAKE NOTE OF ANY SPECIAL INSTRUCTIONS
RELATING TO TOWING. USE THIS PRODUCT CORRECTLY AND WITH CARE FOR THE PURPOSE FOR WHICH IT IS INTENDED. FAILURE
TO DO SO MAY CAUSE DAMAGE OR PERSONAL INJURY AND WILL INVALIDATE THE WARRANTY. PLEASE KEEP INSTRUCTIONS SAFE
FOR FUTURE USE.
1. SAFETY INSTRUCTIONS
2 SPECIFICATION
3. INTRODUCTION
4 . ASSEMBLY
This trailer/cart is designed for use on private land only.
Maximum towing speed must not exceed 10mph.
DO NOT tow this trailer/cart on public roads or thoroughfares.
DO NOT allow passengers to travel in the trailer.
It is important that your trailer/cart is serviced on a regular basis
to ensure your own safety and that of others in the area of use.
Maintain the trailer/cart in good condition. Replace or repair
damaged parts. Use recommended parts only. Unauthorised parts
may be dangerous and will invalidate the warranty.
Ensure that the towing vehicle has a correctly and solidly
mounted towing bracket.
The towing bracket must be strong enough to tow a fully laden
trailer. Check that there is no corrosion in the area of the
mountings.
It is your responsibility to ensure that the towing vehicle is
adequate to tow the trailer and its load. Check that the brakes are
powerful enough. Check that the gross weight of the trailer does
not exceed the towing capacity of the vehicle. The vehicle's
recommended towing limit should be in the vehicle manufacturer’s
handbook.
The addition of a loaded trailer to a vehicle will have a very
serious effect on the vehicles performance. Starting, particularly
on hills, can be much more laboured; stopping can take longer
distances; cornering and negotiating sharp bends require extra
care. If you have no experience of towing a trailer you should
practice in a quiet area. Particular attention should be paid to
reversing a trailer/cart.
Certain loads may require to be securely tied down or restrained.
There must be no load projections outside the trailer/cart that
might cause danger to others in the area.
Loads must be evenly distributed within the trailer/cart and
positioned in such a way as to keep the trailer/cart level.
The nose weight is an important factor in keeping the vehicle/
trailer combination stable during towing. If the load is too far back,
inadequate nose weight will result in snaking problems. If the load
is too far forward, resulting in excessive nose weight, the rear of
the vehicle may be forced down resulting in a detrimental effect
on the steering.
Always ensure that the tyre pressures are correct and that the
tyres are free from cuts and bulges and have adequate tread.
Always ensure that the trailer is correctly connected to the towing
bracket before setting off.
Before setting off ensure that the towing hitch is correctly folded
out and locked in position.
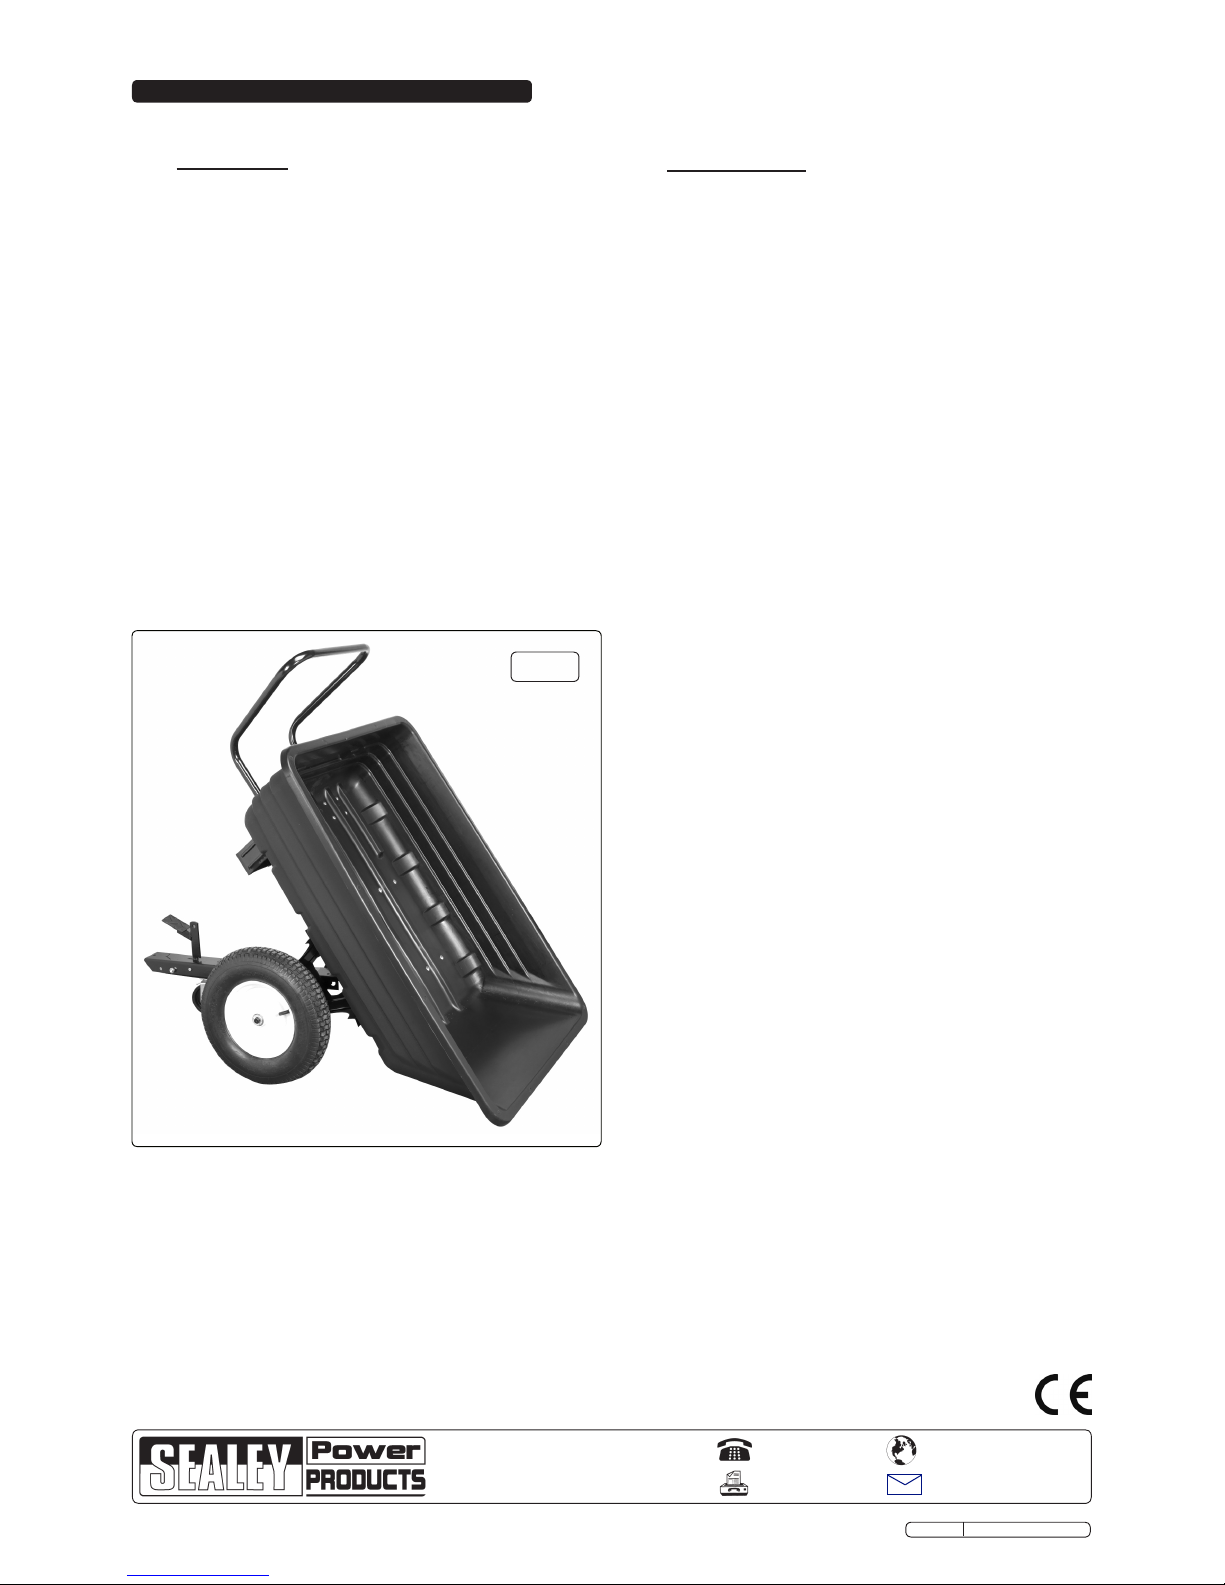
INSTRUCTIONS FOR:
TRAILER / HANDCART 300kg
MODEL NO: TBB300
Thank you for purchasing a Sealey product. Manufactured to a high standard this product will, if used according to these instructions
and properly maintained, give you years of trouble free performance.
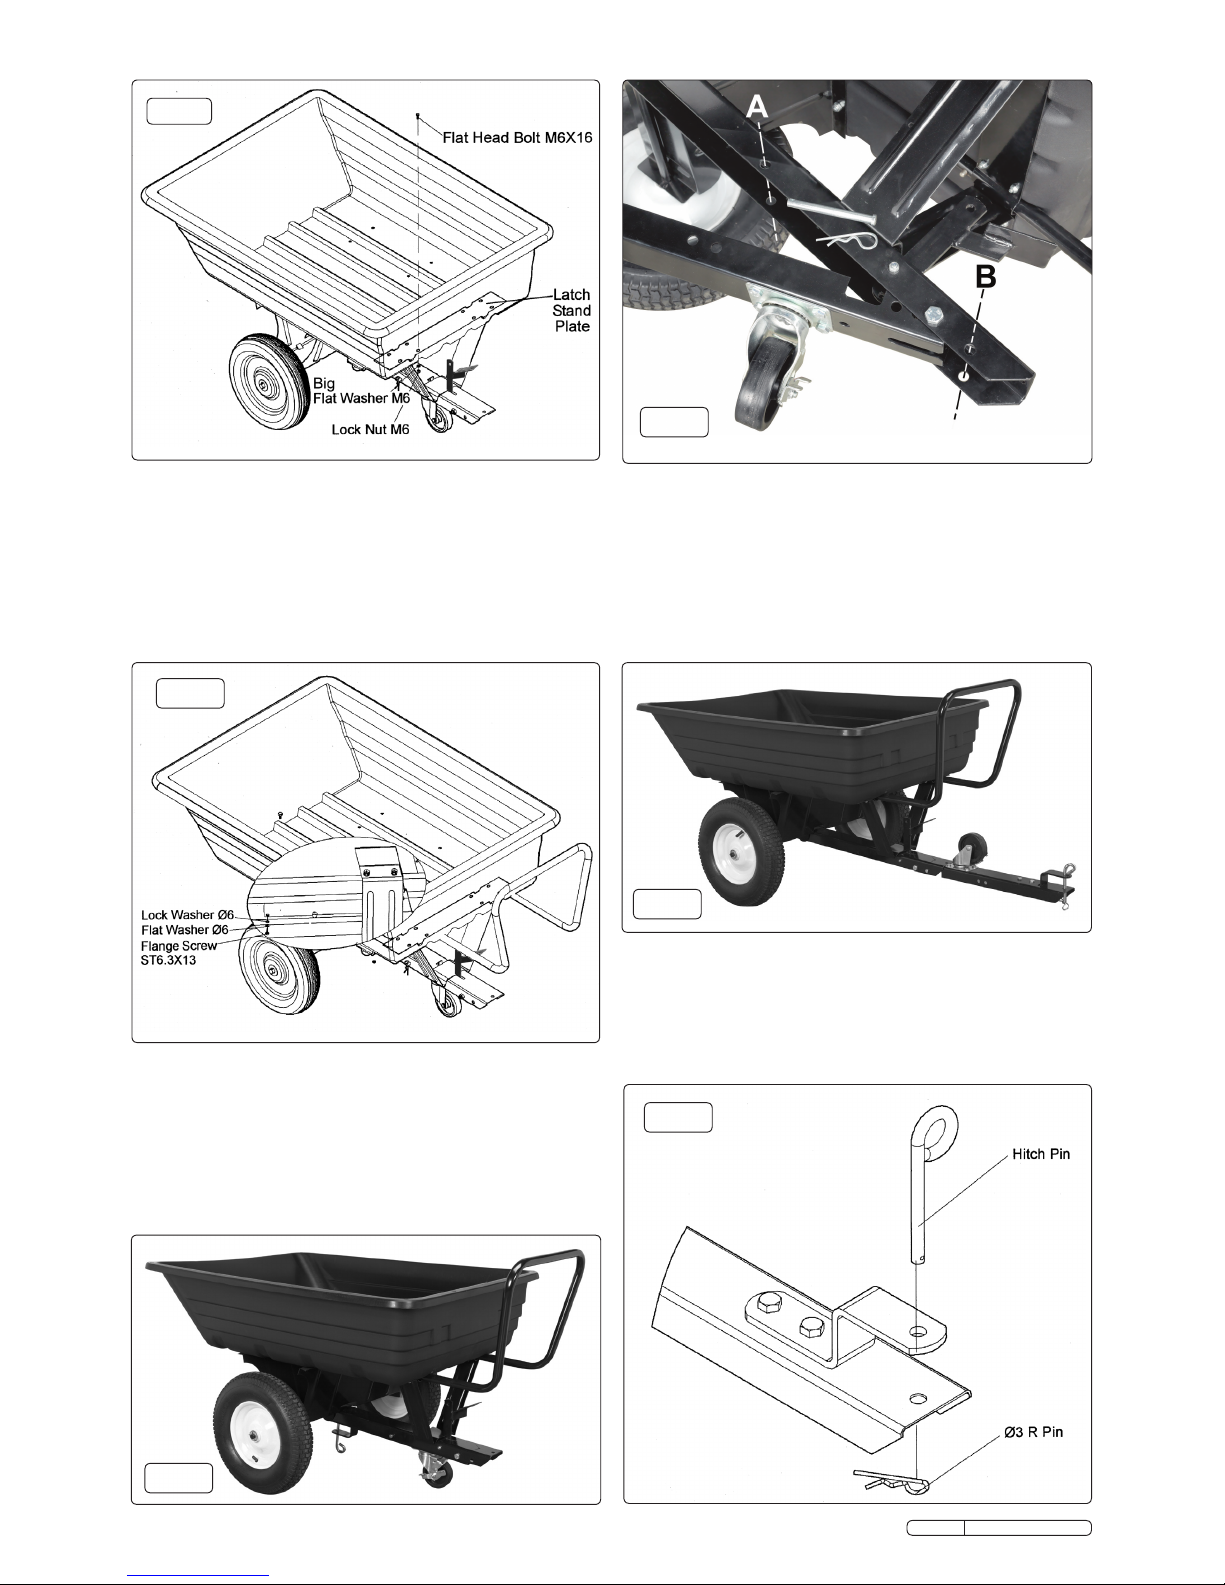
Rustproof polypropylene trailer bed with heavy-duty steel frame. Fitted
with pneumatic tyres for transport over the toughest terrain and single
locking castor wheel. Features foot pedal release mechanism for
tipping trailer bed. Easily and quickly converts into hand cart with
foldaway towing hitch and sliding hand rail.
Specification:
1 ModelNo:....................................TBB300
2 Capacity: ...................................... 300kg
3 TyreSize: ...............................Ø380x90mm
4 Trailer Bed Size, ..............................Internal
5 Length ......................................1050mm
6 Width:.......................................760mm
7 Depth:.......................................280mm
8 OverallHeight: ................................ 790mm
TBB300 Issue No.1 17/11/11
Original Language Version
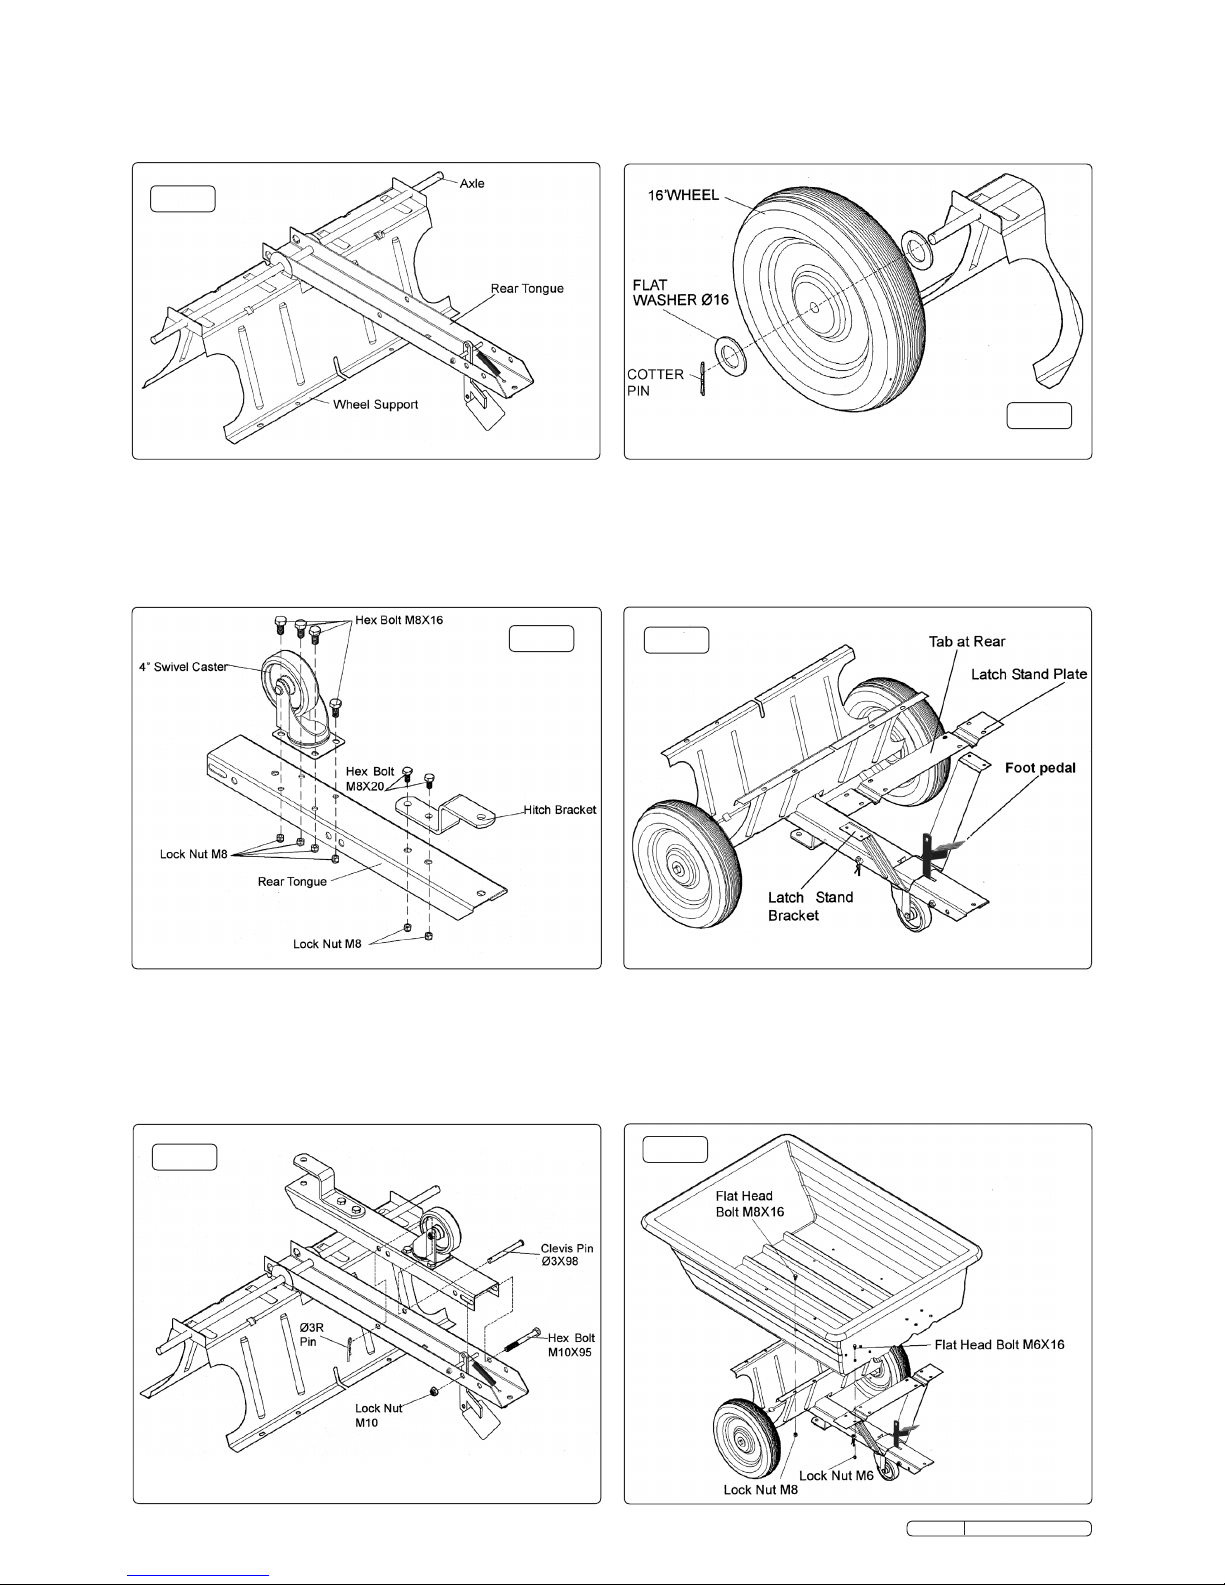
4.1Unpack all components including the hardware pack and
check the contents against the parts list at the end of this
document. If any parts are damaged or missing contact your
Sealey dealer.
4.1.1 Insert the foot pedal through the rear tongue as shown in
fig.1 and create the pivot using an M6x90 hex bolt, an M6
lock nut and two spacers. On the underside of the rear
tongue, hook the spring through hole 'X' in the pedal and the
other end through hole 'Y' in the tongue.
g.1
g.2
4.1.2 Fig.2 shows the rear tongue inverted with the foot pedal fully
assembled, with the spring in place.