TABLE
OF
CON
TENTS
Adjusting
for
Good
Stitches
····· ··
··
··
34
Ad
ju
stin
g Pressure of Presser Foot ·· 10
Adjus
tin
g Tensions
··
·
··
·· 12 -
13
Applique
··
· ····
··
22
Basting ··
··
.......
11
Blind
St
i
tching
··
Buttonholes ··
··
··· . .
..
... ... .
........
19
..
..........
..
....
..
....
20
-
21
Changing the Presser Foot ....
..
..
· .......... 15
Cleaning & Oiling .........
..
..
..
27
-
29
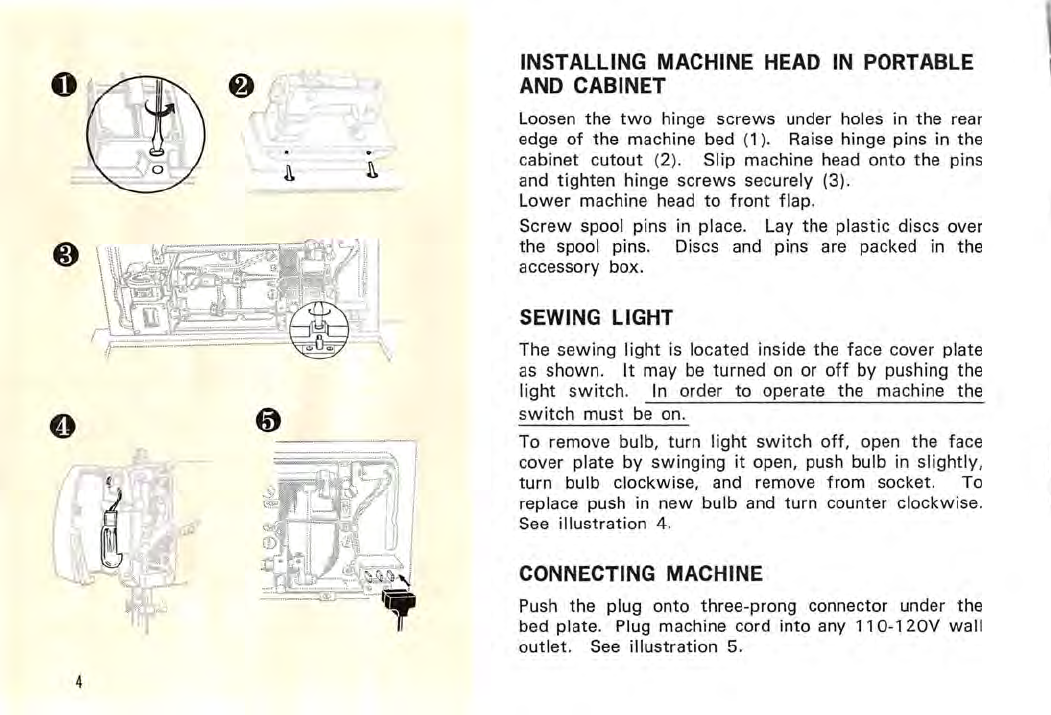
Connecting Machine ·
..
....
...
..
....
..
..
....
..
..
4
Darning
..
..
...
..
..........
..
..
..
..
............ ...
18
Decorative
Stitching
·
.........
17
Double Needle ....· .......
..
..
..
·
..
·
24-25
Fastening a Seam
Feed Dog Control
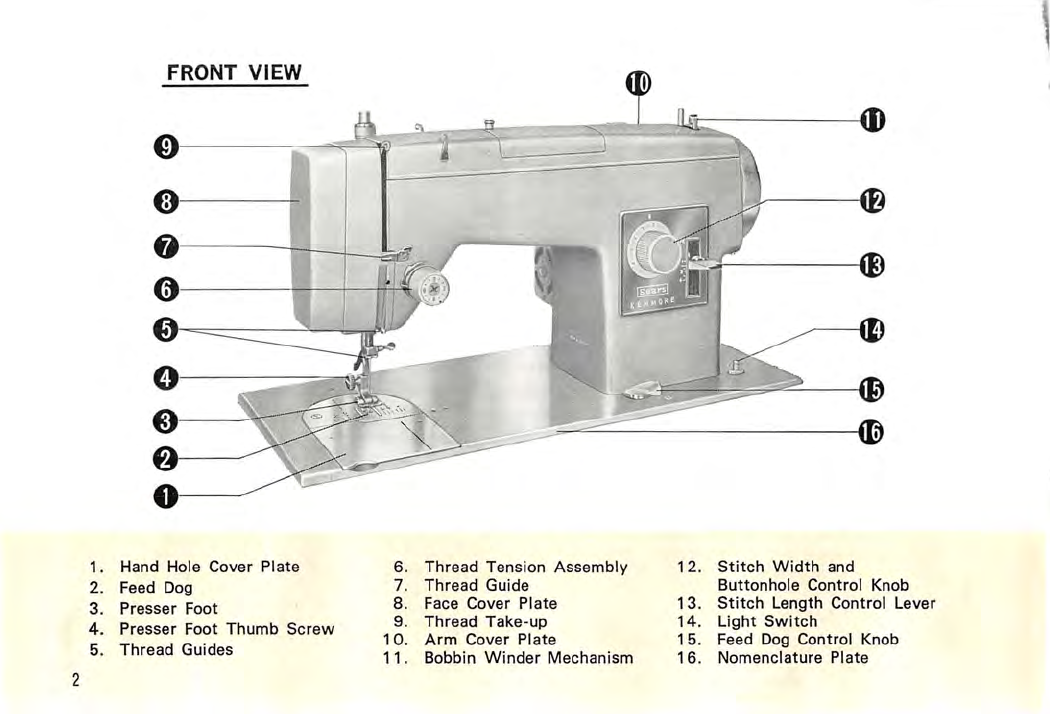
Identif
ication-Head Parts ......
......
15
......
15
..
.... 2 - 3
Inserting
Bobbin
into
Bobbin Case
··
· 8
Inserting Pattern Disc
..
..
· .... 16
Inserting
& Removing
Material
....·
14
Installing
Machine Head · ...........
..
........· 4
Needle & Thread Table ................ 5
Ne
edle Size
..
..
......
..
..
..
..
......
..
....
..
....
..
..
5
Overcasting .......
..
...
..
...... 23
Parts
List
··· · 3
2-3
3
Pi
cking
up Bobbin
Thr
e
ad
...
..
..............
· 10
Placement
of
Needle ....· ...........
..
..
.......· 5
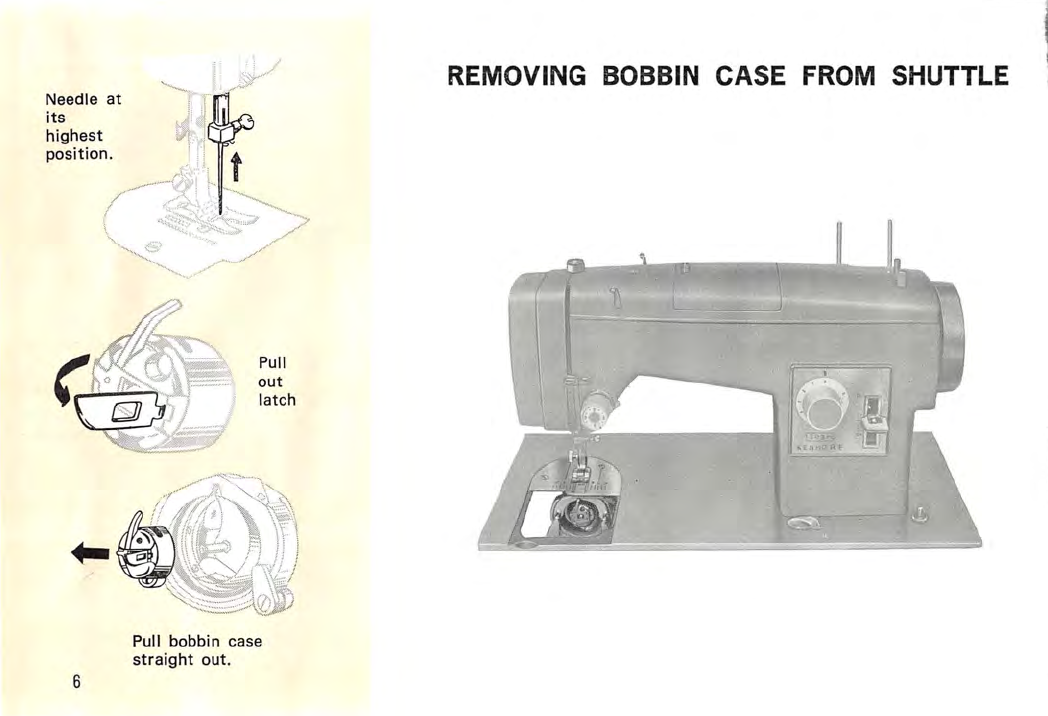
Removing Bobbin
Cas
e
from
Shuttle
..
6
Replacement
of
Belt
............
..
..........
27
Rever
se
Stit
ching
......
......
..........
......
..
·
11
Setting
Stitch
Length ··· 11
Setting
Stitch
Width
..
.
..
....... 16
Sew
ing
Light
..
..
..
.. ..
· 4
Sewing
on Buttons ·
..
·
..
.
..
..
..
..
....·
19
Sewing
on Lace · ......
..
..
·..
..
....·
22
Sewing
on Plastic Films · · ·........... ·
26
Straight
or
Thre
e-Cornered Tear
..
..
·
22
Synth
e
tics
.. ..
........
..
....
·
26
Threading Upper Machine
..
..
..
..
.........
· 9
Turning
a Corner
..
..
..
..
.. 15
What
to
Do
·
.....................
............
30
-
31
Wind
ing the Bobbin
..
..
......· 7
Writing
& Monogramming
....................
23