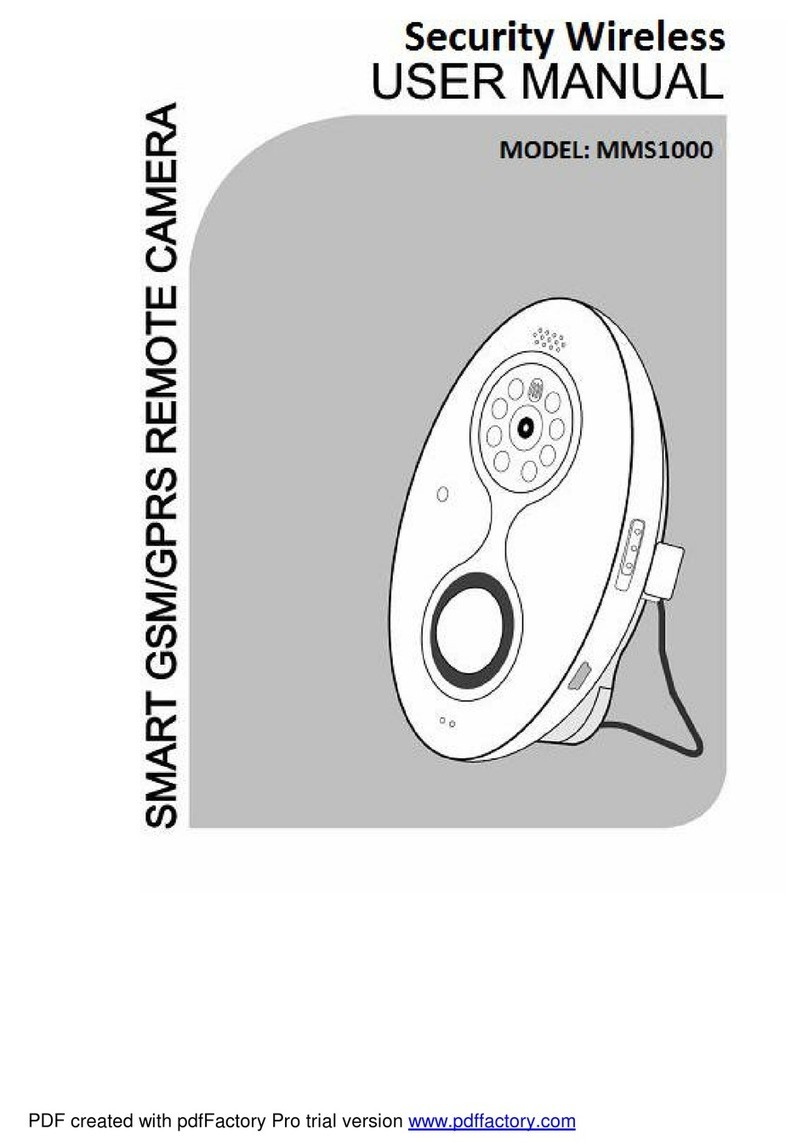
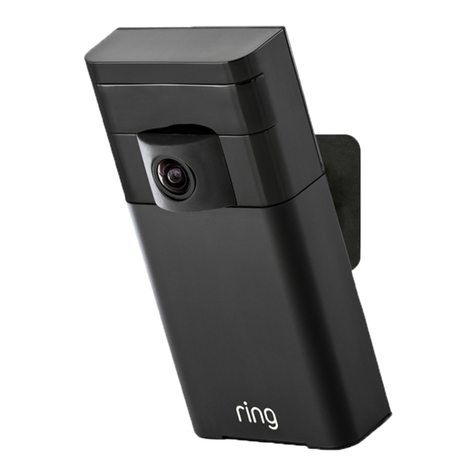
Security Wireless MMS-DLUX User manual

1
User Manual
MMS-DLUX

2
CONTENTS
1. Thank you………………………………………………………………………………..
2. For Your Safety………………………………………………………………………..
Declaration……………………………………………………….……………………..
3. Product Feature…………………………………………………………………..….
Product Accessories……………………………………………...…………………
4. Host Instruction……………………………………………...……………………….
5. Host Instruction……………………………………………...……………………….
SIM Card Installation……………………………...…...………………………….
Remote Control and Receiver Instructions………………………………
6. Quick Start……………………………………………………...……………………….
About the SMS Command……………………………….……………………….
Start Up………………………………………………………….………………………..
7. Quick Start……………………………………………………..………………………..
Power On/Off……………………………………………..……………………………
Add Family Users………………………………………………………………………
Privilege Levels……………………………………………….………………………..
8. Quick Start………………………………………………...…………………………….
Arming/Disarming………………………………….…………………………………
Remote Capture……………………………………………..………………………..
9. Quick Start……………………………………………………..………………………..
Alarm……………………………………………………………………………………..…
Voice Monitor & Speaker………………………………………………...……….
Language………………………………………………………………………..……….
Status Inquiries…………………………………………………………….…………..
10. Quick Start…………………………………………………………….………………….
Reset Factory Settings……………………………………………...………………
11. Maintenance……………………………………………………………….…………..
12. Troubleshooting………………………………………………………….……………
13-17. SMS Command List…………………………………………………...………….
3
3
3
4
4
5
6
6
7
8
8
8
9
9
9
9
10
10
10
11
11
11
11
11
12
12
13
14
15-19

3
Thank you for purchasing the MMS-DLUX.
MMS-DLUX is a smart GSMIGPRS remote camera. It helps you achieve remote monitor, alarm and shooting, and thus
provides a safe solution for protecting your privacy. The built-in 300000 pixels camera allows you to freely ask the
device to take photos and send it to either your mobile phone or mailbox. Images can be received as slide show, by
phone call or SMS command, anytime, anywhere. With the built-in IR lights, it can take high resolution images even in
a dark environment.
When anybody breaks in to your property, it can trigger awareness immediately, take photos and send it to you auto-
matically. In this way, your privacy, safety and security can effectively be protected!
All functions and services are supported by the GSM network and SIM card. For detailed operation and product func-
tions, please read this user manual carefully.
Keep it away from signal interference.
Do not use it in any explosive places.
Please use the original power adapter to avoid any damage.
Keep it out of the reach of children .
Declaration
The information contained in this manual has been carefully checked and is believed to be accurate. However, we
assume no responsibility for any inaccuracies that may be contained herein.
In no event will we, be liable for any direct, indirect, special, incidental, or consequential damages resulting from any
defect or omission in this manual, even if advised of the possibility of such damages.
In the interest of continued product development, we reserve the right to make improvements to this manual, and
the products described herein, at any time without notice or obligation.

4
1. All GSM SIM cards can be used, capable of sending photos taken to MMS service enabled mobile phone or mailbox.
2. Integrated PIR sensor to provide a precise and timely alarm.
3. Built-in CMOS camera and IR lights: it can take clear images at night.
4. Movement detection: it can detect movement in view.
5. Phone call and SMS central: you can remote control the camera by phone call or SMS command.
6. Two-way communication: you can listen to the voice of the monitoring place and your voice can be broadcasted via
a built-in speaker.
7. Multi-mode alarm: it can alarm by SMS, MMS, E-mail and phone call.
8. Schedule monitor: it can time an alarm or monitor as the preset scheduler.
9. Backup battery: built-in lithium battery ensures continued operation in case of a power failure.
10. Easy installation: wireless connection, it can be installed anywhere.
Product Accessories
AdapterCamera
Manual
Receiver
Remote Control

5
Power Switch
Bracket
Speaker
PIR Sensor
Reset Button
Infrared Light
Camera
Connection Diagram

6
Indicator Status Instructions
Color Indicator Status
Red
Flash slowly Searching the network
Flash quickly Detection activated when power on. PIR Sensor alarm or move-
ment detection alarm activated when in working status
Constant Light No SIM card or malfunction
Green
Constant Light Arming status
Flash slowly Disarming status
Flash quickly Disarming status
Light two
seconds
Restored to factory settings
Note: Turn on the camera. When the indicator lights on, press
the RESET button until the indicator turns green, it will restore to
factory settings.
Note:
Slow flash: Indicator flashes 1 time per second; Quick flash: Indicator flashes 2 times per second.
The indicator light can be enabled or disabled by pressing the RESET button for more than
10seconds when in normal status.
SIM card Installation
Remove the cover and take out the battery. Slide the SIM card into its holder with the contacts
facing down as shown in the picture. Insert the battery and then replace the cover.

7
Remote Control and Receiver Operation Instructions
Connect the mini USB plug of the sensor receiver to the USB interface of the mobile guarder. Connect the power
adapter to the sensor receiver, and open the sensor switch.
Press the arming button to the arming status. The Mini guarder will trigger an alarm and send out SMS via the wire-
less sensor, motion detection or infrared detectors.
Press the emergency button, this will call the preset numbers in turn
under the default alarm condition.
Press the number buttons for phone calls, if the mini guarder calls the preset
phone numbers three times but without answer, then it’ll quit from calling status automatically.
Receiver Indicator Status
PPR: Constant light when external power on.
CHG: Constant light in recharging, off when power full.
STA: Receiver with slow flash under standby, when receiving signals from
remote controller of sensors, will flash quickly about 3 seconds. In addition,
when receiver is connected to the mini guarder, if you turn off the
mini guarder indicator, the light of the receiver will be off automatically.

8
Start Up
Please set the master before you use this device or when restored to factory settings, i.e. to let it recognize the
master phone number, so that it can send alarm SMS to the master automatically. There are two methods as fol-
lows:
Method 1: Make a call with your mobile phone and you will hear it hang up.
Method 2: Send the SMS command to start up: #00#. After starting up you will receive the following SMS reply:
“Welcome! Congratulations on your purchase of MMS-DLUX! You are authorized to use this device. Password:
1234.”

9
Power On/Off
Power on: Keep pressing the power switch when power supply (external power supply or battery) is on. During this
period of time, you will hear power on music, then the indicator turns red and then off. After a while it turns red again
and flashes slowly till off, and then turns green (constantly green when armed, slowly flashes green when disarmed)
and sounds “DU---“, then it turns to normal working status. If it is set to arm, after the designated time delay, it will
sound “DU, DU” and turn to armed status. The time delay can be designated by SMS command, please refer to the SMS
commands list “Power on Arm time delay”.
Power off: Keep pressing power switch till you hear power off music.
Add Family Users
Master can send SMS command to the device to add family users: #06#family user mobile phone number#. The num-
ber of family members that can be added is a maximum of 10. The same or repeated numbers will not be allowed.
Privilege levels for Master, Family users and Guests
User
Function Master Family
Users Guests
Password Modification √× ×
Receive MMS Alarm √× ×
Receive SMS Alarm √× ×
Receive Phone Call Alarm √√×
Status Inquiry, Help and get Remote Capture √√√
Chinese/English Switch √× ×
Restore to Factory settings and add family users’ phone num-
bers
√××

10
Arming / Disarming
To arm the device is to activate the alarm function, thus the PIR sensor or movement detection turns to working state
(Product is set default to Arming status). To disarm the device is to deactivate the alarm function, the PIR sensor or
movement detection. There are two following methods:
Method 1:
Send the SMS command to arm: #01#
You will receive the SMS reply “Armed successfully” and the indicator will turn green.
Send the SMS command to disarm: #02#
You will receive the SMS reply “Disarmed successfully”, and the indicator will turn to a slow green flash.
Method 2:
Make a call to the device via the master number or family number, hang up in 5-20 seconds when you hear the ring
tone, and it will automatically switch the arming / disarming status.
Method 3:
Press the "Reset" button for 3-10 seconds, it will automatically switch the status.
Remote Capture
Method 1:
Make a call to the device via the master number or family number, hang up in 5 seconds when you hear the ring tone,
and you will receive the SMS reply “Your request has been received, the device is sending image(s) now”, and then an
MMS reply will follow.
Method 2:
Send the SMS command:
Master/family users: #03#lmage number#
Guest: #03#Password#lmage number#
And you will receive the SMS reply “Remote capture request received, the device is sending image(s) now”, and then
an MMS reply will follow.

11
Alarm
With the built-in PIR sensor, the device can alarm once triggered, default to SMS and MMS. If the alarm SMS, MMS and
call options are activated at the same time, it will send alarm SMS and MMS orderly and then make phone calls, once
for each. For alarm calls, it will dial the master number first and then family numbers until answered. If no answer for
an even 3-cycle calling, then it will give up.
Notes:
The device is default to Movement Detection Alarm, if you would like to change the alarm way, please refer to the SMS
commands list.
Voice Monitor & Speaker
Master and family users can dial the device number until the phone call gets through automatically to monitor the live
voice. If the speaker is open, you can communicate to the monitored area too. The speaker is default to open. When an
active alarming phone call gets through in an armed state, the speaker will automatically open so that you can commu-
nicate through the device.
Send the following SMS command, and you can control the speaker:
#164#Value#
Value: 0, to close speaker. Value: 1, to open speaker.
You will receive an SMS notification:” Speaker closed/open!”
Language
There are two versions of language available, send an SMS command (for master only):
Chinese version: #127#1#
And you will receive the SMS reply “Language switched to English.”
Status Inquiries
To ask the device for the present settings and working status, send an SMS command as follows and you will receive a
reply with all details (password not included):
Master and family users: #07#
Guest: #07# password#

12
To ask the device for help, send an SMS command as follows and you will receive a reply with command list or user
manual:
For SMS commands:
Master or family users: #09#
Guest: #09# password#
For User Manual:
Master or family users: #09#1#
Guest: #09# password#1#
Reset factory settings
When the status of the settings is wrong, it cannot recover even when the power is off. You can than reset the factory
settings (clear all user’s settings including master phone number):
Method 1: Power on, when the indicator is off and before it lights again, press the RESET button till it sounds “Du—“,
and the factory settings have been reset successfully.
Method 2: Master sends an SMS command to the device:
#08#password#
Note: Please make sure you add the password in the command, only master has the rights to reset factory settings via
SMS command. If others send the command, it will reply ”sorry, you don’t have the right to do it.”

13

14
Note: If the problem can’t be solved with the above guidelines, please contact your local dealer or after sales center.
No. Problem Possible Reason Solution
1 Indicator light does not
work
The indicator
light’s disabled
Press the RESET button for 10 seconds or send
SMS command
2 Start up failure (but Indi-
cator works normally) Master already set Restore to factory settings
3 Functions failure (but Indi-
cator works normally)
Caller ID presenta-
tion or MMS ser-
vice deactivated,
overdue
Please contact the operator
4 Indicators remain on red
No SIM card or
poor/wrong con-
tact
Power off, check the SIM card and restart in 2
seconds.
5 Operation failure Malfunction Power off, check the SIM card and restart in 2
seconds. Or restore to factory settings
6
After start up, indicators
remain red flash, does not
turn to green
Weak signal or net-
work busy
Power off and restart in another place with
stronger signal
SIM card PIN code
activated Remove the PIN code
Invalid SIM card Check the SIM card status with the operator
7
Failed to power on with
external power after long
time supply of battery
Battery over dis-
charged
Charge the battery for 1 hour, power off and
then restart
8 Disorder of timed arming
and timed MMS sending
Wrong time in de-
vice Check automatic timing once

15
User Function SMS Command
Master Start the device
#00#
Refer to Chapter 5. Quick start, 1. start up
Master/family Arm the device
#01#
Refer to Chapter 5. Quick start, 4. Arming
Master/family Disarm the device
#02#
Refer to Chapter 5. Quick start, 5. Disarming
Master/family/
guest Capture MMS image
#03#[password#]image number#
Refer to Chapter 5. Quick start, 6. Remote capture image
Master Change password
#04#old password # new password#
Instructions: the length of master’s password: 4 digits
Master Add family number
#06#family number#
You are allowed to add up to 10 different family numbers.
Master/family/
guest Status inquires
#07#
#07#password#
1. Password needed when guest sending
Master Restore to factory set-
tings
#08#password#
Instructions: Password is the current default one
Master/family/
guest
SMS command/
User manual
#09#[password#]
#09#[password#]1#
Refer to Chapter 5. Quick start, 19. Help
Master/family
Deactivate SMS alarm #11#0#
Activate SMS alarm
(Default)
#11#1#
Master/family
Deactivate MMS alarm #12#0#
Activate MMS alarm
(Default)
#12#1#
Master/family
Deactivate call alarm #13#0#
Activate call alarm
(Default)
#13#1#
Master Change master number
#14#new master number#
Instructions: 16-digit max

16
User Function SMS Command
Master/family Switch of mobile
detection
#22#value#
Value = 1: mobile detection open
0: mobile detection closed (default)
Master/family Sensitivity of mobile
detection
#36#grade#
Grade 1,2,3,4,5 optional, from 1 to 5 stands for the sensitivity from
low to high, default 4.
Master/family Set of mobile times
#201#times#
Times from 2 to 10 (Default 2.)
Master/family Delay time of Mo-
bile detection alarm
#202#delaytime#
Delay time: 1to 10 min. (default 2 minutes. It means it will make an
alarm again only 2 minutes later.)
Master/family/
guest
Send captured MMS
image to appointed
mobile number or
mail address
#30#[password#]value# image number#
1. Value=Mobile number or Mail address
2. Guest need password
Master/family Enable IR lights #31#1#
Disable IR lights #31#0# (default)
Master/family Change image size
#32#value#
Value=1:160×128(normally used size for mobile phone)
2: 320×240(QVGA default)
3: 640×480 (VGA)
For example: #32#1# means auto alarm image size as 160*128
Master/family Change alarm image
number
#33#image number#
Number: 2-8 optional, and default to 5, max to 8. If image size is
640*480, the number can only be 1-2.
Master/family Set image brightness
#34#value#
The value can be: 1,2,3,4,5 (From 1 darkest to 5 brightest), default to
4.
Master/family Mirror image
#35#value#
Value =1: mirror image of left and right
0: no mirror image (default)
Master/family Set image contrast
#38#value#
The value can be: 1,2,3,4,5 (From 1 lowest to 5 highest), default to 4.

17
User Function SMS Command
Master/family Image quality
#119#grade#
Grade can be optional from 1 to 4, (1 is lowest, 4 is highest, default is
3).
Master/family Add or modify
Email address
#108#EMAIL#
Everyone can set one mail, and can be modified
Master/family Delete Email
#109#
Delete mail box.
Master/family Alarm send to mail
or not
#110#value#
Value = 1: send to mail
0: not send to mail (default)
Note: Sending to mail on the condition of opening the MMS sending
Master Delete family users
#113#family user#
Instruction: #113# means delete all the family users.
Master/family
Activate MMS
timer sending
#115#1#
Deactivate MMS
timer sending
#115#0# (Default)
Master/family
Time intervals of
timed sending
MMS
#116# working days # time period 1 start time # time period 1 finish
time # time period 1 sending interval # time period 2 start time # time
period 2 finish time # time period 2 sending interval # time period 3
start time # time period 3 finish time # time period 3 sending interval#
Master/family
Activate PIR sensor #118#1#
Deactivate PIR sen-
sor
#118#0# (Default)
Master/family Set time intervals
of infrared alarm
#150#value#
Value is from 2 to 10. (Default 2 minutes. It means it will make an
alarm again only 2 minutes later.)
Master/family Set combined alarm
way
#210#value#
Value = 0: or (default)
1: and
Or : means it will make an alarm on either Mobile detection or Infrared
human body detection;
And: means it will make an alarm only if both Mobile detection and
Infrared human body detection are opened.

18
User Function SMS Command
Master/family Set MMS center
#124#MMS center#
Users need to reset MMS center depending on different networks, such
as Vodacom Mobile (default): #124#http://mmsc.vodacom4me.co.za#
Master/family Set MMS pa-
rameter
#125#ip#wapport#httpport#apn#user#pwd#
Users need to reset MMS parameter depending on different countries,
such as Vodacom Mobile (default):
#125#196.006.128.006#9201#80#mms.vodacom.net#mms#mms#.
Master Change language
#127#value#
Value = 0: Chinese
1: English (default)
Master/family Timing arm the
device
#128#value#
Refer to Quick Start, 15. Timer arming
Master/family Set time period
of timing arming
#129#working days# time period 1start time# time period 1finish time#
time period 2 start time # time period 2 finish time # time period 3 start
time # time period 3 finish time
For details of working days, arming time and disarming time please refer
to Quick start, 15 Timer arming
Master/family
Turn into disarm
status or not af-
ter alarm
#138#value#
Value = 0: close
1: open (default)
Master/family
Turn into disarm
status after sev-
eral alarms
#139#value#
Value = 2 to 10, (default 2, it means it will enter into disarm status after 2
alarms).
Master/family Disable/Enable
indicator
#143#value#
Value =1: Enable (default)
0: Disable
Master/family
Send SMS or
not if power sup-
ply changed
#144#value#
Value = 1: send SMS notice (default)
0: no SMS notice
Master/family Set MMS sending
way
#148#value#
Value =1: HTTP
0: WAP (default)

19
Thank you
For any further assistance contact www.securitywireless.co.za
E-mail: [email protected]
Tel: +27 12 654 6209
User Function SMS Command
Master/family
Regulate device
time
Activate Speaker
#152#number#
The number is the device SIM card number.
Please regulate again when the battery is replaced or re-installed.
Master/family
Activate Speaker #164#1#
Deactivate
Speaker
#164#0# (Default)
Master/family Time Delay
#222#timedelay#
Delayed range can be from 1 to 30 Min. Default to 1 Min., i.e. it will not
make an alarm within 1 min when the power is on, even if it detects
people or movement.
Note: Press the "Reset" button for 3-10 seconds, it will automatically
switch status between arming and disarming.
Master/family Remote control
switch
#211#value#
Value = 1: Remote function open
0: Remote function closed (default)
Master/family Time period of
remote control
#212#time begin#time end#
Default to #212#10:00#16:00#
Master/family
Change number of
alarm images for
timing MMS
#213#number#
Number: 2 to 8 optional, default to 5, at most 8. If image size is
640*480, the number can be at most 2 only.
Master/family
Change number of
alarm images for
remote capture
#214#number#
Number: number of images when you dial to obtain MMS, 2 to 8 op-
tional, default to 5, at most 8. If image size is 640*480, the number can
be at most 2 only.
Table of contents
Other Security Wireless Security Camera manuals
