SECYOUR MON002-SEC User manual


© Copyright SECYOUR™. All documentation rights reserved. 1
Welcome
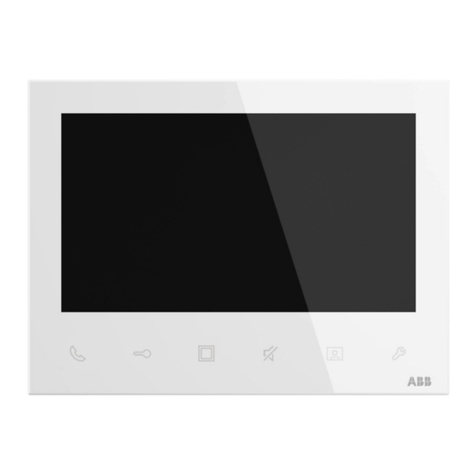
Thank you for purchasing the 21” LED Security Monitor.
This user’s manual is designed to be a reference tool for the
installation and operation of the device.
Here you can find information about the corresponding model’s
features and functions, as well as detailed instructions on how
to operate the device.
Before you operate the device please read the following
safeguards and warnings carefully!

© Copyright SECYOUR™. All documentation rights reserved. 2
Table of Contents
1General information.....................................................................................................2
1.1 Product description and type of use........................................................................2
1.2 General features.....................................................................................................2
1.3 Opening the box .....................................................................................................2
1.4 Contents of the box.................................................................................................3
2Warnings ......................................................................................................................3
2.1 Power .....................................................................................................................3
2.2 Safety precautions..................................................................................................3
2.3 Installation precautions...........................................................................................4
2.4 Cleaning the device ................................................................................................4
2.5 Privacy and copyright..............................................................................................5
3Rear Connection Ports................................................................................................5
4LCD monitor quality and pixel ....................................................................................5
5. Main Menu Operation...................................................................................................6
5.1 Function Keys.........................................................................................................6
5.2 PC Menu.................................................................................................................7
5.3 Audio Menu.............................................................................................................7
5.4 Picture Menu...........................................................................................................8
5.5 Function Menu........................................................................................................8
5.6 OSD Menu..............................................................................................................9
5.7 Geometry Menu......................................................................................................9
5.8Channel Selection.................................................................................................10
6. Troubleshooting Methods.........................................................................................11
7. Product Specifications..............................................................................................13

© Copyright SECYOUR™. All documentation rights reserved. 3
1 General information
1.1 Product description and type of use
The Full HD LCD LED panel comes with a highly advanced video processor,
enhancing the effect of displaying high-definition images. The monitor’s design
incorporates such features as low power dissipation, dust prevention, moisture
protection and shock resistance. All of these elements will effectively lengthen the
service life of CCTV Display.
It is ideal for continuous operation and can be used in closed circuit TV systems
without risks of excessive operational degradation. The power dissipation is low
whether in viewing or standby mode, which means you can contribute to your energy
saving target.
1.2 General features
Contemporary design is Ultra-thin and lightweight.
High contrast ratio and high luminance. Greatly enhances layering and presents
images on screen in greater detail.
Automatically eliminates image ghosting, protecting the LCD panel for long-term
use.
Rapid response, no trailing.
FC bus, latest control circuit. High reliability and good expansibility.
Multilevel menu display function.
Built-in power supply, low energy consumption, long service life.
Auto image adjustment function in VGA state.
1.3 Opening the box
Check that the packing and the contents are not visibly damaged. Contact the
retailer immediately if parts are either missing or damaged. Do not attempt to use the
device if you do find that there are parts missing or the device is damaged. Send the
product back in its original packing, if it is damaged, to the supplier.

© Copyright SECYOUR™. All documentation rights reserved. 4
1.4 Contents of the box
LCD monitor
Remote Control (Optional)
Power unit 12VDC 4A
Power cable
VGA cable
Audio cable
Instruction manual
2 Warnings
2.1 Power
Only use the power unit provided to power the device. Check the mains voltage
rating before plugging the power unit in.
Do not pull the cable to unplug the device. Grip the plug end firmly and slowly
pull out of the monitor.
2.2 Safety precautions
Keep the device away from rain and atmospheres with a high humidity, to
prevent risk of fire and electrocution. Do not introduce material (either solid or
liquid) to the interior of the device. If this should accidentally occur, disconnect
the device from the mains IMMEDIATELY and have it inspected by qualified
personnel.
Never open the device. In all cases, contact the qualified personnel or authorised
service center for repairs.
Keep the device away from young children, to prevent accidental damage.
Do not touch the device with wet hands so to prevent electrical shock or
mechanical damage.
Do not use the device if the external casing is damaged from a fall or impact
from a heavy/forceful object. There is a risk of electrocution if the device is
continued to be used when the casing has been compromised. In all cases,
contact the qualified personnel or authorised service center for repairs.
It is advisable to disconnect the power wire if the monitor is not used for a certain
time.

© Copyright SECYOUR™. All documentation rights reserved. 5
2.3 Installation precautions
To prevent the device from overheating, locate it in a position where there is an
allowance of air flow through the slots in the casing. Ensure at least 5 cm of free
space when installing inside a rack. For the same reason, do not install near
sources of heat, such as radiators or hot air ducts. Keep away from direct
sunlight. Do not install in areas subject to excessive dust, mechanical vibrations
or shocks.
Do not arrange this device on an unstable surface, such as a unbalanced or
slanted table. The device could fall causing injury or mechanical failures.
Do not install the device in a place where it could be exposed to humidity or
water. Do not direct a jet of water onto the device: risk of fire, electrocution or
even mechanical failure.
Stop using the device if water or other material should penetrate inside; risk of
fire and electrocution. Contact the retailer or authorized installer.
Slots and openings in the cabinet are provided for ventilation. These openings
must not be blocked or covered.
Do not place heavy or heat generating objects on top of the device: this could
damage the casing and/or increase internal temperature causing faults.
Do not cover the device with a cloth while it is running to prevent deforming the
external casing and overheating the internal parts. This could raise the risk of
fire, electrocution and mechanical failure.
Keep magnets and magnetised objects away from the device to prevent faults.
Do not use the device in the presence of smoke, vapor or dust.
Wait for a while before operating a device immediately after transporting it from a
cold place to a warm place and vice versa. Wait on average for three hours: this
will allow the device to adapt to the new ambient (temperature, humidity, etc.).
The monitor is provided with a plastic base and rubber feet. It can be positioned
on a horizontal surface, such as a desk or a table. Make sure that the device is
fastened firmly and that it is not resting on unstable supports or surfaces.
Remember to adjust the brightness and contrast to obtain a perfect image.
The monitor can also be installed on the wall by means of a bracket (not
provided).
2.4 Cleaning the device
Rub delicately with a dry cloth to remove dust and dirt.
Dip the cloth in neutral detergent if dirt cannot be eliminated with a dry cloth
alone.
Do not use volatile liquids (such a petrol, alcohol, solvents, etc.) or chemically
treated clothes to clean the device to prevent deformation, deterioration or
scratches to the paint finish.

© Copyright SECYOUR™. All documentation rights reserved. 6
2.5 Privacy and copyright
The LED monitor is a device for use within CCTV systems. Recording of images
is subject to the laws in force in your country. Recording of images that are
protected by copyright is forbidden.
Product users shall be responsible for checking and respecting all local rules and
regulations concerning monitoring and recording video signals. The
manufacturing SHALL NOT MADE LIABLE for use of this product not in
compliance with the laws in force.
3 Rear Connection Ports
Please connect the monitor to external devices according to the following I/O
interface list, and choose corresponding signal incoming channel via the monitor’s
menus interface (see Chapter.
Attention
●Please cut off the power of the external device and this product to make
sure the connection is normal.
4 LCD monitor quality and pixel
The TFT monitor uses high-precision technology, manufactured according to industry
standards, to guarantee trouble-free performance. Nevertheless, the display may have
cosmetic imperfections that appear as small bright or dark spots. This a common matter
related to the specific nature of TFT technology which determines the possible presence of
discontinuity on the screen and is not specific to products.

© Copyright SECYOUR™. All documentation rights reserved. 7
5. Main Menu Operation
5.1 Function Keys
Press the menu button on the bottom right of the screen, and the main menu will be
displayed on the screen.
The submenus of the main menu:
Image menu
Sound menu
Setting menu
Screen menu
Press the menu button to choose the submenus. The menu option chosen will show
a highlighted options window. Press the ▲▼ buttons to move among the secondary
menus of the submenu. The monitor’s 5 function keys are depicted below:
A B C D E
A. ‘Source’ button
Press this button to display all the signal channel menus.

© Copyright SECYOUR™. All documentation rights reserved. 8
B. ‘Upward’ button
Press this button to move the cursor to the needed function.
Press this button to select the OSD menu function.
C. ‘Downward’ button
Press this button to move the cursor to the needed function.
Press this button to select the OSD menu function.
D ‘Menu’ button
Press this button to display the OSD’s main menu.
Used to confirm selection and menus settings with in the OSD.
E. ‘Power’ button
Press the button to turn on or turn off the display on the monitor.
5.2 PC Menu
The PC menu can allow you to set the contrast, brightness, color temp and scale.
Press ▲▼ button to move, press the menu button to confirm and exit.
5.3 Audio Menu
The Audio menu can set the bass, treble, balance and sound mode. Press ▲▼
button to move, press menu button to confirm selection and exit.

© Copyright SECYOUR™. All documentation rights reserved. 9
5.4 Picture Menu
The Picture menu can set the contrast, brightness, hue, saturation, sharpness, color
temp, scale, over-scan and picture mode. Press the ▲▼ buttons to move, then
press the menu button to confirm selection and exit.
5.5 Function Menu
The Function menu can set noise reduction and DLC (Dynamic Light Control - image
noise reduction). Press the ◄► buttons to adjust, Press the ▲▼ buttons to move,
press menu button to confirm and exit.

© Copyright SECYOUR™. All documentation rights reserved. 10
5.6 OSD Menu
The OSD menu can allow you to set a sleep timer, the auto standby, language, H-
position (Horizontal Position), V-position (Vertical Position), duration (time in seconds
the OSD menu appears on screen without being used), halftone and reset. Press the
▲▼ buttons to move, press the menu button to confirm and exit.
5.7 Geometry Menu
The Geometry menu can set H-position, V-position, clock, phase and auto adjust.
Press the ▲▼ buttons to move, press menu button to confirm and exit.

© Copyright SECYOUR™. All documentation rights reserved. 11
5.8 Channel Selection
The Source menu can select the channel. The options include; VGA, HDMI, BNC.
Press the ▲▼ buttons to select, press menu button to confirm.

© Copyright SECYOUR™. All documentation rights reserved. 12
6. Troubleshooting Methods
Before consulting with your monitor supplier, please find out the possible reason for
the problem and the possible solution according to the following chart:
Phenomenon
Handling method
1
2
3
4
5
6
7
8
9
10
No image or sound
⊕
⊕
⊕
⊕
⊕
⊕
Inferior sound - normal image
⊕
⊕
⊕
⊕
Inferior image - normal sound
⊕
⊕
⊕
⊕
⊕
⊕
⊕
Poor signal
⊕
⊕
⊕
⊕
⊕
Vague image
⊕
⊕
⊕
⊕
Double image
⊕
⊕
⊕
⊕
Interfering lines in image
⊕
⊕
⊕
⊕
Twisty image
⊕
⊕
⊕
⊕
Poor signal
⊕
⊕
⊕
⊕
⊕
⊕
Rung stripe in image
⊕
⊕
Image vertically scrolls
⊕
⊕
⊕
⊕
Inferior colour
⊕
⊕
⊕
⊕
⊕
⊕
⊕
⊕
⊕
No colour
⊕
⊕
⊕
⊕
⊕
⊕

© Copyright SECYOUR™. All documentation rights reserved. 13
Processing Method
1
Select another channel or signal path.
2
Check whether the signal line is connected or not.
3
Check whether the signal line is connected or not.
4
Might be disturbed by other electric appliance – move monitor away from
the electrical disturbance.
5
Adjust fine tuning settings.
6
Adjust luminance settings.
7
Adjust contrast ratio settings.
8
Adjust colour settings.
9
Check whether the system is set correctly.
10
Check whether the power is on.

© Copyright SECYOUR™. All documentation rights reserved. 14
7. Product Specifications
Panel
Panel Type
LED-Backlit TFT LCD
Panel Size
21-inch(16:9)
Resolution
1920x1080
Pixel Pitch
0.238x0.238mm
Brightness
250 cd/
㎡
(Typical)
Viewing Angle (H/V)
170°/160°
Display Colour
16.7M
Contrast Ratio
1000:1 (Typical)
Response Time
3.5 ms (GTG)
Input
VGA
x 1
HDMI
x 1
CVBS
BNC x 1
Audio
Audio In
3.5ø mm audio jack
Speaker
8 Ω 3 Watt
Power
Power Supply
Internal
Power Requirements
100 ~ 240V, 50 - 60Hz
Consumption
< 30W (On),< 0.5 W (Off)
VESA
VESA FPMPMI
Yes (100 x 100mm)
HDMI
Licence
Yes
OSD
Language
English, Spanish, German, Chinese, French, Italian
Operating
Conditions
Operating Temperature
32° ~ 104°(0℃~ 40℃)
Storage Temperature
-4° ~ 140°(-20℃~ 60℃)

© Copyright SECYOUR™. All documentation rights reserved. 15
Dimension
Monitor Body Dimensions(W x L x D)
491.55x301.12x53.54mm
Max Dimensions Monitor +Stand
491.55x365.36x163.65mm
Certificate
Certifications & Compliance
FCC, CE, RoHS
IMPORTANT NOTE:
Product specifications may be subject to change without prior notice.

© Copyright SECYOUR™. All documentation rights reserved. 16
For more information about our CCTV Monitors
and available cameras, recorders & accessories,
please visit our website:
www.secyour.co.uk
Alternatively scan this QR code with your smart
phone to be directed instantly to our website.
Table of contents


