SEELEY INTERNATIONAL – OWNER’S MANUAL 1
1
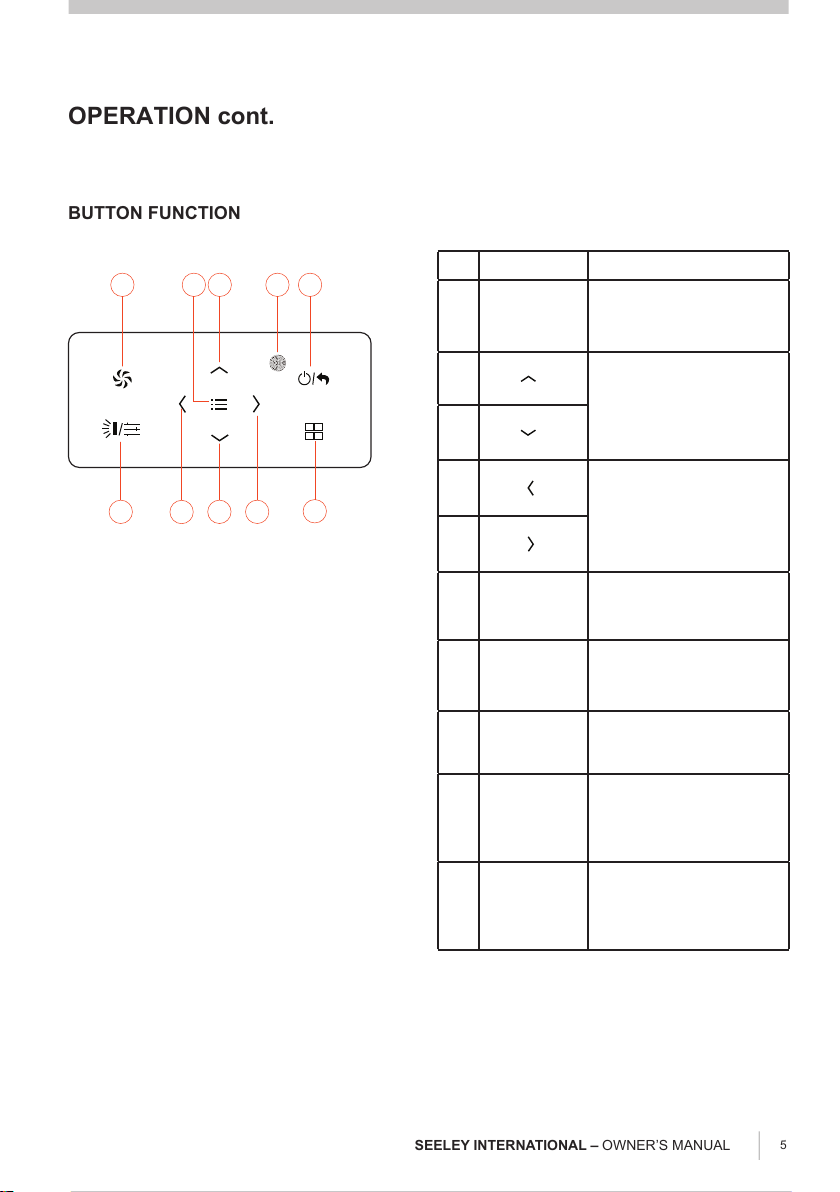
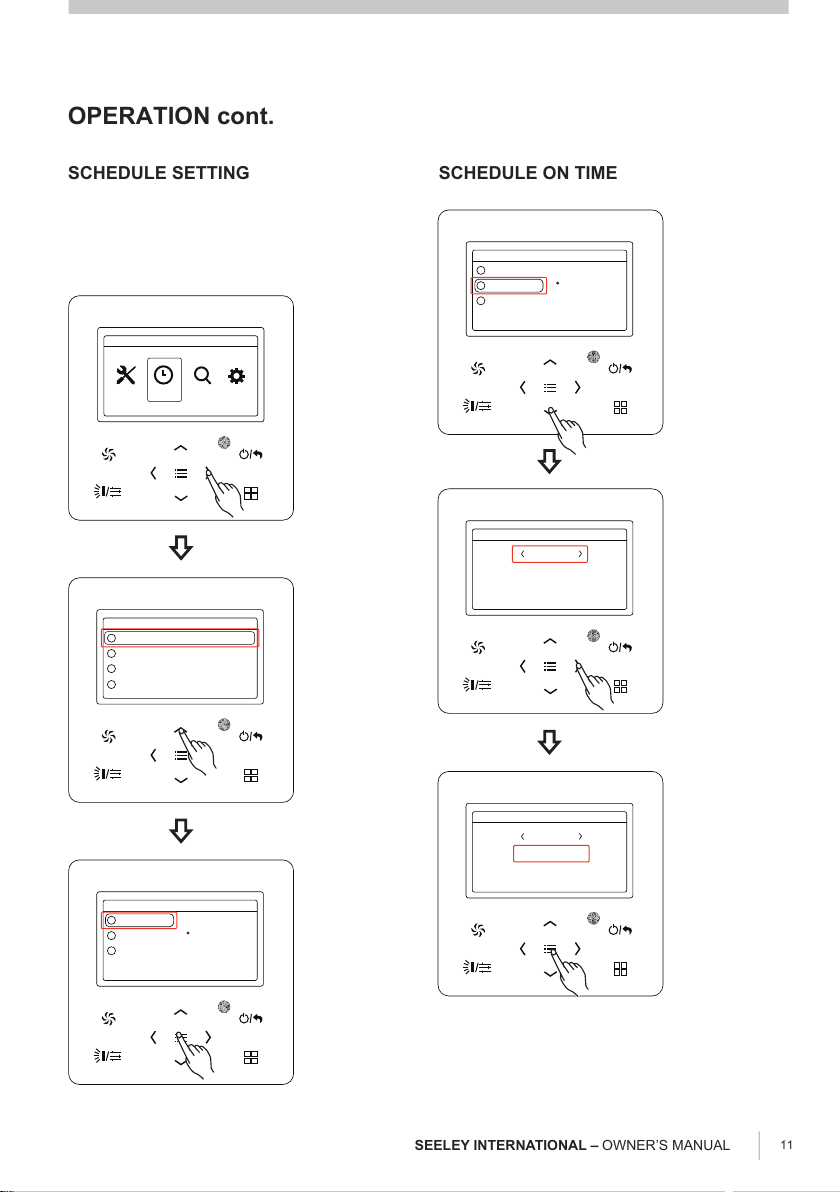
OPERATION cont.
INTRODUCTION & SAFETY...............................................................................
.......................................................................................................
MAINTENANCE & SERVICE..............................................................................
MAINTENANCE SCHEDULE..............................................................................
OPERATION TIPS...............................................................................................32
12
13
14
14
15
16
16
17
17
18
18
18
19
19
20
20
20
20
20
20
21
21
21
21
22
22
23
23
24
24
25
25
26
26
27
27
28
28
30
31
2
3
2
2
4
5
6
6
7
7
8
8
9
9
9
10
10
10
10
10
11
OPERATION
WIRED CONTROLLER .................................................................................
CONTROLLER LAYOUT...............................................................................
LCD ICONS ...................................................................................................
BUTTON FUNCTIONS..................................................................................
ON/OFF .........................................................................................................
MODE............................................................................................................
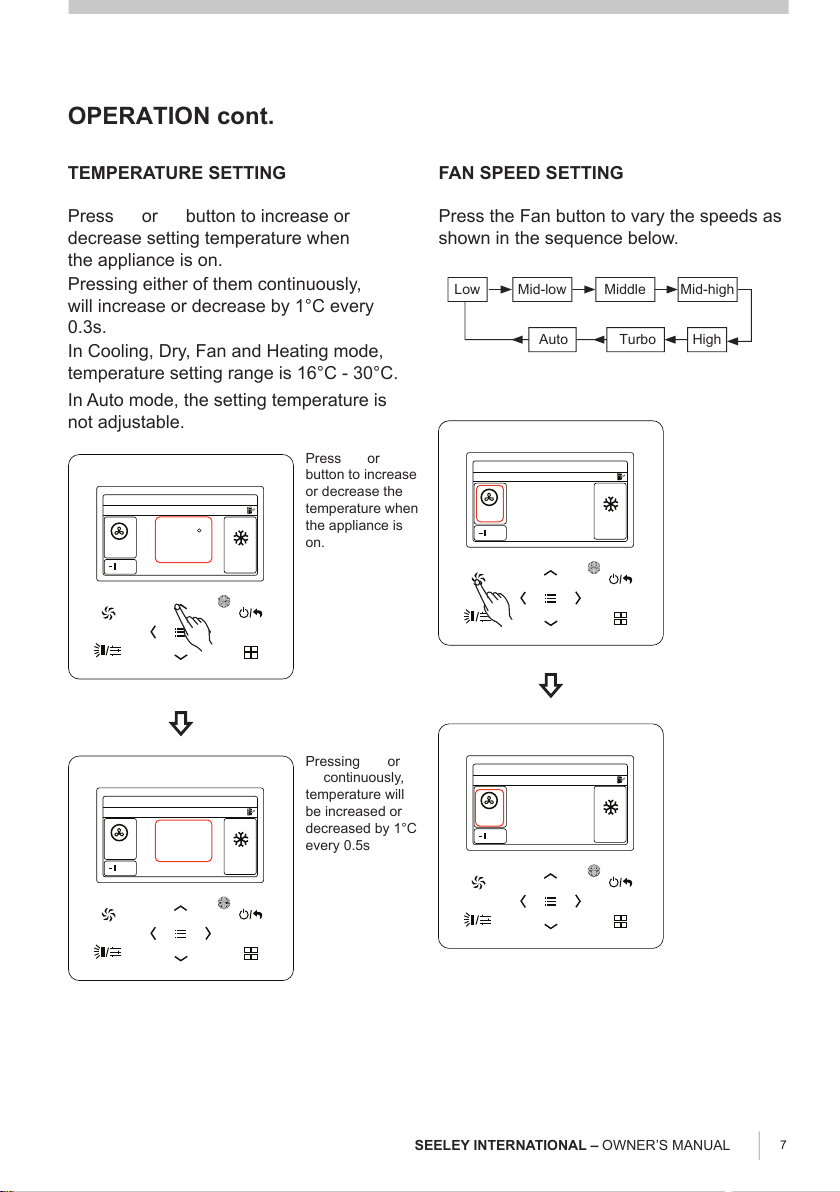
TEMPERATURE SETTING............................................................................
CONTENTS
FAN SPEED SETTING..................................................................................
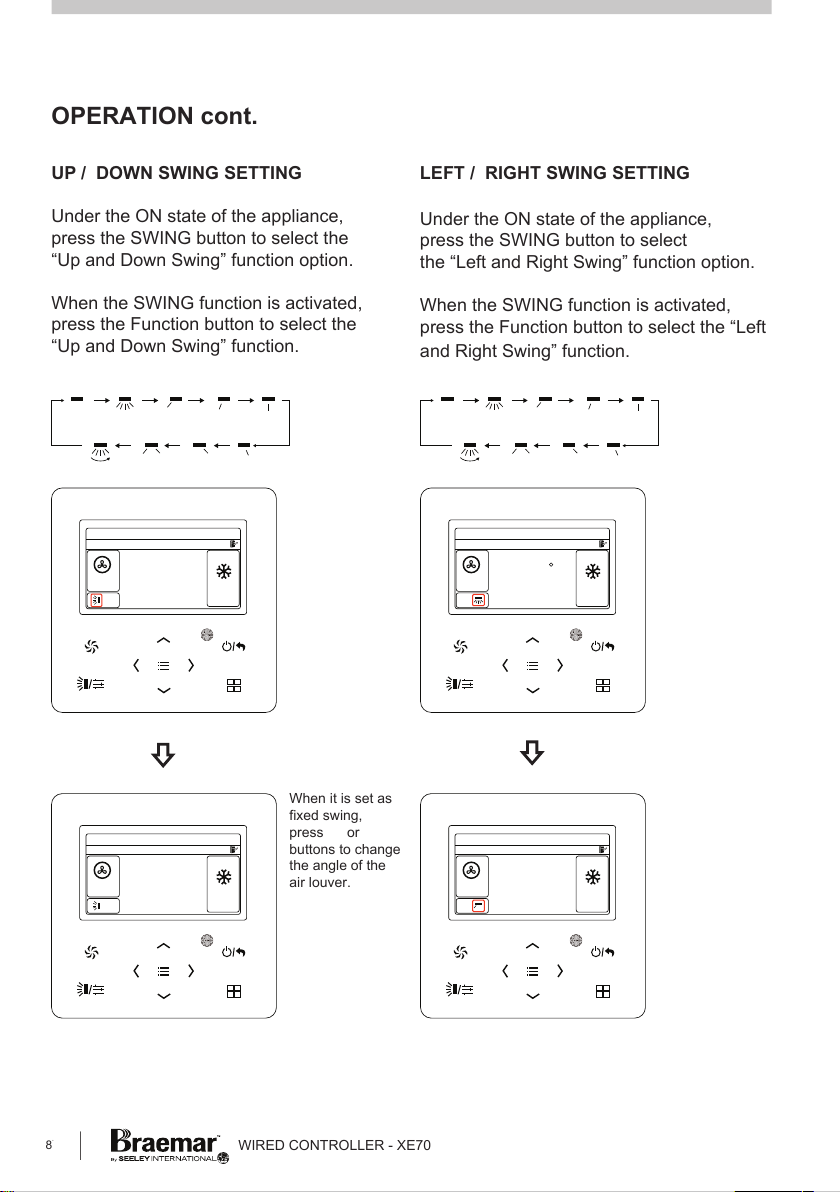
UP / DOWN SWING SETTING......................................................................
LEFT / RIGHT SWING SETTING..................................................................
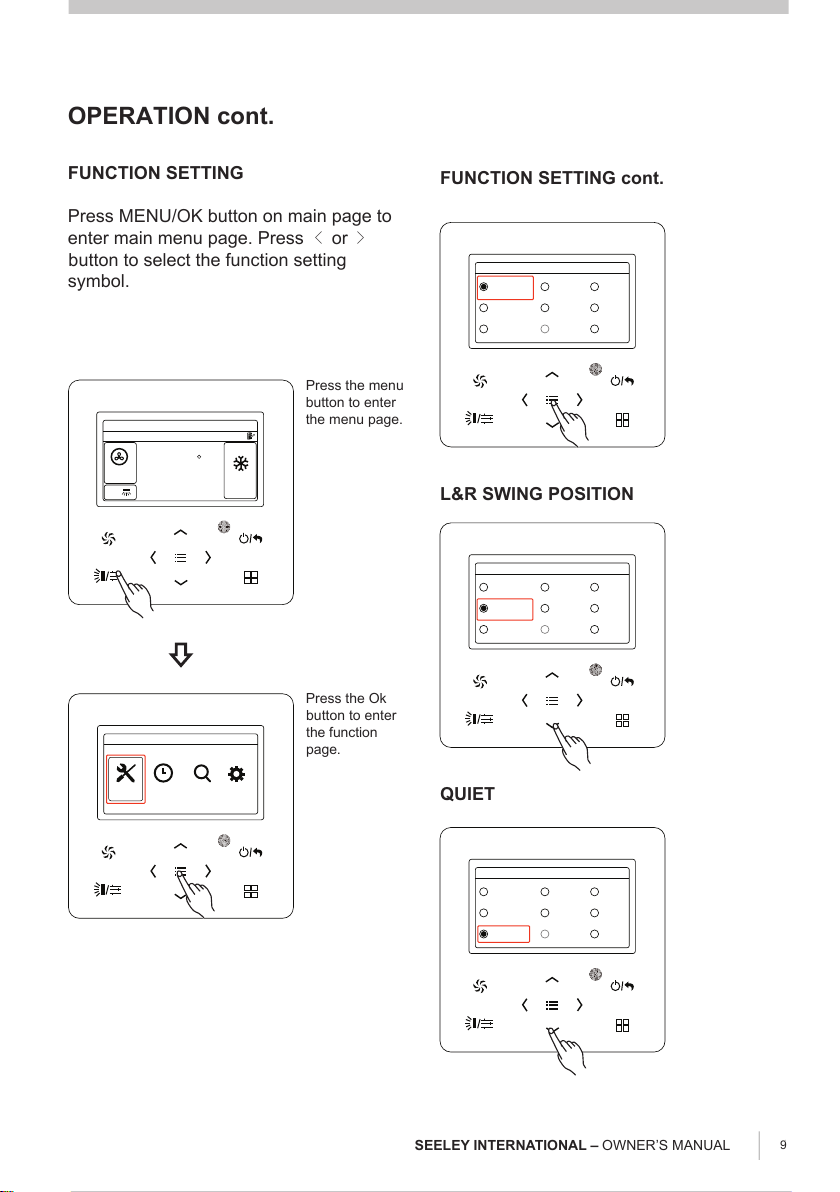
FUNCTION SETTING....................................................................................
L&R SWING POSITION ................................................................................
QUIET............................................................................................................
SLEEP............................................................................................................
LIGHT.............................................................................................................
LOCK..............................................................................................................
RAPID............................................................................................................
X-FAN.............................................................................................................
10SCHEDULE SETTING...................................................................................
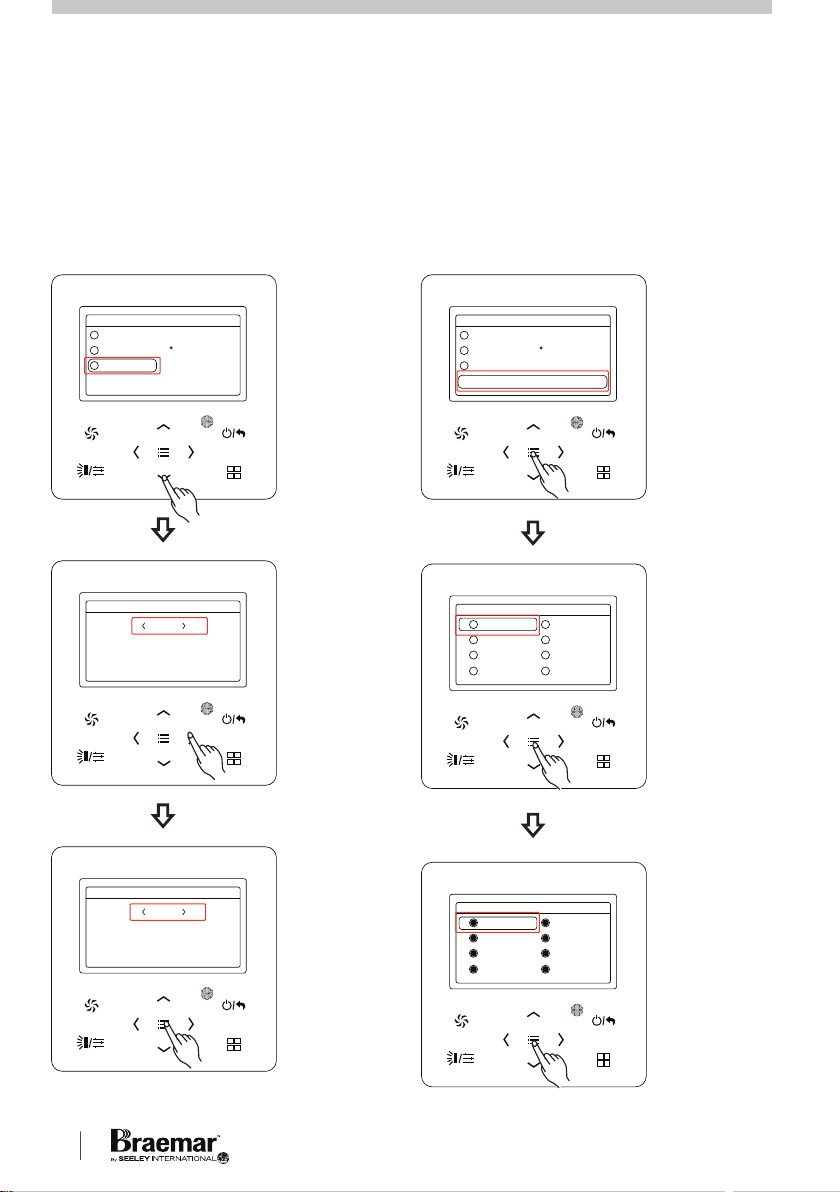
SCHEDULE ON TIME....................................................................................
12SCHEDULE OFF TIME .................................................................................
SCHEDULE REPEAT.....................................................................................
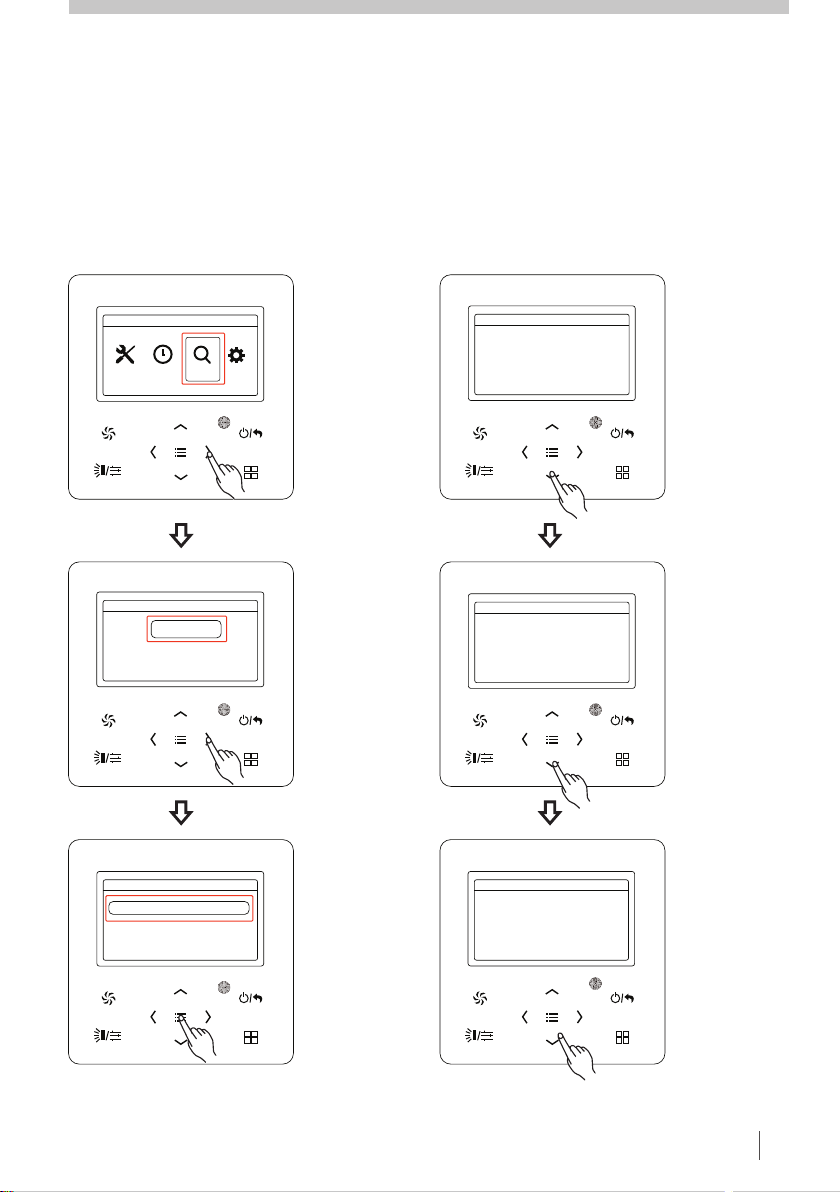
PARAMETER VIEW.......................................................................................
IDU PARAMETER VIEW...............................................................................
ODU PARAMETER VIEW..............................................................................
IDU PROJECT NO. VIEW AND LOCATING.................................................
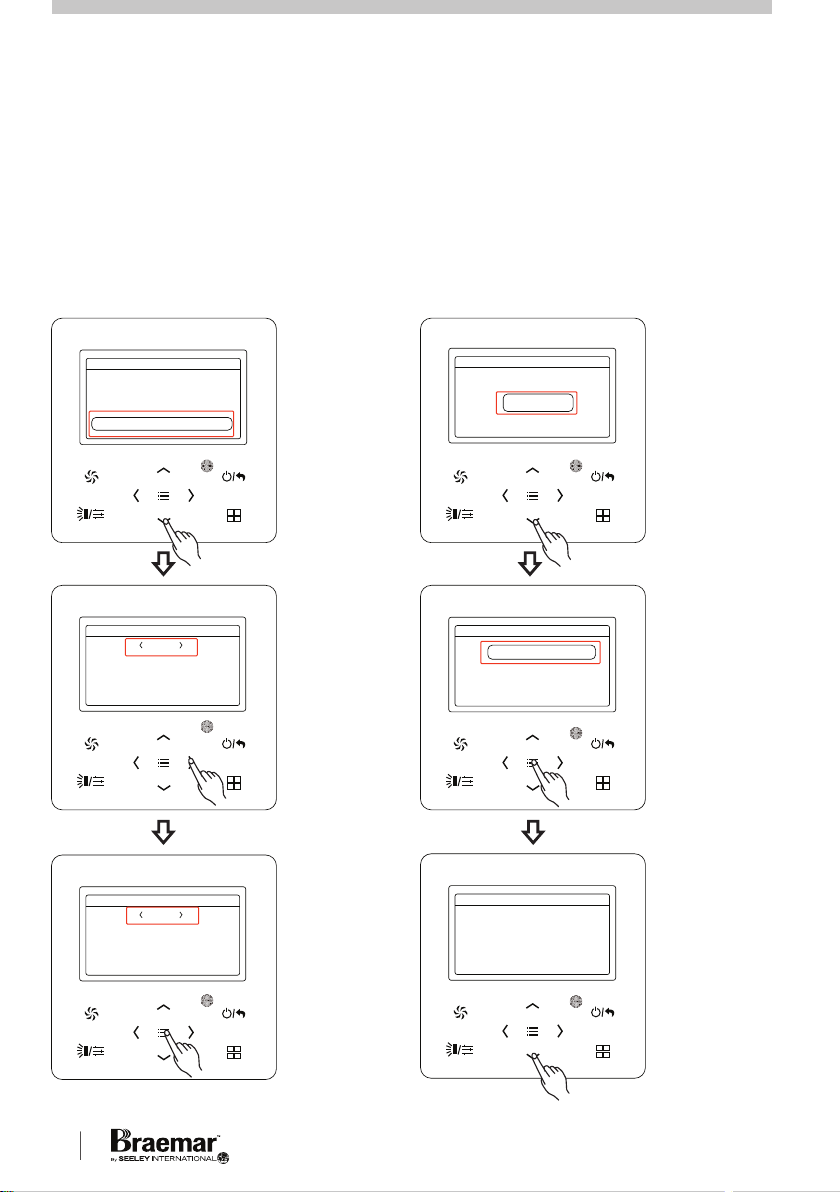
VIEW ALL PROJECT NO...............................................................................
HOTLINE........................................................................................................
LOCAL AFTERSALE TEL .............................................................................
ABOUT UNIT..................................................................................................
SETTING........................................................................................................
LANGUAGE...................................................................................................
TIME FORMAT...............................................................................................
SET TIMER.....................................................................................................
SOUND..........................................................................................................
PROJECT SET..............................................................................................
MASTER WIRED CONTROLLER.................................................................
USE REMOTE...............................................................................................
HIGH CEILING INSTALLTION .....................................................................
PM2.5 FILTER...............................................................................................
MASTER IDU.................................................................................................
PRIOR OPERATION.....................................................................................
LINK WITH FRESH AIR IDU.........................................................................
CHANGE FROM C TO F ...........................................................................
CLEAN FILTER CLEANING TIME................................................................
RESET WIFI...................................................................................................
IDU FAN STATIC PRESSURE......................................................................
NUMBER OF IDU..........................................................................................
ANGLE OF AIR-RETURN BOARD...............................................................
COOLING TEMP IN AUTO MODE................................................................
HEATING TEMP IN AUTO MODE................................................................
COOLING TEMP OF FRESH AIR IDU..........................................................
HEATING TEMP OF FRESH AIR IDU..........................................................
RELATIVE HUMIDITY IN AUTO DRY...........................................................
RELATIVE HUMIDTY IN ABSENCE ............................................................
TEMP OF ABSENCE MODE.........................................................................
RESET WIFI...................................................................................................
TIME FOR IDU COLD AIR PREVENT..........................................................
ERROR..........................................................................................................