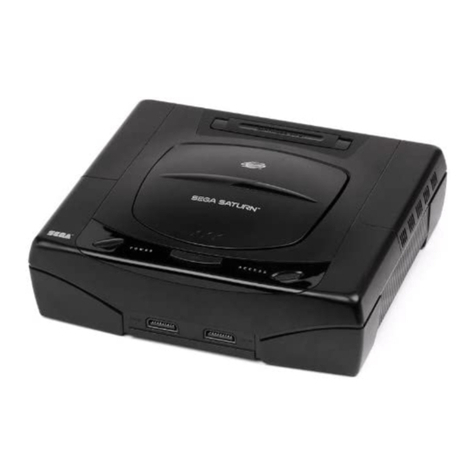
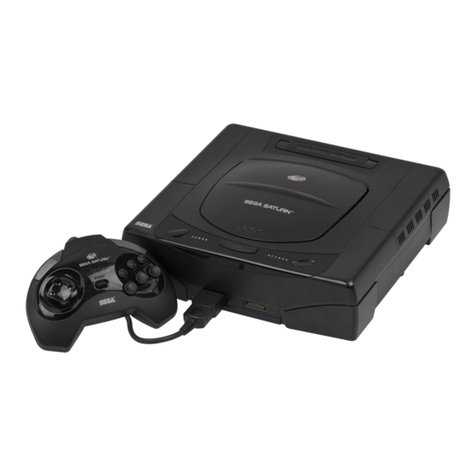
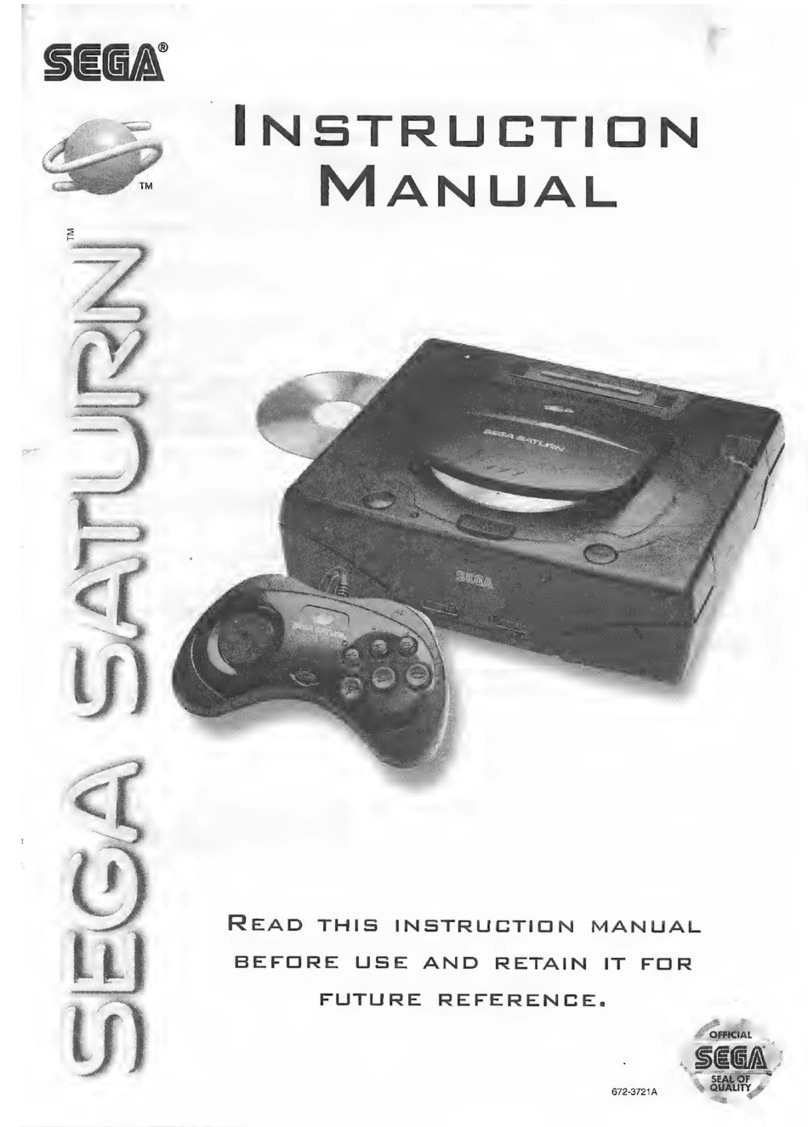
Sega Saturn User manual


ENGLISH
CONTENTS
EPILEPSYWARNING...........................................................................................................................3
FORYOUR HEALTH............................................................................................................................3
WARNING.............................................................................................................................................4
PRECAUTIONS FORUSE...................................................................................................................6
ABOUTYOUR SEGA SATURN............................................................................................................7
ABOUTTHE LITHIUMBATTERY.........................................................................................................8
POWERCORD...................................................................................................................................11
STEREO SCARTCABLE....................................................................................................................11
CONNECTINGTHE SEGA SATURN.................................................................................................12
THE SEGASATURN CONTROLPAD................................................................................................15
EASYSTART!.....................................................................................................................................16
PLAYING SEGA SATURN CD GAMES..............................................................................................16
PLAYING AUDIO CDS........................................................................................................................17
CONTROLSCREENSAND BUTTONFUNCTIONS..........................................................................18
BACKUP FUNCTIONSAND SYSTEMSETTINGS.............................................................................22
SYSTEMSETTINGS...........................................................................................................................24
ADVANCEDCD FUNCTIONS............................................................................................................25
ERRORMESSAGES..........................................................................................................................26
OTHERPROBLEMS...........................................................................................................................27
RESETTINGTHE SEGA SATURN.....................................................................................................28
SEGA SATURN HARDWARE INFORMATION...................................................................................28

EPILEPSYWARNING
Some people are susceptible to epilepticseizuresorloss ofconsciousness when exposed to certain flashing lightsor
light patternsin everydaylife. Such people mayhave a seizure while watching certain television imagesorplaying
certain video games. Thismayhappen even ifthe person hasno medicalhistoryofepilepsyorhasneverhad any
epilepticseizures.
Certain conditionsmayinduce undetected epilepticsymptomseven in personswho have no historyofpriorseizuresor
epilepsy.
Ifyou oranyone in yourfamilyhaseverhad symptomsrelated to epilepsy(seizuresorloss ofconsciousness) when
exposed to flashing lights, consult yourdoctorpriorto playing. We advise that parentsshould monitorthe use ofvideo
gamesbytheirchildren. Ifyou oryourchild experience anyofthe following symptoms: dizziness, blurred vision, eye or
muscle twitches, loss ofconsciousness, disorientation, anyinvoluntarymovement orconvulsion, IMMEDIATELY
discontinue use and consult yourdoctor.
FORYOURHEALTH
§ Do not stand too close to the screen. Sit a good distance awayfromthe television screen, asfarawayasthe
length ofthe cable allows.
§ Preferablyplaythe game on a small television screen.
§ Avoid playing ifyou are tired orhave not had much sleep.
§ Make sure that the roomin which you are playing iswell lit.
§ Rest forat least 10 minutesperhourwhile playing a video game.

WARNING
1. Donotexpose theSegaSaturn towater, rainor moisture, as thiscanresultinelectricshock or fire.
2. Donotdisassembleor altertheSegaSaturn and its peripheralsinanyway. No parts inside the unit can be serviced bythe
user. Misuseof the Sega Saturn inthis waymaylead toelectric shock and damage tothe unit. If you haveaproblem, contact your
Sega dealer.
3. TheSegaSaturn consoleoperates at 220 -240 V AC, ~50/60 Hz.
Using incorrect voltage can result inarisk of electric shock, fire or damage tothe unit.
4. Disconnect thepowerwhenconnecting theSegaSaturn.
Unplug the Power Cord when connecting the Sega Saturn. Alsoensure that the television and VCR towhichthe Sega Saturn is
connected are switched off. If you do not, it maycauseelectric shock.
5. Turn off theSegaSaturn whennotinuse.
Leaving the Sega Saturn withthe power on mayconstitutearisk of fire.
6. Power-cord Protection: The Power Cord shouldbe routed soas toavoidbeing walked on or pinched byitems placed on or
against it. Payparticular attention tothe area near the plug, outlet or receptacle, and the point where the Power Cord exits the
Sega Saturn. A frayed, perforated or stripped cord can result inelectric shock or fire.
7. Heat: The Sega Saturn shouldnot be situated near sources of heat, suchas radiators, heat registers, stoves or other products
(including amplifiers)that produceheat. Failure tocomplywiththis can result inarisk of fire, electric shock or damage tothe unit.
8. Waterand Moisture: Do not usethe Sega Saturn near water, for example, near abathtub, washbowl, kitchen sink, washing
machine or swimming poolor inawet basement and the like. If you do, it maycauseelectric shock or damage the unit.
9. Lightning: For added protection for the Sega Saturn during alightning storm, or when it is left unattended and unused for long
periods of time, unplug it fromthe wall socket and disconnect the antenna or cablesystem. This will prevent damage due to
lightning and power-line surges.
10. Object and LiquidEntry: Never pushobjects of anykind intothe consolethrough openings, as theymaytouchdangerous
voltage points or short out parts that couldresult infire or electric shock. Never spill liquids of anykind on the product.
11. Ventilation: Slots and openings inthe consoleare provided for ventilation, toensure reliableoperation and toprotect the
Sega Saturn fromoverheating. Do not cover your Sega Saturn during useas heat maybuildup internally.
12. KeeptheLithium Batteryoutofthereachofchildren. If achildswallows aLithiumBattery, consult adoctor immediately.
Failure tocomplywiththis can result inarisk of suffocation or poisoning.
13. BatteryDisposal: Do not recharge, disassembleor disposeof infire.
14. Donotlet small childrenstick theirfingersinanyopeningson theSegaSaturn console. Misuseof the Sega Saturn inthis
waymaylead toelectric shock and damage tothe unit.
15. Thisproduct isfittedwithanon-rewirableplug.
If the plug is unsuitablefor your mainssocketoutletthen itshouldbe cutoff and DESTROYED,and an appropriateplug fitted.Never
insert this cut-off plug intoyour mains socket outlet as the wires leading fromthe plug are liveand hazardous.

IMPORTANTFORLASERPRODUCTS
The Sega Saturn isa Class 1 LaserProduct
Class I Lasers are defined asdeviceswhich emit radiation levels"belowwhich biologicalhazardshave not been
established".
Caution-use ofcontrols, adjustmentsorperformance ofproceduresotherthan those specified herein mayresult in
hazardousradiation exposure.
WHENUSING POWERCORDS INTHE U.K.
FOR YOUR SAFETYPLEASE READ THEFOLLOWINGTEXTCAREFULLY
Ifthe plug supplied isnot suitable forthe socket outletsin yourhome, it should be cut off and an appropriate plug fitted in
accordance with the following instructions.
The wiresin the mainslead are coloured in accordance with the following code:
BLUE: NEUTRAL BROWN: LIVE
Ifthe colours ofthe wiresin the mainslead ofthisappliance do not correspond to with the coloured markingsidentifying
the terminalsin yourplug, proceed asfollows:
Connectthe BLUEwire to the BLACK terminal (orthe terminal markedwith an"N").
Connectthe BROWN wire to the RED terminal (orthe terminal markedwith an"L").
Donot make anyconnection to the earth terminal markedwith the letterEor
symbol orcolouredGREEN orGREEN/YELLOW.
The fuse fitted to thisappliance is3Aand replacement fusesshould be A.S.T.A.
approved to B.S.1362. Ifyou need to replace the fuse, proceed asfollows:
Open the fuse compartment with a screwdriverand replace the fuse. Rememberto re-fit
the orange fuse coverbackinto the fuse compartment.

PRECAUTIONSFORUSE
Damage Requiring Service:
Unplug the Sega Saturn fromthe wall socket and referservicing to qualified personnelunderthe following conditions:
(a)Ifthe PowerCord isdamaged;
(b)Ifliquid hasbeen spilled orobjectshave fallen into the Sega Saturn;
(c)Ifthe Sega Saturn hasbeen exposed to rain orwater;
(d)Ifthe Sega Saturn doesnot operate normallydespite following the operating instructions; Adjust onlythose controls
that are covered bythe operating instructionsasan improperadjustment ofothercontrolsmayresult in damage and
will often require extensive workbya qualified technician to restore the product to itsnormaloperation.
(e)Ifthe Sega Saturn hasbeen dropped ordamaged in anyway; (f)Ifthe Sega Saturn exhibitsa
change in performance.
Location
§ Avoidthe following conditions during useor storage: high temperatures, suchas direct sunlight or near aheater; extremecold; steamvapour,
suchas near akitchen stove; dust; areas where the Sega Saturn maybe splashed withwater; humidity; slanted, unstableor vibrating surfaces.
§ Condensation mayaccumulateon the surfaceof the Sega Saturn if it is subjected tosudden changes intemperature. Inthis case, allowthe
Sega Saturn torest for about one hour before use.
Console
§ Do not drop the Sega Saturn or anyother parts or subject themtoshock.
§ When cleaning the Sega Saturn, do not usebenzene, thinner or anyother strong chemicals. Usewater or neutralcleanser.
§ Do not useanysoftware peripheralequipment that was not specificallydesigned for the Sega Saturn.
§ Do not disconnect the ControlPad or anyother peripheralduring gameplayas it mayresult inmalfunction.
§ Do not let the terminals get dirty, as it can damage the Sega Saturn. If theydo get dirty, wipe themwithasoft, drycloth.
CD Drive
§ Do not open the CD door when aCD is playing.
§ Do not useexcessiveforcewhen opening the CD door.
§ Do not touchthe lens inside the CD door. If the lens is dirty, wipe it withasoft, drycloth.
§ Always closethe CD door toavoidaccumulation of dust.
§ Makesure there is no CD inthe CD drivewhen moving the Sega Saturn console.

PowerCord and Supply
§ Do not forciblybend or pull the Power Cord.
§ Do not placeheavy objects on the Power Cord.
§ Holdthe Power Cord bythe plug when disconnecting.
§ Do not allowthe plug or terminals tocomeintocontact withmetallic objects or water.
§ Useonlythe Power Cord supplied withthe Sega Saturn.
§ Never usethe Power Cord withanyother products as it can causedamage.
§ Never touchthe plug withwet hands as it mayresult inelectric shock.
Lithium Battery
§ Makecertainthe positiveside of the LithiumBatteryis facing upward. Reversing polaritymaycausethe batterytoleak.
§ Do not disassemble, heat, charge or ignitethe battery.
§ When the batteryis low, replaceit as soon as possible. A run-downbatteryadverselyaffects the performanceof the Sega Saturn.
§ Wipe the surfaceof the LithiumBatterybefore use.
Note to Owners of Projection Televisions
Still picturesorimagesmaycause permanent picture-tube damage ormarkthe phosphorofthe CRT. Avoid repeated or
extended use ofvideo gameson large-screen projection televisions. Consult yourowner'smanualbefore playing video
gameson yourprojection television.
ABOUTYOURSEGASATURN
Sega Saturn isthe most powerfulhome gaming systemeverbuilt, and takesyou beyond the limitsofconventional
gaming. Sega Saturn bringshome the most realisticsportsand arcade gameplayand 3D worlds. Itsmultifunctional
abilitiesallowyou to enjoya full multimedia entertainment experience.
YourSega Saturnpackage shouldcontainthe following components:
Manualof Instructions (this booklet)Safeguards Sheet Sega Saturn unit
Sega Saturn ControlPad Sega Saturn Stereo A/V CableSega Saturn Power Cord Sega
Saturn Sticker WarrantyCard
LithiumBatteryCR2032 (inserted, withinsulation sheet)

ABOUTTHELITHIUMBATTERY
The Lithiumbattery(type CR2032)powers the internalbackup memoryand clock. Change the batteryabout once a
year.
Before replacing the battery, switch off the powerto the Sega Saturn unit and unplug ' the PowerCord to avoid electric
shock. Wipe the uppersurface ofthe batterywith a drycloth before installing.
Replacing the Battery
(a)Remove the BatteryCover.
(b)Remove the battery.
(c)Insert a newbattery, keeping the positive side upwards, and close the BatteryCover.
Notes
§ If you start agamewithno batteryinstalled or if the batterypower is too low, you cannot savegamedata.
§ When you removethe Lithiumbattery, all saved datais erased. Tokeep datawhilereplacing the Lithiumbattery, purchaseaBack-Up Memory
(see page 16).
§ Makesure todisposeof the LithiumBatteryinthe appropriatewastereceptacleor wastedisposalarea.
You can usean arrayof software on your Sega Saturn:
§ Sega Saturn gameCDs
§ AudioCDs
§ CD+G (audiowithgraphics)discs
§ CD+EG(audiowithextended graphics)discs
§ 8-centimeter audioCD singles
Note: You cannot useMega Drive, Mega CD or Mega Drive32Xgames or peripheralequipment withyour Sega Saturn.

SEGASATURNPERIPHERALS
Thisisjust a sample ofthe exciting Sega Saturn peripheralsavailable nowat yourSega dealer. In addition to the
peripheralsshown above, you can also playvideo CDs, photo CDsand electronicbookson yourSega Saturn with the
use ofadaptors and/orsoftware that issold separately. And there'smore on the way!
1. Sega Saturn ControlPad
2. Back-up Memory
3. 6-Player Adaptor
4. Virtua Stick
5. Arcade Racer
6. Virtua Gun
Future peripherals for Sega Saturn...
§ Keyboard
§ FloppyDisk Drive
§ Hard Disk Drive
§ Infra Red ControlPad

THESEGASATURNUNIT
FRONTVIEW
1. Press the OPENButton toopen the CD door.
2. Insert aCD inthe unit and closethe CD Door.
3. The Cartridge Slot is used toinsert accessories, suchas the Back-up Memory.
4. Press the RESETButton torestart agame.
5. Press the POWERButton toswitchthe power on and off.
6. The Power Light lights when power is on.
7. Plug inaSega Saturn ControlPad or other Sega Saturn peripherals inControlPort 1.
8. UseControlPort 2toconnect aControlPad or other peripherals for multi-player games.
RearView
1. Removethe Insulation Sheet before starting your Sega Saturn for the first time.
2. The Lithiumbatterypowers the Sega Saturn internalmemory.
3. Removethe BatteryCover inorder toreplacethe Lithiumbattery, or insert the Video CD
Adaptor (soldseparately).
4. Interfacewithyour Sega Saturn byusing future Sega technologies through the Communications
Socket!
5. Plug the Stereo Scart Cable(included) intothe A/V OUTSocket.
6. Plug the Power Cord (included) intothe Power Socket.

POWERCORD
Your Sega Saturn package includes aPower Cord. Usethis toconnect the Power Socket on the consoletoastandard ACoutlet.
1. European countries except U.K.
2. For U.K.
3. For Australiaand NewZealand
STEREOSCARTCABLE
Your Sega Saturn package includes aStereo Scart Cable, whichconnects the Sega Saturn consoletoatelevision, or VCR. If your TV is not
equipped withaScart (Euro Connector) facility, pleasecontact your localSega Saturn Dealer toobtainan optionalSega Saturn RFUnit. (Not
availableinFrance)
4. ToA/V OUTSocket
Note: When connecting the Stereo Scart Cable, makesure that the arrowon the plug faces upwards.

CONNECTINGTHESEGASATURN
Make sure that yourSega Saturn isturned off and unplugged fromthe electricsocket before connecting anycables.
Aftermarking all connections, rememberto re-insert all plugs.
Plug yourSega Saturn ControlPad into ControlPort 1 on the Sega Saturn console.
Connecting to a TVwith ScartInput
1. Plug the Stereo Scart Cable into the A/VOUTsocket on the right side ofthe console.
2. Connect the Stereo Scart Cable directlyto yourTV.
3. Select the audio/video input setting on yourTVormonitorwhen playing Sega video gameson the Sega
Saturn. Some TVsmayautomaticallyswitch to thissetting when the Sega Saturn isswitched on.
Note:
1. Toenjoyfull stereo sound, connect your Sega Saturn toastereo TV.
2. When using aStereo Scart Cable, someTVs maydisplaya"black border" on the left-hand side of the TV screen.

Connecting to a TVorVCR without Audio/VideoSockets
(Not available in France)
Connections to a TV/Monitorand Antenna
Ifan antenna cable isplugged into yourTV(orifyou have cable TV), use a Sega Saturn RFUnit (sold separately).
1. Unplug the antenna cable fromthe TV, and plug it into the RFUnit.
2. Plug the RFUnit antenna cable into the TV.
3. Plug the RFcable into the A/VOUTsocket on the backofthe Sega Saturn console.
Note: If your television is connected toaVCR, check tosee if your VCR has audioand video plugs towhichtoconnect.
TVwith ConnectedVCR
1. Ifa VCR isalreadyconnected between the antenna and TVterminal, use a Sega Saturn RFUnit (sold separately).
Unplug the antenna cable ofthe VCR fromthe TVterminal. Then, plug thiscable into the RFUnit.
2. Plug the RFUnit antenna cable into the TVterminal.
3. Plug the RFCable into the A/VOUTsocket on the backofthe Sega Saturn console.

Setting the TVChannel (Except Frenchmodels)
Ifyou are using an RFUnit, see below.
1. Set yourTVto the channel36.
2. Set the channelswitch on the RFUnit to I (United Kingdomonly)/ G(all other
countries).
3. Turn on the TVand fine-tune to locate the MODEL idealpicture.
Note: If your TV has automatic fine-tuning control(AFC), turn it off and manuallyadjust the picture. However, if you
haveacolour TV that turns black and whitewhen the AFCis turned off, leavethe AFCon.
1. Side View
2. Select I-G(CH 36)

THESEGASATURNCONTROLPAD
The Sega Saturn ControlPad controlsgameplaywhen using Sega Saturn game CDs, and controlsotherfunctions
when playing audio CDs.
1. Connect the Terminalto ControlPort I or2 on the Sega Saturn unit.
2. The Left Shift Button (Button L)skipsand searchesbackward through
audio CD tracks.
3. The Right Shift Button (Button R)skipsand searchesforward through
audio CD tracks.
4. The DirectionalButton (D-Button)movesthe cursorup, down, left and
right on screen.
5. The Start Button (START)starts/pausesgames(oraudio playback).
6. ButtonsAand C make selections, and Button Bcancelsselections.
7. Button Xcyclesthrough audio playbackrepeat options. Button Ystops
audio playback. Button Zpausesand resumesaudio playback.
Notes
§ Remember toturn the power tothe Sega Saturn off before connecting the ControlPad, otherwisethe ControlPad maynot respond.
§ Plug the ControlPad intoControlPort 1.
§ For two-player games, asecond ControlPad (soldseparately)is required.
§ For information on the button functions for specific games, check the gamemanual.
Connecting the Control Pad
When using one Sega Saturn ControlPad, plug it into ControlPort 1. Ifyou are using a second ControlPad (MK-
80313, MK-80301, sold separately), plug it into ControlPort 2. Alwaysplug in the ControlPadsbefore switching on the
powerto the Sega Saturn unit, otherwise the ControlPad(s) maynot respond.

EASYSTART!
INITIALSETTINGS
When you switch on the Sega Saturn forthe first time, orafteryou change the Lithiumbattery, the Set Language
screen appears, followed bythe Set Clockscreen.
SETLANGUAGE
You can choose to viewSega Saturn screen messagesin English, German, French, Spanish, Italian orJapanese. Press
the D-Button to highlight a language and press Button AorC. The Set Clockscreen appears next.
SETCLOCK
Press the D-Button left orright to move between DATEand TIME, and press up ordown to change the numbers.
When you're finished, Select EXITand press Button AorC to input the newsettings. The next screen that appears is
the Audio CD Controlscreen.
PLAYINGSEGASATURNCDGAMES
Starting a Session
1. Press the OPEN Button on the Sega Saturn unit to open the CD door.
2. Insert CD (labelup!), shut the CD doorand turn on the Sega Saturn.
3. Press Start to start the game.
4. Ifyou want to return to the game'sTitle screen during play, press ButtonsA, Band
C and STARTsimultaneously, orpress the RESETbutton.
Ending a Session
1. Press the RESETbutton while holding down Button A.
2. Press the OPEN button to open the CD doorand take out the CD.
3. Switch off the POWER button on the Sega Saturn unit.
Note: Before you removethe CD, check that the CD Controlscreen appears (whichmeans the CD has stopped
spinning and is safetoremovefromthe Sega Saturn). Important: Do not useCD GameROMs designed for other
machines, as theymaydamage the Sega Saturn.

PLAYINGAUDIOCDS
YourSega Saturn can playvarioustypesofaudio CDsincluding CD+G, CD+EGand audio trackson Sega Saturn
CD Games. (Formore on Audio CDs, see page 25.)
Starting a Session
1. Insert CD (labelup!), shut the CD doorand turn on the Sega Saturn. In a fewseconds, the Audio CD Control
screen appears.
2. Press STARTorButton Z, orhighlight Play/Pause on screen and press Button AorC to start the CD.
Ending a Session
1. Highlight Stop on the Audio CD Controlscreen and press Button AorC, orifthe Audio CD Controlscreen isnot
displayed, press the RESETbutton.
2. Press the OPEN button to open the CD doorand take out the CD. 3. Switch off the POWER
button on the Sega Saturn unit.
Note: Before you removethe CD, check that the AudioCD Controlscreen appears (whichmeans the CD has stopped spinning and is safeto
removefromthe Sega Saturn).

CONTROLSCREENSANDBUTTONFUNCTIONS
The Audio CD Controlscreen isthe main controlpanelforaudio CDsand CD+Gdiscs. Errormessagesand other
information are displayed here, aswell asvariouscontrolfunctions.
The AudioCD Control Screen
The wayto access the Audio CD Controlscreen dependson the type ofdisc inserted.
Whena CD otherthana Sega SaturnCD is inserted:
Ifthe powerisoff, press the POWER button; ifthe powerison, press the RESETbutton.
Whena Sega SaturnCD is inserted:
Ifthe powerisoff, press the POWER button while holding down Button A; ifthe powerison, press the RESET
button while holding down Button A.
Basic Controls
1. Multi-Button
ForSega Saturn Game CDs, select thisto start the game. ForCD+Gand CD+EGdiscs, press to open the Set CD+G
Channelwindow.
(A)CD+GChannelWindow
The channelfunction allowsyou to programup to 16 channelsperdisc.
1. Highlight the Multi-Button and press Button AorC to open the Set CD+GChannel.
2. Press the D-Button to highlight a channel, and press Button AorC to select. Press Button Bto reset the
channelsto the default.
3. When you're finished, press STARTto return to the Audio CD Controlscreen.

2. SystemSettingsButton
Press to see the SystemSettingsscreen (see page 24). You can also use the SystemSettingsButton to access the
MemoryManagerscreen (see page 22).
3. Hide ControlsButton
Thishidesthe Audio CD Controlscreen, and displaysthe screen saver. When using a CD+Gdisc, the disc'sgraphics
are displayed. To return to the Audio CD Controlscreen, press Button A, BorC, orthe D-Button.
4. Play/Pause Button
Press to play, press to pause!
5. Stop Button
Press to stop playback.
6. Skip Forward Button
Press to skip a track. Press and hold to search through the current tracks.
7. Skip Backward Button
Press to jump backa track. Press and hold to scan backward through current tracks.
8. Repeat Button
Choose from1 (repeat one track), All (repeat all tracks) and Off (to cancelthe Repeat function)Press Button Aor
C to select yourchoice.
9. Change ControlsButton
ThisswitchesfromBasicControlsto Advanced Controls.

AdvancedControls
Use the Advanced Controlsto make variousadjustmentsto youraudio CD listening environment.
1. ProgramSequence
Programa customized playlist!Use the D-Button to select a trackfromthe upperlist and press Button AorC to place
the trackin the lowerlist. Select the next trackthe same way. To delete selections(one byone), press Button B. When
done, press START. Press Button Zto start/ pause programplay.
§ Upperlist showstracksavailable on the disc.
§ Lowerlist showstracksselected forplayback.
2. Shuffle Tracks
Thisfunction arrangesthe audio tracksat random. Press Shuffle Tracksagain to resume normalplayorder.
(Shuffle Trackscancelsotherprogrammed sets.)
3. Repeat A-B
Thisrepeatsa section ofa track. Press once to determine the starting point and again to fixthe end point. Press Repeat
A-Bagain to return to normalplay. (Repeat A-Bcannot be used with Scan Intros.)
4. Scan Intros
Listen to the first 10 secondsfromeach trackin the playlist in order. To return to normalplay, press Scan Introsagain.
(Thisfunction cannot be used with Repeat A-B.)
5. Adjust Surround
Thissimulatesa three-dimensionalaudio effect. Use the D-Button to increase ordecrease the effect. Press Button Bto
reset to the default level. (Adjust Surround cannot be used with Adjust Pitch orMute Vocals.)When done, press START
to exit.
Note: Setting the Adjust Surround leveltoo high maycausedistortion incertaintypesofmusic. Thisisnotafaultwithyour system.Setto
amore suitablelevel.
• Increase 3D audio effect
6. Pitch
Set the pitch ofaudio playbacktracksormute vocals. Press the D-Button left orright to raise orlowerthe pitch.
Press Button AorC to mute the vocals, and press Button Bto reset to the default (restoring the vocals). Adjust
Pitch cannot be used with Adjust Surround. Press STARTto exit.
§ Raise Pitch
Note: MuteVocals suppresses the centralportion of the audiosignal. For stereo recordings, atraceof the vocals will remain. MuteVocals
is not effectiveon mono recordings, and maynot be effectivefor suchgenres as classicalmusic, duets, choralmusic, various forms of
ethnic music and recordings withsucheffects as echo.
Other manuals for Saturn
6
Table of contents
Other Sega Game Console manuals

Sega
Sega Magical Truck Adventure User manual

Sega
Sega Master System User manual

Sega
Sega 32X User manual

Sega
Sega CD II User manual

Sega
Sega CD II User manual

Sega
Sega Genesis Nomad User manual

Sega
Sega Master System User manual

Sega
Sega Master System II User manual

Sega
Sega GAME GEAR User manual

Sega
Sega PODS User manual
Popular Game Console manuals by other brands

Sony
Sony CECH-2508A instruction manual

PlayStation
PlayStation SCPH-7501 - Game Console Service manual

Nintendo
Nintendo DSi XL Quick-stard guide

Gamebox
Gamebox GBHD ADVANCE AGS-001 PCB Installation/assembly guide

Retro Games
Retro Games ATARI THE 400 MINI quick start guide

LeapFrog
LeapFrog Paw Patrol: To the Rescue! instruction manual