© 2019
Order #XXXXX
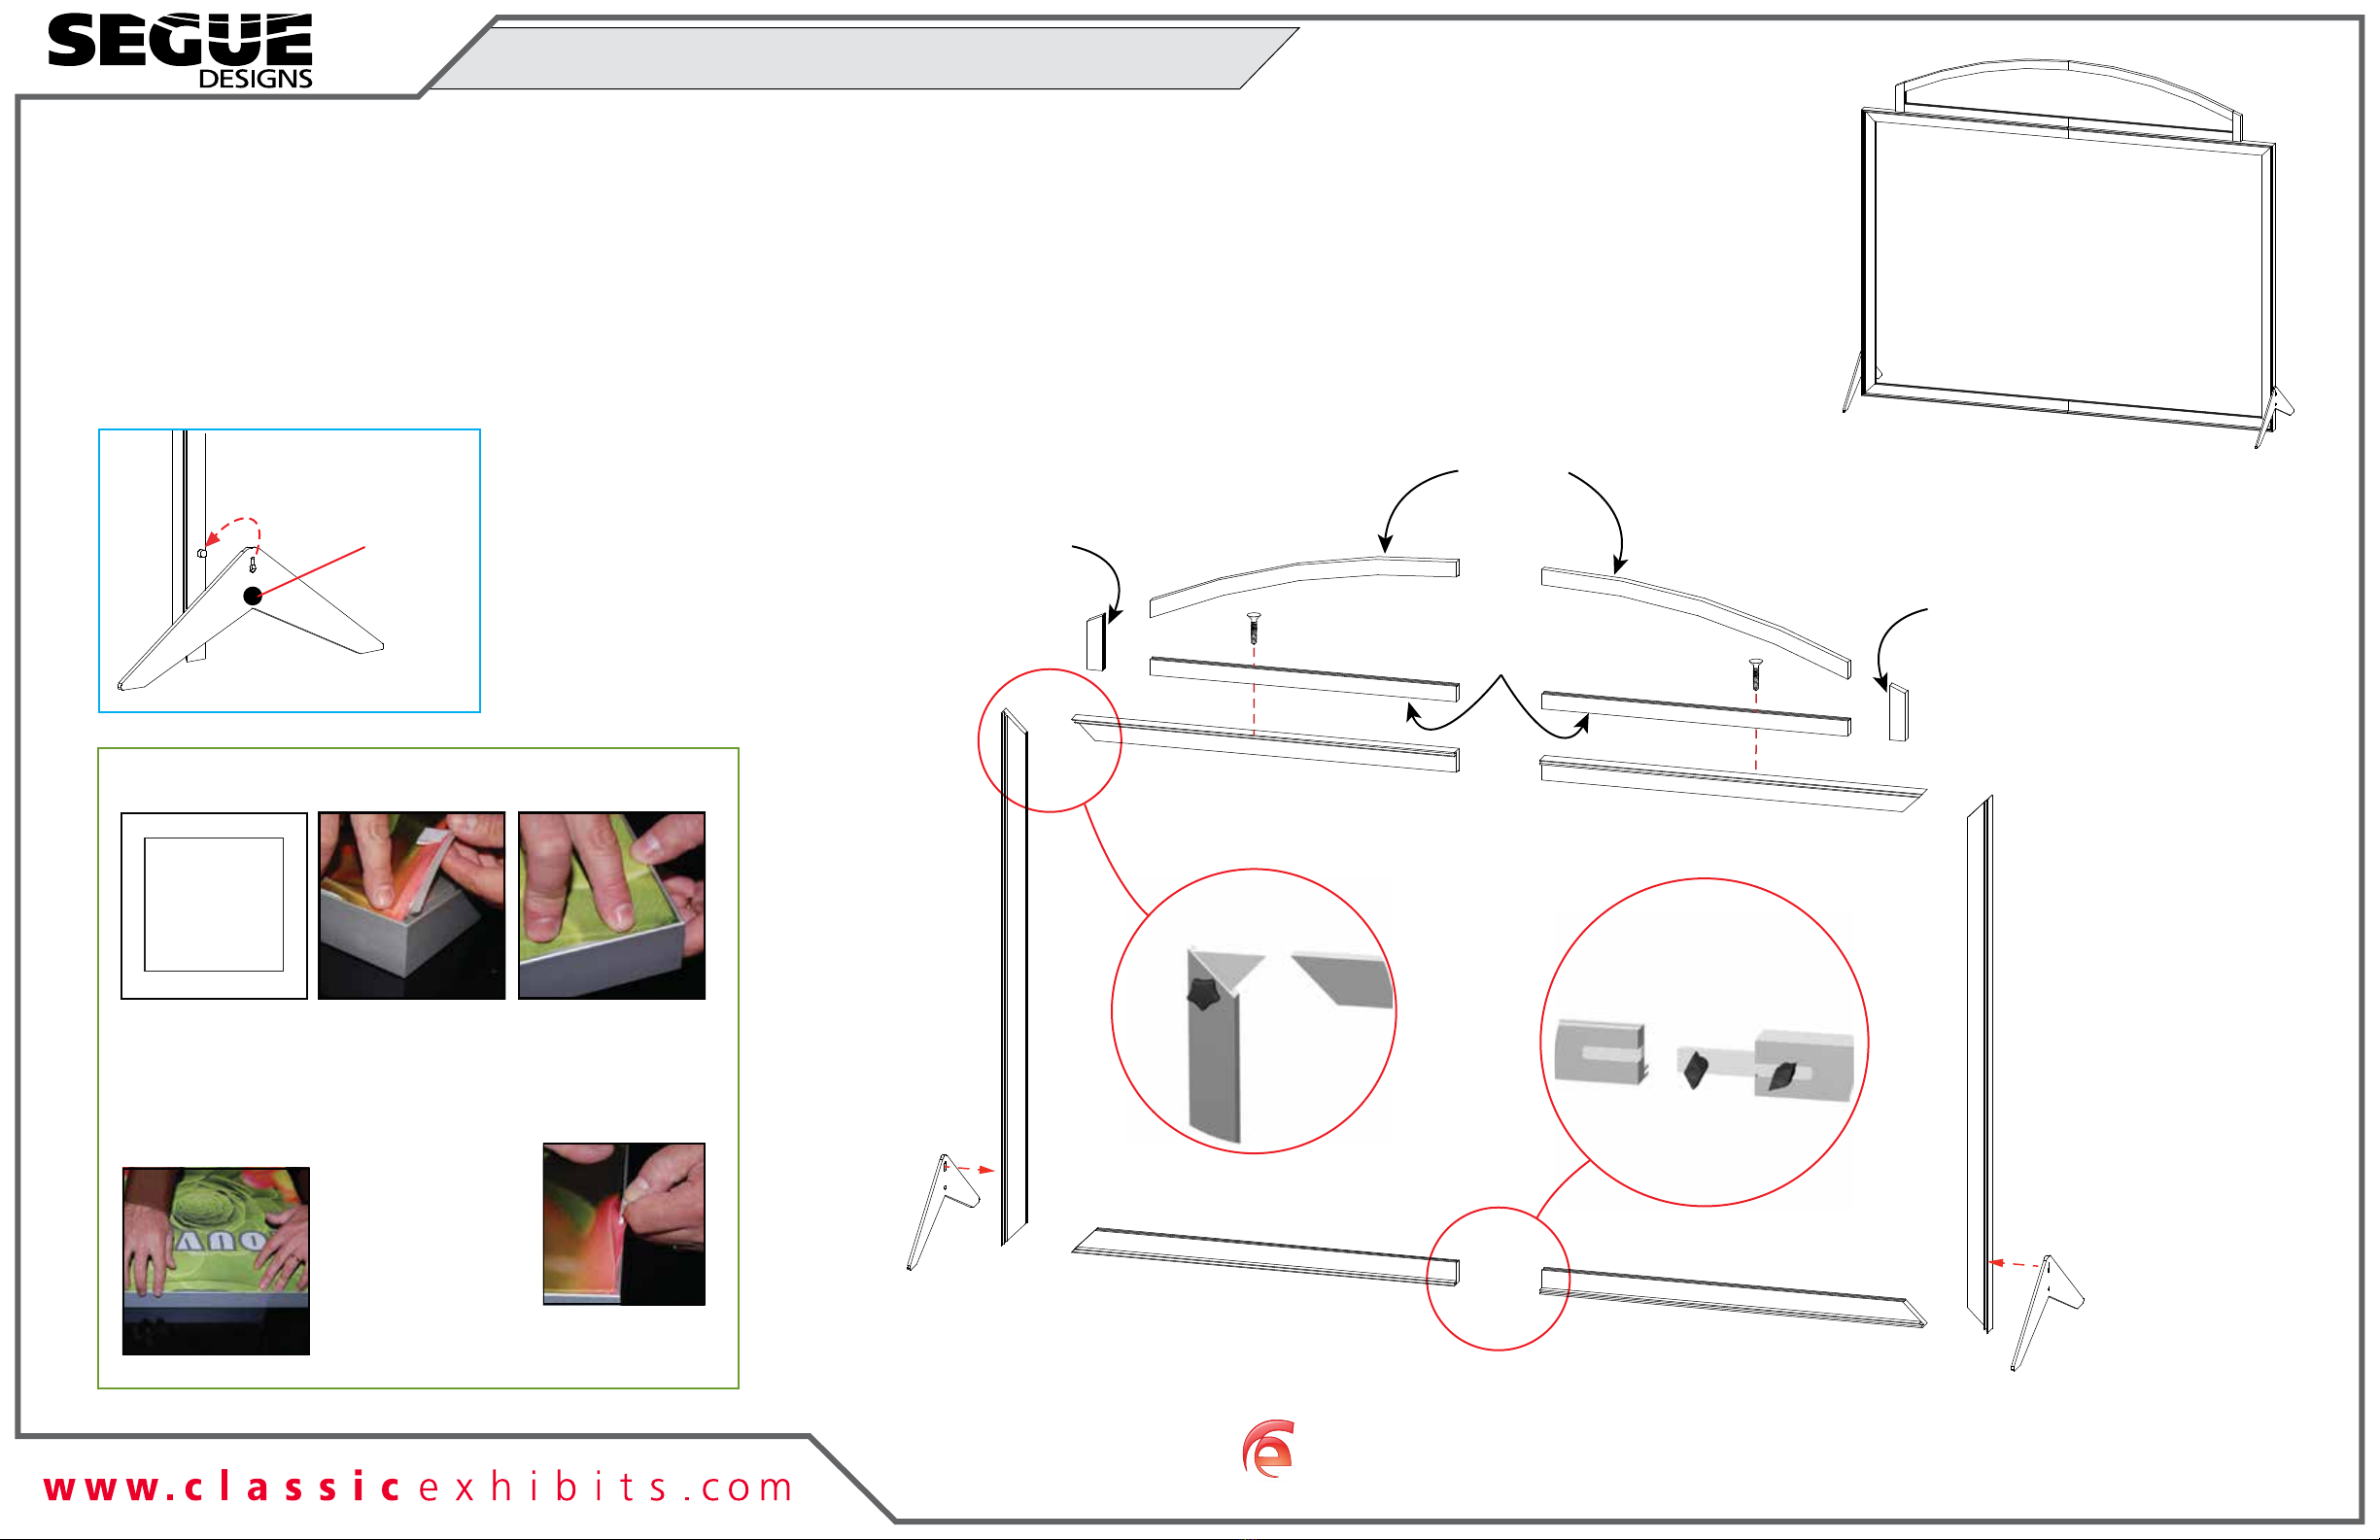
Completed Assembly
Item
1
2
3,3A
4,4A
5,5A
6,6A
7,7A
QTY
1
1
1,1
1,1
1,1
1,1
1,1
Description
44” Vertical Extrusion
44” Vertical Extrusion
31.5” Horizontal Extrusion
31.5” Horizontal Extrusion
25.197” Horizontal Extrusion
4.5” Vertical Extrusion
26.5603” Curved Horizontal Extrusion
Steps:
1) Connect horizontals [3 to 3A] and [4 to 4A]. See Straight detail.
2) Connect verticals [1] and [2] with horizontal assemblies. See Corner detail.
3) Connect header assemblies [5/6/7] and [5A/6A/7A] together.
4) Attach assembled header to [4/4A]. using bolts, making sure Velcro is facing to BACK.
5) Connect Header graphic to Velcro.
6) Attach feet to verticals [1] and [2]. See Foot Attachment detail.
7) Apply graphic to assembled frame. See SEG Graphic Installation detail.
Tighten knob
to secure
Corner
1
2
3
3A
4A
4
5
6
7
7A
5A
6A
and tighten knob
to secure
Slide connecting
bar between
verticals/horizontals
Velcro on
BACK/Inside
Edge Velcro on
BACK/Inside
Edge
Velcro on
BACK/Top
Edges
Velcro on
BACK/Bottom Edges
Header
Tighten Knob
to secure
Hook keyhole
onto bolt.
Foot Attachment
*
Graphic Removal
To remove the graphic from
the frame, locate the fabric
pull tab.Gently pull up on the
tab to remove the fabric.
Step 1
Insert corner A. Turn edge of
graphic so silicon welt is
perpendicular to face of
graphic. Insert narrow side
of welt with fabric to outside
into the channel. Repeat for
other side of this corner.
Step 2
Repeat Step 1 for opposite
corner C, then insert corner
B, followed by corner D, to
complete the installation of
the corners.
Step 3
Once all corners are inserted,
press one silicon edge into
channel from corners and
work toward the center.
Make sure welt is fully inserted
into channel. Continue until
all sides are done. Smooth
out edges of graphic.
SEG Graphic Installation
It is important to first insert
graphic into each alternate
corner then to the sides of
the frame. If this is not done,
graphic will not fit into the
frame correctly.
Corner A
Corner D
Corner B
Corner C
*
*
Straight
Keep extrusions [5/6/7] and
[5A/6A/7A] assembled
when packing.
VK-1853 Sunrise Table Top
If
you
would
like
to
tell
us
about
your
experience
with
your
setup
instructions
please
email
us
at
[email protected]SETUP INSTRUCTIONS


