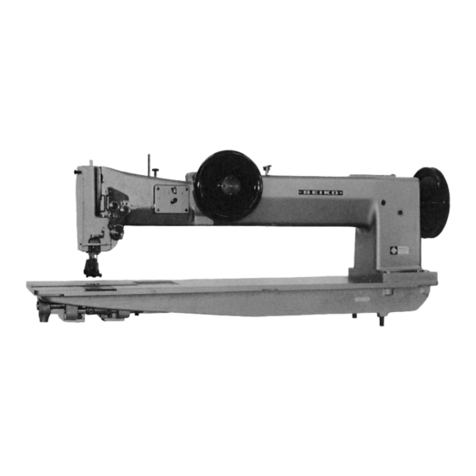
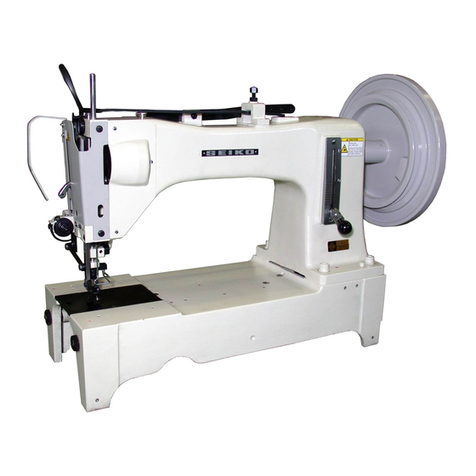
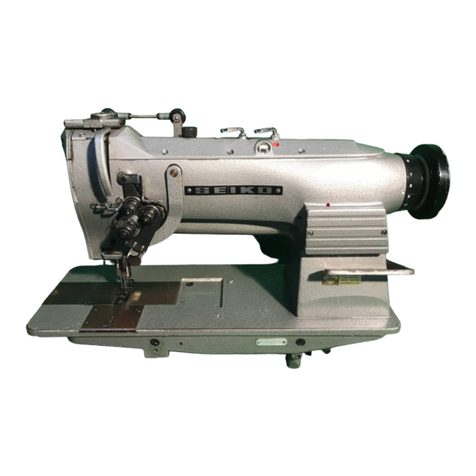
Seiko SKZ-2B User manual

SKZ-2B
SKZ-2B-3
SKZ-6B, SKZ-6B-3
SKZ-6BR, SKZ-6BR-3
SEIKO SEWING MACHINE CO., LTD.
INSTRUCTION MANUAL

Thank you very much for buying a SEIKO sewing machine. Before using your new machine, please read the
safety instructions below and the explanations given in the instruction manual.
With industrial sewing machines, it is normal to carry out work while positioned directly in front of moving
parts such as the needle and thread take-up lever, and consequently there is always a danger of injury
that can be caused by these parts.
Follow the instructions from training personnel and instructors regarding safe and correct operation before
operating the machine so that you will know how to use it correctly.
1. Safety indications and their meanings
This instruction manual and indications and symbols that are used on the machine itself are provided in order
to ensure safe operation of this machine and to prevent accidents and injury to yourself or other people.
The meanings of these indications and symbols are given below.
Indications
Symbols
・・・・・・・・
This symbol (△) indicates something that should be careful of. The picture inside
the triangle indicates the nature of the caution that must be taken.
(For example, the symbol at left means, “beware of injury”.)
・・・・・・・・
This symbol ( ) indicates something that you must not do.
・・・・・・・・
This symbol (●) indicates something that you must do. The picture inside the
circle indicates the nature of the thing that must be done.
(For example, the symbol at left means, “You must make the ground connection”.)
2. Notes on safety
・Use the sewing machine in an area, which ・The ambient temperature should be within
is free from sources of strong electrical the range of 5℃ to 35℃ during use.
noise such as high-frequency welders. Temperatures that are lower or higher than
Sources of strong electrical noise may this may cause problems with correct
cause problems with correct operation. operation.
・Any fluctuations in the power supply voltage ・The relative humidity should be within the
should be within ±10% of the rated voltage range 45% to 85% during use, and no dew
for the machine. formation should occur in any devices.
Voltage fluctuations that are greater than Excessively dry or humid environments and
this may cause problems with correct dew formation may cause problems with
operation. correct operation.
・The power supply capacity should be greater ・Avoid exposure to direct sunlight during use.
than the requirements for the sewing Exposure to direct sunlight may cause
machine’s electrical consumption. problems with correct operation.
Insufficient power supply capacity may cause ・In the event of an electrical storm, turn off
problems with correct operation. the power and disconnect the power cord
・The pneumatic delivery capability should be from the wall outlet.
greater than the requirements for the sewing Lighting may cause problems with correct
machine's total air consumption. operation.
Insufficient pneumatic delivery capability may
cause problems with correct operation.
CAUTION
Environmental requirements
SAFETY INSTRUCTIONS
CAUTION
The instructions which follow this term indicate situations where failure to
follow the instructions could cause injury when using the machine or
physical damage to equipment and surroundings.
ⅰ

・Machine installation should only be carried ・Install the belt guards to the machine head
out by a qualified technician. and motor.
・Contact your SEIKO dealer or a qualified ・If using a work table that has casters, the
electrician for any electrical work that may casters should be secured in such a way so
need to be done. that they cannot move.
・The sewing machine weighs more than
・Use both hands to hold the machine head
55kgf. The installation should be carried out
when tilting it back or returning it to its
by two or more people.
original position. If only one hand is used,
・Do not connect the power cord until instal-
the weight of the machine head may cause
lation is complete, otherwise the machine
your hand to slip, and your hand may get
may operate if the treadle is pressed by
caught.
mistake, which could result in injury.
・Be sure to wear protective goggles and
・Be sure to connect the ground. If the gloves when handling the lubricating oil, so
ground connection is not secure, you run that no oil gets into your eyes or onto your
a high risk of receiving a serious electric skin, otherwise inflammation can result.
shock, and problems with correct operation Furthermore, do not drink the oil under
may also occur. any circumstances, as it can cause vomiting
・All cords should be secured at least 25mm and diarrhea. Keep the oil out of the reach
away from any moving parts. Furthermore, of children.
do not excessively bend the cords or secure
them too firmly with staples, otherwise there
is the danger that fire or electrical shocks
could occur.
・This sewing machine should only be used by ・Attach all safety devices before using the
operators who have received the necessary sewing machine. If the machine is used
training in safe use beforehand. without these devices attached, injury may
・The sewing machine should not be used for result.
any applications other than sewing. ・Do not touch any of moving parts or press
・Be sure to wear protective goggles when any objects against the machine while sewing,
using the machine. If goggles are not worn, as this may result in personal injury or damage
there is the danger that if a needle breaks, to the machine.
parts of the broken needle may enter your ・Use both hands to hold the machine head
eyes and injury may result. when tilting it back or returning it to its
・Turn off the power switch at the following original position. If only one hand is used,
times, otherwise the machine may operate if the weight of the machine head may cause
the treadle is pressed by mistake, which your hand to slip, and your hand may get
could result in injury. caught.
・ When threading the needle
・If an error occurs in machine operation, or if
・ When replacing the needle and bobbin
abnormal noises or smells are noticed, immedi-
・ When not using the machine and when
ately turn off the power switch. Then contact
leaving the machine unattended
your nearest SEIKO dealer or a qualified tech-
* When using a clutch motor, the motor nician.
will keep turning even after the power is
・If the machine develops a problem, contact
switched off as a result of the motor's
your nearest SEIKO dealer or a qualified tech -
inertia. Wait until the motor stops fully
nician.
before starting work.
・If using a worktable that has casters, the
casters should be secured in such a way so
that they cannot move.
CAUTION
Installation
Sewing
ⅱ
・Turn off the power switch before carrying ・Be sure to wear protective goggles and
out cleaning, otherwise the machine may gloves when handling the lubricating oil, so
operate if the treadle is pressed by mistake, that no oil gets into your eyes or onto your
which could result in injury. skin, otherwise inflammation can result.
* When using a clutch motor, the motor Furthermore, do not drink the oil under any
will keep turning even after the power is circumstances, as they can cause vomiting
switched off as a result of the motor's and diarrhea.
inertia. Wait until the motor stops fullyKeep the oil out of the reach of children.
before starting work.
・Use both hands to hold the machine head
when tilting it back or returning it to its
original position. If only one hand is used,
the weight of the machine head may cause
your hand to slip, and your hand may get
caught.
・Maintenance and inspection of the sewing ・Use both hands to hold the machine head
machine should only be carried out by a when tilting it back or returning it to its
qualified technician. original position. If only one hand is used,
・Ask your SEIKO dealer or a qualified elec-
the weight of the machine head may cause
trician to carry out any maintenance and
your hand to slip, and your hand may get
inspection of the electrical system.
caught.
・Turn off the power switch and disconnect ・When checking the rotary hook lubrication,
the power cord from the wall outlet at the do not touch moving parts such as the rotary
following times, otherwise the machine may hook, needle and needle bar with your finger
operate if the treadle is pressed by mistake, or paper nor push them with other objects,
which could result in injury. otherwise injury or damage to the machine
・ When carrying out inspection, adjustment
may result.
and maintenance ・Use only the proper replacement parts as
・ When replacing consumable parts such specified by SEIKO.
as the rotary hook ・If any safety devices have been removed, be
* When using a clutch motor, the motor absolutely sure to re-install them to their
will keep turning even after the power is original positions and check those they
switched off as a result of the motor's operate correctly before using the machine.
inertia. Wait until the motor stops fully・Any problems in machine operation, which
before starting work. result from unauthorized modifications to the
・If the power switch and air need to be left machine, will not be covered by the warranty.
on when carrying out some adjustment, be
extremely careful to observe all safety
precautions.
Maintenance and inspection
CAUTION
Cleaning
ⅲ

CAUTION
Don't hit the hook retaining bracket and the feed rock shaft against the thing of the outside strongly,
when you move a sewing machine for the installation and the check. They may break by the shock.
ⅳ

3. Warning labels
* The following warning labels appear on the sewing machine.
Please follow the instructions on the labels at all times when using the machine.
If the labels have been removed or are difficult to read, please contact your nearest SEIKO dealer.
① ②
Be sure to connect the ground.
If the ground connection is not secure, you run
the risk of receiving a serious electric shock.
③Direction of operation
④Moving parts may cause injury.
Safety devices
・Finger guard
・Thread take-up lever cover
・Belt guard, etc.
ⅴ

1. MAIN PARTS NAMES ………………………………………………………………… 1
2. SPECIFICATIONS …………………………………………………………………… 2
3. WORK TABLE AND MOTOR ………………………………………………………… 3
4. INSTALLATION ……………………………………………………………………… 4
4.1 Installing the hinge rubber cushion and the corner rubber cushion
………… 4
4.2 Installing the oil pan …………………………………………………………… 4
4.3 Installing the machine head ……………………………………………………… 5
4.4 Installing the knee lifter ………………………………………………………… 5
4.5 Installing the V-belt …………………………………………………………… 6
4.6 Installing the bobbin winder ……………………………………………………… 7
4.7 Installing the auxiliary belt guard ……………………………………………… 8
4.8 Installing the thread stand ……………………………………………………… 8
4.9 Checking the machine pulley rotating direction ……………………………… 9
5. LUBRICATION …………………………………………………………………………
10-12
6. PREPARATION BEFORE SEWING ……………………………………………… 13
6.1 Installing the needle …………………………………………………………… 13
6.2 Removing the bobbin case and the bobbin …………………………………… 14
6.3 Winding the lower thread ………………………………………………………… 14
6.4 Installing the bobbin case ………………………………………………………… 15
6.5 Threading the upper thread ……………………………………………………… 16
7. SEWING ………………………………………………………………………………… 17
7.1 Sewing ……………………………………………………………………………… 17
7.2 Backtacking ………………………………………………………………………… 18
7.3 Adjusting the stitch length ……………………………………………………… 18
7.4 Adjusting the stitch width
……………………………………………………… 19
7.5 Adjusting the thread tension …………………………………………………… 20
7.6 Adjusting the foot pressure ……………………………………………………… 21
8. STANDARD ADJUSTMENTS ………………………………………………………… 22
8.1 Adjusting the needle and rotating hook timing ……………………………… 22
8.2 Adjusting the height of the needle ……………………………………………… 23
8.3 Adjusting the clearance between the needle and the hook………………… 24
8.4 Adjusting the height of the feed dog …………………………………………… 25
8.5 Adjusting the inclination of the feed dog ……………………………………… 25
…………
8.6 Adjusting the feed dog position ………………………………………………… 26
8.7 Adjusting the needle and feed timing …………………………………………… 26
8.8 Adjusting the up and down travel of the feeder ……………………………… 27
8.9 Adjusting the thread take-up spring
…………………………………………… 27
8.10 Adjusting the height of the presser foot……………………………………… 28
8.11 Adjusting the swing position of the needle …………………………………… 29
8.12 Adjusting the puller feed amount (SKZ-6BR, 6BR-3) ……………………… 30
8.13 Adjusting the roller pressure (SKZ-6BR, 6BR-3) ………………………… 30
9. TROUBLESHOOTING ……………………………………………………………
31-35
CONTENTS

1. MAIN PARTS NAMES
1

2. SPECIFICATIONS
Variety
Step (point)
Number of needle
Max. sewing speed*
Max. stitch length
Stitch width
by knee
by hand
Needle bar stroke
Needle
Thread
Hook
Thread take-up lever
Lubrication
Alternating presser foot movement amount
Bed size
Working space
Net weight (Head only)
Motor
* Speed depends on threads, materials and type of operation.
Variety SKZ-6B SKZ-6BR SKZ-6B-3 SKZ-6BR-3
Step (point)
Number of needle
Cloth puller device ―○―○
Max. sewing speed*
Max. stitch length
Stitch width
by knee
by hand
Needle bar stroke
Needle
Thread
Hook
Thread take-up lever
Lubrication
Bed size
Working space
Net weight (Head only) 54 kgf 55 kgf 54 kgf 55 kgf
Motor
* Speed depends on threads, materials and type of operation.
Hand type
Single needle
1000 s.p.m.
19/64" (7.5 mm)
0 to 1/2" (0 to 12.7 mm)
Clutch motor
Clearance under presser foot
1/8" to 15/64" (3 to 6 mm)
20-15/32"X9-27/32" (520X250 mm)
10"X7-43/64" (254X195 mm)
55 kgf
Clearance under presser foot19/32" (15 mm)
25/64" (10 mm)
19/32" (15 mm)
11/32" (9 mm)
2" (50.8 mm)
DDXH14 (#25)
#5 (standard)
Extra large horizontal axis hook
Link type
2" (50.8 mm)
DDXH14 (#25)
#5 (standard)
Extra large horizontal axis hook
Link type
Single needle
1,000 s.p.m.
19/64" (7.5 mm)
0 to 1/2" (0 to 12.7 mm)
SKZ-2B SKZ-2B-3
1-step (2-point) 2-step (3-point)
Clutch motor
Hand type
20-15/32"X9-27/32" (520X250 mm)
10"X7-43/64" (254X195 mm)
1-step (2-point) 2-step (3-point)
2

3. WORK TABLE AND MOTOR
■ Work table
・When using a table made by another manufacturer, drill holes in the table as shown in the figure below.
・The top of the table should be 40mm in thickness and should be strong enough to hold the weight and
withstand the vibration of sewing machine.
■Motor
・All cords which are connected to the motor
・ Install the correct belt guard which
should be secured at least 25 mm away from corresponds to the motor being used.
any moving parts. Furthermore, do not
excessively bend the cords or secure them
too firmly with staples, otherwise there is
the danger that fire or electric shocks
could occur.
<Motor>
・ Select the correct motor from those listed
in the table.
・ Refer to the instruction manual for the
motor for details on installing and using the
motor.
<Motor pulley and V-belt>
・ Select the correct motor pulley and Frequency Motor pulley V-belt
V-belt by referring to the table to suit 50 Hz φ95 53 inches
the power frequency of your area. 60 Hz φ80 52 inches
Sewing speed
1,000 s.p.m.
CAUTION
Power Motor
4-pole, 400 W or moreSingle-phase
Three-phase 4-pole, 400 W or more
3

4. INSTALLATION
・A qualified technician should only install ・Do not connect the power cord until
the sewing machine.
installation is complete, otherwise the
・Ask your SEIKO dealer or a qualified machine will operate if the treadle is press-
electrician for any electrical work that may ed by mistake, which could result in injury.
need to be done ・Be sure to connect the ground. If the
・The sewing machine weights more than ground connection is not secure, serious
55 kgf. Two or more people should carry out electric shocks will result.
the installation. ・Install the belt guard to the machine head.
4.1 Installing the hinge rubber cushion and the corner rubber cushion
1. Install the hinge rubber cushion ①on the table
with the two nails ②.(Two places)
2. Install the corner rubber cushion ③at the corner
of the table with a nail.(Four corners)
4.2 Installing the oil pan
Fit the oil pan ①into the opening in the table, and
secure it with 6 nails ②.
CAUTION
4

4.3 Installing the machine head
1. Insert the two hinge connections ①into the
holes in the machine bed.
2. Fit the hinge connection ①to the hinge rubber
cushion ②and then place the machine head onto
the corner rubber cushion ③.
3. Tap the head rest ④(option) into the table hole.
NOTE:
Tap the head rest securely into the table
hole. If the head rest is not pushed in as far as it
will go, the machine head will not be sufficiently
stable when it is tilted back.
4.4 Installing the knee lifter
Assemble a knee lifter ① and install it in the back of the table with four wood screws.
Then, join the knee lifter ① and the chain ② (SKZ-6B : connecting rod) with the hook ③,
and adjust each.
5

4.5 Installing the V-belt
1. Remove the screws ①(4pcs.) and the belt guard side cover ②.
2. Remove the screw ⑤ and the washer ⑥, and then place the V-belt③ onto the machine pulley.
3. Tilt back the machine head, and then place the V-belt ③ onto the motor pulley.
4. Turn the nuts ④ to adjust so that there is 15 to 20 mm of deflection in the V-belt ③ when it is
pressed at the midway point with a force of 9.8N (1kgf).
6

4.6 Installing the bobbin winder
1. Push down the bobbin set lever ① as far as it will
go.
2. Place the bobbin winder pulley ② so that it
pushes the V-belt ③ by approximately 5 mm, and
then place the bobbin winder ④ so that it is parallel
with the belt hole in the work table.
3. Install the bobbin winder ④ to the work table with
the two wood screws ⑤.
4. Pull the bobbin set lever ① back and check that
there is approximately 5 mm of clearance between
the bobbin winder pulley ② and the V-belt ③.
7

4.7 Installing the auxiliary belt guard
Move the auxiliary belt guard ① from behind as
shown in the illustration and tighten it to the belt
guard side cover ② with the thumbscrew ③. Also,
tighten it to the table with two wood screws ④
and two washers ⑤.
4.8 Installing the thread stand
Assemble the thread stand as shown in the
illustration, and then install it to the work table.
* Tighten the nut ① securely so that the thread
stand does not move.
** When installing the thread stand, raise the
spool holder ② to the position where it does
not touch the machine head when the machine
head is tilted back.
8

4.9 Checking the machine pulley rotating direction
・Do not touch any of the moving parts or place any objects against the machine while sewing, as
this may result in personal injury or damage to the machine.
1. Insert the power cord plug into the wall outlet, and
then turn on the power switch.
2. Depress the treadle and check that the direction of
the machine pulley matches the direction of the
arrow ①.
* If the direction of rotation is reversed, change the
direction of rotation to the correct direction while
referring to the instruction manual for the motor.
CAUTION
9

5. LUBRICATION
・Do not connect the power cord until lubrication has been completed, otherwise the machine
may operate if the treadle is pressed by mistake, which could result in injury.
・Be sure to wear protective goggles and gloves when handling the lubricating oil, so that no oil gets
into your eyes or onto your skin, otherwise inflammation can result. Furthermore, do not drink the
oil under any circumstances, as it can cause vomiting and diarrhea.
・Keep the oil out the reach of children.
・The sewing machine should always be lubricated and the oil supply replenished before it is used for the
first time, and also after long periods of non-use.
・Use only the lubricating oil.
・Add 1-2 drops of oil in the places indicated by the arrows.
・Add oil other sliding parts also, while being careful to avoid oil leaks.
・Oiling must be done at least twice daily continuous use.
CAUTION
10

11

12

6. PREPARATION BEFORE SEWING
6.1 Installing the needle
・Turn off the power switch before installing the needle. The motor will keep turning even after the
power is switched off as a result of the motor's inertia. Wait until the motor stopsfully before
starting work. The machine may operate if the treadle is pressed by mistake, which could result in
injury.
1. Turn the machine pulley to move the needle
bar ① to its highest position.
2. Loosen the screw ②.
3. Insert the needle ③ into the needle clamp ④
as far as it will go, making sure that its long
groove face an operator.
4. Tighten the screw ②.
CAUTION
13
This manual suits for next models
5
Table of contents
Other Seiko Sewing Machine manuals

Seiko
Seiko LSW-27BLK User manual

Seiko
Seiko SLH-2B Manual

Seiko
Seiko LD series Manual

Seiko
Seiko LSC-8BV-1.8BLV-1 User manual

Seiko
Seiko PW-6 Manual

Seiko
Seiko Keystone STH-8BLD-3 User manual

Seiko
Seiko CH-2B User manual

Seiko
Seiko TH-2B User manual

Seiko
Seiko SK-6 User manual

Seiko
Seiko JW-8BL-20 User manual