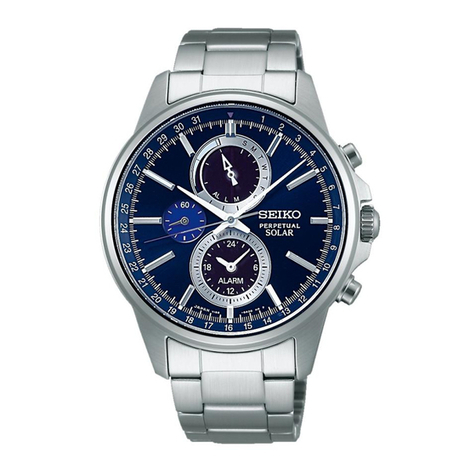
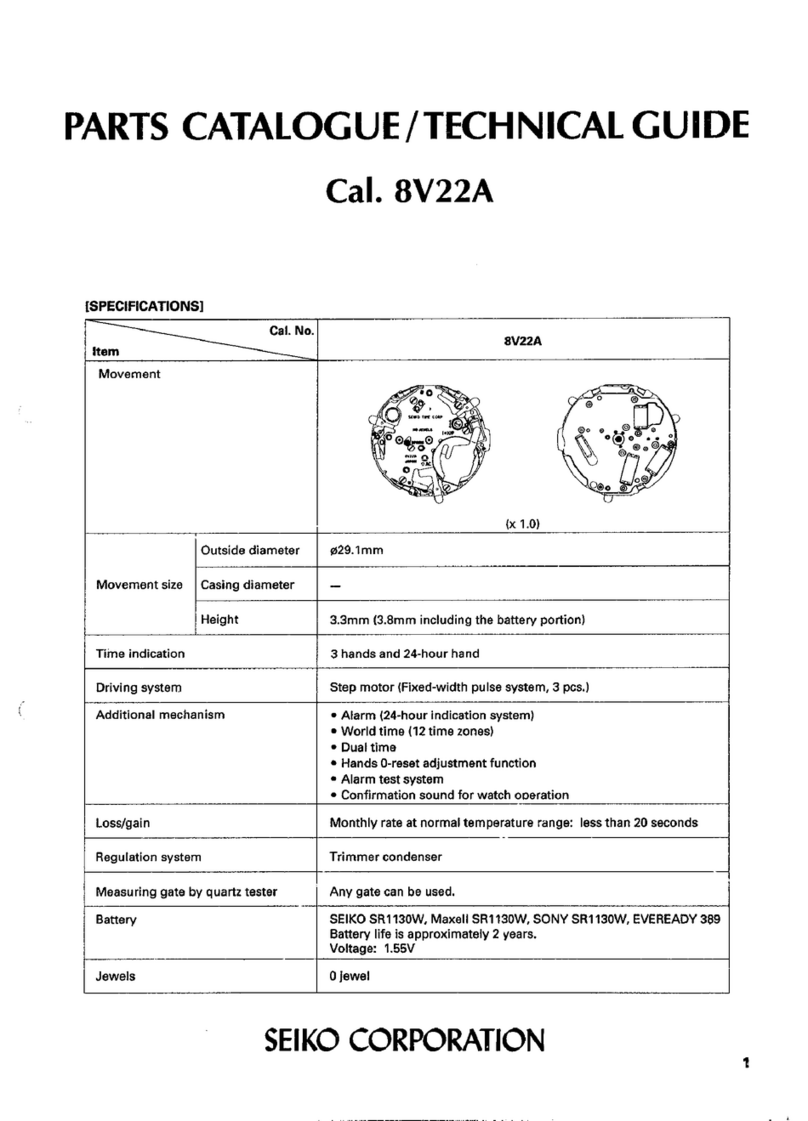
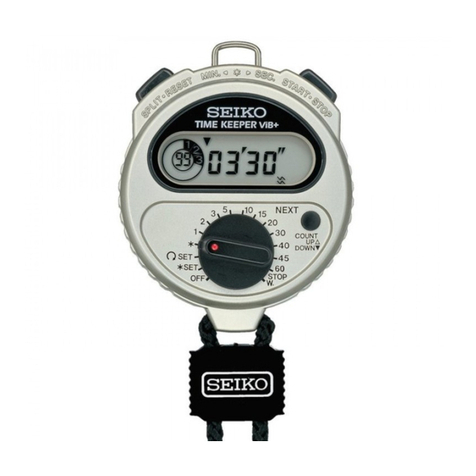
Seiko 7T52 User manual


You are now the proud owner of aSEIKO Analogue Quartz Watch Cal.7T52. For best results.
please read the instructions in this booklet carefully before using your SEIKO Analogue Quartz
Watch. Please keep this manual handy for ready reference.
Vous volci l'heureux propriétaire d’une montre quartz analogique SEIKO Cal. 7T52. Pour obtenir
d’excellentes perlormances de cette article SEIKO, veuillez lire attentivement cette brochure que
vous conserverez pour toute référence ultérieure.
Enhorabuena por su adquisicién de un reloi SEIKO enalogico de cuarzo Cal. 7T52. Para éptimo
resultado, lea detenidamente las instrucciones de este folleto antes de usar el reloj. Guarde este
manual para consulta posterior.
Sie sind jetzt Besitzer einer SEIKO Analog-Quarzuhr Kal. 7T52. Bitte Iesen Sie diese Bedienungsan-
leitung vor Verwendung der Uhr sorgfaltig durch und heben Sie sie gut auf.
Siete ora in possesso di un orologio SEIKO Analogico al Quarzo Cal. 7T52. Per ottenere imigliori
possibili risultati dal Vostro orologio, leggere attentamente le istruzioni di questo manuale prima
di utilizzare il Vostro orologio SEIKO analogico al quarzo. Conservare poi il manuale stesso per
ogni qualsiasi eventuale futuro riferimento.
Vocé pode sentir-se orgulhoso de possuir um Relégio SEIKO Quartz Anélogo Cal. 7T52. Para
obter os melhores resultados, leia atentamente as instruqoes contidas neste opusculo antes de
usar oseu Relogio SEIKO Quartz Analogo. Queira cnservar este manual para referéncias futuras.
F§ITiRT£E@€~§. llihli7T52E*J%§lR$¥Ei’riKE§€?ii filii?$BU#§III$3E$Ii§E-§€i§L1E‘, 5I'%§§>i§
5%§E?1<’I‘iI5°“$=B’~]%lE§5FI. t§§iI%$IIB§£7JDl>5’<’§, L1l§E§5§%%‘ "

H
ENGLS
°°"'TE"'T$ SEIKO ANALOGUE QUARTZ
FEATURES .........................................
MAIN TIME SETTING
CALENDAR SETTING
DISPLAY AND CROWN OPERATIONIIIIIIII """""""""""
Page
\lU'l-P03
1/100 SEC. CHRONOGRAPH
Cal. 7T52
FEATURES
SEIKO Quartz Watch Cal. 7T52 is an analogue watch featuring astopwatch
with a1/100 second hand .
STOPWATCH .................. ..
................... 8IMAIN TIME
HOW TO USE THE TACHYMETER 12 Hour and minute hands with asmall second hand.
ADJUSTING THE HAND POSITION..... 15
NECESSARY PROCEDURE AFTER BATTERY CHANGE. 17 ICAI-‘EN-DAR -
BATTERY LIFE INDICATOR .................. 18 Date ‘S d'sp'aYed '" "“me'a's'
BAITERY CHANGE ........................ ........... '18 ISTQPWATCH
TO PRESERVE THE QUAUTY QF YOUR WATCH 19 It can measure up to 12 hours in 1/100 second increments.
SPECIFICATIONS ........................................ ...................................... 22 IBATTERY LIFE INDICATOR
The small second hand moves at two-second intervals when the battery
needs to be replaced.
ITACHYMETER <
Some models are provided with atachymeter with agraduated dial.
qsBug
23

Eng>1
4
DISPLAY AND CROWN OPERATION
Stopwatch 1/10 second handx
Small second hand\-.__ iii;
stopwatch hour hand/ Stopwatch 5eC°“d hand 3. Push the crown back in to the normal position in accordance with atime
Crown
EThere are three buttons and acrown as shown in the illustratio
Stopwatch 1/100 second hand Hour hand .
/\< V/Minute hand 1/ /S
\/K%.Crown
\5“ /A Small second hand/ "
/
MAIN TIME SETTING
nbelow. /Minute hand
HOW h@"d~\ B'L///Date (Second click)
14; ,
CQ
"3
in
ilt
Q1. Pull out the crown all the way to the second click when the small second
\
~\ '
}
/~ ;.§=
*~Crown i
hand is at the 12 oclock position.
.Turn the crown to set the the hour and minute hands to the desired time.
Stopwatch minute hand signal.
(a) Normal position: Free Notes:
(b) First click :Date setting by turning the crown clockwise 1. When setting the minute hand, advance it 4to 5minutes ahead of the
(c) Second click :Main time setting desired time and then turn it back to the exact time.
Adjusting the stopwatch hand position
LSEug
5

Engsh
6
When setting the hour hand, check that AM/PM is correctly set. Turn the
set for the A.M. or P.M. period. If the date changes to the next, the time
is set for the A.M. period. If it does not change, the time is set for the P.M.
period.
If the stopwatch is measuring and the crown is pulled out to the second
click to set the time, the stopwatch hands are reset to "O" position.
i~wta '1 rt 1" r""1 mar"
:hour hand past the 12 o'clock marker to determine whether the watch is K: P} J“ Eif J
%:|_ iCrown
‘(First click)
Date
1. Pull out the crown to the rst click.
2. Turn the crown clockwise till the date of the previous day appears.
3. Pull out the crown to the second click, and advance the hour and minute
hands till the desired date appears. Then, reset the time as described in
"MAlN TIME SETTlNG”.
4. Push the crown back in to the normal position.
Note: Do not set the date between 9:00 p.m. and 1:00 a.m. Otherwise, the
date may not change properly. If it is necessary to set the date during
that time period, first set the hour hand to any time outside this
period, set the date and then reset the hour hand to the correct time.
U3
us‘3
7

Engs1
8'-9
STOPWATCH *The stopwatch 1/10 second and 1/100 second hands move for 3minutes
The stopwatch can measure up to 12 hours in 1/199 second increments ‘after the measurement is started or restarted and after the split time is
After 12 hours, it will start counting again from "0" and automatically 'e|ea$ed- Themae" thel’ St'3V at “O” Position Whne the smpwatch is
stops counting when the measurement reaches 24 hours_ counting. When the measurement is stopped or split time is measured,
How to read the Stopwatch hands they indicate the 1/10 seconds and 1/100 seconds measured.
Ex.) 9hours 12 minutes 22 seconds 73 ‘V">1>Wat¢h Operao
~Before using the stopwatch, be sure to reset the hands to "0" position.
Stopwatch 1/10 dhd/St th1100
sewn an l,\.‘.—§.;,7 iOpwa C/Second hand When the stopwatch is measuring, press "A" to stop the measurement
§"*’§';’~“";;_ and then press "B" to reset the hands.
5*‘ /St thdh*lf the stopwatch hands do not return to "0" position, reset them
”/opwa CSew“ and following the procedure in "ADJUSTING THE HAND POSlTlON”.
ll “.3 1. Standard measurement
g./ihgeol C/ BA
Stopwatch hour hand "“‘?<¢§)gIj!;U¢;>*/ -H//in:
\Stopwatch minute hand To reset :Press
*The stopwatch minute hand turns afull circle in 30 minutes. When reading 2‘ A°¢l1""1|a"ed elapsed time measufemeni
the hand, therefore, check the position of the stopwatch hour hand. This CTo start :Press "A".
will enable you to conf|rm,for example, whether 10 minutes or 40 minutes To stop Press
have passed To restart 'Press
Ha
us_8

hEngs
To stop Press Acompetitor Press B
Restartand stop ofthe stopwatch can be repeated by To reset ;Press "|3"_
pressing "A"
To reset :Press “B”.
.ll ., To measure the finish time of the second
Notes:
1. Use the stopwatch with the crown at the normal position.
SP"? limefmediatel Tim? measufement 2. lfthecrown is pulled outto the second clickwhile the stopwatch is in use,
To start :Press the stopwatch hands are reset to "0" position.
To measure split time :Press 3. After the stopwatch has been reset, if "A" is pressed before the hands
To release split time :Press "B". reach "0" position, the stopwatch still starts counting from the time “A”
*Measurement and release of the split time can be is Pressed-
repeated by pressing "B".
To stop :Press "A". Demonstration movement of the stopwatch hands
T° Fesei 1Press "B"- Check that the stopwatch hands are reset to "0" position.
Measurement of twg competitors lf "C" is pressed for2seconds with the crown atthe firstclick, the stopwatch
-|-0 Start ;press ~A~_ hands start to show the demonstration movement.
To measure the nish time of the rst *To stop the demonstration, push the crown back in to the normal position
competitor :Press "B". or press uAu' uBu or ncnl
Wheh the Second competitor nishes: *lf the watch is left untouched with the hands showing the demohstration
Press ~A~_ movement, the hands will automatically stop the demonstration in 40
seconds.
ua
us_S

sh
12
HOW TO USE THE TACHYMETER
Eng
igoé
0
-1
>.'1" .I-ml!
1.. pru
To start :Press "A". ,,.. .
To stop .Press "A ~Tachymeter scale gure
Ex. 1)
(For the models with atachymeter scale on the dial) *“‘“‘ I” '*\ lfittakes 40 secondsto go one kilometer (or one mile), the
)Q‘stopwatch second hand indicates "90" on the tachymeter
BA'U59 the ta¢hYmet§F With The $t°PWatCh- l.; scale. This means that the average speed of the vehicle
Stopwatch operation (Standard measurement) Iis 90 knometers (or mes) eho r,
"T: "90 --x1(Kilometer or mile)
To reset Press ,,B,,' (at 40 seconds position )
90 Km/h (mph)
The tachymeter can be used for the following purposes. E><- 2)
lf the measuring distance is extended to 2kilometers (or
(1) To measure the hourly average speed of avehicle miles) or shortened to 0.5 kilometers (miles), multiplythe
ouse the stopwatch to determine how many seconds it figure on the tachymeter scale by 2or 0.5, respectively.
takesto 90 one kimmeter (or one m;|e)_ Thetachymeter We recommend that you utilize the tachymeter in arally,
scale indicated bythe stopwatch second hand givesthe $peedWaV °" circuit race-
average speed per hour. Tachymeter scale figure 2K-| -|
*Please note that the tachymeter scale can be used 90 (at 4° Sewnds p°$'t'°n )X(lometers or ml es)
only when the time required is less than 60 seconds. =130 Km/h (mph)
If it exceeds 60 seconds, shorten the measuring Tht|f‘
distance. (Refer to "Ex. 2" below) 90( ac yme er Sea egure) X0'5 (Knometers or ‘I )
at 40 seconds position mes
=45 Km/h (mph)
us
H5.3
13

Engsh
14
\_\
/“nuIn,‘
l2) To measure the hourly rate of operation 180 (Ta¢|'\Vm9teT scale gure) X15 "abs
at 20 seconds position I
>The tachymeter IS extremely useful in calculatmg factory 00 ,bh
operation efciency or machine production amount. =2'7 1° Sper ou
Ex. 1)
Use the stopwatch to measure the time required to
~...;lq’?;;.,é‘\ \complete one jOb.
\I"\ lfittakes20seconds, thestopwatch second handindicates ADJUSHNG THE HAND POSITION
“' “180" on the tachymeter scale. This h
n:/7 7meanst at 180 l°b$ If the stopwatch hands do not return to "0" position when the stopwatch
will be accomplished in one hour
aw '-Iis reset, follow the procedure below to reset the hands.
\*{.§;;-;i§.¢"/ 180 (Tachymeter scale figure
at 20 seconds position )X1lob =180 Jobs ,,</»‘:'j':\'§*,\
Ex. 2)
Use the stopwatch to determine how many jobs are
accomplished in aspecnc period of time
B,/* t
/"*" Q|‘~1.~\
/':% \_” \\
"-Iiblii
<3
{'55-2:2
If 15jobs are completed in 20 seconds, mul-tiply "180", the \‘?,,‘ 4633*"
figure on thetachymeter scale indicated bythe stopwatch "~91 -2!" '
second hand, by 15. Thus, it is estimated that 2,700 jobs
will be accomplished in one hour.
A
g——Crown
(Second click)
L
@
@
Us~15.8
15

h
Engs
16
17
1. Pull out the crown to the second click. ‘KEECESSARY PROCEDURE AFTER BATTERY CHANGE
2. Press "A" repeatedly to reset the stopwatch 1/10 second and 1/100 _
second hands to “O” position When the battery IS replaced with anew one or the watch hands move
l,fll th drbelow.
3. Press "B" repeatedly to resetthe stopwatch second hand to "0" position. Improper yOOw eproce Ue
4. Press "C" repeatedly to reset the stopwatch hour and minute hands to
"O" position. BA
/
5. Push the crown back in to the normal position. ‘
6. Set the desired time following the procedure in "MAlN TIME SETTING". ‘I “Tcrown _
(Second click)
ll"-"Z7
Note: The hands move quickly ifthe respective buttons are kept pressed.
1. Pull out the crown to the second click.
2. Press "A" and "B" at the same time.
3. Reset the stopwatch hands to "0" position and then setthedesired time.
(Refer to “ADJUSTlNG THE HAND POSlTlON" and MAIN TIME
SETTING )
uaHS.3

sh
Eng
BATTERY “FE WDICATOR ATO PRESERVE THE QUALITY OF YOUR WATCH
Lhfvizznetrzlvneeds ta be TePlaced when you see the small second hand IWATER REs|STANcE
a0-secon intervals instead ofthe normal one-second intervals 'N°"'W"*°"'°$i§*°"°°
The watch wi|l,_however, remain accurate while the second hand is moving Qif “WATER RE5|5TANT" i$‘"°t inscribed 0" the case back, V0111’
at tvvo-second intervals. watch is not water resistant, and care should be taken not to get it
‘wet as water may damage the movement. If the watch becomes
wet, we suggest that you have it checked by an AUTHORIZED SEIKO
DEALER or SERVICE CENTER.
'Water resistance (3 barl
lf "WATER RESISTANT" is inscribed on the case back, your watch
BATTERY CHANGE W3 is designed and manufactured to withstand up to 3bar, such as
Theminiatu brt ,accidental contact with splashes of water or rain, but it is not
2re a9l'Ywhich powersyourwatchshouldlastapproximately d95i9"ed 7°’ Swimming 0' di‘/i"9~
Years |_fY9aI’S- ljlowever. becausethe battery is inserted atthelfactory, its actual ~Water resistance (1 0barl15 bar)
t'h:‘;';:tee'r'\‘/*;‘;“'i:;‘;$f$$'°" "‘aY beleséthanthe specifieqPeriod. When (0% If "WATER RESISTANT 10 BAR" or "WATER RESISTANT 15 BAR"
D.esure to replace it as soon as possible to prevent 1Obar wR is inscribed on the case back, your watch is designed and
any possible malfunction. For battery replacement,we recommend that 15"“ W" manufactured to withstand up to 10 bar/15 bar and is suitable for
You°°"ta°ta"AUTHQR|ZED$ElKODEALER and |'eque5[$E|KosR927w swimming and shallow diving, but not for scuba diving. We
bane|'Y- recommend that you wear aSEIKO Diver's watch for scuba diving.
N1:|f .If used in sea water, rinse the watch in fresh water and dry it
oethegtolpwatch is used formorethan 1houraday. the batterylife completely.
maY 6B55 than the Speied Pefi0d- Do not operate the crown and buttons in water.
ua
Lis_S
18 19

h
Eng
s
20
may
NOTE: ’_,*"‘ ICHEMICALS
Pressure in bar is atest pressure and should not be considered as 1Be careful not to expose the watch to solvents (e.g., alcohol and
corresponding to actual diving depth since swimming movement tends Igasoline), mercury (i.e., from abroken thermometer), cosmetic spray,
to increase the pressure at agiven depth. Care should also be taken 4:4 detergents, adhesives or paints. Otherwise, the case, bracelet, etc.
°" d“/"'19 info Wafeh may become discolored, deteriorated or damaged.
E
‘we ITEMPERATURES ;ICARE OF CASE AND BRACELET
Your watch works 'th tbl ’1To revent possible corrosion of the case and bracelet caused by
Of 5°C and 35°C (41:’Al2|an3 g5°§)?ccuracy between atemperature range /. Idusg moisture and perspiration, wipe them periodically with asoft
TemPBYaiUI'§$ Over 60°C (140°F) may cause battery leakage or shorten ‘my clmh‘
the battery life.
Do not leave your watch in very low temperatures below —10°C (+14°F) .IPRECAUTION REGARDING CASE BACK PROTECT“/E HLM
for along time since the cold may cause aslight time loss or gain. ,lf your watch has aprotective film and/or asticker on the case back,
However, the above conditions will be corrected when the watch re- be sure to peel them off before using your watch. Otherwise,
turns to normal temperature. —perspiration getting in under them may rust the case back.
ISHOCKS 81 VlBRAT|0N hr‘ IPER|OD|C CHECK
'Light activities will not aect your watch, but be careful not to drop lRis lewmmended that the walch be checked Once every 2to 3years"
%ll
Qyour watch or hit it against hard surims, as this [nay cause damage_ '31, Have your watch checked by an AUTHORIZED SEIKO DEALER or SER-
IMAGNETISM
Your watch will be adversely affected by strong magnetism. Keep it
ZNSi. away from close contact with magnetic objects.
VICE CENTER to ensure that the case, buttons, crown, gasket and
crystal seal remain intact.
ua
us‘3
21

sh
Eng
SPECIFICATIONS
1. Frequency of crystal oscillator ............. 32,768 Hz (Hz =Hertz Cycles per second)
2. Loss/gain (monthly rate) ....................... Lessthan15secondsat normaltemperature page
range (5°C ~35°C) (41°F ~95°F)
3' °"e“““°""' ‘e""’°""“'e “’“9" """""""1°°C "*6°°C ‘WP "14°09 i/\I i-/\<; TERISTIQUES ........................................ ....................... 24
4. Driving system ...................................... Step motor, 4pieces M|‘U 1AGE ET EMP|_O| DES REMQN-|-O|Rs 25
5. Dispiaysystem Iii KILAGE DE L'I-IEUFIE PFIINCIPALE Z6
Time .................................................. giggigand mmutehandswithasmallsecond H(ELAGE DU CALENDRIER 28
Calendar Date dismayedin numerals Ii<i<QNOMETRE ........................ 29
Stopwatch Stopwatch hour, minute, second, 1/10 IIIII I5/ATION DU TACHYMETRE ------ ---- 33
Sewnd and 1/100 Second hands. I-II GLAGE DE LA POSITION DES AIGUILLES .... 37
Theswpwatch can measure upt<>12h0urs i>i I\/IARCHE NECESSAIRE APRES REMPLACEMENT DE LA PILE 39
I" ‘/1°°se°°"d‘"°'@"“'*"‘S- WDICATEUR DE CHARGE DE L/-\ PILE ................................. 40
6. Battery........................... SEIKO SR927W, 1piece my/|pLAcEMENT DE LA p||_E ____ __ 40
7- BHIYBYV life indicator POUR PRESERVEFI LA OUALITE DE LA I\/IONTRE 41
8, |C(lntegrated Circuit)c_ivi05_|_5i, 1piece :;i’FC|F|CAT|ONS .... ....................................., 44
IABIE DES MATIERES
*Thespecificationsaresubjecttochangewithout priornotice,f0rproductimprovement.
S\/ONVXIJ
22 23
Table of contents
Other Seiko Watch manuals

Seiko
Seiko Astron 7X52 Installation guide

Seiko
Seiko V110 User manual

Seiko
Seiko Conceptual SNE527P User manual

Seiko
Seiko Conceptual SUR533P User manual

Seiko
Seiko H024A Quick start guide

Seiko
Seiko S140A Installer manual

Seiko
Seiko S351 User manual

Seiko
Seiko 7S26 User manual

Seiko
Seiko 5K25 User manual

Seiko
Seiko SSB367 User manual

Seiko
Seiko SSJ013J1 User manual

Seiko
Seiko 4R57 User manual

Seiko
Seiko 5M42A Quick start guide

Seiko
Seiko C-16 User manual

Seiko
Seiko ASTRON 8X22 GPS SOLAR User manual

Seiko
Seiko Conceptual SUR380P User manual

Seiko
Seiko V693A Installer manual

Seiko
Seiko 4T57A Installer manual

Seiko
Seiko 5T82 User manual

Seiko
Seiko ASTRON GPS SOLAR 3x62 Assembly instructions