Selmo Dynamic User manual

Selmo
Comfort technology
division
“Dynamic”
Electronic control for towel heaters
Rev. Beta
-
March 2018
Selmo
Electronic
Via Pacinotti, 24 - 35030 Rubano (PD) Italy- Tel 049.8976761, Fax 049.8976085 - www.selmo.it
EN
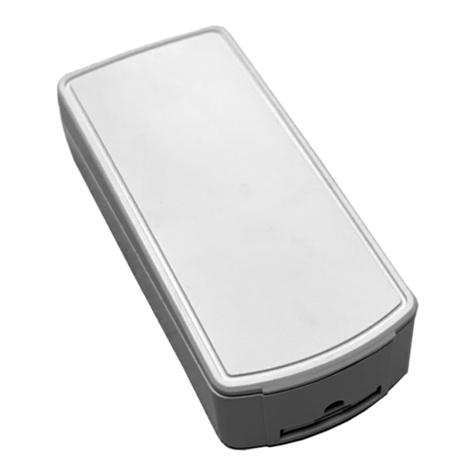
Dynamic is an advanced digital thermostat
for electric towel with fluid heat transfer and
control of environmental
temperature through ambient sensor.
Dynamic is composed by a fixed unity
(placeable in the left or in the right of the
towel warmer) and its provided of a
particular heating element that can rotate
his body of 350°.
the backlight display offers a wide visual of
information about time , mode and
temperature.
Dynamic is a certified product.
Dynamic is according to directives:
Available colors: - White
- Chrome
-Eco-design Directive for Energy-using Products, 2005/32/EC (<0,5W).
EN 62233:2008
EN 55014-1:2006 + A1:2009 + A2:2011
EN 55014-2:1997 + A1:2001 + IS1:2007 + A2:2008 ===> Cat. 2
EN 61000-3-2:2014
EN 61000-3-3:201

Selmo
Comfort technology
division
“Dynamic”
Electronic control for towel heaters
Rev. Beta
-
March 2018
Selmo
Electronic
Via Pacinotti, 24 - 35030 Rubano (PD) Italy- Tel 049.8976761, Fax 049.8976085 - www.selmo.it
EN
Functional characteristics
Function mode: Comfort, Night, Antifreeze, Fil-pilote, Chrono, Timer 2h, Stand -by.
-
In ‘’Comfort’’ mode:
the electronic control maintains the set temperature at the value set by the user.
-
In ‘’Night’’ mode:
the electronic control maintains the ambient temperature at an inferior value respect at
‘’Comfort’’ temperature.
-
In ‘’Antifreeze’’ mode:
the electronic control maintains the temperature over 7°C.
-
In ‘’Fil-Pilote’’ mode:
the electronic control operation is decided by the signal sent by the ‘’Fil-Pilote’’ system.
-
In ‘’Timer 2h’’ mode:
the electronic control activates the heating element for 2 hours, unconditionally by
set temperature. At the end of this period, the thermostat operates again with the
previously set mode. During the 2 hours, for security reasons, the ambient temperature
can’t go higher than 32°C.
-
In ‘’Chrono’’ mode :
the electronic control operates according to a daily program with weekly repetition,
the program can be setted by the user.
-
In ‘’Stand-by’’ mode:
the heating element is deactivated but the electronic control is operative.
Other information:
-
Big backlight display shows: hour, setted temperature and function/mode.
-
3 presetted daily programs and 1 program settable by the user.
-
‘’Open window detection ’’ Function: this function deactivates the heating element
for a max of 30 mins if there is an open window in the room, allowing an energetic saving.

Selmo
Comfort technology
division
“Dynamic”
Electronic control for towel heaters
Rev. Beta
-
March 2018
Selmo
Electronic
Via Pacinotti, 24 - 35030 Rubano (PD) Italy- Tel 049.8976761, Fax 049.8976085 - www.selmo.it
EN
Technical Features
Functions
Comfort, Night, Antifreeze (7°C), Stand-by, Chrono,
Timer 2h, ECO, Fil-Pilote (on I
I Class), Open window
detection, ASC
Certifications
CE
Voltage and Frequency
230 VAC
-
50 Hz
Disponible Powers
From 100 to 1000 Watt
Temperature control range
7°C ÷ 32°C
Insulation Class
Class I, Class II
IP Protection
IP44
Dimensions
71 x 97,5 x 47 mm
Colors
White,Chrome
Optional
Notes
Reparations:
Must be conducted by an autorized assistance center
Compatibility with others products:
Contact your supplier.
Warranty:
2 years of warranty from purchasing date.
Warranty doesn’t responds of this cases:
-
Products damaged by the customer;
-
Products that have been installed or used by the customer not in according with this manual;
-
Products that have been modified by the customer.

Selmo
Comfort technology
division
“Dynamic”
Electronic control for towel heaters
Rev. Beta
-
March 2018
Selmo
Electronic
Via Pacinotti, 24 - 35030 Rubano (PD) Italy- Tel 049.8976761, Fax 049.8976085 - www.selmo.it
EN
Keep this instruction sheet carefully and read it carefully before using this device.
•This device has been designed exclusively for use on towel warmers.
•This thermostat is used to heat the liquid contained inside a heated towel rail in combination with a
heating element. Any other use is prohibited.
•Before use, check that the mains voltage is the same as that of the thermostat (see technical
specifications).
•Only use heating elements suitable for the type of towel warmer used.
•Disconnect the power supply before cleaning or maintenance.
•In case of damage to the power cable, switch the device off and do not tamper with it. Damaged
power cables can only be replaced by the manufacturer or an authorized service center. Failure to
comply with the above can compromise system security and void the warranty.
•Store and transport the heating element only in protective packaging.
•Replacement of the heating element can only be performed by the manufacturer.
•The device can be used by children aged over 8 years and by persons with reduced physical,
sensory or mental abilities, under surveillance. Children must not play with the appliance.
•User cleaning and maintenance must not be carried out by children without supervision.
Caution
Danger of electric shock.
Disconnect the power supply before installation.

Selmo
Comfort technology
division
“Dynamic”
Electronic control for towel heaters
(3)
YES
NO
(4)
(1)
(2)
Rev. Beta - March 2018
Selmo Electronic
Via Pacinotti, 24 - 35030 Rubano (PD) Italy- Tel 049.8976761, Fax 049.8976085 - www.selmo.it
EN
Installation instructions Installer use only
1)
Insert the heating element into the threaded opening in the lower part of the heated
towel rail.
2)
With a 22mm wrench, adequately tighten the resistance with the electronic control to
the body of the towel heater.
3)
The special gasket ensures the tightness of the assembly and allows a slight additional
twist in order to align the thermostat with the towel warmer.
4)
Place the towel warmer in an oblique position (fig 3) making sure that the upper
opening of the towel warmer is in the highest part.
N.B. Do not place the towel warmer on the electronic control of the element
heating.
5)
Fill the towel warmer with the appropriate liquid.
6)
Position the towel warmer vertically and check the level of the internal liquid fig.3.
7)
Make sure of the correct tightening between the towel warmer and the heating
element.
8)
Connect the device to the power supply and activate the heating (In this phase do not
close the upper opening of the towel heater!).
9)
Set the maximum temperature and observe the increase in the liquid level.
- For expansion, the liquid may come out of the towel warmer.
-Remove the excess liquid (with caution to avoid burns) in order not to
wet the thermostat and make sure that the liquid does not reach the edge.
10)
When the liquid level stops rising, wait another 5 minutes and switch off.
11)
If the towel warmer should be refilled, do not wait until it cools down (always paying
attention to the temperature of the internal liquid).
12)
Close the upper opening of the towel warmer with the dedicated cap.
13)
Hook the towel warmer with the appropriate supports on the wall.
14)
Connect the thermostat to the power supply. For versions without an electric plug it is necessary to
install an appropriate device that ensures complete omnipolar disconnection in the conditions of the
overvoltage category III
•
Disconnect the appliance from the mains before installation or maintenance.
•
Protect the device with a 30mAdifferential switch (RCD).

Selmo
Comfort technology
division
“Dynamic”
Electronic control for towel heaters
Rev. Beta
-
March 2018
Selmo
Electronic
Via Pacinotti, 24 - 35030 Rubano (PD) Italy- Tel 049.8976761, Fax 049.8976085 - www.selmo.it
EN
DISPLAY
key [Crono]
key [Prog]
key [ + ]
BACKLIT Display:
Offers a wide visual of
information
key [ - ]
key
[On/stand-by]
BODY
Back
Warming
element
350° revolving
insert
NTC Probe
Alimentation
cable

Selmo
Comfort technology
division
“Dynamic”
Electronic control for towel heaters
Rev. Beta
-
March 2018
Selmo
Electronic
Via Pacinotti, 24 - 35030 Rubano (PD) Italy- Tel 049.8976761, Fax 049.8976085 - www.selmo.it
EN
1
Connection to the Fil-Pilote system
(only for versions with "Fil-Pilote")
Example
1.
One with "Fil-Pilote" function (class II) can be controlled remotely by a control unit that
supports the "Fil-Pilote" system. The brown wire is the phase (L), the gray wire is the
neutral (N) and the black wire is used for the reception of the Fil-Pilote signal.
Do not connect the black wire to the ground.
2.
One without "Fil-Pilote" function (class I), can’t be controlled remotely. The brown
wire is the phase (L), the blue wire is the neutral (N) and the yellow / green wire must be
connected to the ground.
Living room
Thermostat
class II
Bath
Thermostat
class II
"Fil
-
Pilote"
Bedroom1
Thermostat
class II
Bedroom2
Thermostat
class I
P
HASE
N
EUTRAL
Switch
Switch
Switch
Switch
"Fil
-
Pilote"
Station
Thermostat
Thermostat
Thermostat
Thermostat

Selmo
Comfort technology
division
“Dynamic”
Electronic control for towel heaters
Rev. Beta
-
March 2018
Selmo
Electronic
Via Pacinotti, 24 - 35030 Rubano (PD) Italy- Tel 049.8976761, Fax 049.8976085 - www.selmo.it
EN
Function:
"Open window detection".
"keys lock" icon.
Current Chrono program
ASC & ECO functions indicator
Function mode icons:
6- Fil-Pilote
5-Comfort;
4-Night;
3-Antifreeze;
2-Crono;
1-Stand-By
Clock / selected temperature
Comfort/Night bar
"Chrono" mode.
Current Day
1.
ON / STAND-BY
Press the [On / Stand-by] key to turn on the unit or activate the "Stand-by" mode.
When it is active, the set mode and temperature are displayed. During "Stand-by" the display shows
the symbol On / Off, the current time and the day of the week.
NOTE: When the device enters "Stand-by" mode, 2 sounds of 0.5 seconds are emitted.
When the device is switched on, it emits two sounds lasting one second.
Mod. Comfort Mod. Stand-by

Selmo
Comfort technology
division
“Dynamic”
Electronic control for towel heaters
Rev. Beta
-
March 2018
Selmo
Electronic
Via Pacinotti, 24 - 35030 Rubano (PD) Italy- Tel 049.8976761, Fax 049.8976085 - www.selmo.it
EN
2.
COMFORT / NIGHT MODE
Two different temperature levels can be set:
-
"COMFORT" TEMPERATURE: this is the temperature used for the "Chrono", "Fil-Pilote" and
"Comfort" modes.
-
"NIGHT" TEMPERATURE: this is the temperature used for "Night" and "Chrono" modes.
The desired temperature setting can be set by pressing the [+] and [-] buttons.
The temperature regulation range is between 7 ° C and 32 ° C.
IMPORTANT!
The "Night" temperature is always lower than the "Comfort" temperature and the priority is
assigned to the "Comfort" temperature. For this reason the "Night" temperature can be set in the
range 7 ° C ÷ ("Comfort" - 0.5 ° C), on the contrary the "Comfort" temperature can be set within the
entire range: ("Night" + 0 , 5 ° C) to 32 ° C.
3.
OPERATIVE MODE
Press [Prog] to select the desired mode (see the picture).
On/Stand-By
Crono
Antifreeze
Night
Comfort
Fil - Pilote
COMFORT MODE
The "Comfort" mode allows you to maintain the set room temperature.
To set this mode:
-
Press the [Prog] key until the "Comfort" mode icon appears on the display.
-
Set the desired temperature with the [+] and [-] buttons.
NIGHT MODE
In "Night" mode, a temperature lower than the "Comfort" temperature is set.
We recommend using this mode at night or when the room is not used for 2 hours or more.
-
Press the [Prog] key until the "Night" icon appears on the display.
-
Set the desired temperature with the [+] and [-] buttons.
ANTIFREEZE MODE
In the "Antifreeze" mode the temperature is set at 7 ° C. The appliance activates the heating element
when the room temperature drops below 7 ° C. We recommend using this mode when the room is not
used for several days.
-
Press the [Prog] key until the "Antifreeze" icon appears on the display.
TIMER 2H MODE
The "2h Timer" mode can be used to quickly heat the room or speed up the drying of the wipes.
-
Press the [Prog] key until the "" " icon appears on the display.
The appliance is switched on at maximum power for 2 hours, but the ambient temperature, for safety
reasons, cant be higher than 32°C. The "2h Timer" mode automatically stops after a period of 2 hours
and return to the previously set operating mode. If necessary, the user can return to other modes at
any time by simply pressing the [Prog] key.

Selmo
Comfort technology
division
“Dynamic”
Electronic control for towel heaters
Rev. Beta
-
March 2018
Selmo
Electronic
Via Pacinotti, 24 - 35030 Rubano (PD) Italy- Tel 049.8976761, Fax 049.8976085 - www.selmo.it
EN
FIL-PILOTE MODE
(Only for models equipped with "Fil-Pilote" connection).
In "Fil-Pilote" mode the appliance is managed by a central system, which sets the operating mode for all
connected thermostats.
The device also recognizes the most advanced "Fil-Pilote" system with six orders that allows the use of the
functions described below.
1
Standby: switch off the heating element, the thermostat remains on.
2
Comfort: maintains the "Comfort" temperature set by the user.
3.
Eco: maintains the ambient temperature lower than 3.5 ° C compared to the "Comfort" temperature.
4.
Anti-freeze : maintains the ambient temperature at 7 ° C.
5.
Comfort-1: maintains the ambient temperature lower than 1 ° C with respect to the temp. "Comfort".
6.
Comfort-2: maintains the ambient temperature lower than 2 ° C with respect to the temp. "Comfort".
NOTES: activating this mode in versions without fil-pilote, the thermostat operates in Comfort mode.
To activate the "Fil-Pilote" function:
-
Press the [Prog] key until the "Fil-Pilote" mode icon appears on the display.
-
Set the comfort temperature with the [+] and [-] buttons.
If the "Fil-Pilote" system is not installed, the system operates in "Comfort" mode.
CHRONO MODE
Chrono mode programmation
a)
Set the current day and time
-
Activate the "Stand-by" mode and press the [Crono] key for more than 3 seconds.
-
The display will show the words: "Ted '’
-
Press the [Prog] key to enter the mode.
Set the current day with the [+] and [-] keys (from 1 to 7).
-
Press the [Prog] button again to confirm.
The display now shows the current time to be confirmed
'Hours': use the [+] and [-] keys to set the time and confirm with the [Prog] key.
'Minutes': repeat the same procedure and confirm with the [Prog] key.
-
At the end the thermostat returns to "Stand-by" mode.
b)
Set the program for the Chrono mode:
-
Enter "Stand-by" mode and press the [Chrono] key for more than 3 seconds.
-
At the top of the display you will see the words: "Ted’’
-
To set the time sequence of the "Chrono" mode, press the [+] key until
that the word ‘’Prog’’ (Programming) appears on the display.
[See the photo on the right]
-
Press the [Prog] key to enter the mode.
Now a time sequence can be set for each day of the week.
Starting with day 1, select the desired sequence with the keys [+] and [-]
to select, for each hour, between the "Comfort" temperature (full bar) button [+]
and the "Night" temperature (empty bar) [-] key.
Press [Prog] to confirm the first day setting,
repeat the same procedure for the remaining 6 days of the week.

Selmo
Comfort technology
division
“Dynamic”
Electronic control for towel heaters
Rev. Beta
-
March 2018
Selmo
Electronic
Via Pacinotti, 24 - 35030 Rubano (PD) Italy- Tel 049.8976761, Fax 049.8976085 - www.selmo.it
EN
1 2 3 4 5 6 7 8 9 10 11 12 13 14 15 16 17 18 19 20 21 22 23 24
1 2 3 4 5 6 7 8 9 10 11 12 13 14 15 16 17 18 19 20 21 22 23 24
CHRONO MODE
c)
To use a predefined mode (P1 P2 P3) or the programmable mode (P4) press the
[Stand-By / ON] key and exit stand-by mode, press the [Prog] key until symbol
appears in the display. At the top of the display the program in use is displayed (from
P1 to P4),
programs are selected by pressing the [Chrono] key, in the external part of the display
you can see, for each program, the time operation bars of the indicated program.
Chrono mode preset programs
P1 lun-ven
sab-dom
lun-ven
sab-dom
lun-ven
sab-dom
P2
P3
1
2
3
4
5
6
7
8
9
10
11
12
13
14
15
16
17
18
19
20
21
22
23
24
1
2
3
4
5
6
7
8
9
10
11
12
13
14
15
16
17
18
19
20
21
22
23
24
1
2
3
4
5
6
7
8
9
10
11
12
13
14
15
16
17
18
19
20
21
22 23 24

Selmo
Comfort technology
division
“Dynamic”
Electronic control for towel heaters
Rev. Beta
-
March 2018
Selmo
Electronic
Via Pacinotti, 24 - 35030 Rubano (PD) Italy- Tel 049.8976761, Fax 049.8976085 - www.selmo.it
EN
Keys lock
This feature allows the user to lock the keypad to prevent accidental changes. All buttons on the remote
control are locked. To activate the key lock function, press [Prog] for 3 seconds. To deactivate the
function, repeat the procedure.
Open window Function
The device allows to detect the presence of an open window to limit the energy consumption, to activate this
mode, activate the Stand-by mode, press the [Chrono] key for more than 3 seconds, scroll the modes with
the key [+] and select FUNC with the [Prog] key, the window icon will flash in the upper left of the display,
using the [+] key select ON / OFF, visible in the center of the display, and confirm with [Prog] .
the
icon will be active during the thermostat operation, if the open window is detected, the icon will be
flashing and the system will turn off the heating for a maximum of 30 minutes or until a temperature increase
of at least 1, 5 ° C.
ASC Function
This function allows you to optimize the operating times of the device, in order to limit consumption, by
activating this mode the device will record the time necessary to bring a specific room to the set temperature,
adjusting its operation automatically, in this way thermostat can be activated after time setted if is possible to
reach the desired temperature in less time than that foreseen by the operating time intervals that have been
set. activate Stand-by mode, press the [Chrono] key for more than 3 seconds, scroll through the modes
with
the [+] key and select FUNC with the [Prog] key, press it until the icon appears on the upper part of
the screen, select ON with the [+] key and press [Prog] again to confirm. After a few seconds, the remote
control automatically returns to Stand-By mode.
ECO MODE
This mode reduces the consumption of electricity at 3 ° C (Comfort - 3 ° C). in Stand-by mode, press the
[Chrono] key for more than 3 seconds, scroll the voices with the [+] key and select FUNC with the
[Prog] key, press it until the ECO icon appears, select ON with the button [+] and press [Prog] again to
confirm. After a few seconds, the remote control automatically returns to Stand-By mode.

Selmo
Comfort technology
division
“Dynamic”
Electronic control for towel heaters
Rev. Beta
-
March 2018
Selmo
Electronic
Via Pacinotti, 24 - 35030 Rubano (PD) Italy- Tel 049.8976761, Fax 049.8976085 - www.selmo.it
EN
The thermostat is supplied in 2 different versions; in the first version on the lower left, the heating
element is supplied together with the thermostat, already mounted. In the second version, however,
it will be necessary to provide for the assembly of the element itself as supplied separately.

Selmo
Comfort technology
division
“Dynamic”
Electronic control for towel heaters
Rev. Beta
-
March 2018
Selmo
Electronic
Via Pacinotti, 24 - 35030 Rubano (PD) Italy- Tel 049.8976761, Fax 049.8976085 - www.selmo.it
EN
Assembly
(For without resistance elements)
1-
Remove the rear half of the plastic trim cover
2-
Also remove the front half of the ring nut
3-
Remove the 4 screws (A, B, C, D) of the rear cover to
access the Fast-on for the resistance connection
4-
Remove the back cover, the Fast-on connectors for the
resistance connection are indicated by the arrows (1) and
(2).
A
B
C
D
2 1

Selmo
Comfort technology
division
“Dynamic”
Electronic control for towel heaters
Rev. Beta
-
March 2018
Selmo
Electronic
Via Pacinotti, 24 - 35030 Rubano (PD) Italy- Tel 049.8976761, Fax 049.8976085 - www.selmo.it
EN
Heating element mounting
1-
Place the resistive element in such a way that
the two rubber o-rings match with the
corresponding guides, in the plastic body of the
chrono thermostat.
2-
Connect the 2 Fast-on connectors to the
connectors previously indicated by the arrows;
press until you feel the joint.
3-
When both connectors are connected,
close the chrono thermostat cover, now
ready for use.

Selmo
Comfort technology
division
“Dynamic”
Electronic control for towel heaters
Rev. Beta
-
March 2018
Selmo
Electronic
Via Pacinotti, 24 - 35030 Rubano (PD) Italy- Tel 049.8976761, Fax 049.8976085 - www.selmo.it
EN
Heating Element
The following resistive element is supplied.
Below are the instructions for connecting the thermostat resistance.

Selmo
Comfort technology
division
“Dynamic”
Electronic control for towel heaters
Rev. Beta
-
March 2018
Selmo
Electronic
Via Pacinotti, 24 - 35030 Rubano (PD) Italy- Tel 049.8976761, Fax 049.8976085 - www.selmo.it
EN
Assembly
(For on-board heating element versions)
1- For versions with
resistance on board, only
the thermostat must be
installed.
3- Fasten the heating
element to the body of
the towel heater using
a 22 mm wrench.
2- Insert the heating
element into one of the
two lower holes of the
heated towel rail.
4-
After fixing, make sure
that the thermostat
rotation range is sufficient
to satisfy the final
positioning needs.

Selmo
Comfort technology
division
“Dynamic”
Electronic control for towel heaters
Rev. Beta
-
March 2018
Selmo
Electronic
Via Pacinotti, 24 - 35030 Rubano (PD) Italy- Tel 049.8976761, Fax 049.8976085 - www.selmo.it
EN
Assembly
(For on-board heating element versions)
5-
Once assembled and
verified the circular
movement excursion, it will
be necessary to mount the
plastic protections for the
resistance base.
7- The front part must be
lodged in its seat exerting a
pressure in the middle of it.
6-
Insert the front part first,
with protruding and
perforated flaps
8- Position the rear part
with the same procedure,
making sure that it is
securely hooked to the
chrono thermostat body.
8-Final result
The manufacturer reserves the right to make
any changes at any time he deems necessary
to improve the product without prior notice.
DISPOSAL
This appliance is not an ordinary waste. It must be
disposed of through appropriate collection
centers. In case of replacement, it can be return to
the distributor. This end-of-life treatment of the
product will allow us to preserve our environment
and to curb the consumption of natural resources.
This symbol applied to the product indicates the
obligation to deliver it to the appropriate collection
centers to be disposed of in compliance with the
directive 2002/96 / CE (WEEE).
Table of contents
Popular Temperature Controllers manuals by other brands
Oregon Scientific
Oregon Scientific THGN132N user manual
Auber Instruments
Auber Instruments WS-1510DPM Operation & instruction manual
Panasonic
Panasonic CZ-64ESMC3 quick reference

Omega
Omega CN616TC1 user guide

FE
FE PUMA instruction manual

Honeywell
Honeywell FIRE-LITE ALARMS W-H355 Installation and maintenance instructions
