- 9 - 08/2020
Copyright © 2020, Fast ČR, a.s.
■ In the event that the robotic vacuum cleaner is not used for an extended period of
time, disconnect the charging base from the power socket and store it in adry, clean
and cool place. During standard use of the vacuum cleaner, you can leave the base
permanently connected to mains power.
CHARGING THE BATTERY FOR THE FIRST TIME
■ Before using the robotic vacuum cleaner for the first time, it is necessary to fully
charge the battery A16 for aperiod of at least 12 hours. Subsequent recharging then
takes approximately 3-4 hours.
■ Check that the charging base is correctly positioned and connected to a power
socket according to chapter Location of the charging base. Set the power switch
A7 to position I(on). Grasp the robotic vacuum cleaner and manually place it into
the charging base so that the charging contacts A9 on the underside of the robotic
vacuum cleaner and the charging contacts B7 on the charging base are connected.
When the contacts are connected, the charging process will start.
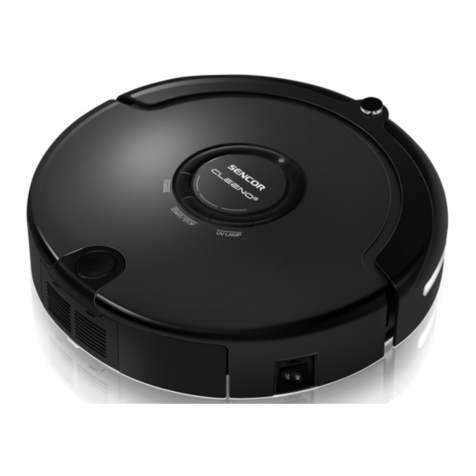
■ The robotic vacuum cleaner can also be charged without using the charging base.
Insert the plug B2 of the power adapter into socket A6 of the vacuum cleaner, and
insert the power cord plug into apower socket.
■ During the charging process, lines are gradually displayed from left to right on the
display A2.
■ When the battery is fully charged, the charging process will stop automatically. The
lines will remain permanently lit. The robotic vacuum cleaner is now ready for use.
OPERATING THE ROBOTIC VACUUM CLEANER
TURNING THE ROBOTIC VACUUM CLEANER ON AND OFF
■ Turn on the power supply to the robotic vacuum cleaner by setting the power
switch A7 to position I(on). A sound signal is made, the backlight of button A4
will start flashing and the descriptions above the control buttons A3 will gradually
light up. After the internal system of the vacuum cleaner is loaded, the descriptions
and button A4 will remain permanently lit. The battery power level indicator will be
shown, see fig C. The robotic vacuum cleaner is now in stand-by mode and ready
for operation.
■ Setting the power switch A7 to position 0(off) will turn off the power supply to the
robotic vacuum cleaner. The display A2 and the backlight of button A4 will turn
off completely. When the robotic vacuum cleaner is turned off, it will not respond
to any button.
STAND-BY MODE
■ The stand-by mode means that the robotic vacuum cleaner is ready for use. The
battery power level indicator is lit on the display A2 and the descriptions of the
main functions of the vacuum cleaner are lit above the control buttons. Button A4
is backlit.
■ The robotic vacuum cleaner goes into the stand-by mode whenever the main switch
A7 is set to the ON position.
SLEEP MODE
■ The robotic vacuum cleaner will automatically enter sleep mode after three minutes
of inactivity. The display and the backlight of button A4 will turn off.
SETTING THE DATE AND SYSTEM TIME OF THE ROBOTIC VACUUM CLEANER
■ The system time is actually the current time. It must be correctly set if you wish to
use the scheduled cleaning function.
■ In the stand-by mode or in the charging mode, press button C3 (CLOCK) on the
charging base. All the available options for setting days and time, including the
current time will be shown on display A2, see fig. D
■Setting the day: Repeatedly press button D2 (DAY) to select the day of the week.
The days of the week will change cyclically from left to right from Su (Sunday) to Sa
(Saturday). Hold down the button D2 to speed up the setting process.
■Setting the hours: Repeatedly press button D3 (HOUR) to set the hours value. The
value changes cyclically and is in 24h format.
■Setting the minutes: Repeatedly press button D4 (MIN) to set the minutes value.
The value changes cyclically.
■ Confirm the selected value by pressing button D5 (OK). The system time has now
been set.
■ All options can be cancelled at any time by pressing button A4. The other option
is not to perform any change within 30 seconds, the system time setting mode will
automatically be cancelled and the previously set time will be shown. The setting
will not be stored in memory.
SELECTING THE ROBOTIC VACUUM CLEANER CLEANING MODE
■ Place the vacuum cleaner on the floor in alocation with enough free space. Check
that the entry door into your apartment or house is closed. From the floor surfaces,
remove clothing, paper, toys, power or extension cords and other items that the
vacuum cleaner could suck in or catch. Lift curtains and drapes that reach to the
floor so that they do not get caught in the vacuum cleaner.
Tip:
During the first vacuum in anew environment, watch the movement
of the robotic vacuum cleaner. You can thereby recognise problematic
obstacles and remove them for the next cleaning session.
Note:
Before starting the robotic vacuum cleaner, always check that the dust
filter H4 is inserted inside the dust container A14.
AUTOMATIC CLEANING MODE
■ Press button A4. The robotic vacuum cleaner will enter the automatic cleaning
mode, in which it effectively combines various routes to achieve an optimal clean of
the entire floor area. As soon as the vacuum cleaner finishes cleaning, it will seek out
the charging base and dock there to recharge.
■ Button A4 is backlit while the robotic vacuum cleaner is running. In the event that
an error occurs, for example one of the wheels on the robotic vacuum cleaner
becomes jammed due to an obstruction, the backlight of the button will turn off, the
respective error code will appear on the display and an acoustic signal will be made.
■ If the battery is discharged while vacuuming, the backlight of the button will turn
off.
■ The automatic cleaning mode can be cancelled at any time by pressing button A4.
AREA (SPOT) CLEANING MODE - 1.5 × 1.5 METRES
■ Place the robotic vacuum cleaner approximately in the middle of the area that you
wish to clean.
■ Press button C5. The robotic vacuum cleaner will enter the cleaning mode in which
it will move in straight parallel lines and vacuum an area of approximately 1.5 ×
1.5 metres. As soon as the robotic vacuum cleaner finishes cleaning this area, it will
return back to the starting point.
Note:
If you lift the turned on vacuum cleaner off the floor, the vacuum
cleaner will run for afew seconds and then stop completely, asound
signal will be made and error message E0 06 will appear on the display.
Put the vacuum cleaner back down on the floor and press button A4,
the vacuum cleaner will resume cleaning.
OTHER FUNCTIONS OF THE ROBOTIC VACUUM CLEANER
RETURN TO THE CHARGING BASE AND CHARGING FUNCTION
■ The robotic vacuum cleaner will automatically switch to the return to charging base
B5 mode when it completes the selected cleaning mode, with the exception of the
SPOT cleaning mode, and when it detects low voltage of the battery A16 during
operation. The mode can be activated by pressing button C2.
■ In this mode, the robotic vacuum cleaner automatically seeks out the route to the
charging base B5 and docks itself to enable the battery A16 to recharge. As soon
as it docks itself successfully, the charging cycle will commence. If it is unable to
detect the charging base, it will stop and it is necessary to place it on the charging
base manually.
■ Make sure that the charging base B5 is located in accordance with the instructions
provided in chapter Installation location and using the charging base. Otherwise,
the robotic vacuum cleaner may not dock successfully.
SCHEDULED CLEANING FUNCTION
■ This function is used to set the day of the week and time in advance, when the
robotic vacuum cleaner is to start automatic cleaning.
Note:
The scheduled cleaning time setting is based on the system time of
the robotic vacuum cleaner. Therefore, before setting the scheduled
cleaning time, it is necessary to correctly set the system time as
described in chapter SETTING THE SYSTEM TIME OF THE ROBOTIC
VACUUM CLEANER.
Setting scheduled cleaning:
■ In the stand-by mode or in the charging mode, press button E5 (SCH) on the
charging base. All the available options for setting days of the week and time of the
planned cleaning, including possibly an earlier set cleaning time E1 will be shown
on display A2, see fig. E.
■Setting the day: Repeatedly press button E3 (DAY) to select the day of the week.
The days of the week will change cyclically from left to right from Su (Sunday) to Sa
(Saturday). Confirm the selected day by pressing button E6 (OK).
■Setting multiple days: After setting the first day of the week, again press button
E3 (DAY). The first set day of the week will be lit on the display and the other day
of the week will flash. Set the other days in the same way as when setting asingle
day of the week.
■Setting the hours: Repeatedly press button E4 (HOUR) to set the hours value. The
value changes cyclically and is in 24h format. Confirm the selected value by pressing
button E6 (OK).
■Setting the minutes: Repeatedly press button E5 (MIN) to set the minutes value.
The value changes cyclically. Confirm the selected value by pressing button E6 (OK).
The planned cleaning time is now set.
■ All options can be cancelled at any time by pressing button A4. The other option
is not to perform any change within 30 seconds, the planned cleaning time setting
mode will automatically be cancelled. The setting will not be stored in memory.
Cancelling scheduled cleaning
■ Press button E5 (SCH).
■ Use button E3 (DAY) to select aday of the week for which you wish to cancel the
planned cleaning. Hold down button E3 (DAY) until the set time value is reset to
zero, see E1. Confirm the selection using button E6 (OK). If you wish to cancel the
planned cleaning for multiple days, proceed in the same manner.
