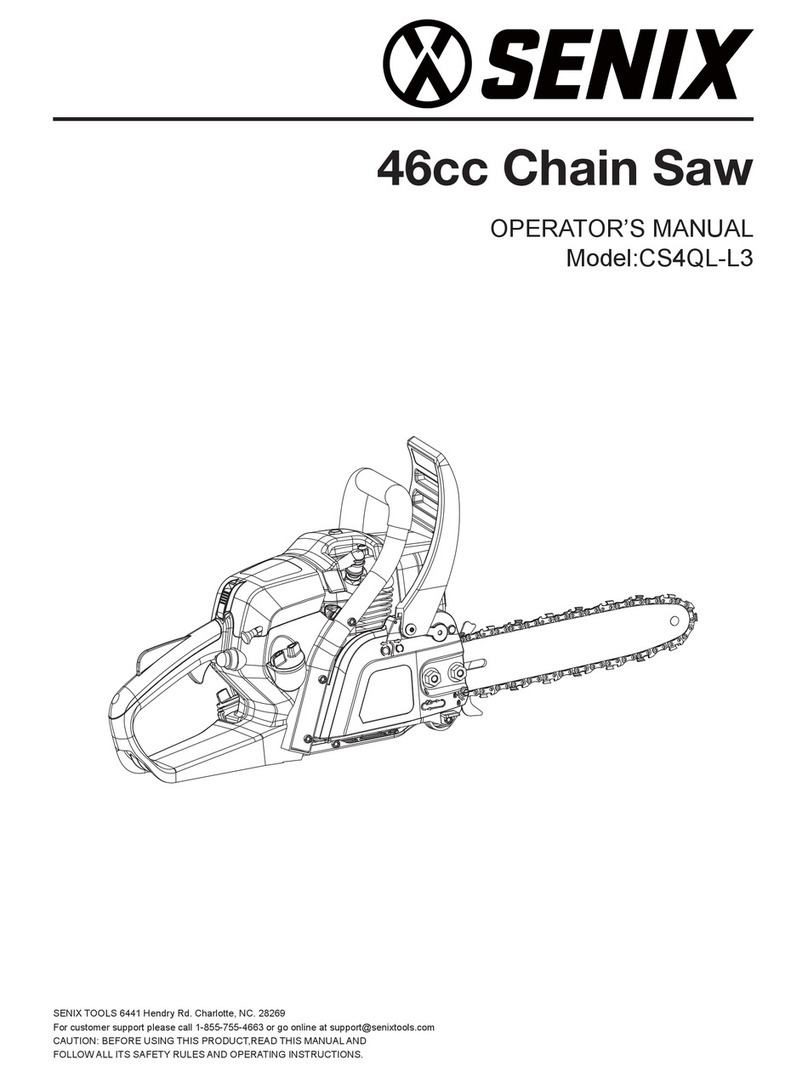
Senix CS4QL-L1 User manual

49cc Chain Saw
OPERATOR’S MANUAL
Model:CS4QL-L1
SENIX TOOLS 6441 Hendry Rd. Charlotte, NC. 28269
CAUTION: BEFORE USING THIS PRODUCT,READ THIS MANUAL AND
FOLLOW ALL ITS SAFETY RULES AND OPERATING INSTRUCTIONS.

2WWW.SENIXTOOLS.COM
• SAFETY & INTERNATIONAL SYMBOLS •
On the product, the rating label and within these instructions you will find among others the following symbols and
abbreviations. Familiarize yourself with them to reduce hazards like personal injuries and damage to property.
Caution / Warning. Choke – CLOSE position
Choke – OPEN position
Push primer bulb, fully and slowly.
Correct direction of cutting-teeth
4 stroke engine oil tank
Engine fuel tank
Chain lubrication oil tank
Do not mix gas and oil. Use unleaded
containing 10% or less ethanol.
Chain brake (the symbol shows the
position in which the brake is released)
WARNING: Tip contact can cause the
chain bar to move suddenly upward and
backward, which can cause serious injury.
Warning: See/Read instruction manual!
Wear protective gloves.
Wear protective, slip-resistant footwear.
No open flames in the work area around
the product
Do not smoke in the work area, around
the product and in the vicinity of
flammable materials!
Contact of the guide bar tip with any
object should be avoided.
Always use the product with two hands.
Do not use one hand when operating the
product.
Hot surface, do not touch! High
temperatures on the product’s surfaces
and structural parts that could cause
burns, if they are touched. The product
can also stay hot for a longer period of
time after operation!
Wear a safety goggles and hearing
protection.

3WWW.SENIXTOOLS.COM
TABLE OF CONTENTS
SAFETY WARNINGS
SAFETY WARNINGS.....................................................................3
KNOW YOUR UNIT........................................................................9
SPECIFICATIONS........................................................................10
OPERATION ................................................................................13
MAINTENANCE ...........................................................................21
WARRANTY ................................................................................ 25
TROUBLESHOOTING..................................................................26
PARTS...........................................................................................27
Gas powered chain saw safety
warnings
1. This product is dangerous if used
carelessly or incorrectly and can cause
serious or even fatal injuries.
2. Read all instructions carefully. When
using gas powered products, always
follow stated safety precautions to
reduce the risk of serious personal
injury and/or damage to the product.
3. The product should only be operated
by those who have read and
understood all safety and operating
instructions in this manual. Local
regulations can restrict the age of the
operator.
4. Keep your work area free from pets,
animals, children and bystanders.
5. Follow instructions for lubricating, chain
tensioning and changing accessories.
Improperly tensioned or lubricated
chain may either break or increase
the chance for kickback. It may cause
the chain to snap, which could lead to
serious or even fatal injuries.
6. Running this product in a confined
or badly ventilated area can result in
death due to asphyxiation or carbon
monoxide poisoning. The product is for
outdoor use only.
7. Take extreme care in wet and freezing
weather conditions. Do not work in rain,
windy or stormy weather.
8. Wear a face and breathing mask.
The use of this product can generate
exhaust gases, lubrication oil mist and
saw dust containing chemicals known
to cause respiratory damage.
9. Use safety steel toe capped footwear,
sturdy cut retardant snug-fitting
protective clothing, protective gloves,
eye, hearing and head protection
devices.
10. Always visually check the product
before use.
11. Do not attempt to tackle any job that
you are not adequately trained for.
12. Do not allow other persons to be
near when starting or cutting with the
product.
Do not operate the product if it has
faulty safety equipment or damaged
parts!
13. Do not under any circumstances modify
the product. Modifications can result in
serious personal injury or death.
14. Do not start cutting until you have a
clear work area, secure footing, and
a planned retreat path from the falling
tree.
15. All product servicing & maintenance,
other than the items listed in the user
manual, safety and maintenance
instructions, should be performed by an
authorized service center.
16. A first time user should have practical
instruction in the use of the product
and protective equipment from an
experienced operator.
17. National regulation can restrict the use
of the product.
18. Do not operate a chain saw with
one hand! Serious injury to the
operator, helpers, bystanders, or any
combination of these persons may
result from one-handed operation. A
chain saw is intended or two-handed
use.

4WWW.SENIXTOOLS.COM
19. Do not operate a chain saw when you
are fatigue.
20. Do not allow other persons to be near
the chain saw when starting or cutting
with the chain saw. Keep bystanders
and animals out of the work area.
21. When transporting your chain saw, use
the appropriate guide-bar scabbard.
22. All chain saw service, other than the
items listed in the instruction manual(s)
maintenance instructions, should be
performed by competent chain saw
service personnel. (For example, if
improper tools are used to remove the
flywheel or if an improper tool is used
to hold the flywheel in order to remove
the clutch. Structural damage to the
flywheel could occur and subsequently
could cause the flywheel to burst.)
Fuel handling
1. Always switch the product off and let
the product cool down, before refueling
it. Fuel and fuel vapor are highly
flammable. Take care when handling
fuel. Never smoke when you are
refueling the product. Do not refuel the
product, if there is an open fire in the
vicinity!
2. Always use suitable aids such as
funnels and filler necks. Do not spill
any fuel on the product or its exhaust
system. There is a risk of ignition.
Remove spilled fuel carefully from all
parts of the product. Move the unit a
safe distance from the refueling point
before starting.
3. Keep the handles dry, clean, and free
of oil or fuel
4. Never use the product in environments
where there is a risk of explosion.
Exhaust gases and fuel fumes are
noxious. Fuel fumes can ignite.
5. Never fill the tank in enclosed spaces,
such as basements or sheds. There is
a risk of poisoning and explosion!
6. Avoid skin contact with gas.
7. Do not eat or drink, while you are
refueling the product. If you have
swallowed gas or oil, or if gas or oil
has gotten into your eyes, then seek
medical attention.
8. Close the tank lid immediately after
filling the tank. Make sure that it is
properly closed.
9. Never use the product without an air
filter.
10. Fuel vapor pressure may build up
inside the fuel tank depending on the
fuel used, weather conditions and the
tank venting system. To reduce the risk
of burns and other personal injuries,
remove the fuel cap carefully to allow
any pressure built up to release slowly.
11. Be aware of fire risks, explosion and
inhalation risks.
12. Ensure the spark plug lead is secured;
a loose lead may cause electrical
arcing that could ignite combustible
fumes and cause a fire or explosion.
13. Check regularly for leaks from the fuel
cap and fuel lines.
14. Tighten the fuel cap thoroughly after
refilling the fuel tank.
15. Do not operate the product if it is
leaking fuel. Do not remove the fuel
tank cap while the engine is running.
16. Use only an approved container.
17. Do not store cans of fuel or refill the
fuel tank in any place where there is
a boiler, stove, wood fire, electrical
sparks, welding sparks, or other
sources of heat or fire which might
ignite the fuel.
18. If you have spilled fuel on yourself or
on your clothes, change your clothes
and wash any part of your body that
has come in contact with fuel before
turning the engine on again.
19. If fuel is ignited, put out the fire with a
dry powder fire extinguisher.
20. If the fuel tank is drained, this should
be done outdoors.
21. Use caution when handling fuel. Move
the chain saw at least 10 feet (3 m)
from the fueling point before starting
the engine.
Getting started
1. Do not operate the product indoors,
it produces poisonous exhaust fumes
while the engine is running and may be
colorless and odorless.
2. Do not wrap the recoil starter rope
around your hand while starting the
product. This may result in injuries to
your hand or fingers.
3. Keep handles dry, clean, and free from

5WWW.SENIXTOOLS.COM
oil and grease. Greasy, oily handles are
slippery causing loss of control.
4. Do not operate the product with a slack
chain. A slack chain may jump off the
guide bar and cause serious or even
fatal injury.
5. Keep all parts of the body away from
the saw chain when the chain saw is
operating. Before you start the chain
saw, make sure the saw chain is not
contacting anything and free from
obstructions. A moment of inattention
while operating chain saws may cause
entanglement of your clothing or body
with the saw chain.
6. Shut off the engine before setting the
product down.
7. Before using the product and after
any impact or dropping, check for
signs of wear or damage and repair as
necessary.
Operation
1. When sawing, ensure the product does
not touch any foreign materials such as
rocks, fences, nails etc. Such objects
may be flung out and could result
in damage to the product or serious
personal injury or even death.
2. Never operate the product on a ladder
or other insecure support.
3. If the chain jams in the cut: STOP THE
ENGINE. Do not try to pull the product
free. Use a lever to open the cut and
free the chain. Failure to do so could
result in serious injuries or death.
4. Only cut with the engine at high
speeds.
5. Use extreme caution when cutting
small size bushes and saplings.
Slender material may catch the saw
chain and whip toward you or put you
off balance.
6. Operate the product only in well
ventilated areas.
7. This product is intended for two handed
use only, with your right hand on the
rear handle and your left hand on
the front handle. You cannot control
reactive forces and you may lose
control of the saw, which can result in
the skating or bouncing of the bar and
chain along the limb or log.
8 .Do not operate the product if you have
any medical conditions that might be
aggravated by strenuous work. Check
with your doctor before operating this
product.
9. Do not operate the product under
the influence of drugs, alcohol or
medication.
10. Do not touch muffler or the exhaust
during use - IT GETS VERY HOT.
11. Do not operate a product that is
damaged, improperly adjusted, or not
completely and securely assembled.
Be sure that the saw chain stops
moving when the throttle trigger is
released.
12. Do not operate this product in a tree
unless you have been specifically
trained to do so. Operation of the
product while up in a tree may result in
personal injury.
13. Do not operate your product near or
around flammable liquids or gases.
14. Do not smoke while operating the
product.
15. Do not grip the handles with constant
or excessive pressure; this will increase
the feeling of vibration and the risk of
“white finger” disease.
16. Do not over reach when operating the
product or cut above shoulder height.
17. Do not operate the product if it is
leaking fuel, engine oil or chain oil.
18. When cutting a limb (branch) that is
under tension, be alert for spring back
so that you will not be struck when the
tension in the wood fibres is released.
19. Always keep proper footing and
operate the chain saw only when
standing on fixed, secure and level
surface. Slippery or unstable surfaces
such as ladders may cause a loss of
balance or control of the chain saw.
20. Cut wood only. Do not use the product
for purposes not intended. For
example: do not use chain saw for
cutting plastic, masonry or non-wood
building materials. Use of the chain
saw for cutting plastic, masonry or non-
wood building materials. Use of the
chain saw for operations different than
intended could result in a hazardous
situation.

6WWW.SENIXTOOLS.COM
Transport and storage
1. Ensure the engine is off and engage
the chain brake before transporting the
product.
2. Carry the product with the engine
stopped, the guide bar and saw chain
to the rear, and the muffler away from
your body.
3. Use the guide bar cover and ensure
that it is fitted to the product during
transportation or storage.
4. Only carry the product in a horizontal
position. Grip the front handle in a
manner that the product is balanced
horizontally.
5. Correctly secure your product when
transporting in a vehicle to prevent
turnover, fuel spillage and damage to
the product.
6. Always store the product and fuel
so that there is no risk of leakages
or fumes coming into contact with
sparks or naked flames from electrical
equipment, electric motors, relays/
switches, boilers etc.
7. For longer periods of storage or
transportation the fuel, engine oil and
chain oil tanks must be emptied.
8. Store fuel in an approved container
designed for that purpose.
9. Ensure that the product is cleaned
before storing.
Causes and operator prevention of
kickback
WARNING!
Kickback may occur when the nose or
tip of the guide bar touches an object, or
when the wood closes in and pinches the
saw chain in the cut.
Tip contact in some cases may cause a
sudden reverse reaction, kicking the guide
bar up and back towards the operator.
Pinching the saw chain along the top of the
guide bar may push the guide bar rapidly
back towards the operator.
Either of these reactions may cause you
to lose control of the saw which could
result in serious personal injury. Do not
rely exclusively upon the safety devices
built into your saw. As a chain saw user,
you should take several steps to keep your
cutting jobs free from accident or injury.
WARNING!
a) With a basic understanding of kickback,
you can reduce or eliminate the
element of surprise. Sudden surprise
contributes to accidents;
b) Keep a good firm grip on the saw with
both hands, the right hand on the rear
handle and the left hand on the front
handle, when the engine is running.
Use a firm grip with thumbs and fingers
encircling the chain saw handles. A firm
grip will help you reduce kickback and
maintain control the saw. Don't let go;
c) Make sure that the area in which you
are cutting is free from obstructions.
Do not let the nose of the guide bar
contact a log, branch, or any other
obstruction that could be hit while you
are operating the saw;
d) Cut at high engine speeds;
e) Do not overreach or cut above shoulder
height;
f) Follow the manufacturer's sharpening
and maintenance instructions for the
saw chain;
g) Only use original equipment
replacement bars and chains specified
by the manufacturer or the equivalent.
Caution: The user not to use
replacement saw chain unless it has
been designed to meet the ANSI
B175.1- (current revision of standard)
kickback performance requirements on
that specific powerhead, or has been
designated as low-kickback saw chain
in accordance with ANSI B 175.1-
(current revision of standard);
Low-kickback saw chain is chain that
has met the kickback performance
requirements of ANSI B 175.1 - (current
revision of standard) (American
National Standard for Power Tools-
Gasoline-Powered Chain Saws-Safety
Requirements) when tested on the
representative sample of chain saws
below 3.8 c.i.d. specified in ANSI B
175.1- (current revision of standard)
WARNING!
Beware of kickback! Kickback can lead to
dangerous loss of control of the product
and result in serious or fatal injury to
the operator or anyone standing close

7WWW.SENIXTOOLS.COM
by! Always be alert because rotational
kickback and pinch kickback are major
product operational dangers and the
leading cause of most accidents!
Kickback may occur if the nose or tip of
the guide bar touches an object, or if wood
pinches the saw chain in the cut. In some
cases, contact with the tip of the guide
bar may cause a lightning-fast reverse
reaction, kicking the guide bar up and back
toward the operator.
Pinching the saw chain along the bottom of
the guide bar may pull the product forward
away from the operator (“skating”).
Pinching the saw chain along the top of the
guide bar may push the guide bar rapidly
back toward the operator (“bouncing”).
Any of these reactions may cause losing
control of the product, which could result
in serious personal injury or even death.
With a basic understanding of ‘kickback’,
the element of surprise can be reduced or
eliminated. Sudden surprise contributes to
the majority of accidents. Keep a good firm
grip on the product with both hands, the
right hand on the rear handle and the left
hand on the front handle, when the engine
is running. Maintain a firm grip with your
thumbs and fingers encircling the handles.
A firm grip will help you reduce ‘kickback’
and maintain control of the product. You
should carefully read all safety warnings
and user instructions before attempting to
operate this product.
To avoid kickback:
1. Saw with guide bar at a flat angle.
2. Never work with a loose, widely
stretched or the heavily worn out chain.
3. Ensure chain is sharpened correctly.
4. Never saw above shoulder height.
5. Never work with the tip of the guide
bar.
6. Always hold the product firmly with
both hands.
7. Always use a low kickback chain.
8. Apply the metal gripping teeth for
leverage.
9. Ensure correct chain tension.
10. Only cut with the engine at high
speeds.
11. Do not let the nose of the guide bar
contact a log, branch, or any other
obstruction which could be hit while
you are operating the product.
12. Follow manufacturer’s sharpening and
maintenance instructions for the saw
chain.
13. Only use replacement guide bars
and saw chains specified by
the manufacturer or equivalent
replacements.
WARNING!
Most ‘kickback’ accidents happen during
limbing! Pay close attention to the position
of the ‘kickback’ zone of the bar when
you are ‘limbing’ branches that are under
tension.
Vibration and noise reduction
To reduce the impact of noise and vibration
emission, limit the time of operation.
Take the following points into account to
minimize the vibration and noise exposure
risks:
1. Only use the product as intended by its
design and these instructions.
2. Ensure that the product is in good
condition and well maintained.
3. Use the correct bar and chain for the
product.
4. Keep tight grip on the handles/gripping
surface.
5. Maintain this product in accordance
with these instructions and keep it well
lubricated.
6. Plan your work schedule to spread any
high vibration tool use across a longer
period of time.
7. Prolonged use of the product exposes
the user to vibrations that can cause a
range of conditions collectively known
as hand-arm vibration syndrome
(HAVS) e.g. fingers going white; as well
as specific diseases such as carpal
tunnel syndrome.
• To reduce this risk when using the
product, always wear protective gloves
and keep your hands warm.
• The symptoms of HAVS include any
combination of the following: Tingling
and numbness in the fingers; Not being
able to feel things properly; Loss of
strength in the hands; Fingers going
white (blanching) and becoming red
and painful on recovery (particularly in
the cold and wet, and probably only in

8WWW.SENIXTOOLS.COM
the tips at first). Seek medical advice
immediately if such symptoms are
experienced.
Emergency
Familiarize yourself with the use of this
product by means of this instruction
manual. Memorize the safety directions
and follow them to the letter. This will help
to prevent risks and hazards.
1. Always be alert when using this
product, so that you can recognize and
handle risks early. Fast intervention can
prevent serious injury and damage to
property.
2. Stop the engine and disconnect
the spark plug wire if there are
malfunctions. Have the product
checked by a qualified professional
and repaired, if necessary, before you
operate it again.
3. In case of fire stop the engine.
Take fire-extinguishing measures
immediately if the product switch is no
longer accessible.
WARNING!
Never use water to extinguish a product
on fire. Burning fuel must be extinguished
with special extinguishing agents. We
recommend that you keep a suitable fire
extinguisher within reach in your work
area!
Residual risks
Even if you are operating this product
in accordance with all the safety
requirements, potential risks of injury and
damage remain. The following dangers
can arise in connection with the structure
and design of this product:
1. Health defects resulting from vibration
emission if the product is being used
over long periods of time or not
adequately managed and properly
maintained.
2. Injuries and damage to property due to
broken or worn bar and chain, or the
sudden impact of hidden objects during
use.
3. Danger of injury and property damage
caused by flying objects.
4. Prolonged use of this product expose
the operator to vibrations and may
produce ‘white finger’ disease. In order
to reduce the risk, please wear gloves
and keep your hands warm. If any of
the ‘white finger’ symptoms appear,
seek medical advice immediately.
‘White finger’ symptoms include:
numbness, loss of feeling, tingling,
pricking, pain, loss of strength,
changes in skin colour or condition.
These symptoms normally appear in
the fingers, hands or wrists. The risk
increases at low temperatures.
WARNING!
This product produces an electromagnetic
field during operation! This field may
under some circumstances interfere with
active or passive medical implants! To
reduce the risk of serious or fatal injury, we
recommend persons with medical implants
to consult their doctor and the medical
implant manufacturer before operating this
product!
Intended use
This gas-powered saw is classified by
CSA as a Class 1C saw. It is intended
for infrequent use by homeowners,
cottagers, and campers, and for such
general applications as clearing, pruning,
cutting firewood, etc. It is not intended for
prolonged use. Prolonged periods of
operation can cause circulatory problems
in the user’s hands due to vibration.
WARNING!
Chain saws shall be used in accordance
with the operating instructions and safety
precautions listed in the operator’s
manual(s). It shall be the responsibility of
the owner to see that such instructions and
precautions are given to every operator
who uses the saw.

9WWW.SENIXTOOLS.COM
Model: CS4QL-L1
For basic limbing,felling, wood cutting.
KNOW YOUR UNIT
1 Primer bulb 12 Chain oil cap
2 Choke knob 13 Starter grip and rope
3 Fuel cap 14 Engine oil cap ( black in color )
4 Clutch cover 15 Throttle trigger
5 Bar mounting nuts 16 Rear handle
6 Chain catcher 17 On/o switch
7 Saw chain tension screw 18 Air lter lever
8 Spark plug 19 Air lter cover
9 Saw chain 20 Chain brake
10 Guide bar 21 Trigger release
11 Front handle 22 Guide bar cover ( scabbard )
8
910
20
19
18
17
21
22
1
3
4
67
5
2
11
12 13 14 15 16

10 WWW.SENIXTOOLS.COM
SPECIFICATIONS*
Model CS4QL-L1
Engine displacement 49cc
Rated input power 1600W
No-Load speed
9000±10%rpm
Maximum chain speed 18.1 m/s
Engine oil tank capacity 3.38 oz. (100ml )
Chain oil tank capacity 10.15 oz.(300ml )
Fuel tank capacity 13.53 oz.(400ml )
Saw chain model 91PJ062X OREGON
Guide bar model 180SDEA041 OREGON
Bar tip radius 0.67’’(17mm)
Bar length 18’’(457mm)
Cutting length 15.98’’ (406mm)
Machine Weight(with chain/bar) 13.58 lbs (6.16kg)

11WWW.SENIXTOOLS.COM
UNPACKING
Before use of this product, familiarize yourself with all
operating features and safety rules.
Chain saw
Before beginning work, inspect the chain saw for damage
to the housing, the saw chain and the guide bar. Never
use an obviously damaged machine.
Choke knob
The choke knob opens and closes the choke valve in the
carburetor. Positions available include FULL CHOKE and
RUN.
Cutting edges on chain are sharp. Use protective
gloves when handling chain.
ALWAYS Maintain proper chain tension. A loose chain
will increase the risk of kickback. A loose chain may
jump out of guide bar groove. This may injure operator
and damage chain. A loose chain will cause chain,
guide bar, and sprocket to wear rapidly. The chain
life of the saw chain mainly depends upon sufficient
lubrication and correct tensioning. Avoid tensioning the
chain if it is hot, as this will cause the chain to become
over tensioned when it cools down.
The Chain Saw comes fully assembled. DO NOT
discard box or packing material until all parts are
examined.
Packing list
49cc Chain saw X1
Bottle of engine oil X1
Torx wrench X1
Spark plug wrench X1
Guide bar cover X1
Quick start guide X1
Operation‘s manual X1
Tensioning the chain
spark plug wrench and torx wrench
A spark plug wrench and a torx wrench tool is provided
for use when performing various maintenance
procedures.
In addition, the spark plug wrench can be used to adjust
the chain tensioning.
Chain brake/front hand guard
The chain brake is designed to quickly stop the chain
from rotating. When the chain brake / front hand
guard is pushed toward the bar, the chain should
stop immediately. The chain brake does not prevent
kickback.
Saw chain
Check the tension and the condition of the chain.
The sharper the saw chain is, the easier and more
manageable operations will be. The same applies to
chain tension. Check the tension every 10 minutes
of operation to maximize safety. New saw chains
in particular are subject to changes due to the heat
created by operation.
Primer bulb
The primer bulb pumps fuel from the fuel tank to the
carburetor.
Throttle trigger
The throttle trigger is used for controlling the chain
speed.
Protective clothing
Make absolutely sure to wear the appropriate close-
fitting protective clothing such as protective pants,
gloves and safety shoes.Wear a helmet,hearing
protection and a face guard to provide protection
against falling and recoiling branches.
Guide bar cover
Align and push the Guide bar cover onto the chain and
guide bar to attach it.
WARNING
WARNING
WARNING
If any part of the chain saw is missing or damaged,
do not use the chain saw until the damaged part is
repaired or replaced.
NOTE: Chain and bar oil is not included. You must fill
the chain oil tank with bar and chain oil before use.
NOTE: Remove the guide bar cover before use.

12 WWW.SENIXTOOLS.COM
2. If adjustments are needed, loosen the bar mounting
nuts at first then loosen the saw chain tension
screw by turning it counterclockwise with the spark
plug wrench(Fig. 2).
3. Do not over-tension the chain: this will lead to
excessive wear and reduces the life of both the bar
and chain.
Fig. 2
Note: The saw chain must be tensioned properly in
order to ensure safe operation. Since the saw chain
heats up during operation, its length can therefore
fluctuate. Check the chain tension every 10 minutes
of operation and adjust as necessary, particularly for
new saw chains. Slacken the saw chain after the work
is completed since it shortens when cooling down. In
doing so, you can elongate the chain’s life and prevent
damage.
1. Check the chain tension by pulling the saw chain
away from the guide bar. A properly tensioned
chain should have roughly 0.12in.( 3 mm )of
distance between itself and the bar guide (Fig. 1).
Fig. 1
1/8” (3 mm)

13WWW.SENIXTOOLS.COM
Fig. 3
Fig. 4
OPERATIONS
General
1. Check the chainsaw as well as bar and chain for
damage before each use. Do not use the product if
it is damaged or shows wear.
2. Check the fuel level, engine oil level and chain oil
level, refill if necessary.
3. Always hold the product on its handles. Keep the
handles dry and free from lubricant to ensure safe
support.
4. Ensure that the air filter is always unobstructed and
clear. Clean them if necessary, with a soft brush.
Blocked air filter may lead to overheating and
damage the product.
5. Switch the product off immediately if you are
disturbed while working by other people entering
the working area. Always let the product come to
complete stop before putting it down.
6. Do not overwork yourself. Take regular breaks to
ensure you can concentrate on the work and have
full control over the product.
1. For the first use: Open the engine oil tank cap,pour
100ml of 4-cycle engine oil provided into the engine
oil tank.
2. For further use: Open the engine oil tank cap and
check the oil level. If the oil level is more than 0.39-
0.79in.( 10-20 mm ) blow the screw thread, please
fill the oil tank.
2. Do not overfill and leave approximately 0.20in.
Engine oil check ( black cap )
Chain lubrication oil
In some communities regulations define at what
time of the day and on what special days products
are allowed to be used and what restrictions apply!
Ask your community for detailed information and
observe the regulations in order to preserve a peaceful
neighborhood and avoid committing administrative
offences.
The product is not filled with bar and chain oil. It is
essential to fill the product with bar and chain oil before
using it! Never operate the product without bar and
chain oil as this will result in extensive damage to the
product!
If the oil level decreases to below one quarter capacity,
refill it with the proper bar and chain oil. To fill the oil
reservoir:
Operating the saw chain dry or with too little bar and
chain oil will decrease cutting efficiency, shorten the
product life span and cause rapid wear to the saw chain
and guide bar from overheating!
Insufficient bar and chain oil is evident by smoke or bar
discoloration! Adequate lubrication of the saw chain
during cutting operations is essential to minimize friction
with the guide bar!
WARNING
WARNING
( 5 mm ) space between the top of the oil and the
inside edge of the tank to allow for expansion(Fig.
3).
3. Tighten the cap firmly.
1. Position the unit in a way that the bar and chain oil
tank cap faces upwards.
2. Open the cap and check the oil level. If the oil level
is more than 0.39-0.79in.( 10-20 mm ) blow the
screw thread, please fill the tank.
3. Do not overfill and leave approx. 0.20in.(5 mm)
space between the top of the oil and the inside
edge of the tank to allow for expansion(Fig. 4).
4. Tighten the cap firmly.
Note: It is recommended that using bar and chain oil.

14 WWW.SENIXTOOLS.COM
1. Position the unit in a way that the fuel tank cap
faces upwards and remove the fuel tank cap.
2. Refill with unleaded fuel (10% Ethanol or less)
carefully without overfilling. Leave approx.
0.20in.( 5 mm ) space between the top of the
fuel and the inside edge of the tank to allow for
expansion(Fig.5).
3. Tighten the fuel tank cap firmly.
NOTE: It is normal for the engine to emit smoke during
and after the first use.
2. Give 6-10 slow, but firm pushes on the primer bulb
until fuel comes into the primer bulb (Fig.7).
3. Pull chock knob all the way out to FULL CHOKE
position (Fig.7).
4. Hold the product firmly with left hand on the front
handle and right foot onto the rear hand safeguard
without touching the throttle trigger, pull the starter
grip and rope until the engine attempts to start 5
times (Fig.8).
5. Push choke knob to RUN position (Fig.9).
6. Then, pull starter rope till engine starts.
Start with cold engine
1. Carefully pull the chain brake back toward the front
handle (Fig6).
Filling fuel
Fig. 5
Fig. 6
Fig. 7
Gasoline and its vapors are highly flammable and
explosive. To prevent serious personal injury and
property damage, handle it with care. Keep away from
ignition sources and open flames, handle outdoors only,
do not smoke, and wipe up spills immediately.
Always shut off engine before fueling. Never remove
fuel cap or add fuel to a machine with a running or hot
engine. Make sure unit is sitting on a flat, level surface
and only add fuel outdoors. If the engine is hot, allow
to cool for at least five minutes before adding fuel.
Immediately replace fuel cap after fueling and tighten
securely. Move at least 118.1 in.( 3 m ) from refueling
site before starting the engine. Do not smoke and stay
away from open flames and sparks. Failure to follow
these instructions could result in a fire and cause
serious personal injury.
WARNING
WARNING
Check for fuel leaks. A leaking fuel cap, tank, or line is
a fire hazard and must be replaced immediately. If you
find any leaks, correct the problem before using the
product. Failure to do so could result in a fire that could
cause serious personal injury.
WARNING

15WWW.SENIXTOOLS.COM
Fig. 8
Fig. 9
Fig. 10
Fig. 11
Fig. 12
x5x5
The choke knob should be switched to “RUN” position
immediately by pressing the throttle trigger after cold
start, otherwise the engine could be damaged due to
continuous running with closed choke.
Press primer bulb 5 times until gas is visible in the
primer bulb and fuel line. (Fig. 10)
Pull the choke knob all the way out to FULL CHOKE
position.
Push the choke knob in. The choke is now in the Run
position.
Note: When the engine is running with no load at
high speed, you may hear the engine speed limiter
controlling maximum RPM.
The sound is normal. When saw is under load cutting,
the sound will become steady.
Start with warm engine
WARNING

16 WWW.SENIXTOOLS.COM
Fig. 13
Fig. 14
Fig. 15
Fig. 16
Trigger release
Throttle trigger
Not braked
Braked
Rapidly pull starter rope till engine starts. If engine does
not start, follow Warm Start procedure.
Ready to cut, push and hold the trigger release with
your hand, while squeezing the throttle trigger (Fig.14).
The following function check should be carried out
before each use. The purpose of the chain brake testing
is to reduce the possibility of injury due to kickback:
Chain brake
The chain brake is a safety mechanism. When kickback
occurs the saw chain stops immediately when the chain
break is engaged (Fig.15, Fig.16).
NOTE:The trigger release reduces the risk of accidental
starting.
To turn the unit OFF, release the throttle trigger. and
press the On/off switch to OFF position.
Trigger release
Not braked
Braked
Throttle trigger
NOTE: If the engine does not start, the engine may be
flooded. Flooding is caused by too much fuel mixture
applied at the wrong time and can prevent a product
from starting.
Follow below procedure:
- Push the choke knob fully back to RUN position.
- Remove the spark plug and dry it.
- Pull the recoil starter handle for several times to drain
the fuel from the combustion chamber.
- Wipe off the area around the spark plug hole and
place the spark plug back in. Tighten to proper torque.
Clean up any spilled fuel and move the product at
least 3 metres (10’) away before starting the engine
to avoid any accidental fire. Wait the engine to cool
down and then start the product as described in
section “Cold start”.
1. Start the product as described above.
2. Press down on the throttle release, then fully
squeeze the throttle trigger with your index finger
and hold in this position.
3. While the engine and chain are running, activate
the chain brake by rolling your left hand forward
against the front hand guard. Saw chain should
stop immediately.
4. Release the throttle trigger afterward.
5. Pull back the chain brake to non-braked position.

17WWW.SENIXTOOLS.COM
Fig. 17
Fig. 18
Fig. 19
If the saw chain fails to stop when the chain brake is
engaged, take the product to the nearest authorized
service center or a similarly qualified person! Do not
use the product if the chain brake is not in working
properly!
The front hand guard can only be used for short time
check and emergency. It should not be used for starting
and stopping the product during normal operation!
Otherwise the clutch and/or the clutch cover will be
damaged!
If the saw chain shows any sign of moving, stop the
engine immediately! Wait for all moving parts to stop!
Contact an authorized service center or a similarly
qualified person to readjust idling speed!
Cutting procedure
1. To become proficient attend a recognised chain saw
training course to learn how to operate chain saws
safely and effectively. Familiarise yourself with all
the controls and switches. Practice all movements
with the product switched off.
2. Always hold the product firmly with both hands.
Front handle with the left hand and rear handle with
the right hand. Fully grip both handles at all times
during operation. Never operate the product using
only one hand.
3. Only use the product with a secure stance. Hold the
product at the right-hand side of your body(Fig.18).
4. Ensure that cutting object does not exceed the
usable cutting length of the chain saw. The tip of
guide bar shall always be kept at least 1.97in.(5 cm)
outside the outline of the wood log.
5. Ensure the saw chain is running at full speed before
it makes contact with the wood. Use the spiked
bumper to secure the product onto the wood before
starting to cut and use it as a leverage point while
cutting(Fig.19).
Chain speed
The saw chain shall not move under engine idle speed
without pressing the throttle trigger.
Checking chain lubrication
The chain lubrication should be checked after
everything else is ready before cutting.
This product is equipped with an automatic oiling
system! The oiling system automatically delivers the
proper amount of oil to the bar and chain.
Start the engine; keep it running at medium speed
and check if the chain oil is delivered as shown in the
figure(Fig.17).
WARNING
WARNING
WARNING

18 WWW.SENIXTOOLS.COM
6. Reset the spiked bumper at a low point when
cutting thicker logs by pulling the product slightly
backwards until the gripping teeth release, and
reposition at lower level to continue sawing. Do not
remove the product completely from the wood.
7. Do not force the saw chain while cutting, let the
chain do the work, using the gripping teeth of
spiked bumper to apply minimal leverage pressure.
8. Do not operate the product with arms fully extended
or attempt to saw areas which are difficult to reach,
or on a ladder. Never use the product above
shoulder height.
9. Optimum sawing is achieved if the chain speed
remains constant during cutting.
10. Be careful when reaching the end of the cut. The
weight of the product may change unexpectedly as
it cuts free from the wood. This can cause accidents
to the legs and feet. Always remove the product
from a wood cut while the product is running.
11. Check the chain tension and oil feeding regularly.
1. When bucking and felling operations are being
performed by two or more persons at the same
time, the felling operations should be separated
from the bucking operation by a distance of at
least twice the height of the tree being felled.
Trees should not be felled in a manner that would
endanger any person, strike any utility line or cause
any property damage. If the tree does make contact
with any utility line, the utility company should be
notified immediately.
2. The product operator should keep on the uphill
side of the terrain as the tree is likely to roll or slide
downhill after it is felled.
3. An escape path should be planned and cleared as
necessary before cuts are started. The escape path
should extend back and diagonally to the rear of the
expected line of fall(Fig.20).
4. Before felling is started, consider the natural lean
of the tree, the location of larger branches and the
wind direction to judge which way the tree will fall.
5. Remove dirt, stones, loose bark, nails, staples and
wire from the tree.
Felling a tree
Notching undercut and felling back
cut
Most ‘kickback’ accidents happen during limbing! Pay
close attention to the position of the ‘kickback’ zone of
the bar when you are ‘limbing’ branches that are under
tension.
Make the notch (B) 1/3 the diameter of the tree,
perpendicular to the direction of falls. Make the lower
horizontal notching cut first. This will help to avoid
pinching either the saw chain or the guide bar when the
second notch is being made.
Make the felling back cut (A) at least 1.97in.(5 cm )
higher than the horizontal notching cut. Keep the felling
back cut parallel to the horizontal notching cut. Make
the felling back cut so enough wood is left to act as a
hinge. The hinge (C) wood keeps the tree from twisting
and falling in the wrong direction. Do not cut through the
hinge.
As the felling gets close to the hinge, the tree should
begin to fall. If there is any chance that the tree may
not fall in desired direction or it may rock back and bind
the saw chain, stop cutting before the felling back cut is
complete and use wedges of wood, plastic or aluminum
to open the cut and drop the tree along the desired line
of fall.
When the tree begins to fall remove the chainsaw from
the cut, stop the engine put the chainsaw down then
use the retreat path planned. Be alert for overhead
limbs falling and watch your footing(Fig.21).
WARNING
Fig. 20
Fig. 21

19WWW.SENIXTOOLS.COM
Limbing and pruning
Cutting spring poles
Limbing is removing the branches from a fallen tree.
When limbing leave larger lower limbs to support the
log off the ground. Remove the small limbs in one cut.
Branches under tension should be cut from the bottom
up to avoid binding the product(Fig.22).
A spring pole is any log, branch, rooted stump, or
sapling which is bent under tension by other wood
so that it springs back if the wood holding it is cut or
removed. On a fallen tree, a rooted stump has a high
potential of springing back to the upright position during
the bucking cut to separate the log from the stump.
Watch out for spring poles, they are dangerous(Fig.23).
Fig. 22
Fig. 23
Fig. 24
Fig. 25
1. Follow the simple directions for easy cutting. When
the log is supported along its entire length, it is cut
from the top (overbuck)(Fig.24). Do not let the bar
and chain hit the ground.
2. When the log is supported on one end, cut 1/3 the
diameter from the underside (underbuck). Then
make the finished cut by overbucking to meet the
first cut (Fig.25).
Bucking a log

20 WWW.SENIXTOOLS.COM
Fig. 26
Fig. 28
Fig. 29
Fig. 30
3. When the log is supported on both ends, cut 1/3 the
diameter from the top (overbuck). Then make the
finished cut by underbucking the lower 2/3 to meet
the first cut(Fig.26).
4. When bucking on a slope always stand on the uphill
side of the log. When “cutting through”, to maintain
complete control release the cutting pressure near
the end of the cut without relaxing your grip on
the product handles. Do not let the chain contact
the ground. After completing the cut, wait for the
saw chain to stop before you move the product.
Always stop the engine before moving from tree to
tree(Fig.28).
5. Support small logs on a sawing stand or another log
while bucking(Fig.29).
6. If the wood diameter is large enough for you to
insert a soft bucking wedge without touching the
chain, you should use the wedge to hold the cut
open to prevent pinching(Fig.30).
WEDGE
Table of contents
Languages:
Other Senix Chainsaw manuals
