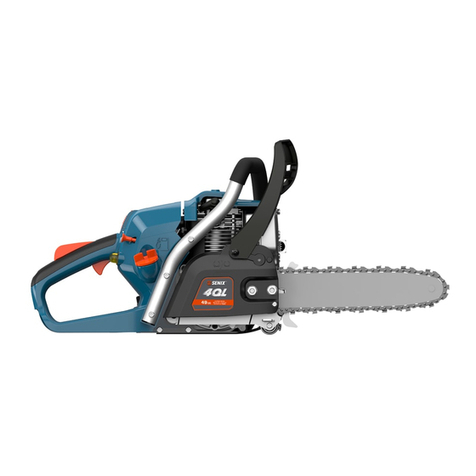
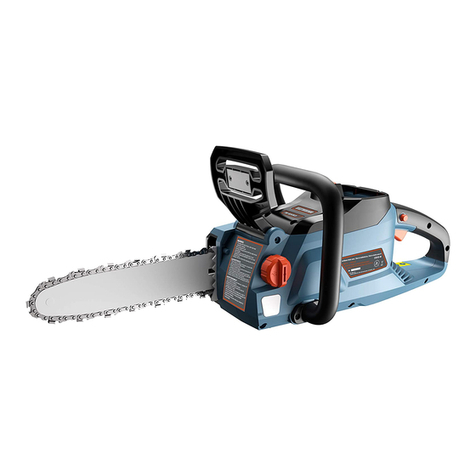
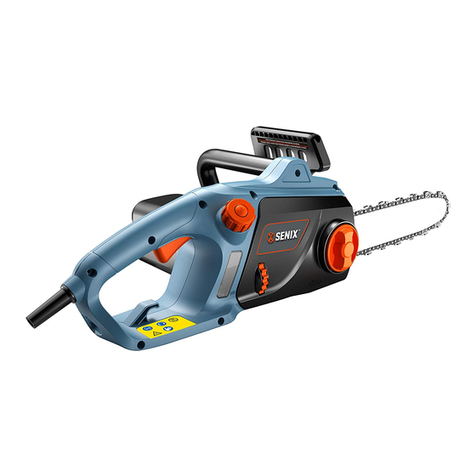
Senix CSE10-L User manual

70g双胶纸
Http:www.yattool.com
名 称:
客 户:
料 号:
尺 寸:
材 质:
US001
8458-A011021001-001
颜 色:
页 数: 32 张A4纸
设计人员: QQ: 2019-7-24 Adobe Acrobat 7 Pro
制作日期: 运用软件:
备注:
焦伙平 807948422
说明书
A4(210x297mm)
黑白印刷
材质符合欧盟包装指令(94/62/EC)

10 Amp Motor
Electric Chain Saw
Operator’s manual
Model: CSE10-L
For customer support, please call 1-800-261-3981 or send email to:
SAVE THIS MANUAL FOR FUTURE REFERENCE. 8458-A011021001-001

2WWW.SENIXTOOLS.COM
TABLE OF CONTENTS
SAFETY...................................................................2
KNOW YOUR UNIT..............................................10
INCLUDED PARTS...............................................10
SPECIFICATIONS*...............................................10
CHAIN SAW PREPARATION................................11
OPERATION.........................................................14
SAWING TECHNIQUES ......................................15
MAINTENANCE AND ADJUSTMENTS................17
PARTS...................................................................20
WARRANTY...........................................................21
The purpose of safety symbols is to attract
your attention to possible dangers. The safety
symbols, and their explanations, deserve
your careful attention and understanding.
The safety warnings DO NOT by themselves
eliminate any danger. The substitutes or
warnings they give are not ubstitutes for
proper accident prevention measures.
Signals an EXTREME hazard.Failure to obey
a safety DANGER symbol WILL result in
serious injury or death to yourself or to others.
Crude oil, gasoline, diesel fuel and other
petroleum products can expose
you to chemicals including toluene and
benzene, which are known to the State of
California to cause cancer
and birth defects or other reproductive
harm. These exposures can occur in and
around oil elds, reneries, chemical
plants, transport and storage operations
such as pipelines, marine terminals, tank
trucks and other facilities and equipment.
For more information go to:
www.P65Warnings.ca.gov/petroleum.
Signals a SERIOUS hazard. Failure to obey
a safety WARNING symbol CAN result in
serious injury to yourself or to others.
This product contains a
chemical known to the state of California
to cause cancer, birth defects or other
reproductive harm. Drilling, sawing,
sanding or machining wood products can
expose you to wood dust, a substance
known to the State of California to cause
cancer. Avoid inhaling wood dust or use a
dust askor other safeguards for personal
protection. For more information go to
www.P65Warnings.ca.gov/woods.
Signals a MODERATE
hazard. Failure to obey a safety CAUTION
symbol MAY result in property damage or
injury to yourself or to others.
NOTE: Advises you of information or
instructions vital to the operation or
maintenance of the equipment.
CALIFORNIA PROPOSITION 65
DANGER:
WARNING:
WARNING:
WARNING:
CAUTION:
BE SURE to read and understand all
instructions in this manual before using
this electric Chain Saw. Failure to follow
all instructions listed below may result in
electric shock, re and/or serious personal
injury.
WARNING:
SAFETY

3WWW.SENIXTOOLS.COM
To avoid mistakes that could cause
serious injury, DO NOT connect the
Chain Saw to the power source until the
following instructions have been read and
understood.
WARNING:
When using the unit, all safety instructions
must be followed. Please read these
instructions before operating the unit in
order to ensure the safety of the operator
and any bystanders. Please keep these
instructions for later use.
IMPORTANT SAFETY
INSTRUCTIONS
WARNING!
Read all safety warnings and instructions.
Failure to follow the warnings and
nstructions may result in electric shock,
re and/or serious injury.
READ ALL INSTRUCTIONS
BEFORE OPERATING
For location and purchase information call
1-800-261-3981.
WARNING:
keep these instructions for later use.
• Readtheinstructionscarefully.Befamiliar
with the controls and proper use of the unit.
• Read the instructions carefully.Be
familiar with the controls and proper use of
the unit.
• DO NOT operate this unit when tired, ill
orundertheinuenceofalcohol,drugsor
medication.
Consider the work area environment. Use
extreme caution when cutting small size
brush and saplings because the slender
material may catch the saw chain and
be whipped toward you or pull you off
balance. DO NOT operate a chain saw in
a tree unless specically trained to do so.
When cutting a limb that is under tension
be alert for spring back so that you will not
be struck when the tension in the wood
bers is released.
WARNING:
• Never allow children to operate the
unit. Teens must be trained, accompanied
and supervised by an adult. Never allow
adults to operate the unit without proper
instruction.
• All guards and safety attachments must
be installed properly before operating
the unit.
• Inspecttheunitbeforeuse.Replace
damaged parts. Check for fuel leaks. Make
sure all fasteners are in place and secure.
Replace parts that are cracked, chipped, or
damaged in any way. DO NOT operate the
unit with loose or damaged parts.
• Be aware of risk of injury to the head,
hands and feet.
• Carefully inspect the area before
starting the unit. Remove rocks, broken
glass, nails, wire, string and other objects
that may be thrown or become entangled
with the unit.
• Clear the area of children, bystanders
and pets; keep them outside a 50-foot
(15 m) radius, at a minimum. Even then,
they are still at risk from thrown objects.
Encourage bystanders to wear eye
protection. If you are approached, stop the
unit immediately.
• Squeezethethrottlecontrolandcheckthat
it returns automatically to the idle position.
Make all adjustments or repairs before
using the unit.
• This unit is intended for occasional,
household use only.
WHILE OPERATING
• Wear safety glasses or goggles
that meet current ANSI/ ISEA Z87.1
standards and are marked as such.
Wear ear/hearing protection when
operating this unit. Wear a face mask or
dust mask if the operation is dusty.
• Wearheavylongpants,boots,glovesand
a long sleeve shirt. DO NOT wear loose
clothing, jewelry, short pants, sandals or go
barefoot. Secure hair above shoulder level.
• Use the unit only in daylight or good
articial light.
• Usetherighttool.Only use this tool for
its intended purpose.
• Alwaysholdtheunitwithbothhandswhen
operating.Keeparmgriponbothhandles
or grips.
• DO NOT overreach. Always keep proper
footing and balance. Take extra care when

4WWW.SENIXTOOLS.COM
working on stairs, steep slopes or inclines.
To avoid serious injury, DO NOT operate
the unit while on a ladder or a roof.
• Keephands,face,andfeetawayfromall
moving parts. DO NOT touch or try to stop
moving parts.
• DO NOT operate the unit faster than the
speed needed to do the job. DO NOT run
the unit at high speed when not in use.
• DO NOT force the unit. It will do a better,
safer job when used at the intended rate.
• Always stop the unit when operation
is delayed or when walking from one
location to another.
• Beforesettingtheunitdown,alwaysMAKE
SURE the engine is off and all moving parts
have stopped.
• Ifyoustrikeorbecomeentangledwitha
foreign object, stop the unit immediately
and check for damage. DO NOT operate
the unit before repairing damage. DO NOT
operate the unit with loose or damaged
parts.
• Unplug the unit for maintenance or
repair.
• Use only original equipment
manufacturer (OEM) replacement parts
and accessories for this unit. Use of any
other parts or accessories could lead to
serious injury to the user, or damage to the
unit, and void the warranty.
• Keep the unit clean. Carefully remove
vegetation and other debris that could
block moving parts.
• To reduce re hazard, keep air vents
free from grass, leaves or excessive
grease.
•If the unit starts to vibrate abnormally,
stop the unit immediately. Inspect the unit
for the cause of the vibration. Vibration is
generally an indicator of trouble.
Do not permit ngers to touch the
terminalsof plug when installing or
removing the extension cord from the plug.
ELECTRICAL SAFETY
WARNING!
1. Double insulated tools are equipped
with a polarized plug (one blade is
wider than the other and will require
the use of a polarized extension
cord.TheChainSaw’splugwilltinto
a polarized extension cord only one
way.Iftheplugdoesnottfullyintothe
extension cord, reverse the plug. If the
plugstilldoesnott,obtainacorrect
polarized extension cord. A polarized
extension cord will require the use of a
polarizedwalloutlet.Thisplugwilltinto
the polarized wall outlet only one way.
Iftheplugdoesnottfullyintothewall
outlet, reverse the plug. If the plug still
doesnott,contactaqualiedlectrician
to install the proper outlet. Do not
change or alter the equipment plug,
extension cord receptacle, or extension
cord plug in any way.
2. Double insulation eliminates the need
for the three-wire grounded power cord
and grounded power supply system.
Applicable only to Class II (double-
insulated) tools. This Chain Saw is a
double insulated tool.
Circuit Interrupter) protection should be
provided on all circuits or outlets to be
used for electric chain saws and lawn
and garden power tools. Receptacles are
available having built-in GFCI protection
and should be used for this measure of
protection.
WARNING!
• Double insulation DOES NOT take the
place of normal safety precautions when
operating this tool.
• Guard against electric shock: Prevent
body contact with grounded surfaces.
For example: metal pipes, wire fences.
3. BEFORE plugging in the tool, BE SURE
that the outlet voltage supplied is within
the voltage marked on the tool’s data
plate. DO NOT use ‘AC only” rated tools
with a DC power supply.

5WWW.SENIXTOOLS.COM
4. DO NOT expose tools to rain or wet
conditions or use electric tools in
wet or damp locations. Water entering
an electric tool will increase the risk of
electric shock.
5. If operating an electric tool in damp
locations is unavoidable, ALWAYS USE
a Ground Fault Circuit Interrupter to
supply power to your tool. ALWAYS
WEAR electrician’s rubber gloves and
footwear in damp conditions.
6. To reduce the risk of electric shock,
use only with an extension cord intended
for outdoor use, such as an extension
cord of cord type: SW-A, SOW-A, STW-A,
STOW-A, SJW-A, SJOW-A, SJTW-A. or
SJTOW-A.
7. INSPECT tool cords for damage. Have
damaged tool cords repaired at an
authorized Service Center. BE SURE to
stay constantly aware of the cord location
and keep it well away from the cutting
blade.
8. DO NOT abuse the extension cord.
NEVER use the cord to carry the tool by
or to pull the plug from the outlet. Keep
cord away from heat, oil, sharp edges or
moving parts. Replace damaged cords
immediately. Damaged cords increase the
risk of electric shock.
EXTENSION CORDS
Use a proper extension cord. ONLY use
cords listed by underwriters Laboratories
(UL). Other extension cords can cause a drop
in line voltage, resulting in a loss of power
and overheating of tool.
For this tool an AWG (American Wire Gauge)
size of a least 14-gauge is recommended for
an extension cord of 25-ft. or less in length.
Use 12-gauge for an extension cord of 50-
ft. Extension cords 100-ft. or longer are not
recommended.
Remember, a smaller wire gauge size has
greater capacity than a larger number
(14-gauge wire has more capacity than
16-gauge wire; 12-gauge wire has more
capacity than 14-gauge). When in doubt use
the smaller number.
EXTENSION CORDS
Ampere Rating
Securing extension cord
Volts Total length of cord in feet
More than/Not more than AWG
120 V 25 50 100 150
0-6
6-10
10-12
18
18
16
16
16
16
16
14
14
14
12
12
12-16 14 12 Not recommended
GENERAL POWER TOOL SAFETY
WARNINGS
Keep the extension cord clear of the work
area. Position the cord so that it will not
get caught on bushes, hedges, tree trunks,
lawnmowers or other obstructions while
you are working with the Chain Saw.
Check extension cords before each use. If
damaged replace immediately. Never use
tool with a damaged cord since touching
the damaged area could cause electrical
shock, resulting in serious injury.
Read all safety warnings and all instructions.
Failure to follow the warnings and instructions
mayresultinelectricshock,reand/or
serious injury.
Save all warnings and instructions for future
reference. The term “power tool” in the
warnings refers to your mains-operated
(corded) power tool or battery-operated
(cordless) power tool.
CAUTION:
WARNING:
WARNING:

6WWW.SENIXTOOLS.COM
1. Work area safety
a. Keep work area clean and well lit.
Cluttered or dark areas invite accidents.
b. DO NOT operate power tools in explosive
atmospheres, such as in the presence of
ammableliquids,gasesordust.Power
tools create sparks which may ignite the
dust or fumes.
c. Keep children and bystanders away
while operating a power tool. Distractions
can cause you to lose control.
2. Electrical Safety
a. Power tool plugs must match the outlet.
Never modify the plug in any way. DO
NOT use any adapter plugs with earthed
(grounded)powertools.Unmodiedplugs
and matching outlets will reduce risk of
electric shock.
b. Avoid body contact with earthed or
grounded surfaces, such as pipes,
radiators, ranges and refrigerators.
There is an increased risk of electric shock
if your body is earthed or grounded.
c. DO NOT expose power tools to rain or wet
conditions. Water entering a power tool will
increase the risk of electric shock.
d. DO NOT abuse the cord. Never use the
cord for carrying, pulling or unplugging the
power tool. Keep cord away from heat, oil,
sharp edges or moving parts. Damaged or
entangled cords increase the risk of electric
shock.
e. When operating a power tool outdoors,
use an extension cord suitable for
outdoor use. Use of a cord suitable for
outdoor use reduces the risk of electric
shock.
f. If operating a power tool in a damp
location is unavoidable, use a residual
current device (RCD) protected supply.
Use of an RCD reduces the risk of electric
shock.
3. Personal Safety
a. Stay alert, watch what you are doing
and use common sense when operating
a power tool. DO NOT use a power tool
whileyouaretiredorundertheinuence
of drugs, alcohol or edication. A moment of
inattention while operating power tools may
result in serious personal injury.
b. Use personal protective equipment.
Alwaysweareyeprotection.Protective
equipment such as dust mask, non-
skid safety shoes, hard hat, or hearing
protection used for appropriate conditions
will reduce personal injuries.
c. Prevent unintentional starting. Ensure
the switch is in the off-position before
connecting to power source and/or battery
pack, picking up or carrying the tool.
Carryingpowertoolswithyourngeronthe
switch or energising power tools that have
the switch on invites accidents.
d. Remove any adjusting key or wrench
before turning the power tool on. A
wrench or a key left attached to a rotating
part of the power tool may result in
personal injury.
e. DO NOT overreach. Keep proper
footing and balance at all times. This
enables better control of the power tool in
unexpected situations.
f. Dress properly. DO NOT wear loose
clothing or jewellery. Keep your hair,
clothing and gloves away from moving
parts. Loose clothes, jewellery or long hair
can be caught in moving parts.
g. If devices are provided for the
connection of dust extraction and
collection facilities, ensure these are
connected and properly used. Use of
dust collection can reduce dust-related
hazards.
4. Power Tool Use and Care
a. DO NOT force the power tool. Use the
correct power tool for your application. The
correct power tool will do the job better and
safer at the rate for which it was designed.
b. DO NOT use the power tool if the switch
does not turn it on and off. Any power
tool that cannot be controlled with the
switch is dangerous and must be repaired.
c. Disconnect the plug from the power
source and/or the battery pack from
the power tool before making any
adjustments, changing accessories,
or storing power tools. Such preventive
safety measures reduce the risk of starting
the power tool accidentally.
d. Store idle power tools out of the reach
of children. DO NOT allow persons
unfamiliar with the power tool or these
instructions to operate the power tool.
Powertoolsaredangerousinthehandsof
untrained users.

7WWW.SENIXTOOLS.COM
e. Maintain power tools. Check for
misalignment or binding of moving parts,
breakage of parts and any other condition
that may affect the power tools operation.
If damaged, have the power tool repaired
before use. Many accidents are caused by
poorly maintained power tools.
f. Keep cutting tools sharp and clean.
Properlymaintainedcuttingtoolswith
sharp cutting edges are less likely to bind
and are easier to control.
g. Use the power tool, accessories and
tool bits etc. in accordance with these
instructions, taking into account the
working conditions and the work to
be performed. Use of the power tool for
operations different from those intended
could result in a hazardous situation.
5. Service
a. Have your power tool serviced by a
qualied repair person using only
identical replacement parts. This will
ensure that the safety of the power tool is
maintained.
CHAIN SAW SAFETY WARNINGS
• Keep all parts of the body away from
the saw chain when the chain saw is
operating.Beforeyoustartthechainsaw,
make sure the saw chain is not contacting
anything. A moment of inattention
while operating chain saws may cause
entanglement of your clothing or body with
the saw chain.
• Always hold the chain saw with your
right hand on the rear handle and your
left hand on the front handle. Holding
the chain saw with a reversed hand
congurationincreasestheriskofpersonal
injury and should never be done.
NOTE: For chain saws designed with the
chain bar on the left side, the reference to
“right hand” and “left hand” positioning is
reversed.
• Hold the power tool by insulated
gripping surfaces only. The saw chain
may contact hidden wiring or its own cord.
Saw chains contacting a “live” wire may
make exposed metal parts of the power
tool “live” and could give the operator an
electric shock.
• Wear safety glasses and hearing
protection. Further protective equipment
for head, hands, legs and feet is
recommended. Adequate protective
clothingwillreducepersonalinjurybyying
debris or accidental contact with the saw
chain.
• DO NOT operate a chain saw in a tree.
Operation of a chain saw while up in a tree
may result in personal injury.
• Always keep proper footing and operate
the chain saw only when standing on
xed, secure and level surface. Slippery
or unstable surfaces such as ladders may
cause a loss of balance or control of the
chain saw.
• When cutting a limb that is under
tension be alert for spring back. When
thetensioninthewoodbresisreleased
the spring loaded limb may strike the
operator and/or throw the chain saw out of
control.
• Use extreme caution when cutting
brush and saplings. The slender material
may catch the saw chain and be whipped
toward you or pull you off balance.
• Carry the chain saw by the front handle
with the chain saw switched off and
away from your body. When transporting
orstoringthechainsawalwaystthechain
barcover.Properhandlingofthechain
saw will reduce the likelihood of accidental
contact with the moving saw chain.
• Follow instructions for lubricating, chain
tensioning and changing accessories.
Improperly tensioned or lubricated chain
may either break or increase the chance for
kickback.
• Keep handles dry, clean, and free from
oil and grease. Greasy, oily handles are
slippery causing loss of control.
• Cutwoodonly.DO NOT use chain saw
for purposes not intended. For example:
DO NOT use chain saw for cutting plastic,
masonry or non-wood building materials.
Use of the chain saw for operations
different than intended could result in a
hazardous situation.
Causes and Operator Prevention of
Kickback Kickback may occur when the nose
or tip of the chain bar touches an object, or
when the wood closes in and pinches the
saw chain in the cut. Tip contact in some
cases may cause a sudden reverse reaction,

8WWW.SENIXTOOLS.COM
SAVE THESE INSTRUCTIONS
kicking the chain bar up and back towards the
operator.Pinchingthesawchainalongthetop
of the chain bar may push the chain bar
rapidly back towards the operator. Either of
these reactions may cause you to lose control
of the saw which could result in serious
personal injury. DO NOT rely exclusively upon
the safety devices built into your saw. As a
chain saw user, you should take several steps
to keep your cutting jobs free from accident
or injury. Kickback is the result of tool misuse
and/or incorrect operating procedures or
conditions and can be avoided by taking
proper precautions as given below:
•Maintainarmgrip,withthumbsand
ngersencirclingthechainsawhandles,
with both hands on the saw and position
your body and arm to allow you to resist
kickback forces. Kickback forces can
be controlled by the operator, if proper
precautions are taken. DO NOT let go of
the chain saw.
•DONOToverreachandDONOTcut
above shoulder height. This helps prevent
unintended tip contact and enables better
control of the chain saw in unexpected
situations.
•Onlyusereplacementbarsandchains
speciedbythemanufacturer.Incorrect
replacement bars and chains may cause
chain breakage and/or kickback.
• Followthemanufacturer’ssharpeningand
maintenance instructions for the saw chain.

9WWW.SENIXTOOLS.COM
SAFETY ALERT SYMBOL
Indicates danger, warning or caution.
May be used in conjunction with other
symbols or pictographs.
KEEP BYSTANDERS AWAY
WARNING: Keep all bystanders,
especially children and pets, at least 50
feet (15 m) from the operating area.
WARNING: DO NOT expose to rain.
WARNING: Contact of the chain bar tip
with any object should be avoided.
WARNING: Tip contact can cause the
chain bar to move suddenly upward
and backward, which can cause serious
injury.
WARNING: Always use two hands
when operating the chain saw.
GUARD AGAINST ELECTRIC SHOCK
Prevent body contact with earthed or
grounded surfaces (e.g. metal railings,
lamp-posts, etc.). Electric safety can
be further improved by using a high-
sensitivity (30 mA/30mS) Residual
Current Device (RCD).
READ OPERATOR’S MANUAL
WARNING:Read the operator’s
manual(s) and follow all warnings and
safety instructions. Failure to do so can
result in serious injury to the operator
and/or bystanders.
WEAR EYE AND HEARING PROTECTION
WARNING:Thrown objects and
loud noise can cause severe eye injury
and hearing loss. Wear eye protection
meeting current ANSI / ISEA Z87.1
standards and ear protection when
operating this unit. Use a full face shield
when needed.
WEAR DUST MASK
Wear breathing protection.
WEAR HAND PROTECTION
Wear heavy duty work gloves to protect
hands.
WEAR FOOT PROTECTION
Wear boots with slip-resistant and
puncture-resistant soles.
WARNING: Failure to keep your hands
away from the blade will result in
serious personal injury.
WARNING: Remove plug from
the mains immediately if the cable is
damaged or cut.
WARNING: Thrown objects can
ricochet and result in personal injury or
property damage.
CLASS II CONSTRUCTION
Double-Insulation. When servicing, use
only identical replacement parts.
This operator’s manual describes safety and international symbols and pictographs that may
appear on this product. Read the operator’s manual for complete safety, assembly, operating and
maintenance and repair information.
SAFETY & INTERNATIONAL SYMBOLS

10 WWW.SENIXTOOLS.COM
KNOW YOUR UNIT
SPECIFICATIONS*
*Allspecicationsarebasedonthelatestproductinformationavailableatthetimeofprinting.
We reserve the right to make changes at any time without notice.
INCLUDED PARTS
Quantity Item Quantity Item
1 Operator’s Manual 1
Chain/Bar/BladeProtectiveCover
Rated Voltage...............................................................................................................120V~60Hz
Rated current............................................................................................................................10A
Motor type..............................................................................................................Universal Motor
No load speed...................................................................................................................4500/min
Maximum chain speed.........................................................................................................8.2 m/s
Oil tank capacity....................................................................................................4.05 oz. (120 ml)
Sawbarmodel.........................................................................................................YS14-52-507P
Sawchainmodel...........................................................................................................3/8LP-A-52
Weight................................................................................................................... 7.16lbs. (3.5 kg)
Saw chain
Guide bar
Chain’s Screw
Cover
Oil Level Indicator
Extension Cord Retainer
Safety Button
Switch Trigger ON/OFF
Power Cord&Plug
Blade Protective Cover
Main Handle
Oil Tank Cap
Motor Housing
Front Handle
TM

11WWW.SENIXTOOLS.COM
1. Check the chain tension by pulling the saw
chain away from the chain bar. A properly
tensioned chain should have roughly 1/8
inch (3 mm) of distance between itself and
the bar guide (Fig. 1).
2. If adjustments are needed, loosen the end
cover nut until it is hand-tight. Use the
at-tipbladescrewdrivertoturnthechain
tensioner screw clockwise to tension
the chain. A cold chain will be correctly
tensioned when there is no slack on the
underside of the guide bar; the chain is
snug, but it can be turned by hand without
binding.
3. To adjust the saw chain tension, the
tension is correct when the drive links on
the chain do not slip out of the chain guide
on the bar when the chain is pulled up from
the middle of the bar(Fig. 1). Rotating the
chain tensioning screw upwards increases
the tension while rotating it downwards
CHAIN SAW PREPARATION
ASSEMBLY
TENSIONING THE CHAIN
WARNING!
WARNING!
WARNING!
WARNING!
To avoid serious personal injury, read
and understand all safety instructions
provided.
INSTALLING THE GUIDE BAR AND CHAIN
Unplug chain saw from power source
before adjusting saw chain tension.
Cutting edges on chain are sharp. Use
protective gloves when handling chain.
ALWAYS Maintain proper chain tension.
A loose chain may jump out of chainbar
groove. This may injure operator and
damage chain. A loose chain will cause
chain, chain bar, and sprocket to wear
rapidly. The chain life of the saw chain
mainly depends upon sufcient lubrication
and correct tensioning. Avoid tensioning
the chain if it is hot, as this
will cause the chain to become over
tensioned when it cools down.
NOTE: When replacing the guide bar and
chain, use only identical replacement
parts. Make sure the chain saw is
disconnected from the power supply
before proceeding with installation.
NOTE: A new chain tends to stretch; check
the chain tension frequently, and
adjust tension as required.
NOTE:RemovetheChain/Bar/Blade
ProtectiveCoverbeforeuse.
1. Use the hex key wrench to unscrew the
end cover nut and remove the chain/
sprocket end cover.
2. Lay out the new saw chain in a loop and
straightenanykinks.THESHARPSIDE
OF THE TEETH MUST FACE AWAY
FROM YOU AND IN THE DIRECTION
OF THE CHAIN ROTATION INDICATED
ONTHEGUIDEBAR.Iftheteethface
backwards, turn the loop over.
3. Starting at the tip, mount the chain drive
links into the bar groove, leaving a loop at
the back of the bar. The chain will loosely
tuntilitisplacedonthesprocket.
NOTE: Make certain of the direction of the
chain. If the chain is mounted
backwards, the saw will vibrate
abnormally and will not cut.
4. Hold the chain in position on the bar and
place the loop around the sprocket. Fit the
barushagainstthemountingsurfaceso
that the bar studs are in the long slot of the
bar and the adjusting pin is in the chain
tension pin hole.
5.Whilekeepingthebarandchainush
against the mounting surface, adjust the
chain tension as needed by adjusting the
chain tensioning screw with the supplied
at-tipbladescrewdriver.Turnthechain
tensioning screw clockwise to tightening
the chain, or counter-clockwise to loosen
the chain.
6. Replace the chain/sprocket end cover by
insertingthereartabrstintotherear
tab slot and position the cover over the
bar end. Tighten the end cover nut; leave
the bar loose enough to move slightly for
tension adjustment.
7. Remove all slack from the chain by turning
the chain tensioning screw clockwise until
the chain seats snugly against the bar with
thedrivelinksushinsidethebargroove.
8. Tighten the end cover nut completely using
the hex key wrench.

12 WWW.SENIXTOOLS.COM
FILLING THE AUTO OIL SYSTEM
ATTACHING THE EXTENSION CORD
CAUTION!
CAUTION!
The chain saw is NOTsuppliedlledwith
oil.Itisessentialtollwithoilbeforeuse.
Never operate the chain saw without chain
oil or at an empty oil tank level, as this will
result in extensive damage to the product.
Chain life and cutting capacity depends on
optimum lubrication. Therefore, the chain is
automatically oiled during operation via the
oil outlet.
To prevent oil leakage, ensure machine is left
inahorizontalposition(oilllercapupright)
when not in use. Use only the recommended
oil to avoid damage to the chain saw. Never
use recycled/old oil. Use of non approved oil
will invalidate the warranty.
Remove the plug safety cap (Fig. 5). Insert
the extension cord socket into the chain saw
plug.
This chain saw features an auto-oiling system
to keep the chain and chain bar properly
lubricated. The oil level indicator shows the
remaining oil in the chain saw. If the oil level
decreasestobelowonequartercapacity,rell
it with the proper bar and chain oil.
Tolltheoilreservoir:
1. Remove the oil cap (Fig. 4). Fill the
reservoir with bar and chain oil (SAE30)
until the oil level has reached full capacity.
2.Puttheoilcapbackon.Makesureto
check the oil level after every 10 minutes of
use. Unplug the chain saw before checking
oillevelsorllingtheoilreservoir.
Fig. 3
Bladescrewdriver
decreases tensionwith the blade
screwdriver. A properly tensioned chain
should have no sag (Fig. 3) and should
only be able to be pulled 1/8 inch (3 mm)
away from the chain bar of the saw.
4. Once the chain is properly tensioned,
tighten the end cover nut. DO NOT over-
tension the chain: this will lead to excessive
wear and reduces the life of both the bar
and chain.
NOTE: The saw chain must be tensioned
properly in order to ensure safe
operation. The chain tension is optimal
if the saw chain can be lifted 1/8
inch (3 mm) from the center of the
chain bar. Since the saw chain heats
up during operation, its length can
thereforeuctuate.Checkthechain
tension every 10 minutes of operation
and adjust as necessary, particularly
for new saw chains. Slacken the saw
chain after the work is completed
since it shortens when cooling down.
In doing so, you can increase the
chain’s life and prevent damage.
1/8” (3 mm)
Fig. 1
Fig. 2

13WWW.SENIXTOOLS.COM
Fig. 4
Fig. 5
An extension cord retainer is attached to the
handle to reduce strain on the cord (Fig. 5).
To use the cord retainer, double the extension
cord as shown, about a foot from the end,
andinsertitintotheendoftheretainer.Place
the loop formed by doubling the cord over the
hook. Gently tug on the cord to ensure that it
isrmlysituatedintheretainer.
Keep the extension cord clear of operator,
unit, and any obstacles at all times. Do not
expose the cord to heat, oil, water, or sharp
edges.
Oil Cap
Oil Level Indicator
Completed

14 WWW.SENIXTOOLS.COM
1. In order to ensure safe work, DO NOT
operate the saw above shoulder height.
2.Positionthecordsothatitwillnotbe
caught on branches and the like, during
cutting.
3. Never stand below a branch that is being
sawed.
4. Exercise caution when sawing both
branches under tension or branches that
are splintering.
5. Make sure to safe guard against the risk of
injuryfromfallingbranchesandyingwood
projectiles.
6. If the machine is in operation, keep persons
OPERATION
PREPARATION
ON/OFF SWITCH
SAFETY WARNINGS
CHAIN SAW: Beforebeginningwork,inspect
the chain saw for damage to the housing,
the extension cord, the saw chain and the
chain bar. Never use an obviously damaged
machine.
OIL TANK:Checkthellleveloftheoiltank.
Alsocheckwhetherthereissufcientoil
available while working. Never operate
the saw if there is no oil or the oil level has
dropped below the minimum oil level mark
in order to prevent damage to the chain
saw.Onaverage,anoilllingissufcientfor
approximately 10 minutes of cutting operation
(depending the duration of pauses and the
density of the work piece).
SAW CHAIN: Check the tension of the
saw and the condition of the blades. The
sharper the saw chain is, the easier and more
manageable operations will be. The same
applies to chain tension. Check the tension
every 10 minutes of operation to maximize
safety. New saw chains in particular are
subject to changes due to the heat created by
operation.
PROTECTIVE CLOTHING: Make absolutely
suretoweartheappropriateclose-tting
protective clothing such as protective pants,
gloves and safety shoes. Wear a safety
helmet with integrated hearing protection and
a face guard to provide protection against
falling and recoiling branches.
DO NOT cut down trees in high wind
conditions. This can result in injury and
should only be performed by a trained
professional.
Beforeeachuse,checkthefollowingitemsto
ensure safe working conditions.
To turn the tool ON: press the safety button
and then squeeze the trigger (Fig. 6). After
the tool has started, you can release the
safety switch without turning the tool off.
To turn the tool OFF: release the trigger
switch (Fig. 6).
and animals away from the danger area.
7 The machine is not protected against
electric shock when coming into contact
with high-voltage lines. Maintain a minimum
clearance of 30 feet from current-carrying
power lines to avoid life-threatening electric
shock.
8. When working on an incline, always stand
above or to the side of the branch being
sawed.
9. Allow the chain to cut for you. Keep the
saw running at full speed for the entire
duration of the cut.First-time user should,
as a minimum practice, cutting logs on a
saw-horse or cradle.
Fig. 6

15WWW.SENIXTOOLS.COM
Fig. 7
Fig. 8
SAWING TECHNIQUES
• Sawoffthelowerbranchesonthetree
rst.Bydoingso,itiseasierforthecut
branches to fall to the ground.
• Attheendofthecut,theweightofthesaw
suddenly increases for the user since it is
no longer being supported by a branch.
There is a risk of losing control of the saw,
so make sure to stay alert during the entire
sawing operation.
• Onlypullthesawoutofacutwhilethesaw
isrunning.Bydoingso,youpreventthe
chain from jamming in the wood.
• DONOTsawwiththetipofthechainbar.
DO NOT saw into the branch formations
(where the tree branches outwards).
This will impede the tree’s ability to heal.
• Forsawingoffsmallerbranches,placethe
stop face of the saw on the branch. This
prevents unwanted movements of the saw
at the beginning of the cut. While applying
light pressure, guide the saw through the
branch from top to bottom.
• Forsawingofflargerbranches,rstmake
a relief cut. Saw through 1/3 of the branch
diameter from the bottom to top using the
top side of the chain bar. Then saw from
top to bottom for the other 2/3 using the
bottom side of the chain bar. Saw off longer
branches in sections in order to maintain
control over the location of impact.
IMPORTANT: It is recommended that
rst-timeusershould,asa
minimum practice, cutting logs
on a saw-horse or cradle.
FELLING A TREE
When bucking and felling operations are
being performed by two or more persons at
the same time, the felling operations should
be separated from the bucking operation by a
distance of at least twice the height of the tree
being felled.
Trees should not be felled in a manner that
would endanger any person, strike any utility
line or cause any property damage. If the tree
does make contact with any utility line, the
companyshouldbenotiedimmediately.
The chain saw operator should keep on
the uphill side of the terrain as the tree is
likely to roll or slide downhill after it is felled.
necessary before cuts are started.
The escape path should extend back and
diagonally to the rear of the expected line of
fall (Figure 7).
Beforefellingisstarted,considerthe
natural lean of the tree, the location of
larger branches and the wind direction to
judge which way the tree will fall. Remove
dirt, stones, loose bark, nails, staples and
wire from the tree. Make the notch 1/3 the
diameter of the tree, perpendicular to the
direction of falls (Figure 8).
Makethelowerhorizontalnotchingcutrst.
This will help to avoid pinching either the saw
chain or the chain bar when the second notch
is being made.
Danger zone
Escape
route Escape
route
Description of felling: escape routes
Felling direction
Danger zone
Direction of fall
Notch
50 mm Felling back cut
Hinge
Description of felling: undercutting
50 mm

16 WWW.SENIXTOOLS.COM
Log supported along the entire length
Cut from top (overbuck). Avoid cutting earth.
2nd cut overbuck (2/3 diameter)
to meet 1st cut (to avoid pinching)
1st cut underbuck
(1/3 diameter)
to avoid splintering
Log supported one end
2nd cut underbuck (2/3 diameter)
to meet 1st cut (to avoid pinching)
Log supported both ends
1st cut overbuck (1/3 diameter)
to avoid splintering
Bucking a log
Stand on uphill side when cutting because log may roll
FELLING BACK A CUT
LIMBING A TREE
BUCKING A LOG
Make the felling back cut at least 50 mm
higher than the horizontal notching cut
(Figure 8). Keep the felling back cut parallel
to the horizontal notching cut. Make the felling
back cut so enough wood is left to act as a
hinge. The hinge wood keeps the tree from
twisting and falling in the wrong direction. DO
NOT cut through the hinge.
As the felling gets close to the hinge, the tree
should begin to fall. If there is any chance
that the tree may not fall in desired direction
or it may rock back and bind the saw chain,
stop cutting before the felling back cut is
complete and use wedges of wood, plastic or
aluminium to open the cut and drop the tree
along the desired line of fall.
When the tree begins to fall remove the chain
saw from the cut, stop the motor, put the
chain saw down, then use the retreat path
planned.Bealertforoverheadlimbsfalling
and watch your footing.
Limbing is removing the branches from a
fallen tree. When limbing leave larger lower
limbs to support the log off the ground.
Remove the small limbs in one cut (Figure 9).
Branchesundertensionshouldbecutfrom
the bottom up to avoid binding the chain saw.
When the log is supported on one end,cut 1/3
the diameter from the underside (underbuck)
(Figure11).Thenmakethenishedcutby
overbuckingtomeettherstcut.
When the log is supported on both ends,
cut 1/3 the diameter from the top (overbuck)
(Figure12).Thenmakethenishedcut
by underbucking the lower 2/3 to meet the
rstcut.
When bucking on a slope always stand on the
uphill side of the log (Figure 13).
Buckingiscuttingalogintolengths.Itis
importanttomakesureyourfootingisrm
and your weight is evenly distributed on both
feet. When possible, the log should be raised
and supported by the use of limbs, logs or
chocks. Follow the simple directions for easy
cutting. When the log is supported along its
entire length, it is cut from the top (overbuck)
(Figure 10).
To maintain complete control when cutting
through a log, release the cutting pressure
near the end of the cut without relaxing your
grip on the chain saw handles. Don’t let the
chain contact the ground. After completing the
cut, wait for the saw chain to stop before you
move the chain saw. Always stop the motor
before moving from tree to tree.
Fig. 9
Fig. 12
Fig. 13
Fig. 10
Fig. 11
Keep work off ground. Leave support limbs until log is cut.
Tree limbing

17WWW.SENIXTOOLS.COM
MAINTENANCE AND ADJUSTMENTS
• Cleanthemoldedplastichousingofthe
chain saw using a soft brush and clean
cloth.
• DO NOT use water, solvents or polishes.
• Removealldebris,especiallyfromthe
motor cooling vents.
• Removeandbrushcleanthecoverplate,
chain and chain bar after 1 to 3 hours of
use.
• Cleantheareaunderthecoverplate,the
drive sprocket and chain bar assembly
using a soft brush.
• Cleanoiloutletwithacleancloth.
• Ifthechainsawistobestoredforalonger
period of time, clean chain and chain bar.
• STORE IN A SECURE, DRY PLACE OUT
OF THE REACH OF CHILDREN.
• DO NOT place other objects on the chain
saw.
• Topreventoilleakage,ensuremachineis
left in a horizontal position.
• Whenstoringmachineinoriginalpackaging
the oil tank must be completely emptied.
CLEANING/STORAGE
CHECKING THE AUTOMATIC
CHAIN LUBRICATION
LUBRICATE SPROCKET
SHARPENING THE SAW CHAIN
Regularly check the functionality of the
automatic chain lubrication in order to prevent
overheating and the subsequent damage
to the chain bar and saw chain associated
with it. For this purpose, align the chain bar
tip against a smooth surface (board, cut-in
of a tree) and allow the chain saw to run.
If an increasing amount of oil appears, the
automatic chain lubrication functions properly. Keep chain sharp. Your saw will cut faster
and more safely. A dull chain will cause undue
sprocket, guide bar, chain, and motor wear.
If you must force chain into wood and cutting
creates only sawdust with a few large chips,
then chain is dull.
Purchaseanewchain,haveyourchain
sharpenedprofessionallyataqualied
service center, or sharpen the chain
yourself using a proper sharpening kit. The
height difference between the cutting tip and
the ridge is the depth gauge setting (Fig. 15).
When you sharpen the cutting tip, the depth
gauge setting between the tip and the side
plate ridge will decrease. To maintain optimal
cuttingperformance,theridgehastobeled
down to achieve the recommended depth
gauge setting.
ON/OFF SWITCH
WARNING!
WARNING!
Wear heavy duty gloves when performing any
maintenance or service to this tool.
Always unplug the tool before performing any
service or maintenance on this tool.
Unplug chain saw from power source before
servicing. Severe injury or death could occur
from electrical shock or body contact with
moving chain. Cutting edges on chain are
sharp. Use protective gloves when handling
chain.
NOTE: It is not necessary to remove the
chain or bar when lubricating the sprocket.
1. Clean the bar and sprocket.
2. Using a grease gun, insert the tip of the
gun into the lubrication hole and inject
grease until it appears at the outside edge
of the sprocket tip (Fig. 14).
3. To rotate the sprocket release the chain
stop and pull the chain by hand until the
ungreased side of the sprocket is in line
with the grease hole. Repeat the lubrication
procedure.
Fig. 14

18 WWW.SENIXTOOLS.COM
ABC
D
Cutter
Length
Depth Gauge
Setting 0.025 in.
A - Top Plate
B - Cutting Tip
C - File Position
D - Ridge
Fig. 15
Fig. 16
Fig. 17
Fig. 18
To sharpen the chain:
1. Using protective gloves, ensure the chain is
correctly tensioned on the guide bar.
2.Usearoundlewithadiameter1.1times
the cutting tooth depth. Make sure 20% of
thelediameterisabovethecutter’stop
plate (Fig. 16).
3. File at an angle perpendicular to the bar,
and at an angle of 25° to the direction of
travel (Fig. 17).
4. File each tooth from the inside towards
outsideonly.Fileonesideofthechainrst
then turn the saw around and repeat the
process.
• Sharpeneachtoothequallybyusingthe
same number of strokes.
• Keepallcutterlengthsequal(Fig.18).
Each time the cutting tip is sharpened the
cutting length is reduced. When the cutter
length is reduced to 0.16 inch (4 mm), the
chain is worn out and should be replaced.
• Thedepthgaugesettingisalsoreduced
with each sharpening. Every 5 sharpenings
NOTE:Aleguideisavailablefrommost
chainsaw retailers and is the easiest way to
holdtheleatthecorrectposition.
B
A
A - Top Plate
B - Side Plate
use a depth gauge measuring tool to check
the height between the cutting tip and the
ridge (Fig. 15). When necessary, use a
atletoledowntheridgetoachieve
the .025 inch depth gauge setting. Depth
gauge measuring tools are available from
most chainsaws retailers.
• Ifthesawisnotfunctioningproperly,take
ittoaqualiedchainsawservicecenterto
have the saw inspected. Use only identical
parts as listed in this manual.
25°
A
SAW CHAIN DIRECTION
Sharpening Angle
FILE
DIRECTION
Outside
Inside
A - Left-hand Cutter
A
B
CD
A - Right-hand Cutter
B - Left-hand Cutter
C - Bumper Drive Link
D - Tie Strap
SAW CHAIN DIRECTION

19WWW.SENIXTOOLS.COM
REPLACING THE SAW CHAIN
AND CHAIN BAR REPLACING THE POWER CORD
If the supply cord of this power tool is
damaged, it must be replaced by a specially
prepared cord. Inspect the power cord and
plug often. If damaged, have replaced by a
qualiedservicedealer.
WARNING!
APPROVED SAW BAR/SAW CHAIN:
WARNING!
Do not connect the chain saw to extension
cord and power source before it is completely
assembled. Always use gloves when handling
the chain.
Replace chain when cutters are too worn
to sharpen or when chain breaks. Only use
replacement chain noted in this manual.
Always include new drive sprocket when
replacing chain. This will maintain proper
driving of chain.
When handling saw chains, always wear
protective gloves.
1.Placethesawbodyonarmandlevel
surface.
2. Use a hexagon wrench to turn the saw’s
screw anticlockwise to (Fig. 19) to remove
the cover from the saw’s body.
3. Wearing protective gloves, wrap the saw
chain around the chain bar, making sure
that the teeth are aimed in the direction of
rotation. The chain should be properly set
in the slot running along the entire outside
edge of the chain bar.
4.Placethesawchainaroundthesprocket
(Fig. 20) while lining up the slot in the chain
bar with the internal bolt at the base of the
saw and the chain tensioning pin in the
chain bar’s pin hole (Fig. 20). The chain
tensioning pin may need adjustment to
properly align with the hole in the chain bar.
Use the chain tensioning screw to adjust its
locationuntilittsinthechainbar.
5. Turn the chain tensioning screw to
preliminarily tighten the chain bar enough
that it stays in place. While holding the bar
still, place the cover back onto the saw.
Make sure the tab properly lines up with
the slot on the body of the saw. Lock the
cover in place with saw’s screw by turning
it clockwise until it engages. Adjust the
chain tension.
Fig. 19
Internal Bolt
Chain Tensioning Pin
Sprocket
Fig. 20
SawBarmodel: YS14-52-507P
Saw Chain model:
3/8LP-A-52
Table of contents
Languages:
Other Senix Chainsaw manuals
