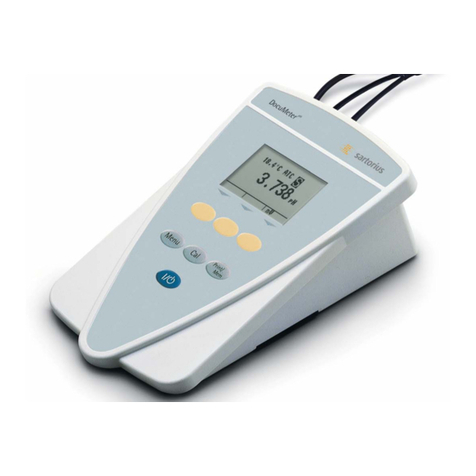
Sensonix pH Light PS-101 User manual

pH Light Instruction ManualpH Light Instruction Manual
pH Light Instruction ManualpH Light Instruction Manual
pH Light Instruction Manual

Mounting Holder Bracket
Temp. pH7 pH4
0 7.12 4.01
10 7.07 4.00
15 7.04 4.00
20 7.02 4.00
25 7.00 4.00
30 6.99 4.01
40 6.98 4.03
50 6.97 4.06
60 6.98 4.09
70 6.99 4.12
80 7.00 4.15
90 7.02 4.20
pH Light Instruction ManualpH Light Instruction Manual
pH Light Instruction ManualpH Light Instruction Manual
pH Light Instruction Manual
Thank you for choosing your pH Light pH Meter. The pH light is designed for ease of use, but we suggest
2. pH calibration of the buffer liquid2. pH calibration of the buffer liquid
2. pH calibration of the buffer liquid2. pH calibration of the buffer liquid
2. pH calibration of the buffer liquid
you read the following instruction to familiarize yourself with the features and operation of the meter.
1.Description of features.1.Description of features.
1.Description of features.1.Description of features.
1.Description of features.
1. Remove electrode from soaker/storage bottle
Hold the cap and twist and remove the bottle.
2. To proceed with calibration, you will need the 7 and 4 pH buffers and
distilled water for rinsing (Tap water may be used but distilled water is
preferred for rinsing )
3. Rinse the electrode in the distilled water, then remove and shake off
excess water. Place the electrode in the 7 pH buffer.
4. Depress the ON/OFF button for 2 seconds until the buzzer sounds
and display lights up.
5. Depress the • gCAL•hbutton. 7.00 will be displayed.
6. When 7.00 calibration is complete, 4.00 (or 10.00) will be displayed.
7. Rinse the electrode in distilled water, then remove and shake off express water. Place the electrode in
the pH 4 (or 10.00) buffer.
8. 4.00 (or 10) will be display on upper portion of the LCD.
9. When the 4.00 (or 10.00) reading disappears., the calibration is complete.
10. Older electrode should be re-checked in buffer solutions. If the readings are not correct, repeat the
calibration procedure (step 3-9). If the readings still are not correct, the electrode should be
replaced.
NoteNote
NoteNote
Note : It is recommended to perform routine calibration.
Use fresh pH buffers to ensure quality calibrations.
pH Buffer vs. Temperature TablepH Buffer vs. Temperature Table
pH Buffer vs. Temperature TablepH Buffer vs. Temperature Table
pH Buffer vs. Temperature Table
HOLD CAL
ON/
OFF
CAL
HOLD
ON/
OFF
Depress until buzzer sounds,
the displayed value will be
held.
Depress until buzzer sounds,
You will enter calibration
mode.
0.00〜14.00
Mating electrode connecter
Battery Box Adapter
Depress for 2 seconds and
buzzer will confirm ON/OFF
status.
External power input
3.5 Digit LCD Display
pH electrode
Model S101
Remove electrode for measuring and
return electrode to bottle when not
in use.
Soaker/storage bottle for electrode
ON/OFF Power switch.

3. Taking pH measurements.3. Taking pH measurements.
3. Taking pH measurements.3. Taking pH measurements.
3. Taking pH measurements.
1. When the calibration is complete, the meter is ready for use. The electrode should be rinsed in
distilled water before inserting it into sample.
2. The electrode should be immersed at least 25mm (1 inch) in sample to be measured.
3. To freeze a pH reading on the display, depress the • gHOLD•hbutton. The reading will remain even if
the electrode is removed from the sample. The reading is released by depressing the • gHOLD•h
button again. When you have completed measurements, depress the ON/OFF button.
4. To turn the unit off. Depress the ON/OFF button.
4. Using Outside Power (Battery Box Adapter).4. Using Outside Power (Battery Box Adapter).
4. Using Outside Power (Battery Box Adapter).4. Using Outside Power (Battery Box Adapter).
4. Using Outside Power (Battery Box Adapter).
To use the pH light for continuous measurements, used the enclosed attachments of Battery Box and
connect it to the input terminal located on the underside of the pH light. (Remove the rubber tab
covering the input terminal). The meter uses 4 AA 1.5V button batteries as an internal power source.
And the battery box, use 4 re-changeable cells, AA 1.5V LR6. (1.5V UM-3 AA, R & Alkali battery).
Caution :Caution :
Caution :Caution :
Caution : In the case of continuous measurements, calibration should be done from time to time
usingpHbuffersolutions.
5. Cleaning and storage of pH electrodes.5. Cleaning and storage of pH electrodes.
5. Cleaning and storage of pH electrodes.5. Cleaning and storage of pH electrodes.
5. Cleaning and storage of pH electrodes.
1. To clean coatings from the electrode, soak in dilute HCl acid (1%) and or non-abrasive soap products
thoroughly rinse the electrode after cleaning.
Caution :Caution :
Caution :Caution :
Caution : Protective Aprons, gloves and eye protection should be used whenever handing aids.
Avoid contact with eyes, skin and clothing. Read acid manufacturers safety precautions
beforeuse.
2. When not in use., the electrode should be stored in the soaker/storage bottle. The storage solution
is 4.00 pH buffer with 1.5M KCl. Should you lose the solution, plain 4.0 pH buffer may be used.
If none of the above are available, use plain tap water.
Note:Note:
Note:Note:
Not
e: Never store a pH electrode in distilled water. Distilled water is for rinsing, not storing.
If water is used for storing the electrode, make sure it is tap water.
6. Replacement of the Electrode6. Replacement of the Electrode
6. Replacement of the Electrode6. Replacement of the Electrode
6. Replacement of the Electrode
Normal service life of an electrode is approximately one (1) year. If you are unable to calibrate and
the electrode is over one (1) year old, it should be replaced.
7. Replacement of the Battery7. Replacement of the Battery
7. Replacement of the Battery7. Replacement of the Battery
7. Replacement of the Battery
When the is visible on display, the batteries should be replaced. Use 4 AA 1.5V cells.
To replace the batteries, remove the back cover using a screwdriver. Ensure proper polarity when
replacing the batteries.
Other indications of weak batteries are
1. Weak display.
2. No display.
3. The buzzer sound is weak.

1-10-25,HONKOMAGOME,BUNKYO-KU,TOKYO,JAPAN1-10-25,HONKOMAGOME,BUNKYO-KU,TOKYO,JAPAN
1-10-25,HONKOMAGOME,BUNKYO-KU,TOKYO,JAPAN1-10-25,HONKOMAGOME,BUNKYO-KU,TOKYO,JAPAN
1-10-25,HONKOMAGOME,BUNKYO-KU,TOKYO,JAPAN
•§•§
•§•§
•§113-8638 Tel:03-3946-1226 Fax:03-3946-7921113-8638 Tel:03-3946-1226 Fax:03-3946-7921
113-8638 Tel:03-3946-1226 Fax:03-3946-7921113-8638 Tel:03-3946-1226 Fax:03-3946-7921
113-8638 Tel:03-3946-1226 Fax:03-3946-7921
Specification of Electrode
9. Included accessories9. Included accessories
9. Included accessories9. Included accessories
9. Included accessories
9981020H
SpecificationSpecification
SpecificationSpecification
Specification
Specification of Meter
10. Electrode for replacement10. Electrode for replacement
10. Electrode for replacement10. Electrode for replacement
10. Electrode for replacement
11. Warranty Terms and Conditions.11. Warranty Terms and Conditions.
11. Warranty Terms and Conditions.11. Warranty Terms and Conditions.
11. Warranty Terms and Conditions.
Thank you again for your purchasing of your pH Light Meter. Your meter carries a warranty against
material and workmanship defects for a period of one (1) year from the date of purchase.
At our option , we will repair or replace your meter free of change. Damage to the meter due to water,
voltage spikes, lighting strikes, etc., will be repaired with charge.
pH electrodes, batteries and buffer solution are excluded. The pH electrode carries a limited 3-months
warranty for defects in material and workmanship however it is not warranted for misuse, breakage or
chemical attack.
Under all circumstances, any claims of liability arising from use of this pH Light Meter are limited to the
purchase price only of your pH Light Meter. Use of your pH Light Meter acknowledges your acceptance
of these terms.
NameofPart Portable&continuousMeasuringpHMeater
Brand&Model pHLightPS-101
Display LCD
RangeofMeasurement 0〜14.00pHResolution0.01
Repeatability ±0.05pH±1digital
RangeofusingTemp. 0〜40℃
PowerSource BatteryLR44×4(SR44×4)
BatteryAdapterforcontinuoususe(1year)
(4PCs.of1.5VUM-3AA,R&Alkalibattery)
Weight Approx.125g(IncludingElectrode)
AttachedElectrode KClSealedtypePlasticBodypHElectrode(0〜50℃)
Model S101
Electrodetype Plastic(polycabonate)
Leadwire 1m(5moptionallyavailable)
Included with the PS-101 pH Light Meter are the following :
S101pHElectrode-7and4pHBuffer,BatteryAdapter,MountingHolderBracket,CarryingCord.
pHElectrode S101with1Mleadwire
pHElectrode S105with5Mleadwire

TEL:03‑3946‑1226MADEINCHINATEL:03‑3946‑1226MADEINCHINA
TEL:03‑3946‑1226MADEINCHINATEL:03‑3946‑1226MADEINCHINA
TEL:03‑3946‑1226MADEINCHINA
MODELNO.PS‑101MODELNO.PS‑101
MODELNO.PS‑101MODELNO.PS‑101
MODELNO.PS‑101
pH7
pH4
Other Sensonix Measuring Instrument manuals
Popular Measuring Instrument manuals by other brands
S+S Regeltechnik
S+S Regeltechnik PREMASGARD SHD Operating Instructions, Mounting & Installation
Sprague
Sprague TO-6 operating manual

Keison
Keison PFP7 Operating and service manual
isweek
isweek GM63B instruction manual

LaserLiner
LaserLiner ThermoMaster operating instructions
ROHDE & GRAHL
ROHDE & GRAHL R&S ZPH Series manual
