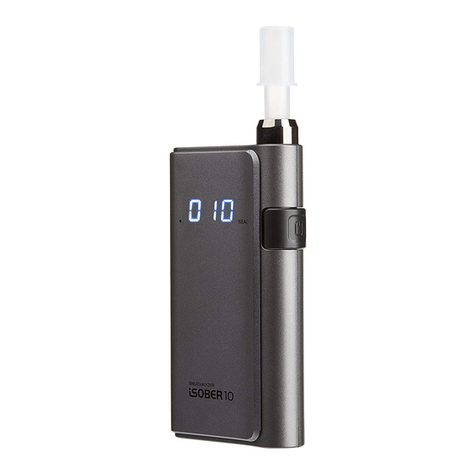
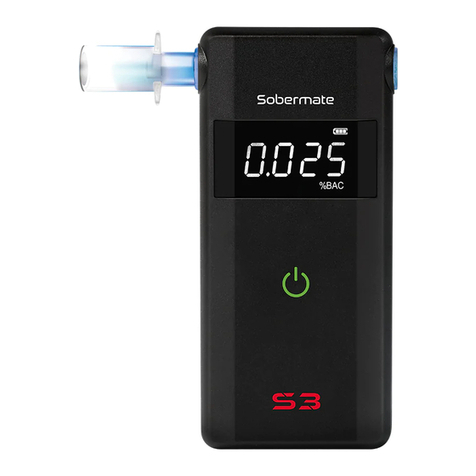
SenTech Suracell iblow 10 User manual

TM
Technology
USER MANUAL
iblowTM is a registered trademark of Sentech Korea Corp.

Introduction
With new Fuel Cell Sensor Technology of Sentech Korea, iblow 10 is designed to high-qulity
professional use to check person’s alcohol concentration fastly & accurately
With iblow10, the alcohol levels of 12 people can be measured per minute and the results
are displayed in numerics and can also indicate zero-low-high levels. The device has
manual sampling function so it is possible to check alcohol level of specific drinks or
unconscious subject .
The blow cap is easily replaced for hygienic use, and the built-in magnets make it attachable
to vehicles when police conduct roadside tests, preventing damage to the equipment. The
LED lighting can also be used in various ways at night.
The user can also adjust the settings directly or connect it to PC software for more detailed
settings. The alarm function also indicates the calibration warning and grace period of
calibration warning, making it much more convenient.
Parts name
Contents
iblow10 1pc, Blow cap (Basic pack: 3pcs/Advanced pack: 10pcs), Micro USB cable 1pc,
Handstrap 1pc, User manual 1pc
Blow cap
LED Lighting
Magnet insralled
(Rear side)
Micro USB port
Lighting / Up button
White FND display
Power / Confirmation
/ Passive test button
Setting / Down button
Battery cover &
handle
Slotted screw
2

.ProdutItrodutio
Bakgroud
Produtoept
Suar
Appeaae
LightCap
Wido
FrotBod
Light/DoButto
Poer/PassieButto
Meu/UpButto
BatterCoer
MagetiAttahet
RearBod
USBCoetor
‐.iBlo

.ProdutItrodutio
Bakgroud
Produtoept
Suar
Butto odes
PoerO/Off
Etertheeu
Seletthefutio
Moedo
Moeup
Lightode Meuode
‐.iBlo

Safety information : please read before using iblow10
ㆍㆍㆍㆍㆍㆍㆍㆍㆍㆍㆍㆍㆍㆍㆍㆍㆍㆍㆍ
Always use genuine Sentech Korea accessories. Use imitation items for the device may
not give you proper result, or they may damage the device.
Recalibrating the device or modifying the device’s hardware and software from unofficial
sources may damage the device.
Wait at least 20 minutes after eating or drinking before testing. Alcohol remaining in the
mouth, or even excess saliva, may interfere with testing. This includes alcohol-based
mouthwash or similar products, which include any alcohol ingredient.
Avoid testing in high wind or enclosed spaces. Poor ventilation may also lengthen the time
required for warm up between tests.
Do not blow smoke, saliva or other contaminants into the sampling hole, as the sensor may
become damaged.
Hold the device at straight to the subject for accurate results. The others may not give you
correct results.
Poor handling, physical impact, or electrical shock causes most premature device failures.
Do not store the device extreme temperatures, direct sunlight, dirt and dust
Store the device beyond children’s reach.
Any service in regard to the device should be performed by authorized service partners.
Battery safety information
Do not disassemble the batteries!
Only replace with batteries of the same type, never use different types of batteries together
or used batteries with new ones.
Replace al the batteries at the same time!
Keep batteries out of children’s hands!
Do not use manganese batteries!
Do not attempt to recharge Alkaline batteries! There is a risk of explosion!
Do not insert the battery into the opposite electrode (see the diagram on the rearside label)
Please remove all the batteries when not using it for long period!
If it may cause to the leakeage from batteries, please avoid contact with eyes, skin and
mucous membranes! If battery liquid comes in contact with any of these body parts, rinse
the affected region with a sufficient amount of clean water and seek medical attention
immidiately!
3

*Manual sampling activation: if the subject did not breathe out hard enough, or when
checking the alcohol content of a drink, press the power button once on “go” status for the
manual sampling.
Manual sampling result will be displayed 3 levels as 0.00 (Zero), Lo (Low), Hi (High)
*In numeric result mode, test result could be affected
by sampling distance, angle, flow rate and strength
Unit operation
1. Press the power button
2. 3. If you keep press the power button, “L” and particular number which is the last test
result will be displayed
4. Battery level will be indicated: High or Middle or Low
5. Warming up status
6. “go” means ready to test. Maintain subject to blow cap area 2~3cm and blow steadily into
device’s sampling hole
7. Test result will be displayed in 2 modes: Zero- Low- High or Numeric results
7-1. 7-2. 7-3. 3 levels of test result display: 0.00 (Zero), Lo (Low), Hi (High)
7-A. 7-B. 7-C. Numerical test result display: Approximate numeric result until 1.00g/L
(1.00g/L =0.50mg/L= 0.10%BAC= 100mg/100mL)
* If the result is higher than 1.00g/L, display will shows “HI” without numeric display
4
1.
7-1. 7-2.
Passive result Numerical result
7-A. 7-B. 7-C.7-3.
2. 3. 4. 5. 6.

.ProdutItrodutio
Bakgroud
Produtoept
Suar
Poeoseuee
....
......
.Poeo.Batteleel.Iitializig
.Readtolo
.Poeo.DisplaL.Displalatesttestdata
.Batteleel.Iitializig.Readtolo
.Aalzig. Test esult
.Keeppushthepoeuttoadeleaseheespose.
.Keeppushthepoeuttoadjustkeeppushit.
Repeatutileleasetheutto
‐.iBlo

Device setting menu can be entered by keep pressing on mode
*If you want back to mode at setting menu, keep pressing together
0. Last Result Check
1. Counting of Test Numbers Check
2. Display Mode Setting
last 12 hours
After calibration
*Alternating display type
000.300 = Tested 300 times
*Alternating display type
003.300 = Tested 3,300 times
0, Lo (Low), Hi (High) displaying
Total numbers
Passive result
Approximate Numerical result
*the lastest test result
*Dot on the display means the thousands
Device Settings
5

6
3. LED Lighting Mode Setting
All LED OFF
Only test result LED ON
*Refer to LED operation chart
Device off after 30 seconds
Device off after 60 seconds
Device off after 300 seconds
Device off after 600 seconds
Device off after 900 seconds
All LED ON
4. Automatic Device Off time Setting

Test result displaying 1 second
Test result displaying 2 second
Test result displaying 9 second
Remaining DAYS to calibration 300 DAYS left to calibration
5. Test result displaying time Setting
7. Calibration reminder check
What if device passed calibration DAYS or COUNTS?
->DAYS or COUNTS of grace period will be activated and “remaining DAYS or COUNTS” to
the calibration lock will be displayed initially whenever device is turned on
What if device passed grace period of calibration DAYS or COUNTS?
->Device will be calibration locked so please contact local service provider
*Calibration lock: Device is locked and can not operate device anymore so device needs to
be recalibrated to be operated
Remaining COUNTS to calibration 600 COUNTS left to calibration
7

8
Out to “go” (ready to blow) mode from setting menu
*Short cut key: keep pressing together
Running out of batteries and need to replace batteries to new one
*Replace all batteries at a time
Too low temperature to operate
the device. It will apprear below
than -5 ℃(celsius)
DAYS of calibration grace period activated
CA.d and specific numbers left DAYS to calibration lock will be displayed alternatively
Device need to have calibration service before calibration lock
Device is in calibration lock status. Contact technical service provider
COUNTS of calibration grace period activated
CA.t and specific numbers left COUNTS to calibration lock will be displayed alternatively
(001 = 10 COUNTS left)
Device need to have calibration service before calibration lock
Closing to the calibration required DAYS (e.g. d.30 means 30 days left to calibration
required days) It will ONLY apprear warming up status when the device is turned on
Closing to the calibration required COUNTS (e.g. t.99 means 990 test counts left to calibration
required counts) It will ONLY apprear warming up status when the device is turned on
Battery level indication
It will ONLY apprear warming up status when the device is turned on
Device is under calibration grace period (DAYS or COUNTS)
Device need to have calibration service before calibration lock
Flow error: the breath sample was not strong enough
Blow strong and steady during sampling
USB cable is connected to the device
Err1 error: Pressure sensor damaged so contact technical service provider
PC software is connected to the device
Low battery level indication while device is ready to blow status
Status bar is moving and batteries need to be replaced immediately
* Low battery level indication could be displayed under WHITE LEDstatus due
to power consuming on WHITE LED is much bigger than other color of LED
Too high temperatrue to operate
the device. It will apprear above
than 50 ℃(celsius)
Displays on iblow10

Err2 error: Alcohol sensor damaged so contact technical service provider
Err3 error: Timer or battery for the timer damaged so contact technical service provider
Err5 error: Memory damaged so contact technical service provider
Err2 error: Alcohol sensor damaged so contact technical service provider
Device is ready to OFF
Press power button once to off the device. Device OFF
SuracellTM sensor (Fuel Cell sensor)
AA Size Alkaline Battery
Or Rechargeable Battery 6EA
370g (Including batteries)
276(Height) X 44.5(Width) X 44.5(Thickness)
Zero : Green / Low : Red / High : Blinking Red
0.00/Lo/Hi or Numerical result
(Display “HI” in Numerical result mode means more than 1.00 g/l of BAC)
Zero : 1 Beep sound
Low : Repeating short Beep sound
High : long Beep sound
Within 10 seconds
Within 2 seconds (at 0.00 BAC)
12 times / 1 minute
-5°C ~ 50°C
-10°C ~ 60°C
Blow cap (Replaceable & washable passive cone type)
Adjustable 30 to 900 seconds
Adjustable 1 to 9 seconds
Every 5,000 tests or 12 months whichever comes first
(Factory Default) *Changeable by Web-server software
Built-in Magnet
Reminder for calibration & Grace period
Calibration protection by Web-server connecting
Manual LED lighting: White, Red blinking, Red, Red & blue
Sensor Type
Battery
Weight
Size (mm)
Test result
Warming up time
Time for analysis
Maximum test
Working temperature
Storage
Mouthpiece
Auto power OFF
Duration time for display
Calibration period
Additional Function
Specification
LED Alert
FND display
Buzzer alarm
9

10
1. Loosen the slotted screw anticlockwise with coin or appropriate tools and remove the Battery cover
LED operation chart: LED mode setting & manual LED operation
Changing Batteries

2. Replace new six 1.5V Alkalnie Batteries (LR06,AA) or rechargeable batteries. Please make sure the insrting
3. Put the battery cover (Arrow upward) align the protrusion with the slot on the device and tighten clockwise
the slotted screw with coin or appropriate tools
batteries are the right ways (follow the batteries diagram on the rearside label)
+
+
+
+
AA
+
AA
+
The manufacturer warrants the product to be free from defects in workmanship or material (excluding
calibration) under normal use for six (6) months from the date of purchase.
The manufacturer’s obligation under this warranty is limited to replacing, adjusting or repairing the unit if returned
along with proof of purchase. This warranty is void if the unit has been tampered with or maliciously damaged.
Warranty
For recalibration and technical support, please contact us at:
Calibration & Service
11

12
USER MANUAL
TM
Technology
Table of contents
Other SenTech Test Equipment manuals
