Seymour Z-500 Operating manual

1. Wear safety glasses!
With some of these actions, there is a
risk of paint splattering, especially to
those unfamiliar with the apparatus.
2. Detach crank mechanism from
apparatus.
Unwind the crank completely, then grip
the
base support firmly and turn it
counterclockwise to
unlock it. Then pull the crank mechanism
out of the tube. Since this mechanism fits
so snug due to the rubber gasket that
seals it airtight, strong but controlled
pressure must be exerted to extract it.
Once it is free, set it aside. You can also
lubricate with water if using water based
paint) or mineral spirits if using solvent
based paint) to ease insertion back into
the tube.
Z-500 Paint Crank
The Paint Crank is a professional paint injection tool.
Use it to easily aerosolize almost any custom water or
solvent-based paint or stain color in minutes.
The Paint Crank is perfect for do it yourselfers,
contractors or decorators.
This manually operated aerosol can filling tool is the
first of its kind to allow you to fill cans at a job site.
It's easy to operate and cleans up in a snap.
Paint Crank illing Directions:

3. Attach can to apparatus
Grip the black plastic coupler by hand and unscrew it halfway. Remove sprayhead from aerosol
can, then snap the top of the can into the coupler by gripping the apparatus in one hand and the
aerosol can in the other and joining them. Once it is firmly attached, retighten the black plastic
coupler #2502) by hand to the apparatus. This will mate the filling nozzle with the valve on the
top of the can. It should be tight, but not impossible to unscrew by hand. Hand tools such as
channel locks or pliers are not necessary.
4. Stand upright, ill tube with paint
Set the coupled can/apparatus upright
and fill it to the marked level, about an
inch below the crank locking mechanism.
This is approximately 4 ounces. Do not
overfill! Replace the crank mechanism
and lock it in place. Take care to hold the
apparatus at all times to avoid accidental
spills. With the crank mechanism locked,
the apparatus can be set down
horizontally on the edge of a flat work
surface, with the crank hanging over the
edge of the work surface and the support
legs providing a stable base.
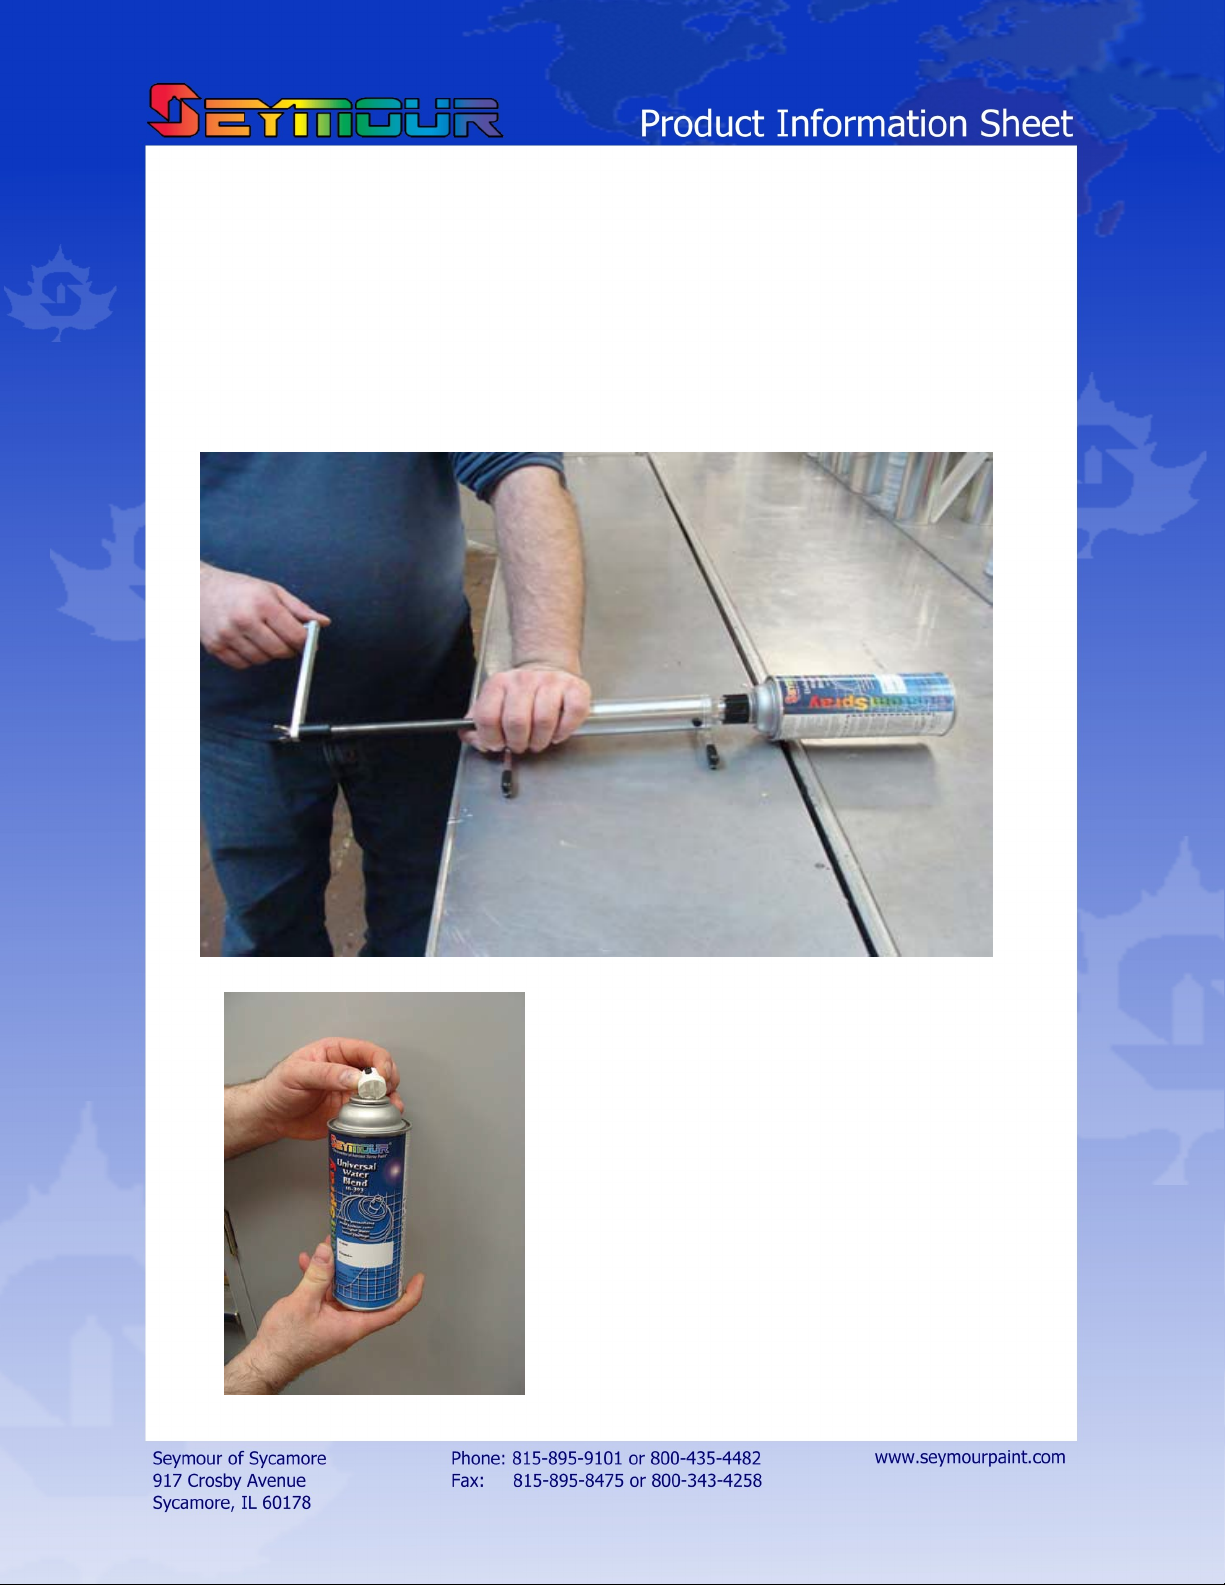
5. ill can with paint
Turn crank clockwise completely, until it stops making forward progress. This can be done
either by hand or with the aid of a cordless drill unscrew wingnut and detach hand crank). With
filling complete, grip the black coupler and loosen it halfway again. In order to separate the can
from the coupler, you must hold the tube in one hand and the aerosol can in the other. Gently
separate the two components. Immediately clean any leaked paint from the can and the filling
head. Replace the sprayhead with a gentle twisting motion,shake the can for one minute, then
spray the can for a couple seconds to clear the dip tube. Once a desirable spray pattern is
achieved, turn the can upside down and spray for a few seconds to clear the sprayhead for future
use. Replace overcap.
6. Disassembly/Cleaning Instructions
After filling the can and disconnecting it from
the apparatus, unscrew the crank back to its original
position. Detach the crank mechanism see step 2)
in order to clean the inside of the tube. Use soap
and water for a water based paint and mineral spirits
for a solvent based paint. For simple, quick cleaning,
these liquids are commonly used to flush out the
apparatus. Take care to prevent any residual paint
from remaining in the apparatus after cleaning. For
more thorough cleaning or to replace worn out parts,
unscrew the small black thumbsrews at the base of
the tube. Once unscrewed, strong but controlled
pressure will detach the filling head from the tube.
Twisting while pulling also helps.
Table of contents
Other Seymour Power Tools manuals


Popular Power Tools manuals by other brands


SEM
SEM 0101 Operation and maintenance manual

Weston
Weston 07-0801 instructions

Cooper
Cooper Weller DS 22 operating instructions

Campbell Hausfeld
Campbell Hausfeld DG460300CK S Operating instructions and parts manual

Ingersoll-Rand
Ingersoll-Rand QX Series user manual

Omega Technology
Omega Technology Cleco 35PHH instruction manual

DeWalt
DeWalt DW624 Original instructions

Textron
Textron Avdel Genesis G3 quick start guide

Bartell
Bartell BCF1080 Owner's manual and parts book

Black & Decker
Black & Decker SR650 instruction manual

Isel
Isel ICP 4030 iMC-P Assembly instructions/Operating instructions

AEG
AEG WS 22-180 Original instructions