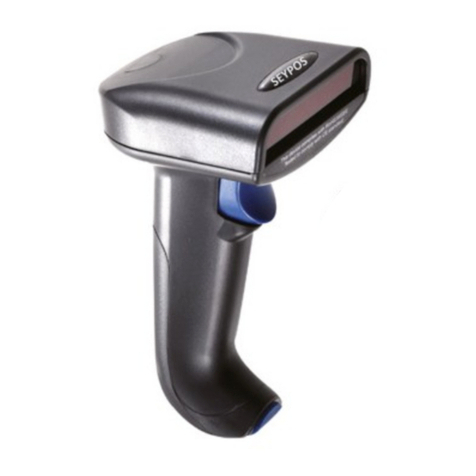
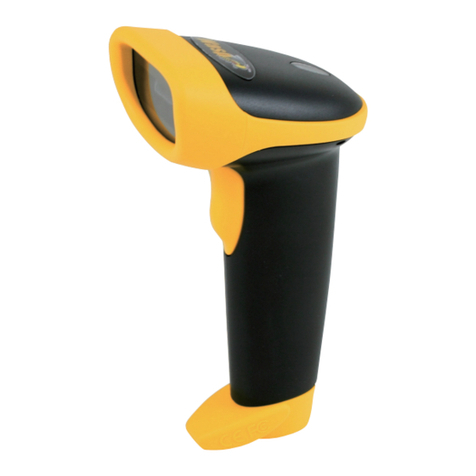
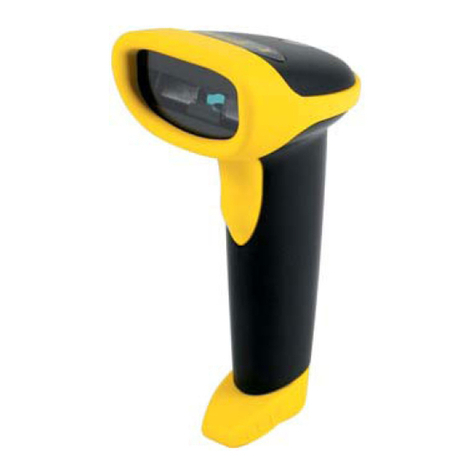
Seypos BD-6500BT User manual

BD-6500BT
Bluetooth 2D Barcode Scanner
Configuration Guide
V 2.1

Table of Contents
1 Getting Started ……………………………………………………………………………………………………….
3
1.1 About This Guide ……………………………………………………………………………………….. 3
1.2 Barcode Scanning ……………………………………………………………………………………….. 3
1.3 Factory Defaults ………………………………………………………………………………………….. 3
1.4 Pairing Cradle ……………………………………………………………………………………………… 4
1.5 Pairing Smart Phone, Table PC …………………………………………………………………….. 5
1.6 Multiple scanner pair one Cradle ………………………………………………………………… 6
1.7 Sleeping time setting …………………………………………………………………………………… 7
2 Cradle Communication Interfaces ………………………………………………………………………….. 8
2.1 USB interface ………………………………………………………………………………………………. 8
2.2 USB COM Port Emulation ……………………………………………………………………………. 8
2.3 USB Country Keyboard Types ………………………………………………………………………. 9
2.4 Convert Case ………………………………………………………………………………………………. 11
3 General Configuration ……………………………………………………………………………………………. 12
3.1 Trigger Mode ………………………………………………………………………………………………. 12
3.2 Continue Mode …………………………………………………………………………………………… 12
3.3 Video reverse ……………………………………………………………………………………………… 13
3.4 Beeper –Good Read …………………………………………………………………………………… 13
3.5 Beeper Tone –Good Read ………………………………………………………………………….. 13
3.6 Beeper Duration –Good Read …………………………………………………………………….. 14
3.7 Beeper Number –Good Read ……………………………………………………………………… 14
3.8 Barcode Scanning Delay ……………………………………………………………………………… 15
4 Data Formatting…………………………………………………………………………………………………….. 16
4.1 General Configuration …………………………………………………………………………………. 16
4.2 Add Prefix …………………………………………………………………………………………………… 17
4.3 Add Suffix …………………………………………………………………………………………………… 18
4.4 Clear All Prefix and Suffix ……………………………………………………………………………. 18
5 Symbologies ………………………………………………………………………………………………………….. 19
5.1 General Settings …………………………………………………………………………………………. 19
5.2 1D Symbologies ………………………………………………………………………………………….. 20
5.2.1 Code 128 ………….…………………………………………………………………………………………. 20

5.2.2 EAN-8 ……………………………………………………………………………………………………………
21
5.2.3 EAN-13 ………………………………………………………………………………………………………… 22
5.2.4 UPC-E ………………………………………………………………………………………………………….. 23
5.2.5 UPC-A ………………………………………………………………………………………………………….. 28
5.2.6 Interleaved 2 of 5 …………………………………………………………………………………………. 30
5.2.7 Matrix 2 of 5 ………………………………………………………………………………………………… 31
5.2.8 Industrial 2 of 5 ……………………………………………………………………………………………. 32
5.2.9 Code 39 ……………………………………………………………………………………………………….. 33
5.2.10 CodaBar ………………………………………………………………………………………………………… 35
5.2.11 Code 93 ………………………………………………………………………………………………………… 37
5.2.12 GS1-128 ………………………………………………………………………………………………………… 38
5.2 13 MSI ……………………………………………………………………………………………………………….. 39
5.3 2D Symbologies …………………………………………………………………………………………… 41
5.3.1 PDF 417 ……………………………………………………………………………………………………….. 41
5.3.2 QR Code ………………………………………………………………………………………………………. 42
5.3.3 Data Matrix ………………………………………………………………………………………………….. 43
5.3.4 Maxi Code ……………………………………………………………………………………………………. 44
5.3.5 Aztec ……………………………………………………………………………………………………………. 45
5.3.6 Hanxin …………………………………………………………………………………………………………. 46
5.4 Postal Symbologies ……………………………………………………………………………………… 47
5.4.1 China Postal Code ………………………………………………………………………………………… 47
5.4.2 Telepen ………………………………………………………………………………………………………… 48
6 Appendix ……………………………………………………………………………………………………………….. 49
6.1 Appendix 1: ASCII Table …………………………………………………….………………………… 49
6.2 Appendix 2: Digit Barcodes …………………………………………………………………………. 54
6.3 Appendix 3: Programming Command Guide ……………………………………………….. 55

1. Getting
Started
1.1 About This Guide
This guide provides programming instructions for the BD-6500BT 2D BARCODER READER. Users can
configure the BD-6500BT 2D BARCODER READER by scanning the programming barcodes included in
this manual.
1.2 Barcode Scanning
Powered by area-imaging technology and BD-6500BT 2D BARCODER READER patented “Hercules”
technology, the BD-6500BT 2D BARCODER READER features fast scanning and decoding accuracy.
Barcodes rotated at any angle can still be read with ease. When scanning a barcode, simply center the
aiming beam or pattern projected by the BD-6500BT 2D BARCODER READER over the barcode.
1.3 Factory
Def
aults
Scanning the following barcode can restore the engine to the factory defaults.
.
Restore All Factory Defaults
Report Firmware version
3

1.4 Pairing Cradle
1. Scan "Default"
2. Scan "setting configuration"
3. Scan "open SPP"
4.
Scan "disconnect previous pairing"
5.
Scan Cradle bottom code
6.
Scan "Repairing"
7.Save BT SPP setting
8.Scan "End BT SPP setting"
9.
Apple device needs enable transmission, others need to disable
Enable iOS transmission Disable iOS transmission
4

1.5 Pairing Smart Phone , Table PC
1
Scan "default"
2
Scan "setting configuration:
3Open a HID connection
4 Disconnect previous pairing
5 BT visible setting
6 Save BT HID configuration
7
End BT HID configuration
8
Apple device needs to enable transmission, others disable transmission
Enable iOS transmission Disable iOS transmission
9Enable BT function in iPad or smart phone and then serach BT (NVC_MD_CS45) to pair.
5

1.6 Multiple scanner pair one Cradle
(1) Start (2) Open
SPP
(3) Disconnected previous connection (4) Scan receiver barcode (5) Reconnected
(5) Save (6) End
(7) BT receiving setting
Remark: Please follow the step (1) ~ (6) for the first scanner. When it is connected (Blue Light), read the barcode
as below. Other scanners don’t do this step, only need (1) ~ (6).
6

1.7 Sleeping time setting
Sleeping mode Save
Numeric
0 1 2
3 4 5
6 7 8
Sleeping mode setting step:
1. Scan “default”
2. Scan “Sleeping Mode”
3. Setting sleeping mode numeric: (Unit: minute)
For example: Set sleeping mode in 10 minutes. Then needs to scan numeric “0”, “1”, “0”.
Remark: Sleeping time range is from 1 to 999 minutes, and each setting needs to have 3 digits.
4. Scan “Save”
Remark: After setting sleeping time, it has to san “save” to keep the data in the scanner. If there is any mistake
happens during configuration, it needs to redo each step again.
7

8
2. Cradle Communication
Interf
aces
2.1 USB
Interf
ace
* USB-HID
2.2 USB COM Port Emulation
If you connect the engine to the Host via a USB connection, the USB COM Port Emulation feature allows
the Host to receive data in the way as a serial port does.A driver is required for this feature.
USB COM Port Emulation

9
2.3 USB Country Keyboard Types
Keyboard layouts vary from country to country. The default setting is 1-U.S. keyboard.
*USA
Belgium
Brazil
Canada
Croatia
Czech
Denmark
Finland
France
Germany
Hungary
Italy
Latin
Dutch
Norway
Poland
Portugal
Serbia

10
Slovakia
Slovenia
Spain
Sweden
Swiss-French
Swiss-German
Turkey-F
Turkey-Q
UK
Japan

11
2.4 Convert Case
Scan the appropriate barcode below to convert barcode data to your desired case.
* No Case conversion
Convert All to Upper Case Convert All to Lower Case
Example: When the Convert All to Lower Case feature is enabled, barcode data “AbC”is transmitted as
“abc”.

12
3. General Configuration
3.1 Trigger Mode
If the Trigger Mode is enabled, you could activate the scanner by providing an external hardware trigger, or
using a serial trigger command. When in manual trigger mode, the scanner scans until a barcode is read, or
until the hardware trigger is released. When in serial mode, the scanner scans until a barcode has been
read or until the deactivate command is sent.
* Trigger Mode
3.2 Continue Mode
This set the scanner to work in Continue mode.
Continue Mode

13
3.3 Video Reverse
On * Off
3.4 Beeper - Good Read
* On Off
3.5 Beeper Tone - Good Read
Low Middle * High

14
3.6 Beeper Duration - Good Read
* Normal Short
3.7 Beeper Number - Good Read
* 1 2
3 4
5 6

15
3.8 Barcode Scanning Delay
* No Delay Delay 500ms
Delay 2000ms

16
4. Data Formatting
4.1 General Configuration
Add CR Add LF
Add CR+LF Add TAB

17
4.2 Add Prefix
Set Custom Prefix
Save Not Save
To set a customer prefix, scan the “Set Custom Prefix” barcode and the numeric barcodes which representing
the hexadecimal values of a desired prefix, and then scan the “Save” barcode. Refer to Appendix 4: ASCII
Table for hexadecimal values of characters.
Example: Set the custom Prefix to “ODE”
1. Check the hex values of “ODE”in the ASCII Table. (“ODE”: 4F, 44, 45)
2. Scan the Set Custom Prefix barcode.
3. Scan the numeric barcodes”9”,”9”, “4”, “F”, “4”, “4”, “4” and “5”in Appendix 5 .
4. Scan the Save barcode.

18
4.3 Add Suffix
Set Custom Suffix
Save Not Save
To set a customer suffix, scan the “Set Custom Suffix” barcode and the numeric barcodes which representing
the hexadecimal values of a desired suffix, and then scan the “Save” barcode. Refer to Appendix 4: ASCII
Table for hexadecimal values of characters.
Example: Set the custom Suffix to “ODE”
1. Check the hex values of “ODE”in the ASCII Table. (“ODE”: 4F, 44, 45)
2. Scan the Set Custom Suffix barcode.
3. Scan the numeric barcodes”9”,”9”, “4”, “F”, “4”, “4”, “4” and “5”in Appendix 5 .
4. Scan the Save barcode.
4.4 Clear All Prefix and
Suffix
Clear all prefix and suffix

19
5. Symbologies
5.1 General Settings
Enable All Symbologies
Table of contents
Other Seypos Barcode Reader manuals


