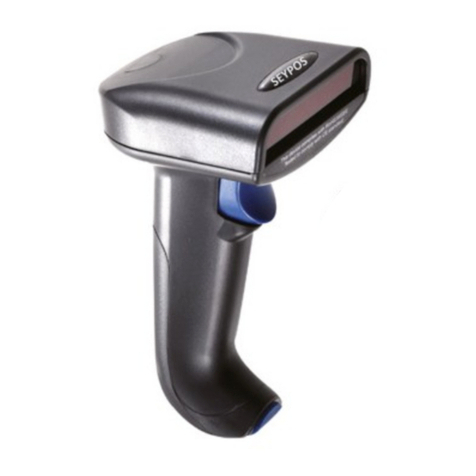
Seypos KD-3500ZB User manual

Configuration guide
KD-3500ZB
Wireless Area-Imaging Scanner

Ui
bar code configuration

Table of contents
Uiii
TABLE OF CONTENTS
1. Introduction.............................................U1
2. Defaults....................................................U3
3. Code options......................................... U5
3.1. Setting of readable codes.................. U6
3.1.1. Enabling a single read. Code............. U7
3.1.2. Enabling of readable codes............... U11
3.2. Setting of number of characters.........U17
3.3. Setting code specific options............. U18
3.3.1. Options for UPC-A............................. U19
3.3.2. Options for UPC-E............................. U20
3.3.3. Options for EAN-13 and EAN-8......... U22
3.3.4. Options for Code 39 and It.Pharm..... U24
3.3.5. Options for Codabar.......................... U29
3.3.6. Options for 2of5 and S-Code............. U31
3.3.7. Options for IATA.................................U33
3.3.8. Options for MSI/Plessey.................... U34
3.3.9. Options for Telepen............................ U36
3.3.10.Options for UK/Plessey...................... U37
3.3.11.Options for Code 128 and GS1-128.. U38
3.3.12.Options for Code 93........................... U40
3.3.13.Options for Code 11........................... U42
3.3.14.Options for Korean Postal Authority... U43
3.3.15.Options for Intelligent Mail Barcode... U44
3.3.16.Options for POSTNET....................... U44
3.3.17.Options for GS1 Databar................... U45
3.3.18.Options for Composite Codes............ U46
3. Code options (continued)
3.3.19.Options for Codablock F.....................U47
3.3.20.Options for DataMatrix........................U47
3.3.21.Options for Aztec................................U49
3.3.21.Options for Chinese Sensible code....U65
3.3.22.Options for QR Code..........................U51
3.3.23.Options for Micro QR Code................U51
3.3.24.Options for Maxicode..........................U52
3.3.25.Options for PDF417............................U53
3.3.26.Options for MicroPDF417...................U53
4. String options........................................U54
4.2. Set prefix and suffix............................U55
4.2.1 Set prefix............................................U60
4.2.2. Set suffix.............................................U63
4.3.2. Direct input character misc.................U66
4.3.3. Direct input numeric.......................... U69
4.3.4. Direct input character....................... U70
4.3.5. Direct input lower case character..... U72
4.3.6. Direct input control character............ U74
4.3.7. Direct input code id/length................ U77
5. Read options....................................... U78
5.1. Read mode options.......................... U80
5.1.1. Multiple read reset time.................... U81
5.1.2. Quiet zone options............................U82
5.2. Read time options.............................U83
5.4. Redundancy.....................................U84
5.5. Positive and negative bar codes.......U85
5.6. Floodlight and aiming options...........U86
A. Example codes.................................U87

Introduction
0
U1
1. INTRODUCTION
This menu book is intended for setting up your
bar code reader to optimize its performance for
your particular application. When the required
options have been configured, they remain in
the reader, even after power down. The reader
can be returned to factory default by reading
the default label.
Menu labels
The reader must be set by reading the bar code
labels in the menu table. The layout of the table
is explained in next figure 0.01.
Besides options, some chapters have
commands. The commands need to be
scanned directly, without reading the “SET” and
“END” labels. The commands are executed
directly and, unlike options, are not stored in
non volatile memory.
Fig. 0.01. Menu labels
Enter mode
Save mode
configuration parametersserial commands
optional setting
factory default setting

U2
Configuring via the menu book
To configure the required options proceed as
follows:
• scan the SET label
• scan the required option(s)
• scan the END label
After scanning the END label, the new settings
are stored in non volatile memory.
Recommended steps to follow for quick
configuration
After checking your connection you are ready
to start the configuration of your reader.
• Check connection:
Ensure that the power is disconnected from
your equipment before you connect the reader.
After connecting the data cable, the power can
be applied to the equipment and the reader.
•1:
Use chapter 1 to set the correct default for your
reader.
* The reader is now in factory default.
•2:
Use chapter 2 to optimize the interface.
* The reader is now able to read bar codes and
transmit the data.
•3:
Use chapter 3 to optimize the reader for the
type of bar codes you use. Set the readable
codes first and then the options for each of
these codes.
* The reader is now able to read the codes you
selected, validate the data using length and
check digit and transmit that part of the data
you specified.
•4:
Use chapter 4 to select the string options for
your application. These include transmission of
code length, conversion of upper and lower
case and setting a prefix and suffix.
* The reader can now read and transmit the
data in the required format.
•5:
Use chapter 5 to select the read options to your
preference. These options affect the read
mode, read time, trigger and redundancy.
•6:
Use chapter 6 to select the indicator options
you prefer. These options affect the operation
of the buzzer and good read LED.
* The reader will now operate to your personal
preference.
See figure 0.02.
Power OFF
Connect reader
Power ON
Set Default (1)
Optimize interface (2)
Optimize symbologies (3)
Set string options (4)
Set read options (5)
Set indicator options (6)
Fig. 0.02. Recommended Steps

Defaults
1
U3
2. DEFAULTS
This option allows you to undo all previously
configured options and bring the reader's
configuration back to factory default settings.
These factory default settings are printed in
bold.
Note that differences may occur depending on
the type of interface as will be mentioned in the
text.
Select only the correct default settings
corresponding to your hardware "defaults"
label.
The interfaces supported depend on the reader
model and software release.
Please consult your sales office for not listed
interfaces.

U4
2. Defaults
USB-HID

Code options
3
U5
Symbology plus translations
UPC-A
UPC-A +2
UPC-A +5
UPC-E
UPC-E +2
UPC-E +5
EAN-13
EAN-13 +2
EAN-13 +5
EAN-8
EAN-8 +2
EAN-8 +5
Code 39
Code 39 Full ASCII
Tri-Optic
Italian Pharmaceutical
Codabar
Codabar ABC
Codabar CX
Industrial 2of5
Interleaved 2of5
S-Code
Matrix 2of5
Chinese Post Matrix 20f5
Code 128
GS1-128
GS1 Databar
GS1 Databar Limited
GS1 Databar Expanded
CC-A
CC-B
CC-C
Aztec
Aztec Runes
Group
UPC-A
UPC-E
EAN-13 and EAN-8
Code 39 and It.Pharm.
Codabar
2of5 and S-Code
IATA
MSI/Plessey
Telepen
UK/Plessey
Code 128 and GS1-128
Code 93
Code 11
Korean Postal Authority code
Intelligent Mail Barcode
POSTNET
GS1 Databar
Composite Codes
Codablock F
DataMatrix
Aztec
Chinese Sensible code
QR code
Micro QR Code
Maxi Code
PDF417
MicroPDF417
Fig. 3.00. Code translations and relations
Relations
ISBN Bookland, ISSN, ISMN
NW7
NW7 ABC
NW7 CX
Chinese Post
(EAN-128 / UCC-128)
(RSS-14)
(RSS Limited)
(RSS Expanded)
3. CODE OPTIONS
The menu options in this chapter are intended
to adjust the decoding settings of the reader:
• which bar code types can be read
• the permissible length of the bar codes to be
read
• bar code specific options
Note:
The menubook categorizes the barcodes as
groups of different symbologies with their
translations and sometimes with relations to
other family names. The next figure visualizes
how code translations and relations are
maintained in this Code options chapter. See
figure 3.00.

U6
3.1. Setting of readable codes
These options do not affect the reading of the
menu labels. The required bar code types can
be selected by enabling a single readable code
only and enabling readable codes.
It is strongly recommended to select only
the required codes.
Advantages of selecting only the required
codes are:
• faster reading
• no accidental scanning of unwanted bar
codes
• reduced probability of reading errors which
can not be prevented completely, because of
the limited security of some bar code types
Some bar codes are translations or special
variants of other bar code types. The table on
the title page of this chapter visualizes these
relations. The setting of different codes is
explained in the next chapter 3.1.1. Enabling a
single read. code.
3.1.1. Enabling a single read. code
With this option you can set the reader to read
a single bar code type only. If you select 'Code
39 only', no other codes will be read.
Example 1:
If you want to read Code 39 only, you read the
option 'Code 39 only'. See figure 3.01.
Example 2:
If you want to read one of the special bar codes
that is a variation of the readable code, read
the single read. code option followed by the
dedicated variation option from the applicable
symbology options chapter.
• EAN128 only: read the option 'Code 128 only'
followed by 'Enable EAN-128 only' from the
'Options for Code 128'.
• Italian Pharmaceutical: read Enable Code 39
only, followed by the option 'Italian
Pharmaceutical only' from the 'Options for
Code 39'.
See figure 3.02.
Example 3:
If you want to read a code that is changed to
another family name, read the new name.
• RSS+14: read the option ‘GS1 Databar’.
See figure 3.03.
Fig. 3.01. Enabling a single readable code:
Symbology only
Code 39
SET
Code 39 only
END
It. Pharmaceutical only
Options for Code 39 and It. Pharm
Enabling a single read. code
Fig. 3.02. Enabling a single readable code:
Special variations
GS1-128 Italian Pharmaceutical
SET
Code 128 only
GS1-128 only
END
SET
Code 39 only
It. Pharmaceutical only
END
Options for
Code 39 and
It. Pharm
Enabling a
single read.
code
Options for
Code 128
Enabling a
single read.
code
Fig. 3.03. Enabling a single readable code:
New family name
RSS-14
SET
GS1 Databar only
END

Code options
3
U7
3.1.1. Enabling a single read. code
SET _ZZ_
All codes excl. add-on A0 _A0_
Only all UPC and EAN
codes J0 _J0_
UPC only J1 _J1_
UPC + 2 only J2 _J2_
UPC + 5 only J3 _J3_
EAN only J4 _J4_
EAN + 2 only J5 _J5_
EAN + 5 only J6 _J6_
Code 39 only A2 _A2_
Tri-Optic only JD _JD_
Codabar only A3 _A3_
Industrial 2of5 only J7 _J7_
Interleaved 2of5 only J8 _J8_
END _ZZ_

U8
S-Code only RA _RA_
Matrix 2of5 only AB _AB_
Chinese Post Matrix 2of5
only JE _JE_
Korean Postal Authority
code only JL _JL_
Intelligent Mail Barcode
only D5H _D5H_
POSTNET only D6C _D6C_
IATA only A4 _A4_
MSI/Plessey only A7 _A7_
Telepen only A9 _A9_
UK/Plessey only A1 _A1_
Code 128 only A6 _A6_
Code 93 only A5 _A5_
Code 11 only BLB _BLB_
SET _ZZ_
END _ZZ_

Code options
3
U9
GS1 DataBar only J9 _J9_
GS1 DataBar Limited
only JJ _JJ_
GS1 DataBar Expanded
only JK _JK_
Codablock F only D4R _D4R_
DataMatrix ECC000 -
140 only BG2 _BG2_
DataMatrix ECC200 only BC0 _BC0_
Aztec only BC5 _BC5_
Aztec runes only BF4 _BF4_
Chinese Sensible code
only D4K _D4K_
QR Code only BC1 _BC1_
Micro QR Code only D38 _D38_
Maxicode only BC2 _BC2_
PDF417 only BC3 _BC3_
SET _ZZ_
END _ZZ_

U10
3.1.2. Enabling of readable codes
With this option you can set the reader to read
a number of bar code types or simply enable
additional bar code types.
Example:
If you only want to read Code 39 and Code
128, you read 'Code 39 only' and 'enable Code
128'. Alternatively you can read 'Disable All',
'Enable Code 39' and 'Enable Code 128'. See
figure 3.04.
Example of addition:
If you want to enable Codabar in addition to
what you already have configured, you read
'Enable Codabar'. See figure 3.05.
MicroPDF417 only BC4 _BC4_
Enable all 1D codes only BCA _BCA_
Enable all 2D codes only BCB _BCB_
SET _ZZ_
END _ZZ_
Fig. 3.04. Enabling of readable codes
SET
Code 39 only
Enable Code 128
END
SET
Disable All
Enable Code 39
Enable Code 128
END
Fig. 3.05. Enabling of readable codes
addition
SET
Enable Codabar
END

Code options
3
U11
3.1.2. Enabling of readable codes
SET _ZZ_
All codes excl. add-on A0 _A0_
Enable UPC R1 _R1_
Enable UPC + 2 R2 _R2_
Enable UPC + 5 R3 _R3_
Enable EAN R4 _R4_
Enable EAN + 2 R5 _R5_
Enable EAN + 5 R6 _R6_
Enable Code 39 B2 _B2_
Enable Tri-Optic JZ _JZ_
Enable Codabar B3 _B3_
Enable Industrial 2of5 R7 _R7_
Enable Interleaved 2of5 R8 _R8_
Enable S-Code R9 _R9_
END _ZZ_

U12
Enable Matrix 2of5 BB _BB_
Enable Chinese Post
Matrix 2of5 JS _JS_
Enable Korean Postal
Authority code WH _WH_
Enable Intelligent Mail
Barcode D5F _D5F_
Enable POSTNET D6A _D6A_
Enable IATA B4 _B4_
Enable MSI/Plessey B7 _B7_
Enable Telepen B9 _B9_
Enable UK/Plessey B1 _B1_
Enable Code 128 B6 _B6_
Enable Code 93 B5 _B5_
Enable Code 11 BLC _BLC_
Enable GS1-Databar JX _JX_
SET _ZZ_
END _ZZ_

Code options
3
U13
Enable GS1-Databar
Limited JY _JY_
Enable GS1-Databar
Expanded DR _DR_
Enable Codablock F D4P _D4P_
Enable DataMatrix
ECC000 - 140 BG0 _BG0_
Enable DataMatrix
ECC200 BCC _BCC_
Enable Aztec BCH _BCH_
Enable Aztec runes BF2 _BF2_
Enable Chinese Sensible
code D4L _D4L_
Enable QR Code BCD _BCD_
Enable Micro QR Code D2U _D2U_
Enable Maxicode BCE _BCE_
Enable PDF417 BCF _BCF_
Enable MicroPDF417 BCG _BCG_
SET _ZZ_
END _ZZ_

U14
3.2. Setting of number of characters
If you are going to read bar codes of known
length, it is recommended to set the reader for
a fixed number of characters. This can be done
for up to two lengths. The reader uses this to
verify that labels read are of the correct length,
rejecting any labels which do not have the
specified length. The advantage of setting a
fixed length, is that it provides protection
against short scans of labels, such as
Interleaved 2of5, which do not provide sufficient
security against partial scan. The length
checking is done on the label data and is not
affected by options such as (not) transmit start/
stop character or check digit. Setting the
number of characters does not affect fixed
length codes, such as EAN-13. 2D
symbologies such as PDF417 and Data Matrix
are also not affected by fixed length settings.
The following options are available:
Fixed length OFF all codes.
This option cancels the fixed length checking.
Fixed length ON all codes.
This option enables the fixed length checking.
Two fixed lengths are programmed which will
affect all variable length codes. This is done by
reading the following labels:
<SET>
<Fixed length ON - all codes>
a bar code with the required length,
a second bar code with the required length
(this may be the same length as the first one)
<END>
See figure 3.06.
Enable all 1D codes BCM _BCM_
Enable all 2D codes BCN _BCN_
Disable all B0 _B0_
SET _ZZ_
END _ZZ_
Fig. 3.06. Setting Fixed length ON
all codes
SET
Fixed length ON
Scan a bar code
with the required length
Scan a 2nd bar code
with the required length
END

Code options
3
U15
It is possible to configure a fixed length or a
minimum and a maximum length for selected
symbologies by reading the respective option
followed by a barcode label with the required
length. The different functions may be
combined and will be used as follows:
• if a label is checked for fixed length, it will not
be checked for minimum or maximum length
• if a label is not checked for fixed length it will
be checked for both minimum and maximum
length
By reading an option followed by the 'END'
label, the function is disabled or the values for
that option are reset to their default. The default
values are:
• fixed: disabled, thus no fixed length checking
• minimum: according to the next figure (The
minimum length of the 2of5 bar code types
can not be changed independent.)
• maximum: disabled, thus no maximum length
checking. (The maximum length is reader
dependent)
See figure 3.07.
Fixed length ON for selected codes:
This option enables fixed length checking for
different bar code types and will only affects the
bar code types read. The number of fixed
lengths which can be configured is reader
dependent.
<SET>
<Fixed length ON for selected codes>
Scan bar codes of the required type and length
<END>
Example:
The 2 examples shown in the next figure have
the following results: In the first example only
Code 39 labels will be checked for a length of 6
characters. Any other bar code type will not be
checked for fixed length. In the second example
Code 39 labels will be checked for a length of 6
characters and Interleaved 2of5 labels for a
length of 12 characters. This implies that also
Industrial 2of5, Matrix 2of5 and S-Code are
checked for a fixed length of 12 characters. Any
other bar code type will not be checked for fixed
length. See figure 3.08.
Fig. 3.07. Setting Minimum length table
Code type:
Codabar
Code 11
Code 39
Code 93
Code 128
Industrial 2of5
Interleaved 2of5
IATA
Matrix 2of5
MSI/Plessey
UK/Plessey
GS1Databar-expanded
S-Code
Telepen
5
1
1
1
1
5
6
5
5
3
2
1
5
1
Minimum length Fig. 3.08. Setting Fixed length ON
selected codes
SET
Fixed length ON
for selected only
Scan a label,
i.e. Code 39
with length = 6
Scan a label,
i.e. Interleaved 2of5
with length = 12
END
SET
Fixed length ON
for selected only
Scan a label,
i.e. Code 39
with length = 6
END

U16
Minimum length for selected codes:
This option modifies the default minimum
length table. The number of minimum lengths
which can be configured is reader dependent.
This is done by reading the following labels:
<SET>
<Minimum length for selected codes>
Scan bar codes of the required type and length
<END>
Example:
The two examples shown in the next figure
have the following result: In the first example
only Code 39 labels will be checked for a
minimum length of 2 characters. All other bar
code types will be checked for a minimum
length as displayed in the next figure.
In the second example Code 39 labels will be
checked for a minimum length of 2 characters
and Interleaved 2of5 labels for a minimum
length of 4 characters. This implies that also
Industrial 2of5, Matrix 2of5 and S-Code are
checked for a minimum length of 4 characters.
All other bar code types will be checked for a
minimum length as per figure 3.09.
Maximum length for selected codes:
This option enables the maximum length
checking. The number of maximum lengths
which can be configured is reader dependent.
This is done by reading the following labels:
<SET>
<Maximum length for selected codes>
Scan bar codes of the required type and length
<END>
Example:
The two following examples shown in the next
figure have the following result: In the first
example only Code 39 labels will be checked
for a maximum length of 12 characters. Any
other bar code types will not be checked for a
maximum length. In the second example Code
39 labels will be checked for a maximum length
of 12 characters and Interleaved 2of5 labels for
a maximum length of 14 characters. This
implies that also Industrial 2of5, Matrix 2of5
and S-Code are checked for a maximum length
of 14 characters. Any other bar code types will
not be checked for a maximum length. See
figure 3.10.
Fig. 3.09. Setting Minimum length
for selected codes
SET
Minimum length
for selected codes
Scan a label,
i.e. Code 39
with length = 2
Scan a label,
i.e. Interleaved 2of5
with length = 4
END
SET
Minimum length
for selected codes
Scan a label,
i.e. Code 39
with length = 2
END
Fig. 3.10. Setting Maximum length
for selected codes
SET
Maximum length
for selected codes
Scan a label,
i.e. Code 39
with length = 12
Scan a label,
i.e. Interleaved 2of5
with length = 14
END
SET
Maximum length
for selected codes
Scan a label,
i.e. Code 39
with length = 12
END

Code options
3
U17
3.2. Setting of number of characters
SET _ZZ_
Fixed length OFF all
codes H0 _H0_
Fixed length ON all
codes H1 _H1_
Fixed length ON for
selected codes HK _HK_
Minimum length for
selected codes HL _HL_
Maximum length for
selected codes HM _HM_
END _ZZ_
Table of contents
Other Seypos Barcode Reader manuals
Popular Barcode Reader manuals by other brands
DeLOCK
DeLOCK 90556 user manual
Avision
Avision AV8350 user manual
Honeywell
Honeywell MK9535-79A540 - MS9535 VoyagerBT - Wireless Portable Barcode... Configuration guide

Honeywell
Honeywell ms2420 user guide
Datalogic
Datalogic Gryphon I GBT4400 Quick reference guide
Datalogic
Datalogic DS2100N Reference manual
