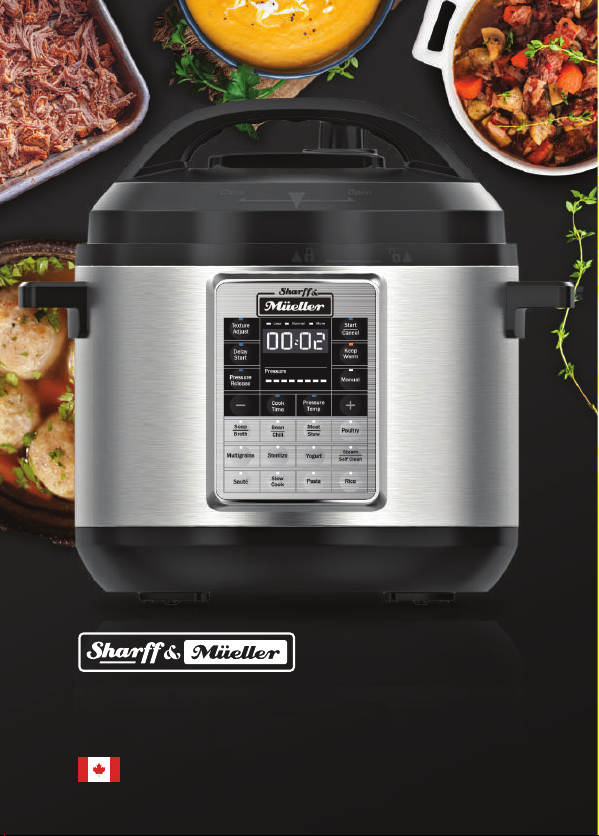
Sharff & Mueller DUOPRO PLUS Owner's manual
USER MANUAL
ENGINEERED AND DESIGN IN CANADA
BOOK
DUOPRO PLUS

TABLE OF CONTENT PAGE: 1 KEEP THESE INSTRUCTIONS PAGE: 2
| KEEP THESE INSTRUCTIONS 02
| 11
|
FEATURES AND CONTROL
14
| NON-PRESSURE COOKING
17
| SAFETY AND COOKING TIPS 21
|CARE AND CLEANING 22
|WARRANTY AND TROUBLESHOOTING 23
KEEP THESE INSTRUCTIONS
The following safety measures should always be abided when using the pressure cooker:
1. Use side handles when lifting, and never touch the surfaces of the cooker when heated.
2. Never place the pressure cooker on or near electric burners or gas, or in an oven while it is on.
3. Use on counter-tops only.
4. Only use the pressure cooker for its designated use.
5. Do not attempt to pressure fry or deep fry with oil in the pressure cooker.
6. Make sure that the cord does not touch hot surfaces or hang over the counter or table.
7. Only use the cooker in 110-120V~/60Hz electrical systems (for North America).
8. Never operate the cooker if the cord or plug is damaged. If the cooker is malfunctioning
or compromised in any way, do not use again until it is repaired.
9. Only open the cooker after it has cooled down and all the pressure has been released.
The float valve will drop, and the lid will turn easily when this happens. Never force the lid open.
Please refer to “Get Started,” on pages 11-13.
10. The amount of food and liquid in the inner pot should never pass the 2/3 line prior to
cooking. Beans, rice, vegetables or any other foods that expand during the cooking
process, should not be added past the 1/2 line. If overfilled, steam cannot be released
properly, and the cooker can become overly pressurized. This can damage the cooker
and cause burns and injuries to the user. Note that these fill level warnings only apply
to pressurized cooking programs.
TABLE OF CONTENT
| 07
GET STARTED
PRESSURE COOKING
|ELECTRICAL WARRANTY 25

KEEP THESE INSTRUCTIONS PAGE: 3KEEP THESE INSTRUCTIONS PAGE : 4
11. For all pressure cooking programs, keep the steam release handle
in the Sealing position.
12. Not for use by or near children or by individuals with impairments which may limit their
ability to operate pressure cookers, or by those who have not been educated on their
proper use.
13. To avoid electrical shock, never immerse the cord, power plug, cooker base in any
liquid.
14. Connect the plug to the cooker before plugging the cable into the wall. To disconnect,
switch all controls OFF and then remove the plug from the wall. Keep the cooker
unplugged whenever you are not using it and during cleaning. Give the cooker time to
cool down prior to removing or putting parts on, and cleaning.
15. Do not use outside.
16. Use great caution if moving cooker with hot liquids inside.
17. Warning: Failure to follow instructions during use could result in serious burns. Always
ensure that the lid is securely closed before cooking. Only cook food in removable containers
to avoid electric shock. Refer to “Getting Started” on pages 11-13 for more information.
18. Utilizing accessories or replacement parts not branded or recommended by the Duopro
Plus ® company puts the cooker at risk of malfunctioning. Duopro Plus® innerpots
provide optimal results, whereas pots from other brands might not match up with
the heating element.
19. Particular foods, including cranberries, rhubarb, pearl barley, applesauce, oatmeal,
cereals, split peas and pasta can plug up the steam release valve. Avoid using pressure
cooking settings when cooking these foods except if directed to do so in Duopro
Plus® cooker recipes.
20. Inspect the steam release and float valves as well as the anti-block shield
before cooking to make sure they are not clogged.
Never place unprotected or bare skin over the steam release
valve when the cooker is operating or releasing pressure.
Never pick up or move the
cooker when it is on.
Wait until the float valve is DOWN before opening the lid. Never
force the lid open if the float valve is UP.
WARNING: Contact with spilled food can cause severe burns. Do not let children come near the
cooker or cord when in use. Do not let the cord hang over the edge of the counter, connect it to
an extension cord or use an outlet that is under the counter.
Under UL safety regulations, a power supply cord of 0.6m to 0.9m with a three-pronged
grounding plug is included with your cooker, to help minimize the risk of tripping and
entanglement. Plug the cord into a grounded electrical outlet that is easy to access, to reduce the
likelihood of
INSTRUCTIONS FOR SPECIAL CORD SET
KEEP THESE INSTRUCTIONS PAGE: 5KEEP THESE INSTRUCTIONS PAGE: 6
TO REMOVE: Using your thumb, push
the side of the anti-block shield towards
the lid rim and lift up with some eort.
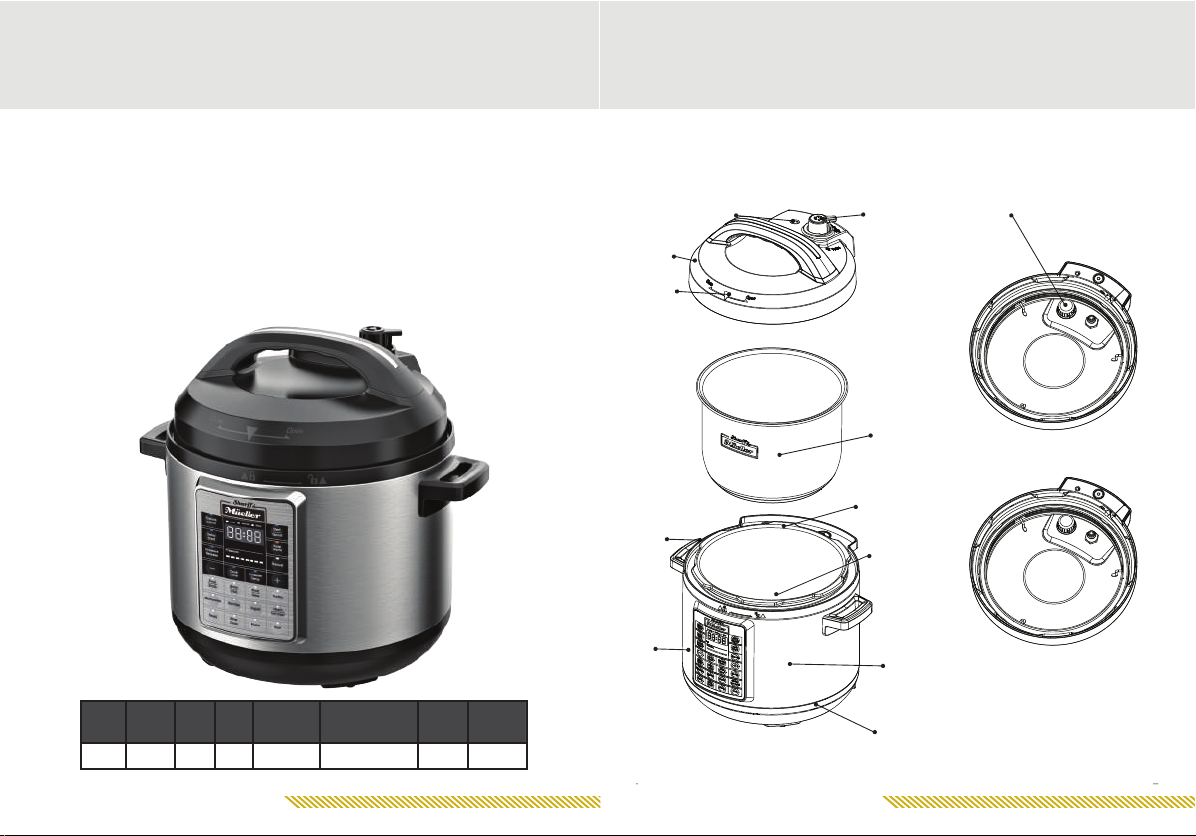
The anti-block shield should pop out
Base and
heating unit
Cooker base
Stainless steel
inner pot
Steam release
handle
Heating
element
Control
panel
Cooker
handle
Lid position
maker
Float valve
Lid
Exterior
MODEL
AKS737A
POWER
SUPPLY
RATED
POWER VOLUME
INNER POT
DIMENSION
CM/IN
PRODUCT SIZE
CM/IN
WEIGHT
KG/IBS
POWER CORD
LENGTH
Duopro
Plus
Working Pressure: 1.5 ~11.6 Psi ( 10~80 kPa)
1000W 6Qt 160*
6.29*9.4in.
240mm 350*312*320mm/ 5.4kg
/11.9Ibs 0.9m
13.78*12.28*12.60in
120V/60Hz
TO INSTALL: Position the anti-block
sheild in place and push down
ANTI-BLOCK SHIED
OVERVIEW
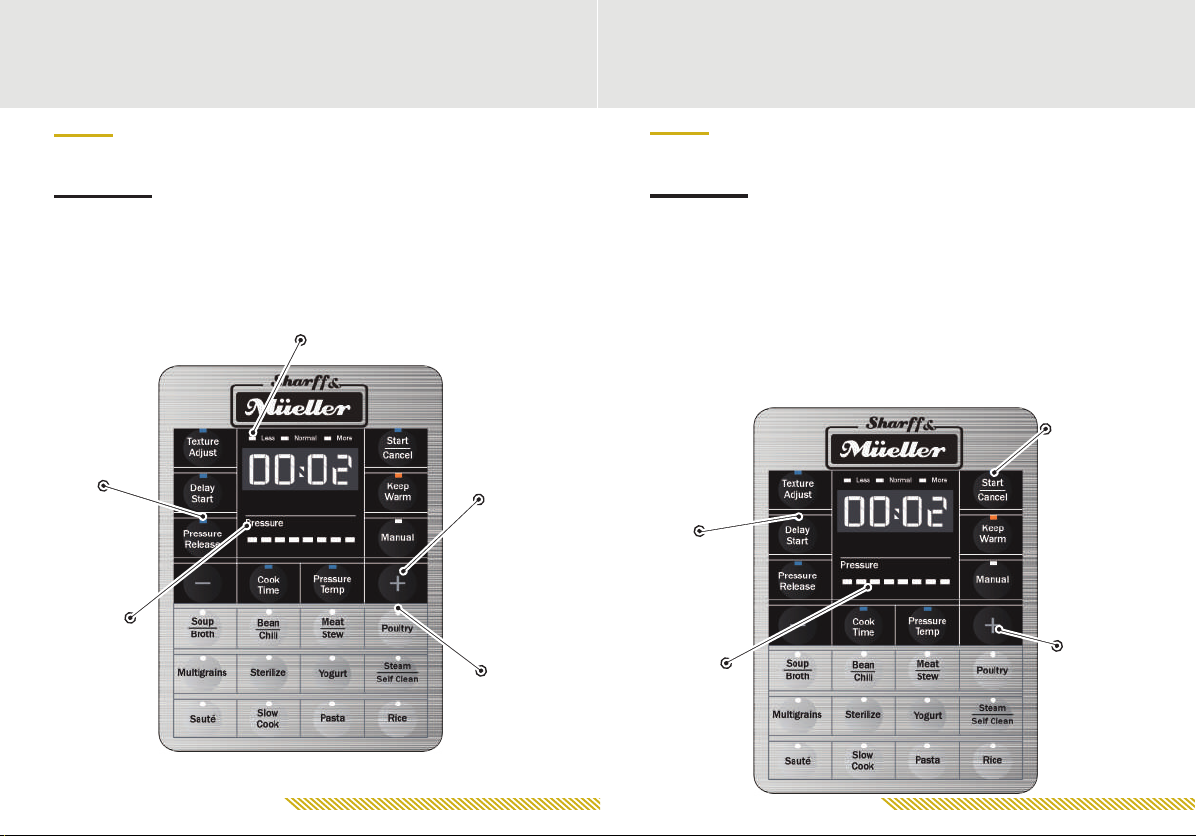
FEATURES AND CONTROL
Mode Indicates texture Less, Normal, More
The Pressure Release key
allows to release pressure
programmed or manually
The pressure level key
toggles pressure setting
between 10~80kpa for
pressure cooking
programs.
+/- keys to adjust cooking
time or pressure after
selecting a program and
press “Cook Time” or
“Pressure/Temp”
Cooking programs key
FEATURES AND CONTROL PAGE: 7
CONTROL PANEL: Your Shar & Müeller is a programmed smart cooker that has preset
cooking instructions for dierent ingredients and cooking methods. It also
remembers your most recent setting per cooking program for a more personalized cooking
experience.To return to factory default settings for a specific cooking program: return
cooker to standby mode displaying OFF, then press and hold the cooking program key until
the cooker beeps and displays OFF. For a full reset of all cooking programs, return cooker to
standby mode displaying OFF, then press and hold the Cancel key until the cooker beeps.
The Pressure Level key has no eect on the non-pressure cooking programs: Slow Cook,
Sauté and Yogurt.
FEATURES AND CONTROL PAGE: 8
CONTROL PANEL: The control panel of your Shar & Müeller consists of a screen
display, cooking program keys, and operations keys to control texture, pressure level, and
cooking time. Select a program and Press Cook time or Pressure/Temp and then press + / -
to adjust cooking time or setting pressure. Press Start/Cancel button to start or cancel.
The keep warm key
switches automatic keep
warm function On and OFF
after a cooking program
finishes. When keep warm
mode or function is on, the
keep warm button will
light up.
The delay start key sets
the delayed time before
a cooking program starts
Pressure indicators Per
light represent 10kPa
Sound On/O Press Cancel
to return cooker to standby
mode displaying OFF, press
and hold the -key for at
least 6 seconds to SOFF,
or the +key for at least 6
seconds to SOn.
FEATURES AND CONTROL
Table of contents


