manuals.online logo
Brands
  1. Home
  2. •
  3. Brands
  4. •
  5. Shark
  6. •
  7. Vacuum Cleaner
  8. •
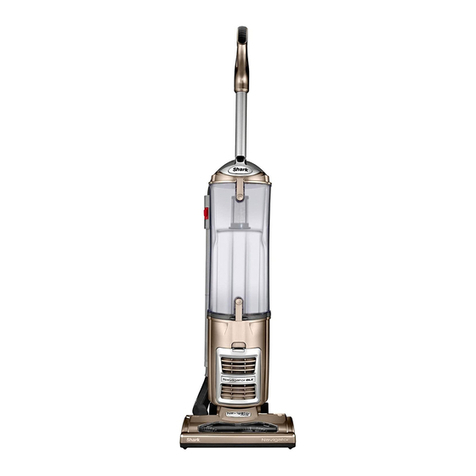
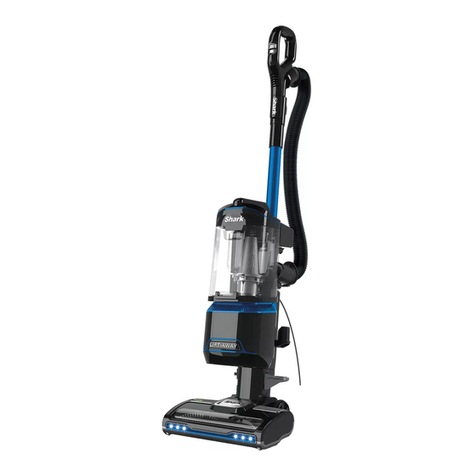
  9. Shark V1945Z User manual

Shark V1945Z User manual

OWNER’S GUIDE
V1945Z
www.sharkclean.com
V1945Z_32_ENG_IB_100929.indd 1 29/09/10 2:32 PM
2 TOLL FREE: 1-800-798-7398 3ww w.sharkclean.com
TO MAXIMIZE THE LIFE OF YOUR
NI-CD BATTERIES:
1 Charge for 24 hours before initial use. Failure
to do so will reduce the product’s battery life
significantly.
2 After first use, discharge the unit fully and then
recharge for 16 hours.
3 Always remove the charging adapter from the unit
after the charging period has completed.
4 Do not store the unit with the charging adapter
attached and plugged in.
5 For maximum battery life, only recharge the unit
when the batteries are close to fully discharged. It
is best to fully discharge the batteries at least once
a month.
6 DO NOT store in areas of high temperature or
humidity.
7 After 3 months of non-use, the product should be
fully discharged and then recharged to maximize
battery power.
8 If the product has never been used or has been
stored for an extended period of time without use -
it will take several complete charge and discharge
cycles to realize the full operational time of your
product.
9 Ni-Cd batteries have a long useful life but at some
time they will need to be replaced.
To purchase replacement batteries, visit
www.sharkclean.com.
NOTE: The power button must be in the “Off”
position in order to charge the unit. If the charging
indicator does not light, press the power button
once.
READ ALL INSTRUCTIONS BEFORE USING YOUR
SHARK® CORDLESS FLOOR AND CARPET CLEANER.
WHEN USING YOUR SHARK CORDLESS FLOOR AND
CARPET CLEANER, BASIC SAFETY PRECAUTIONS
SHOULD ALWAYS BE OBSERVED, INCLUDING THE
FOLLOWING:
1 Read and follow all label, operational and marking
instructions.
2 Use ONLY as described in this manual. Use only
manufacturer’s recommended attachments.
3 DO NOT allow to be used as a toy. Close attention
is necessary when used by or near children.
4 DO NOT use for any purpose other than described
in this user’s guide.
5 DO NOT use with damaged cord or plug. Do not
use the cordless floor and carpet cleaner if it has
been dropped, damaged, left outdoors, or dropped
in water. Return it to EURO-PRO Operating LLC for
examination, repair or adjustment.
6 DO NOT abuse the charger cord. Never carry the
charger or base by the cord or yank to disconnect
from an outlet; instead grasp the charger and pull
to disconnect.
7 Keep the charger cord away from heated surfaces.
8 DO NOT use the charger with an extension cord.
Plug the charger directly into an electrical outlet.
Use charger only in a standard (120V., 60Hz.)
electrical outlet.
9 DO NOT attempt to use the charger with any other
product or attempt to charge this product with
another charger. Use only the charger model
Helms-Man UD3514090020G supplied with this
cordless floor and carpet cleaner.
10 DO NOT charge this unit outdoors.
11 DO NOT use outdoors or on wet surfaces.
12 DO NOT handle plug or appliance with wet hands.
13 Use only on dry, indoor surfaces.
Quick Start 4
Assembly 6
Charging Your Cordless Floor & Carpet Cleaner 7
Using Your Cordless Floor & Carpet Cleaner 7
Emptying the Dust Container 8
Storing Your Cordless Floor & Carpet Cleaner 8
Maintenance 9
Troubleshooting Guide 10
Ordering Replacement Parts 10
Warranty and Registration 11
Thank you
for purchasing
the Shark®
Cordless
Floor and
Carpet
Cleaner
IMPORTANT SAFETY INSTRUCTIONS
For Household Use Only
SAVE THESE
INSTRUCTIONS
14 DO NOT put any object into openings. Do not use
with brush roll blocked; keep free of fiber, lint, hair
and anything that may prevent the brush roll from
working.
15 Keep hair, loose clothing, fingers and all parts of
body away from openings and moving parts.
16 DO NOT pick up anything that is burning or
smoking, such as cigarettes, matches or hot ashes.
17 DO NOT use to pick up flammable or combustible
liquids such as gasoline or use in areas where they
may be present.
18 DO NOT attempt to change accessories while the
unit is running.
19 DO NOT use the cordless floor and carpet cleaner
without the dust container in place.
20 Use extra care when cleaning on stairs.
21 Store the cordless floor and carpet cleaner indoors.
Store after use to prevent accidents.
22 Leaks from battery cells can occur under extreme
conditions. If the liquid, which is 20-35% solution
of potassium hydroxide, gets on the skin - wash
immediately with soap and water or neutralize with
a mild acid such as lemon juice or vinegar. If the
liquid gets into the eyes, flush them immediately
with clean water for a minimum of 10 minutes and
seek medical attention.
23 This product includes rechargeable nickel cadmium
batteries. Batteries must be recycled or disposed
of properly. Do not incinerate the batteries or
expose to high temperatures as they may explode.
24 The cordless floor and carpet cleaner must
be disconnected from the power supply when
removing the battery.
CONTENTS
V1945Z_32_ENG_IB_100929.indd 2-3 29/09/10 2:32 PM
4 TOLL FREE: 1-800-798-7398 5ww w.sharkclean.com
6
12
HOURS
18
IMPORTANT: Before you can start using your new
cordless floor and carpet cleaner, charge it for 24
hours.
NOTE: The charging adapter and lower handle will be
shipped inside the packaging.
ASSEMBLE
1 Insert the smaller end of the
lower handle into the top of the
unit. Push until firmly in place.
Assemble the upper and lower
poles into the elbow joint to
form the Shark® Backsaver™
folding handle. Then insert it
into the top of the lower handle.
(Fig. 1)
5 The Shark® Backsaver™ folding
handle makes cleaning under
furniture a breeze. Just press
the button on the handle with
your thumb to engage the
Shark® Backsaver™ function.
(Fig. 4)
EMPTY
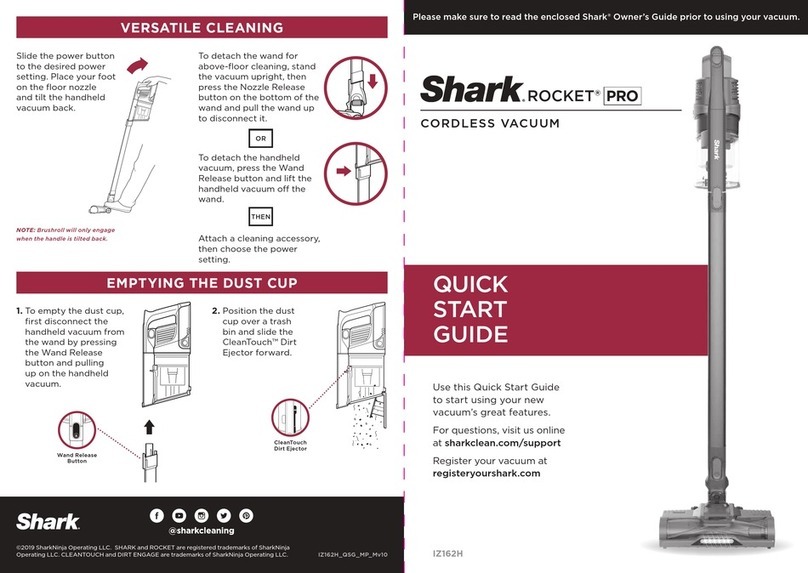
6 When you’re finished cleaning,
pull the dust container straight
out from the side. (Fig. 5)
NOTE: Be careful not to
accidentally turn the unit on.
Fig. 1 Fig. 2 Fig. 3 Fig. 6
Fig. 4
QUICK START
CLEAN
2 Pull back on the handle and
press lightly on the body of the
unit with your foot to engage the
steering. (Fig. 2)
3 Using your foot, press the
power button and push the unit
forward over the surface you
wish to clean. (Fig. 3)
4 Press the speed button on the
right with your foot to change
the speeds. One light indicates
the speed optimized to clean
bare floors and two lights
indicate the speed optimized to
clean carpets and larger debris
on bare floors.
7 Empty dust container contents.
(Fig. 6) If desired, you may
rinse with water to clean
the dust container - but dry
thoroughly before replacing.
When finished, replace the dust
container.
Fig. 5
24
V1945Z_32_ENG_IB_100929.indd 4-5 29/09/10 2:32 PM
6 TOLL FREE: 1-800-798-7398 7ww w.sharkclean.com
ASSEMBLY OF YOUR FLOOR
AND CARPET CLEANER:
NOTE: The charging adapter
and lower handle will be
shipped inside the packaging.
1 Insert the smaller end of the
lower handle into the top of the
unit. Push until firmly in place.
(Fig. 1)
2 Slide the upper pole (the tube
with the handle) into the end
of the Shark® Backsaver™ joint
that has a small notch in it (a).
Then slide the lower pole into
the other end of the joint (b).
Push it in until it clicks into
place. (Fig. 2)
COMPONENTS:
A Main Unit
B Speed Control Button
C Power Button
D Dust Container
E Lower Handle
F Backsaver™ Release Button
G Upper Pole with Handle
H Shark® Backsaver™ Joint
I Lower Pole
J Charging Adapter
Fig. 2
Fig. 3
If the brush roll stops moving, it’s probably due
to the anti-jam feature. This feature protects
the motor from becoming overheated. If the
brush becomes overloaded, it will stop turning
and both speed indicator lights will stay on.
Turn off your unit by pressing the power button
once. See page 9 for instructions on removing
or cleaning the brush roll. Wait for 10 seconds
to let your unit cool down. Now press the
power button again and you’re ready to resume
cleaning!
Model Number: V1945Z 32
Voltage: 7.2 V
F
A
ASSEMBLY
G
H I
J
3 Insert the Shark® Backsaver™
folding handle you just
assembled into the top of the
lower handle. You should hear
the locking tab click into place.
(Fig. 3)
IMPORTANT: Charge the
batteries for 24 hours before
using the unit for the first time.
See page 7 for instructions on
charging your unit.
Fig. 1
E
B
C
D
1 Always make sure that the unit
is turned off. (Fig. 4)
2 Insert the charger plug into
the hole on the back of the
unit. Plug the charger into a
wall outlet. The light next to
the power button will illuminate
when the unit is charging. If the
unit is plugged in and the light is
not illuminated, press the power
button once. The light should
now be illuminated indicating
that the unit is charging.
(Fig. 5)
CHARGING YOUR CORDLESS FLOOR AND CARPET CLEANER
3 Charge the battery for 24
hours before initial use and
16 hours for each recharge.
Your cordless floor and carpet
cleaner is powered by Ni-Cd
batteries that need this time to
build up their charge.
4 Always remove the charging
adapter from the unit after the
charging period has completed.
Storing the unit with the
adapter attached and
plugged in will reduce the
battery life.
IMPORTANT: Although many
adaptors look similar, it’s
important to use only the
adaptor that came with the unit
(Helms-Man UD3514090020G).
To maintain peak
performance of your unit,
let the battery run down
completely at least once a
month and then recharge it.
indicates the speed optimized to
clean bare floors and two lights
indicate the speed optimized to
clean carpets and larger debris
on bare floors. (Fig. 7)
1 Press the power button to start
the unit. The lights on the unit
will illuminate. When finished
cleaning, press the power
button again to turn the unit
off. (Fig. 6)
USING YOUR CORDLESS FLOOR AND CARPET CLEANER
2 You can adjust the speed of the
brush roll to suit the floors that
you are cleaning. Press the
button on the right (opposite
the power button) to switch
between speeds. One light
Fig. 6 Fig. 7
FLOOR CARPET
a
b
Fig. 4 Fig. 5
OFF
V1945Z_32_ENG_IB_100929.indd 6-7 29/09/10 2:32 PM
8 TOLL FREE: 1-800-798-7398 9ww w.sharkclean.com
CAUTION: Do not clean the unit
while it is charging.
1 Once a month, wipe down the
unit with a dry cloth, including
the area under the dust
container. Wipe away any hair,
fiber or other dirt that may have
built up in the chamber and on
the rotating brush. Do not use
any harsh cleaner or chemicals.
2 Do not immerse the unit in
water.
CLEANING THE ROTATING BRUSH
1 Pull the dust container straight
out from the side. (Fig. 10)
2 Turn the unit upside down. Be
careful not to accidently turn
the unit on!
3 Remove the brush cover by
gently forcing it down. (Fig. 14)
4 Remove all hair, string or fibers
wrapped around the brush
bar. Using a pair of scissors,
carefully cut anything wound
around the brush bar. Avoid
damaging or cutting the bristles.
(Fig. 15)
MAINTENANCE
REMOVING AND REPLACING THE
BATTERY
NOTE: If uncertain as to how
to remove your battery pack,
we suggest you take the unit
to a reputable small appliance
service technician to have this
service performed.
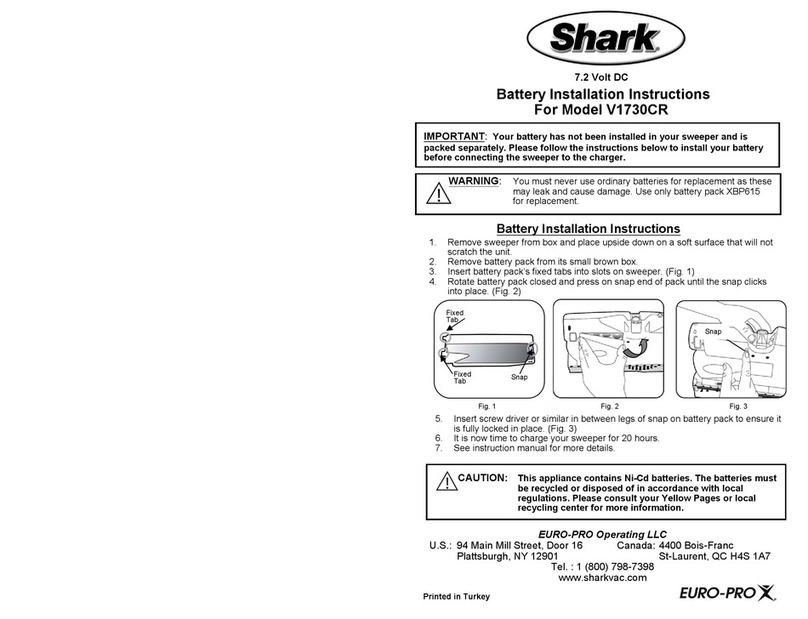
1 Pull the dust container straight
out from the side. (Fig. 10)
2 Turn the unit upside down. Be
careful not to accidently turn
the unit on!
3 With a screwdriver, remove the
screw securing the battery pack
compartment cover to the unit
and set the cover and screw
aside. (Fig. 16)
4 Carefully lift out the battery
pack and disconnect the wire
terminals by pulling apart the
wire terminal connectors.
Remove the battery pack.
(Fig. 17)
5 Connect the wire terminal from
the unit to the wire terminal
connector of the new battery
pack and replace the battery
pack into the unit.
6 Tuck the wiring inside the
battery compartment and
replace the cover and screw.
7 Follow the instructions on page
7 to charge your new battery
pack. Please call customer
service at 1-800-798-7398
if you have any problems
removing the battery pack.
IMPORTANT This appliance
contains Ni-Cd batteries. The
batteries must be recycled
or disposed of in accordance
with local regulations. Please
consult your Yellow Pages or
local recycling center for more
information.
WARNING: Never use ordinary
batteries for replacement as
these may leak and cause
damage. Use only battery pack
XB1945W for replacement.
Fig. 14
Fig. 16 Fig. 17
Ni-Cd BATTERY
MUST BE RECYCLED
OR DISPOSED OF
PROPERLY
Fig. 15
1 To achieve the best
performance, empty the dust
container after each use. Pull
the dust container straight out
from the side. (Fig. 10)
NOTE: Be careful not to
accidentally turn the unit on.
2 Empty dust container contents.
(Fig. 11) If desired, you may
rinse with water to clean
the dust container - but dry
thoroughly before replacing.
3 Re-insert the dust container into
the unit. (Fig. 12)
push down on the handle to fold
it completely in half. The folding
pivot will audibly click into the
bent position. (Fig. 13)
CAUTION: Any electronic
appliance should not be stored
in or exposed to areas of
high heat or humidity. Do not
store the unit close to stoves,
radiators, furnaces or in a
bathroom or bathing area.
1 Properly storing your unit
will keep it ready to go the
next time you want to use it.
Store the unit in a dry area
where it won’t be exposed to
the elements. For storing in
smaller spaces the handle folds
in half.
2 First press the Backsaver™
release button to bend the
handle 90 degrees, then firmly
EMPTYING THE DUST CONTAINER
Fig. 10 Fig. 11 Fig. 12
3 To clean under furniture, use
the Shark® Backsaver™ folding
handle. Press the handle
release button and apply a bit
of pressure to bend the handle
forward. (Fig. 8) The Shark®
Backsaver™ joint will release
from the locked position to
reach messes under furniture.
(Fig. 9)
4 Do not use the unit to pick up
liquids or clean wet floors.
5 Do not use the unit on
concrete, tar or other rough
surfaces.
6 Do not use the unit to pick
up pieces of string or fabrics.
Do not use the unit to clean
tasseled or frayed carpets.
Fig. 9
Fig. 8
Fig. 13
USING YOUR CORDLESS FLOOR AND CARPET CLEANER -cont’d
STORING YOUR CORDLESS FLOOR AND CARPET CLEANER
V1945Z_32_ENG_IB_100929.indd 8-9 29/09/10 2:32 PM

Other Shark Vacuum Cleaner manuals

Shark SV1100 User manual

Shark

Shark SV1100 User manual

Shark APEX ZS360C User manual

Shark

Shark APEX ZS360C User manual

Shark NP320SL User manual

Shark

Shark NP320SL User manual

Shark ZU60 Series User manual

Shark

Shark ZU60 Series User manual

Shark Rotator ZU100 Series User manual

Shark

Shark Rotator ZU100 Series User manual

Shark Rotator NV552 User manual

Shark

Shark Rotator NV552 User manual

Shark ROTATOR NV95 Series User manual

Shark

Shark ROTATOR NV95 Series User manual

Shark Rocket HV320ANZ User manual

Shark

Shark Rocket HV320ANZ User manual

Shark DuoClean IF200UK Series User manual

Shark

Shark DuoClean IF200UK Series User manual

Shark Rotator Lift-Away ADV LA500 Series User manual

Shark

Shark Rotator Lift-Away ADV LA500 Series User manual

Shark IX101EU Series User manual

Shark

Shark IX101EU Series User manual

Shark Rocket HV300REF User manual

Shark

Shark Rocket HV300REF User manual

Shark Navigator Lift-Away ADV LA300 Series User manual

Shark

Shark Navigator Lift-Away ADV LA300 Series User manual

Shark APEX ZS364Q User manual

Shark

Shark APEX ZS364Q User manual

Shark IQrobot User manual

Shark

Shark IQrobot User manual

Shark UV180 User manual

Shark

Shark UV180 User manual

Shark Navigator Lift-Away ZU503AMZ User manual

Shark

Shark Navigator Lift-Away ZU503AMZ User manual

Shark NV360 User manual

Shark

Shark NV360 User manual

Shark VERTEX AZ1800 Series User manual

Shark

Shark VERTEX AZ1800 Series User manual

Shark SV1100UKJR User manual

Shark

Shark SV1100UKJR User manual

Shark V1950 N User manual

Shark

Shark V1950 N User manual

Shark Rocket User manual

Shark

Shark Rocket User manual

Shark APEX UpLight Lift-Away LZ600 Series User manual

Shark

Shark APEX UpLight Lift-Away LZ600 Series User manual

Shark ION RV870 Series User manual

Shark

Shark ION RV870 Series User manual

Popular Vacuum Cleaner manuals by other brands

Shark CORDLESS SV780_N 14 user manual

Shark CORDLESS

Shark CORDLESS SV780_N 14 user manual

Philips FC9176/08 manual

Philips

Philips FC9176/08 manual

Kenmore KW3030 user manual

Kenmore

Kenmore KW3030 user manual

AMiO YF-101 user manual

AMiO

AMiO YF-101 user manual

Beko VRT 94929 VI user manual

Beko

Beko VRT 94929 VI user manual

Shark CORDLESS SV780 Series quick start guide

Shark CORDLESS

Shark CORDLESS SV780 Series quick start guide

Lumme LU-3203 instruction manual

Lumme

Lumme LU-3203 instruction manual

Melissa 640-040/051 instruction manual

Melissa

Melissa 640-040/051 instruction manual

Makita DVC152L instruction manual

Makita

Makita DVC152L instruction manual

Bosch BSN1 instruction manual

Bosch

Bosch BSN1 instruction manual

King Canada 8560LST Service manual & parts list

King Canada

King Canada 8560LST Service manual & parts list

EUFY RoboVac 11c+ owner's manual

EUFY

EUFY RoboVac 11c+ owner's manual

Panasonic MC-E4101 Service manual

Panasonic

Panasonic MC-E4101 Service manual

Panasonic MC-V9658 operating instructions

Panasonic

Panasonic MC-V9658 operating instructions

Bosch BGB 2 Series instruction manual

Bosch

Bosch BGB 2 Series instruction manual

Hoover dog & cat TURBO manual

Hoover

Hoover dog & cat TURBO manual

FGE Far Tools NET UP 20 manual

FGE

FGE Far Tools NET UP 20 manual

MARIMEX SPA VAC user manual

MARIMEX

MARIMEX SPA VAC user manual

manuals.online logo
manuals.online logoBrands
  • About & Mission
  • Contact us
  • Privacy Policy
  • Terms and Conditions

Copyright 2025 Manuals.Online. All Rights Reserved.